You know what people always ask me? They have this beautiful image in their mind of a spa-like bathroom, a serene escape. But the reality they’re living in is a cluttered counter, a cramped layout, and a morning routine that feels more like a frantic battle than a peaceful start to the day. They wonder where the disconnect is.
The secret isn’t just about picking a pretty vanity from a catalog. It’s about designing a space that understands how you live. It’s about creating a flow that works for you, whether you’re rushing to get the kids ready or winding down with a glass of wine after a dinner party. Just like in a kitchen, good design here isn’t a luxury; it’s the foundation for a smoother, happier day. Let’s break down how to get it right.
Laying the Foundation: Smart Planning & Budgeting
Think of this part as your mise en place—the French culinary term for getting all your ingredients prepped and organized before you start cooking. Doing this prep work now saves you from so much chaos and heartache later. Rushing this stage is how you end up with a beautiful vanity that blocks the door from opening all the way. True story.
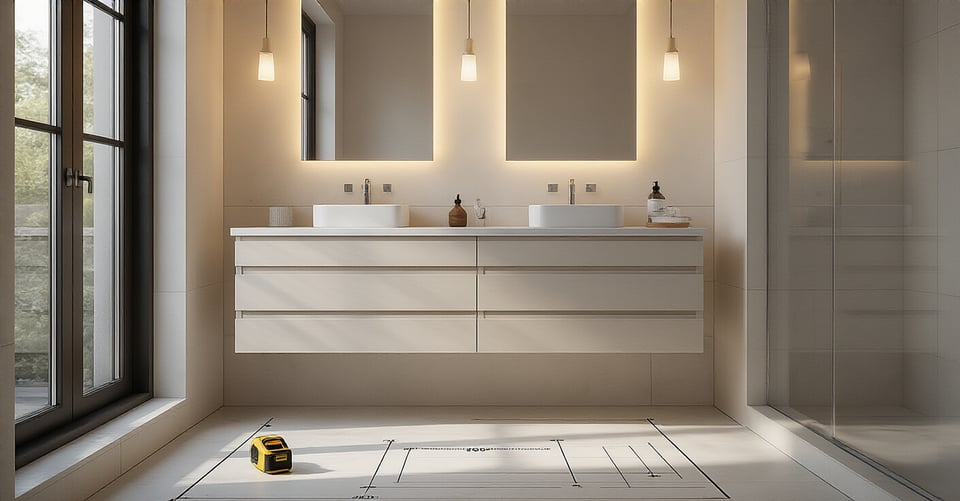
1. Precisely Measure Your Bathroom Space for Perfect Fit.
I once watched a client stand in his newly tiled bathroom, staring at a gorgeous 60-inch double vanity he’d ordered online. The problem? He’d measured the wall space, but not the door swing. The vanity was so deep that the bathroom door would only open halfway, banging right into the corner of the new quartz countertop. It was a $2,000 mistake that cost him restocking fees, delivery charges, and two extra weeks of living in a construction zone, all because of a five-minute measurement he skipped.
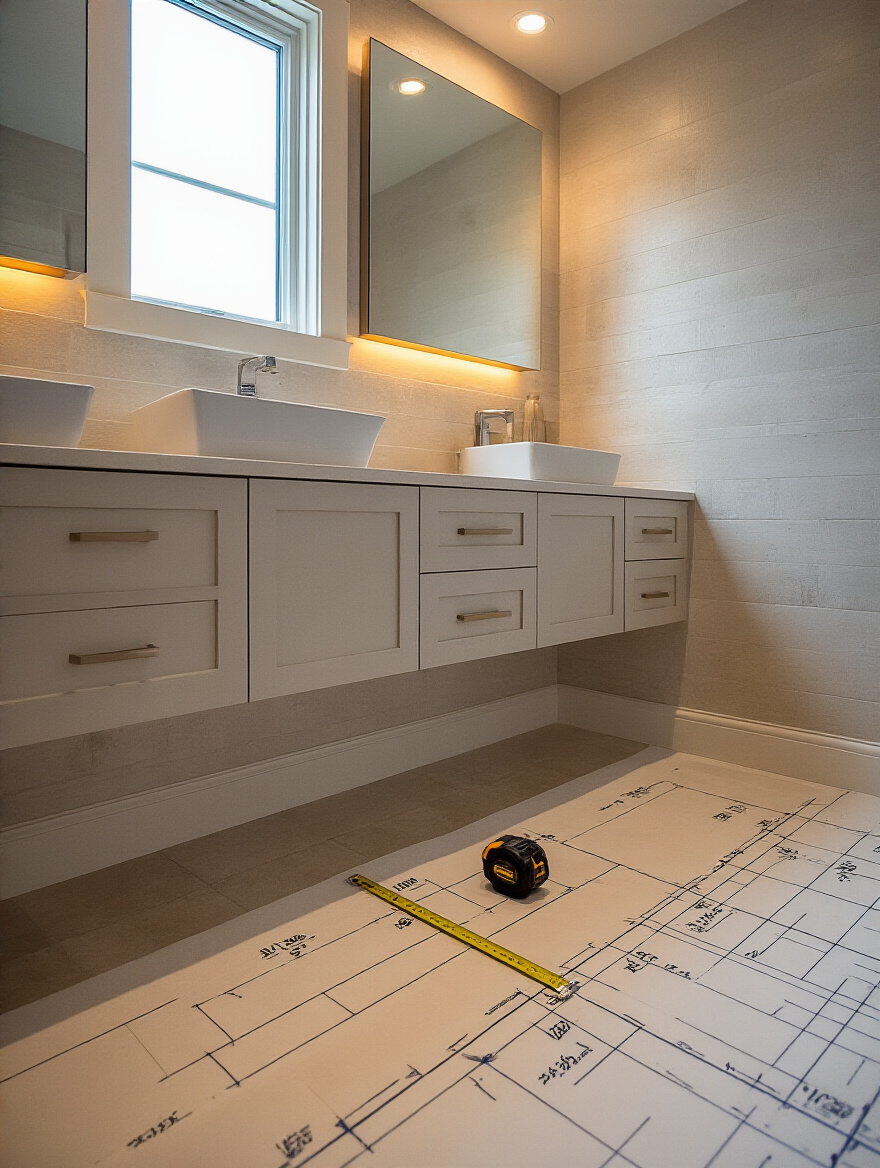
Don’t be that guy. Get a real steel tape measure, not a flimsy one. Measure the width, depth, and height of the vanity space. Then, measure everything else: the distance to the toilet, the shower door swing, the window trim, everything. Mark the plumbing locations—where the water lines and drain come out of the wall. Write it all down. Then, get on the floor with painter’s tape and map out the footprint of the vanity you think you want. Now, walk around it. Open the door. Can you comfortably stand at the sink? Does it feel crowded? This is how you prevent those soul-crushing, expensive mistakes.
And don’t forget a transition to the next part. Now that you have your real-world dimensions, you can set a budget that’s rooted in reality, not fantasy.
2. Define Realistic Budget Ranges for Vanity and Sink Selection.
The biggest lie people tell themselves during a renovation is about the budget. They see a vanity online for $800 and think, “Great, my budget is $800!” But they completely forget the extras. The faucet that perfectly matches their style? That’s another $250. The plumber to install it because the connections are tricky? That’s $400. Getting rid of the old, heavy vanity? Another $50. Suddenly, their $800 project is pushing $1,500.

This is why setting a realistic budget is about more than just the price tag on the main piece. You have to account for the “hidden” costs: the faucet, the pop-up drain, new supply lines, the installation, and delivery. And here’s the most important part: you must have a contingency fund. I tell every client to set aside an extra 15-20%. Because no matter how well you plan, you might open up a wall and find old, leaky pipes. That contingency fund isn’t for fun splurges; it’s your project insurance.
Once you know what everything costs, you can make smarter trade-offs. Maybe you go for a slightly less expensive vanity cabinet to afford the high-end faucet and professional installation. Knowing your all-in number upfront is what separates a stressful project from a successful one.
3. Assess Your Current Plumbing for Compatibility and Placement Needs.
Okay, time to get a little friendly with the pipes under your sink. Before you even think about buying a new vanity, grab your phone, turn on the flashlight, and take a bunch of pictures of what’s going on down there. Where do the hot and cold water lines come out of the wall? Where is the drainpipe? Is it centered, or off to one side? This is your plumbing “rough-in,” and its location is everything.
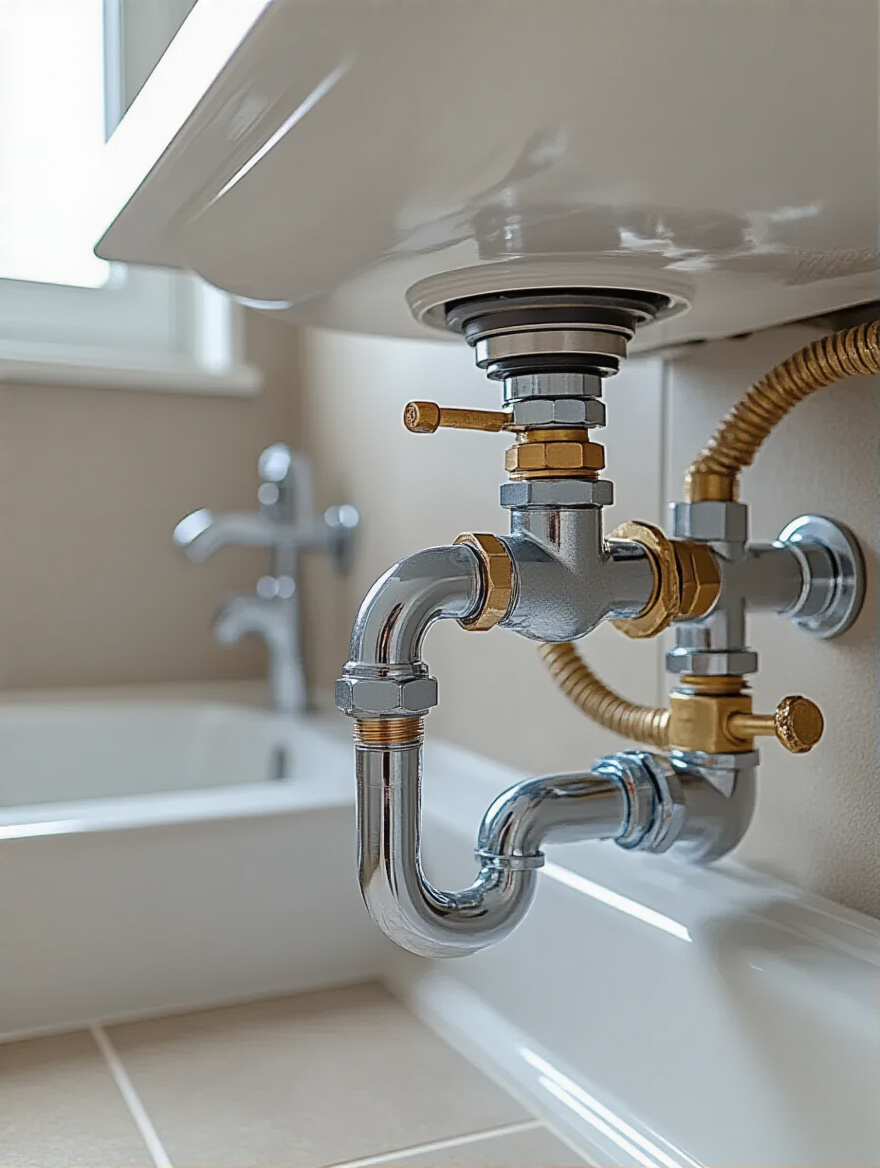
I had a client fall in love with a beautiful vanity that had two large, deep drawers. But their drainpipe came out of the wall right in the middle, exactly where the track for the top drawer needed to go. It was a complete non-starter. They either had to find a different vanity or pay a plumber a fortune to open the wall and move the drain. Had they just looked under their old sink and compared it to the new vanity’s spec sheet online, they would have spotted the problem in two minutes. The lesson? Your new vanity has to work with your existing plumbing, unless you’ve budgeted to change it.
4. Determine Essential Storage Needs for Vanity Cabinet Configurations.
Can we please stop buying vanities based on how they look and start buying them based on what they need to hold? Before you shop, I want you to do something that feels a little crazy: take everything out of your current bathroom cabinets and drawers. Lay it all on the floor. Yes, all of it—the half-empty bottles of shampoo, the tangled hair ties, the hairdryer, the cleaning supplies. This is your reality. Now, be honest. What do you use every day? What can go? What absolutely needs to live in this space?
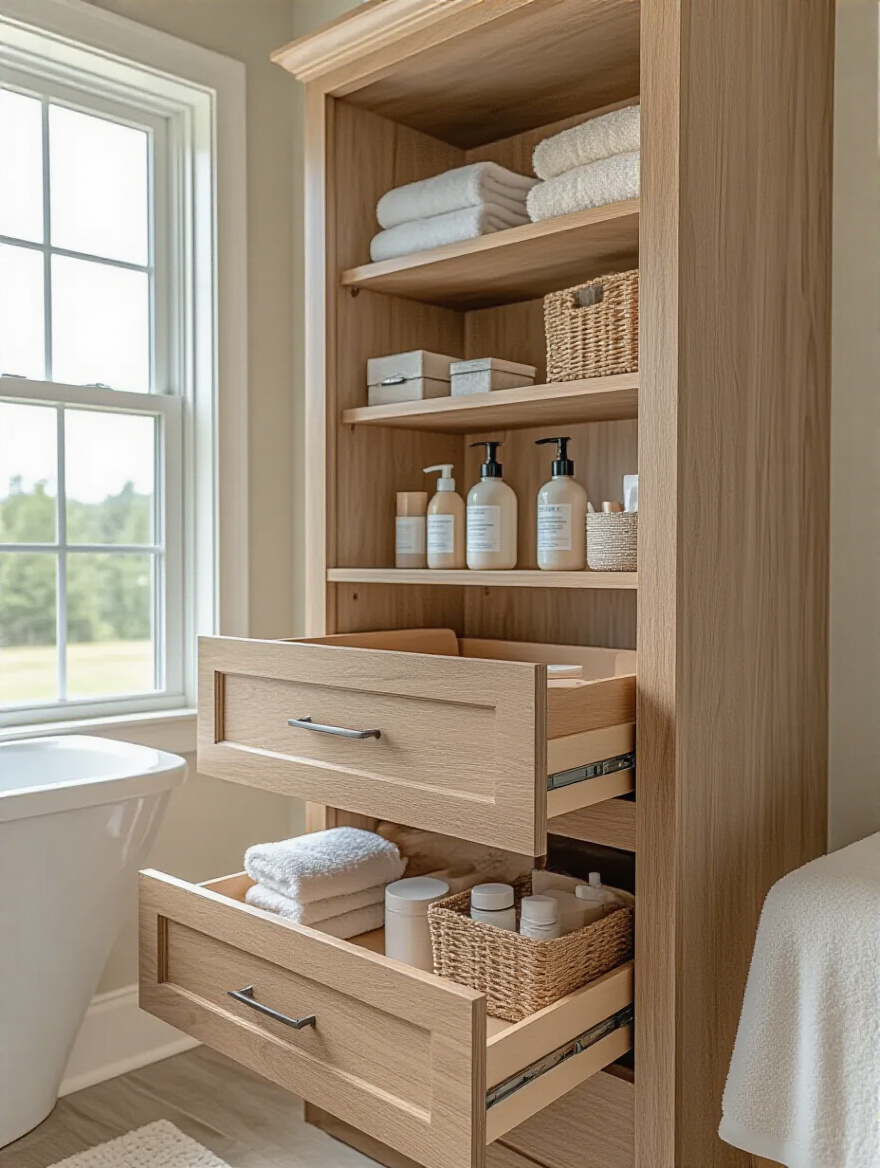
This isn’t about creating a sparse, magazine-perfect bathroom; it’s about designing for your actual life. If you have a ton of makeup, you need shallow drawers with dividers, not a big open cabinet where everything gets lost. If you have tall bottles of lotion and hairspray, you need a cabinet with adjustable or deep shelving. A client of mine with three daughters was drowning in countertop clutter. We designed a vanity with deep drawers fitted with custom heat-resistant holsters for their hair dryers and curling irons. It was a game-changer. Their morning routine got 15 minutes shorter, and the arguments dropped by 90%. That’s what good storage design does.
5. Align New Vanity Design with Your Home’s Overall Aesthetic.
A bathroom should feel like a continuation of your home’s story, not a random chapter from a completely different book. I’ve walked into stunning mid-century modern homes only to find a fussy, traditional bathroom with a dark, ornate vanity that felt completely out of place. It’s jarring, and it instantly makes the whole house feel less cohesive. Your vanity choice is a huge opportunity to reinforce your home’s unique character.
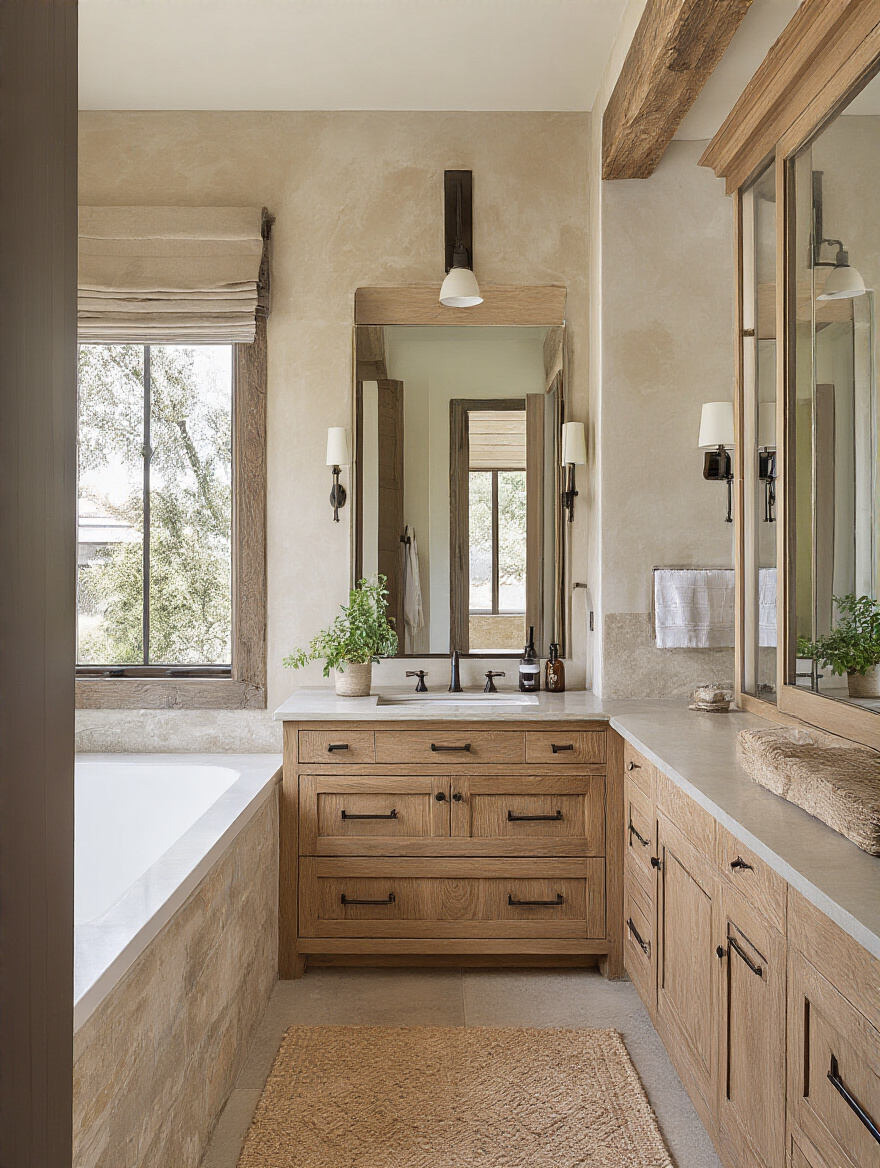
Look around your house. What are the common threads? Do you have clean lines and natural woods (Modern)? Or cozy textiles and weathered finishes (Farmhouse)? Or maybe a mix of classic and contemporary (Transitional)? Let that guide you. For a beautiful 1920s Craftsman I worked on, we chose a simple, Shaker-style oak vanity with oil-rubbed bronze hardware. It felt like it had always been there. It respected the home’s history while still feeling fresh and functional. When the design feels holistic, it doesn’t just look better—it adds real, tangible value to your home.
With your “mise en place” complete, you’re ready for the really fun part: picking out all the beautiful pieces.
Navigating Style, Sink & Material Choices
This is where your vision starts to come to life. But it’s easy to get sidetracked by pretty things. The key is to balance beauty with the practical realities of a hardworking bathroom. Let’s make sure the choices you make today will be ones you still love in five years.
6. Choose the Optimal Sink Type for Desired Aesthetics and Practicality.
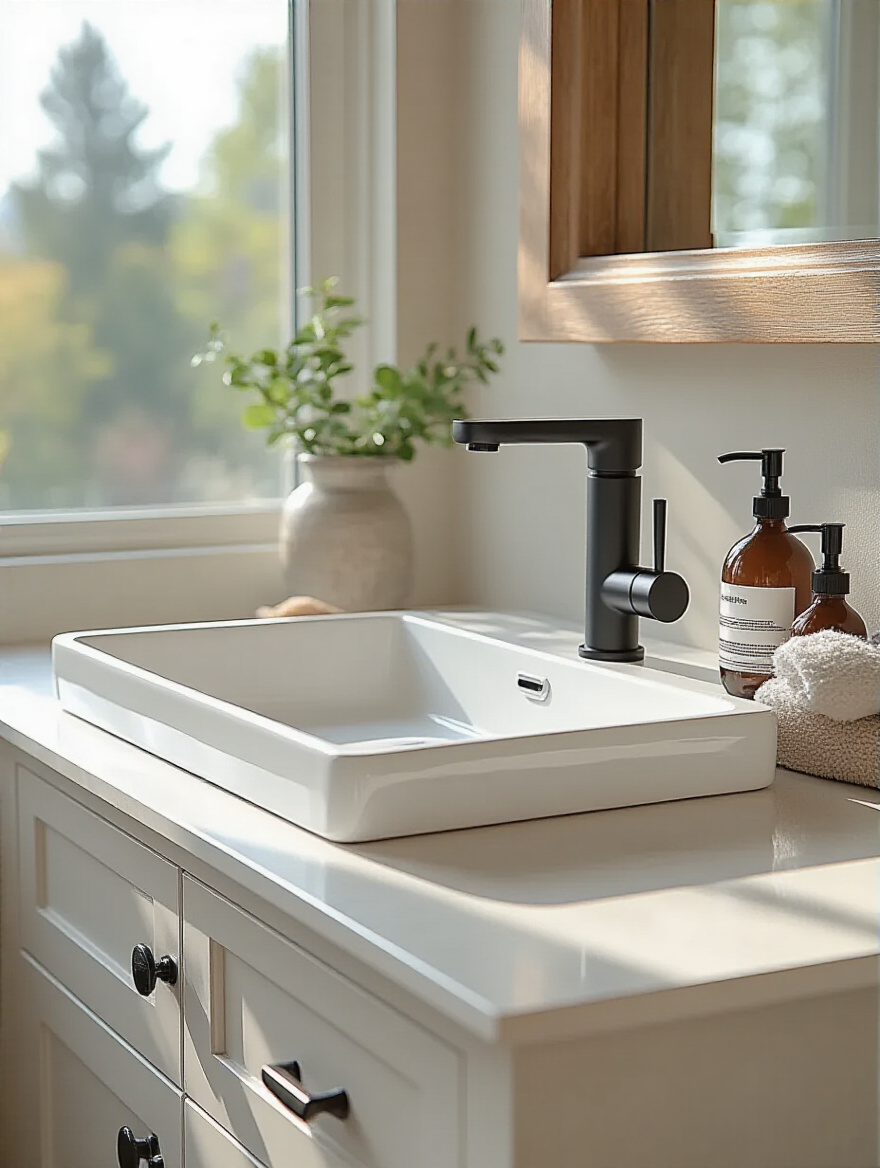
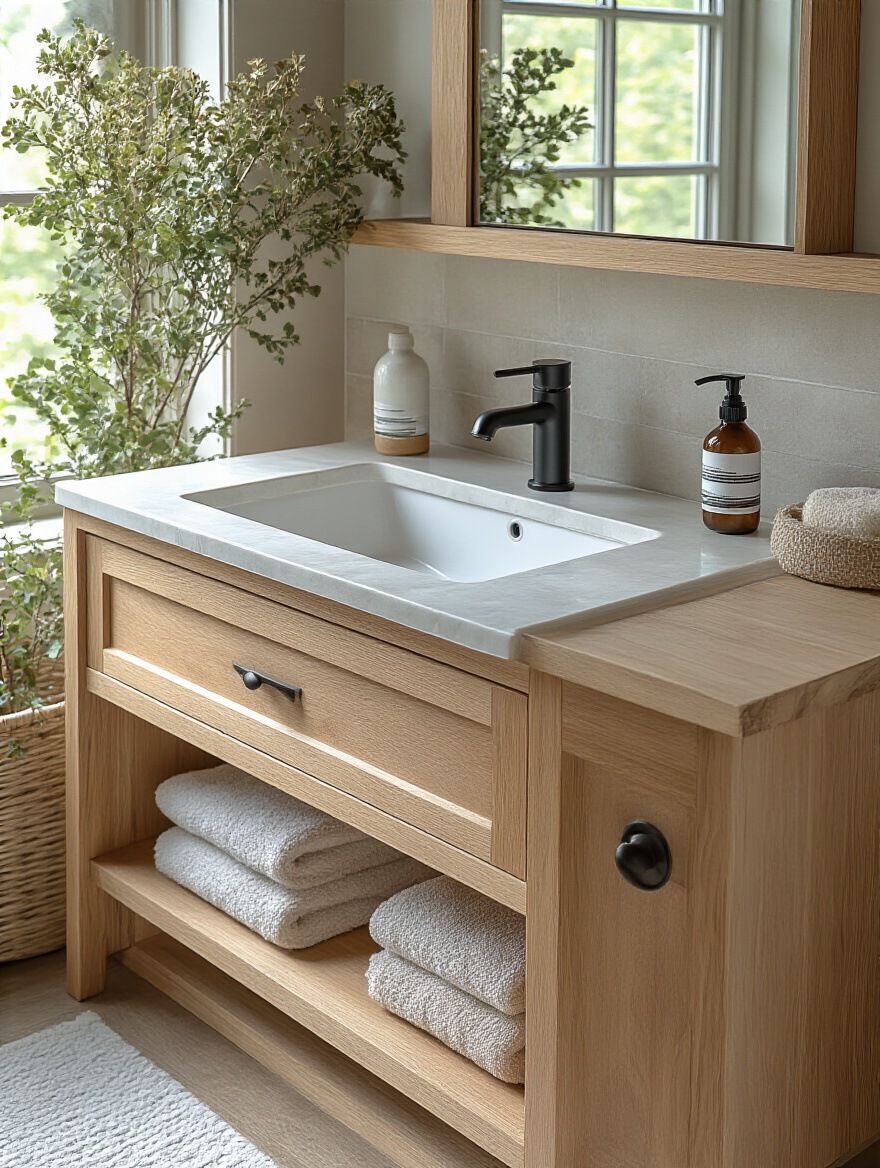
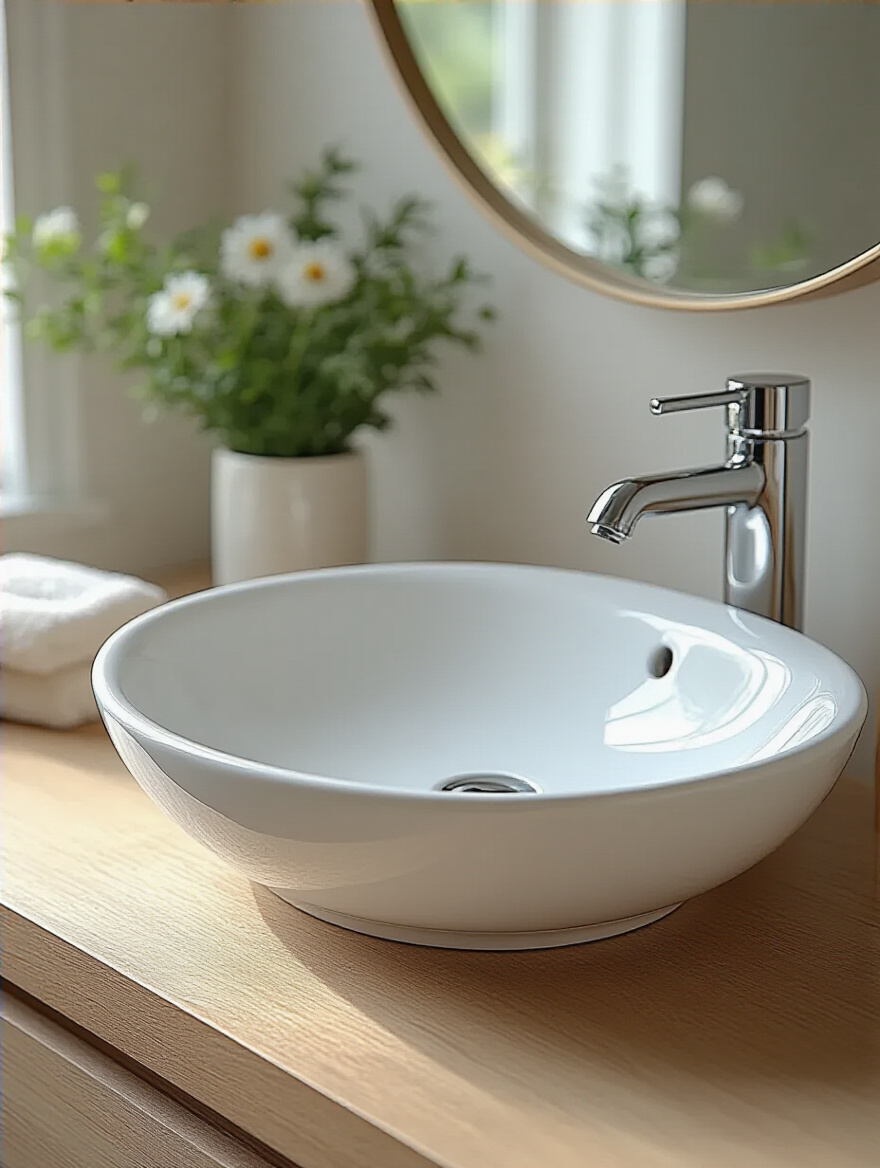
Everyone loves the look of a vessel sink—that beautiful bowl sitting on top of the counter. But here’s the secret: they can be a real pain. They tend to splash more, and cleaning around the base is a nuisance. For a busy family bathroom, I almost always recommend an undermount sink. It’s mounted beneath the countertop, creating a seamless surface that you can wipe directly into the sink. It’s a small detail that makes daily cleanup infinitely easier and maximizes your precious counter space.
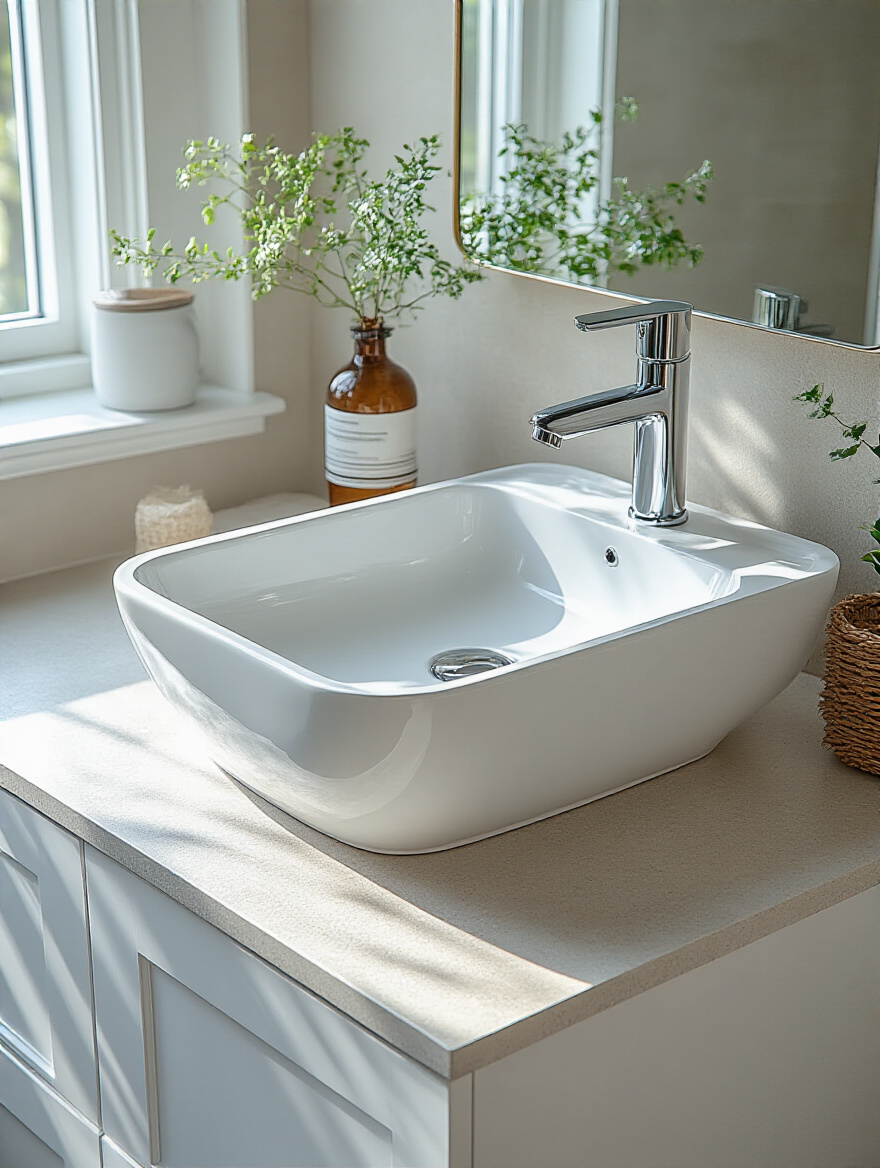
Think about your space and how you use it. A wall-mounted sink can make a tiny powder room feel much larger because you see the floor underneath. An integrated sink, where the counter and sink are molded from one piece of material like solid surface, offers the ultimate in sleek, easy-to-clean design with no seams to catch grime. Don’t just choose a sink for its looks; choose it for the lifestyle it supports. The right sink makes your daily routine smoother, and that’s a beautiful thing.
7. Select Durable Vanity Materials that Withstand Bathroom Humidity.
A bathroom is a brutal environment for furniture. It’s a constant cycle of steam, humidity, and splashes. The single biggest mistake I see people make is buying a vanity made of cheap particleboard. It might look fine in the showroom, but after a year in a real bathroom, the edges will start to swell and the finish will peel. It’s just not built to last. It’s like trying to make a wedding cake out of cotton candy—it’s doomed from the start.
For long-term durability, you want to invest in better materials. Solid wood is wonderful, but it must have a high-quality, factory-applied finish to protect it. My go-to recommendation for most people is high-quality plywood or solid PVC. Marine-grade plywood is designed to resist moisture, and PVC is essentially plastic, so it’s completely waterproof. These materials are the workhorses of the bathroom. They won’t swell, warp, or give you grief down the road. It’s worth paying a little more upfront to avoid replacing the entire thing in three years.
8. Evaluate Countertop Materials for Resilience and Aesthetic Harmony.
Your vanity countertop takes a lot of abuse—from globs of toothpaste to splatters of hair dye and hot curling irons. You need a material that can stand up to it. Natural marble is breathtakingly beautiful, but it’s also porous and high-maintenance. It will stain if you look at it wrong and can be etched by something as simple as a lemon slice. For a master bathroom where you can be careful, it might be worth it. For a kids’ bathroom? Absolutely not.
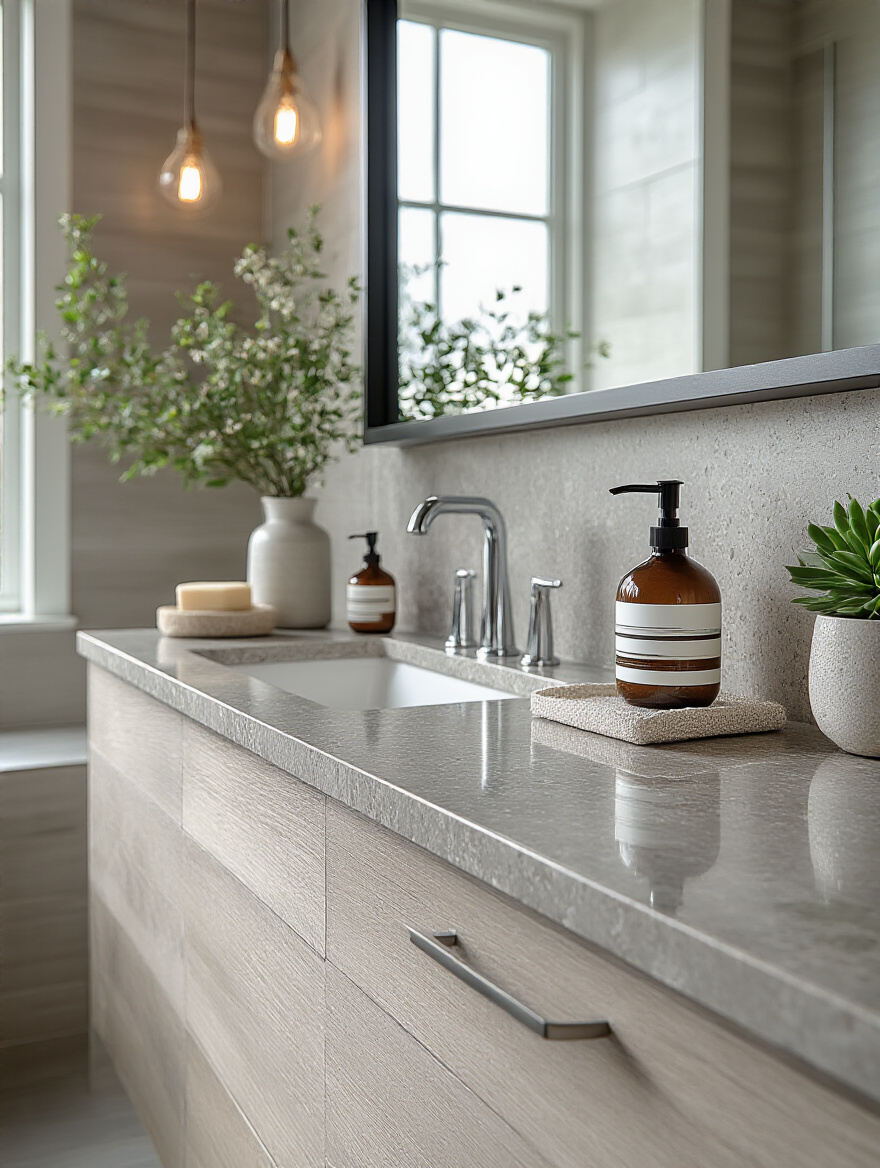
For 90% of bathrooms, I recommend engineered quartz. It’s a workhorse material that gives you the look of natural stone without the drama. It’s non-porous, so it won’t stain or harbor bacteria, and it’s incredibly durable and scratch-resistant. You can find it in a million different colors and patterns to match any style. Another great option is a solid surface material (like Corian), which can even have the sink integrated for a seamless, easy-to-clean look. It’s all about finding that sweet spot between the look you love and the low-maintenance life you want to live.
9. Harmonize Faucet Style and Finish with Your Chosen Sink.
A faucet is the jewelry of the bathroom. It’s a small detail that can either elevate the whole look or make it feel cheap and disconnected. The key is to match not just the finish, but the style and scale to your sink and vanity. A big, industrial-looking faucet will completely overpower a delicate, traditional pedestal sink. It’s about creating balance. If your vanity has clean, modern lines, choose a faucet with a similar sleek profile. If you have a more classic vanity, a faucet with graceful curves will feel right.
And please, think about function! If you chose a vessel sink, you need a faucet that’s tall enough to comfortably reach over the edge, and the water stream needs to hit the drain, not the side of the bowl, to avoid splashing. I always tell my clients to create a small mood board. Put a picture of your vanity, your countertop sample, your hardware, and your potential faucet all together. You’ll see right away if the family of shapes and finishes works together or if they’re fighting each other.
10. Decide Between Single or Double Sinks Based on Usage Needs.
Ah, the great debate: one sink or two? This is purely about your lifestyle and your space. If you have two people trying to get ready at the same time every morning, a double vanity isn’t a luxury; it’s a marriage-saver. It puts an end to the elbow-jostling dance and gives each person their own zone. But—and this is a big but—you have to have the space for it. The absolute minimum width for a functional double vanity is 60 inches. Anything less and it feels uncomfortably cramped. 72 inches is ideal.
If your bathroom is less than 60 inches wide, or if it’s a guest bath or powder room, stick with a single sink. Don’t try to cram two in. A generous single-sink vanity with plenty of counter space is far more luxurious and practical than a tiny, crowded double vanity. Be honest about your space and your daily needs. This is one of those decisions where function has to trump fantasy.
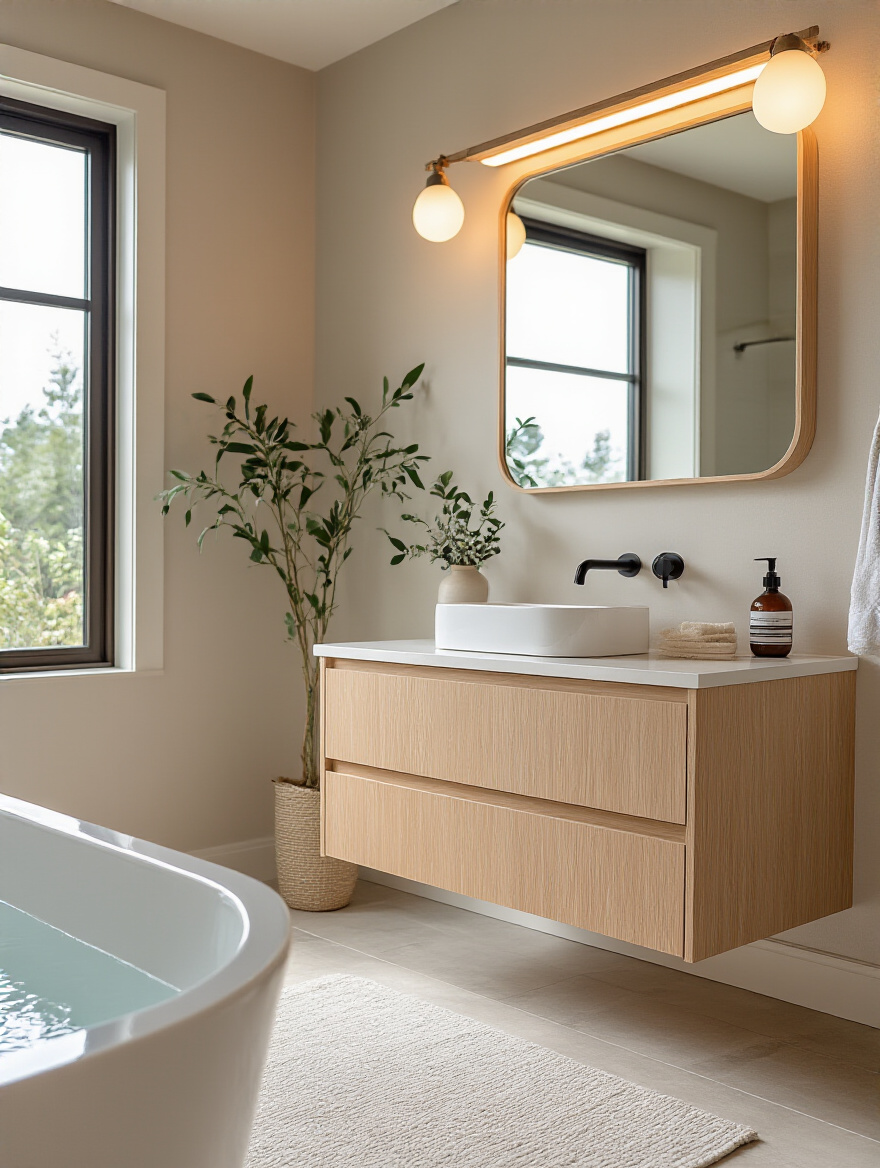
11. Explore Wall-Mounted Vanities for Space-Saving Elegance.
If you have a small bathroom, a wall-mounted or “floating” vanity is your secret weapon. By lifting the cabinet off the floor, you create an uninterrupted line of sight, which tricks the eye into seeing the room as larger and more open. It’s an optical illusion that works every time. Plus, it makes cleaning the floor a dream. No more trying to wedge a mop around a dusty toe-kick.
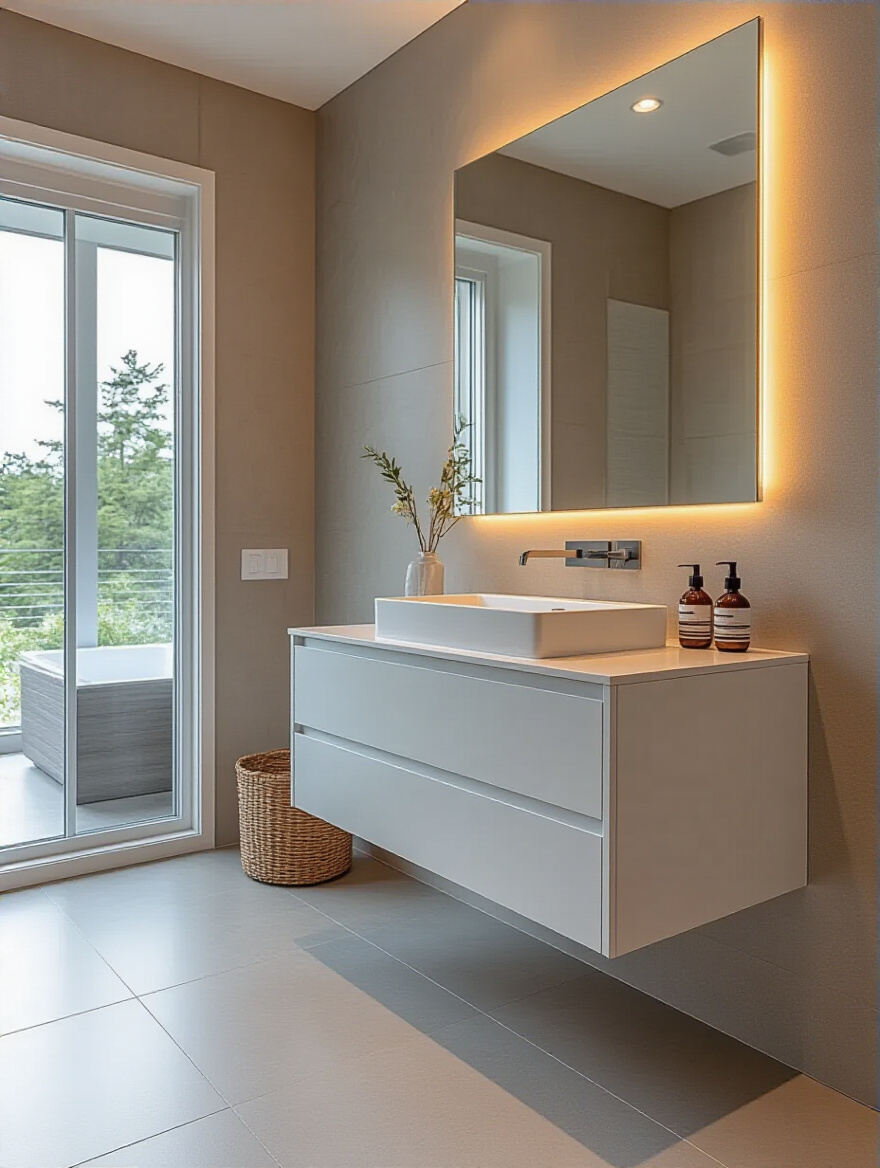
But here’s the crucial part that people get wrong: a floating vanity needs serious support. You can’t just attach it to the drywall with a few screws. It needs to be anchored directly into the solid wood studs inside your wall. During a renovation, the best practice is to open up the wall and install horizontal wood “blocking” between the studs. This creates a rock-solid anchor point that will ensure your vanity stays on the wall, and not on your floor, for years to come. It’s a bit of extra work, but for a piece of furniture that has a heavy sink full of water attached to it, it is absolutely non-negotiable.
Once you’ve made these critical style and material choices, it’s time to move into the home stretch: installation.
Optimizing Layout & Seamless Installation
You’re so close! You’ve picked out all the perfect pieces. Now it’s about putting them together in a way that’s not just beautiful, but smart. This is where we fine-tune the details that make a bathroom truly functional and feel great to be in every day.
12. Ensure Adequate Ventilation to Protect Your New Vanity.
You can buy the most expensive, waterproof vanity in the world, but if your bathroom doesn’t have a good exhaust fan, you’re just throwing money away. Humidity is the number one enemy of bathroom cabinetry. It causes wood to swell, finishes to peel, and creates the perfect breeding ground for mold. A powerful, quiet fan that is properly ducted to the outside (not into your attic!) is the best insurance policy for your entire bathroom renovation.
Run the fan every time you shower or bathe, and let it run for a good 15-20 minutes afterward, until the mirror is clear. This simple habit actively pulls the moisture out of the air before it has a chance to settle on your beautiful new vanity. I love fans with built-in humidity sensors that turn on automatically when things get steamy. It’s a set-it-and-forget-it solution that will literally add years to the life of your investment.
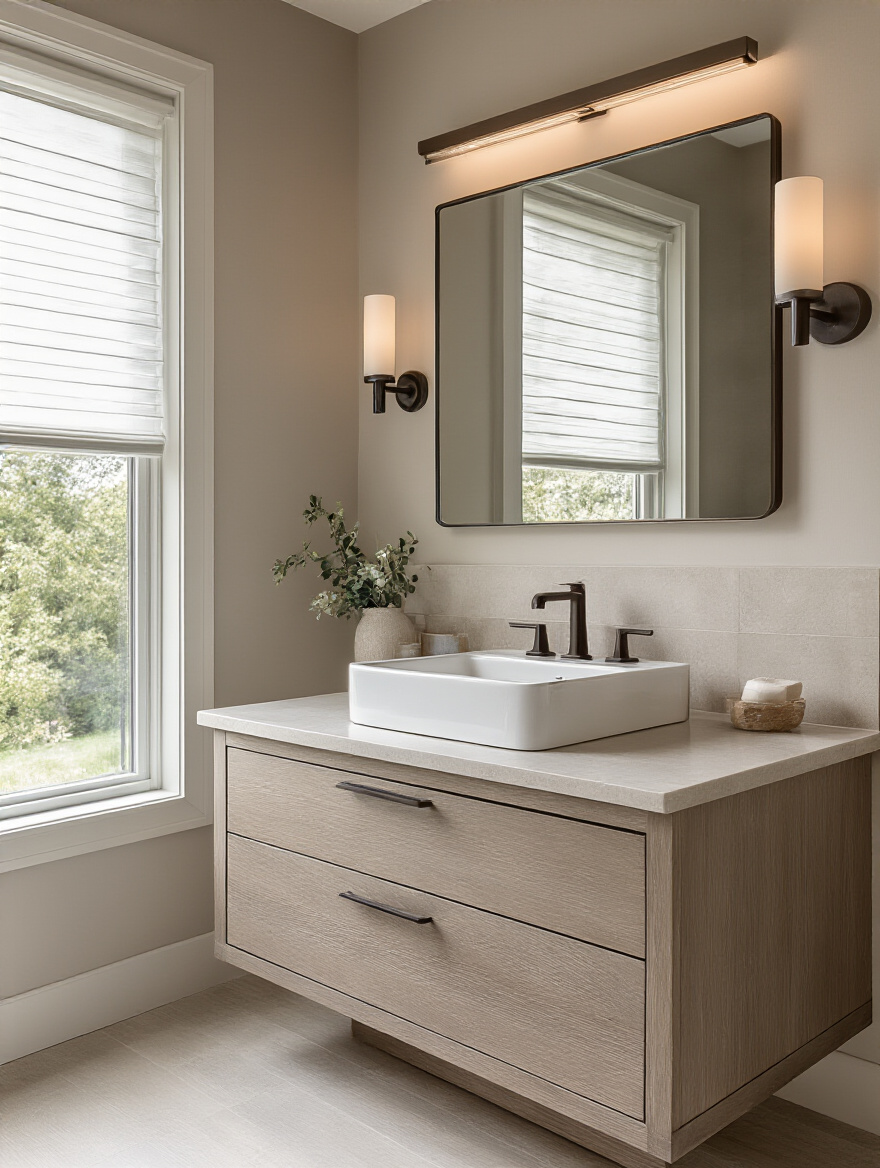
13. Position Lighting Strategically for Functional and Flattering Illumination.
Have you ever looked in a bathroom mirror and thought you looked exhausted, only to realize it was just terrible lighting? A single light fixture plopped directly over the mirror is the worst offender. It casts harsh shadows under your eyes, nose, and chin—it’s the least flattering light imaginable. It makes everything from shaving to applying makeup a guessing game.
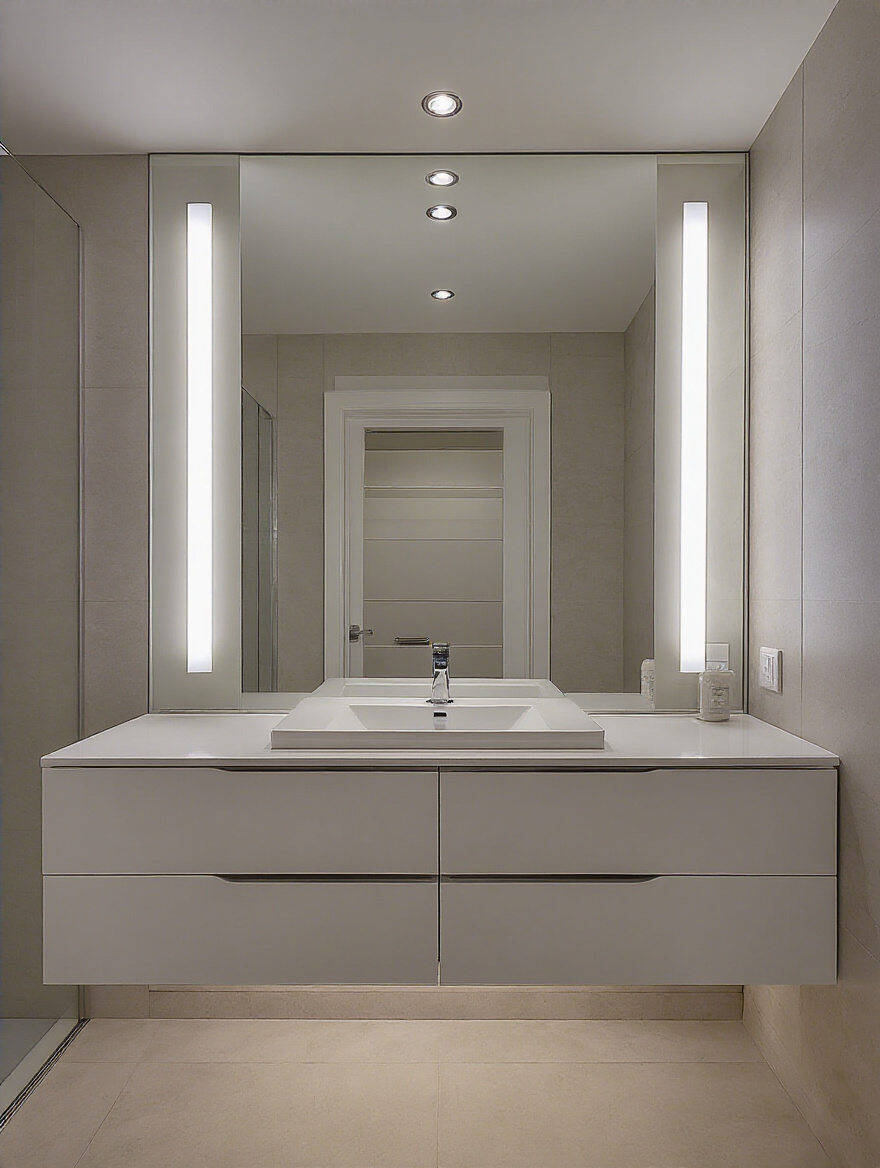
The secret to great vanity lighting is to light the person, not the mirror. The best way to do this is with vertical fixtures or sconces on either side of the mirror, mounted at about eye level. This creates even, cross-illumination that gets rid of shadows and gives you a clear, honest reflection. Supplement this with an overhead light for general ambient room lighting, and put everything on a dimmer switch. Bright light for getting ready, soft light for a relaxing soak. It’s functional luxury at its best.
14. Plan Mirror Sizing and Placement Complementary to the Vanity.
The mirror is the art of the vanity area, but it has a job to do. There are a few simple rules of thumb for getting the scale right. For a single vanity, the mirror should generally be a few inches narrower than the vanity itself; it should never be wider. A 48-inch vanity, for example, looks great with a 40- to 42-inch mirror. This gives it a little breathing room on the sides and keeps the composition looking balanced and intentional.
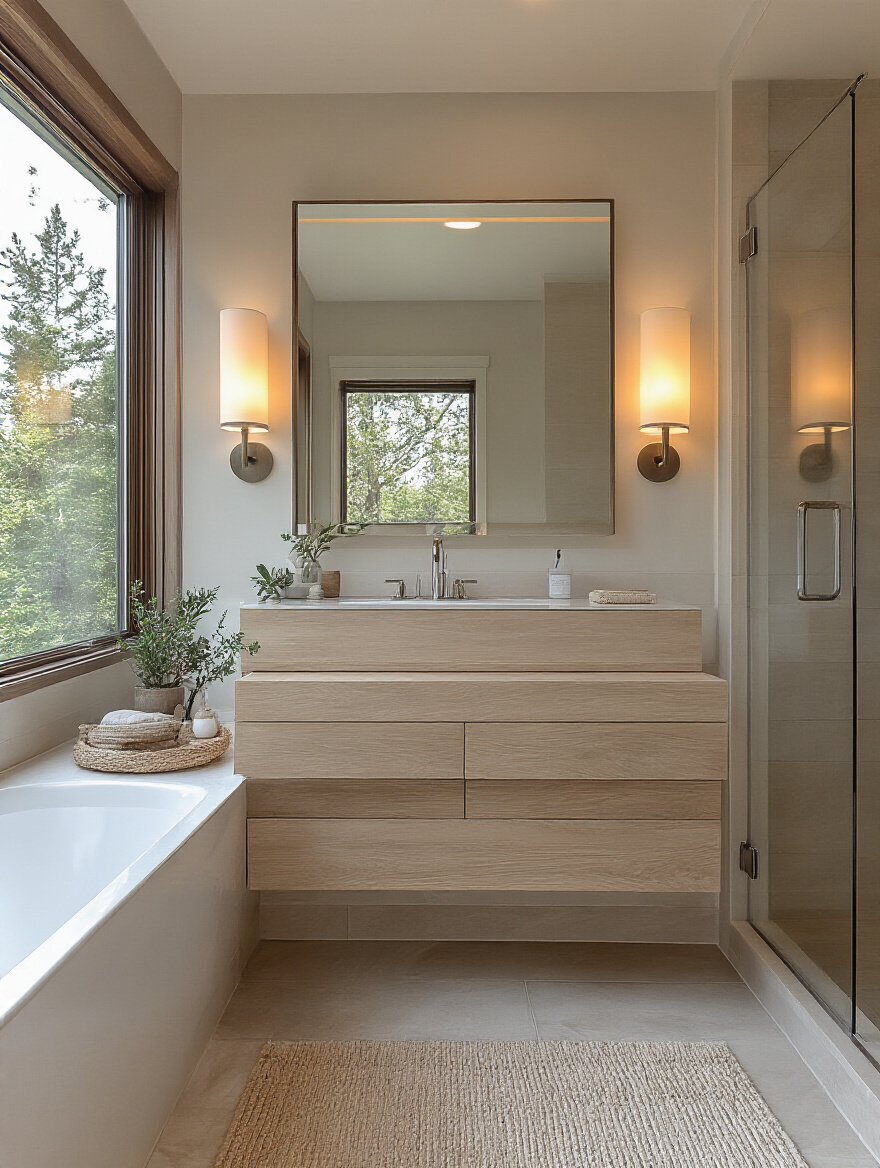
For placement, hang it so the bottom edge is 5-10 inches above the faucet, and try to center it between the countertop and the ceiling (or your light fixture). Before you drill any holes, use a cardboard cutout or painter’s tape to mock up the size and placement on the wall. Live with it for a day. See how it feels. This simple step helps you visualize the final result and catch any awkward proportions before it’s too late.
15. Verify Vanity Structural Support, Especially for Wall-Hung Units.
We touched on this with floating vanities, but it’s so important it deserves its own reminder. Whether you have a wall-hung unit or just a very heavy traditional one with a stone top, you need to know what’s behind your drywall. Your vanity needs to be anchored securely into the wood studs of your wall frame. This is not a suggestion; it’s a safety requirement.
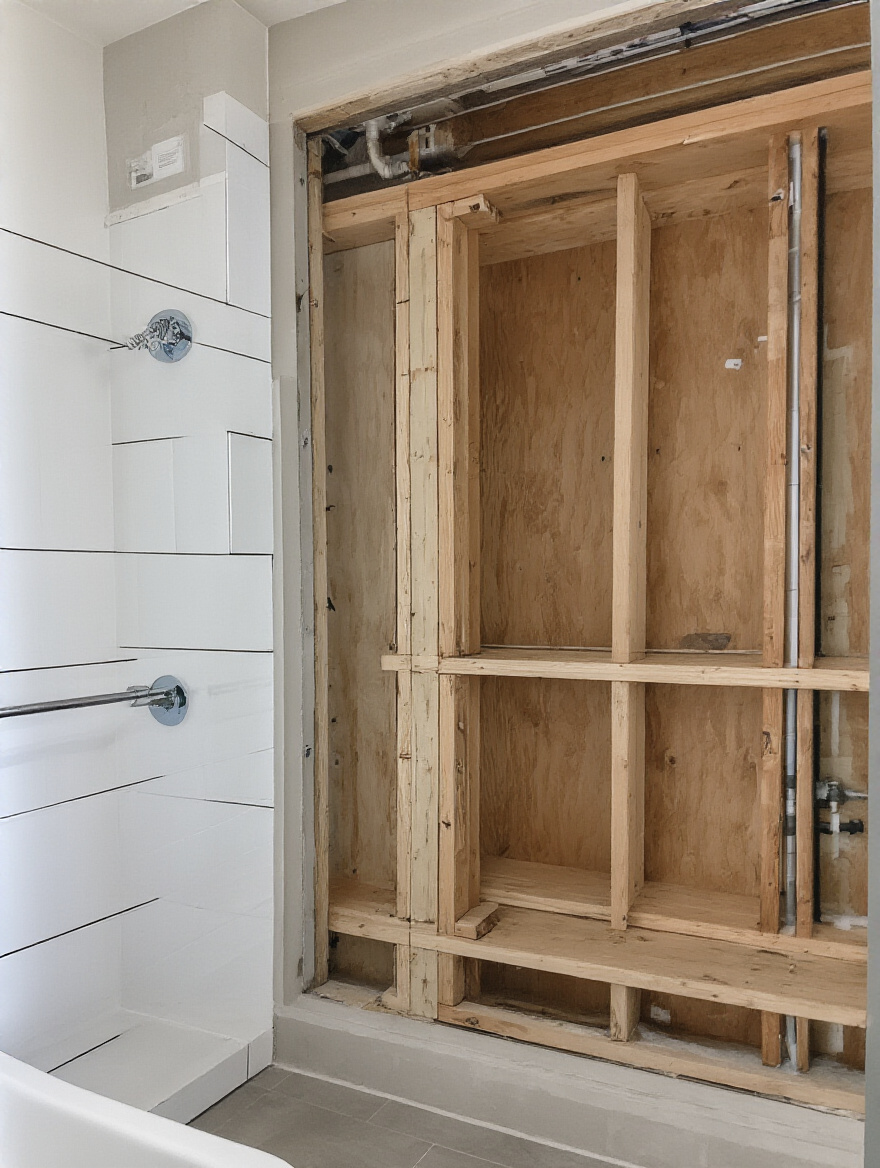
I once consulted on a fix where a previous installer had used only drywall anchors to hang a heavy granite-topped vanity. Over a year, it had slowly pulled away from the wall, putting immense strain on the plumbing and creating a dangerous situation. The homeowners had to pay to have it removed, the wall repaired and reinforced with proper blocking, and the entire thing reinstalled. Don’t cut corners here. Use a stud finder, find the studs, and use long, heavy-duty screws to anchor your investment securely.
16. Maximize Countertop Real Estate for Daily Essentials and Decor.
The goal for your countertop isn’t to store everything you own; it’s to create a functional and serene workspace for your daily routine. The best way to achieve this is to have less on it. That goes back to choosing a vanity with the right kind of storage inside it. But for the things that must live on the counter—your soap, toothbrush, and maybe a few other daily essentials—organize them thoughtfully.

Use a beautiful tray to corral smaller items. It instantly makes a collection of bottles and jars look tidy and intentional rather than cluttered. Consider a mirrored medicine cabinet for hidden storage right where you need it. Some of my favorite new designs have integrated electrical outlets inside for charging toothbrushes and shavers, keeping the cords completely out of sight. It’s about being strategic. Every item on your counter should be either beautiful or used every single day. Preferably both.
17. Confirm Faucet Hole Drilling Matches Your Selected Sink.
This is the last checkpoint before installation, and it’s a simple one that trips up so many people. Faucets come in a few standard configurations: single-hole, 4-inch centerset, and 8-inch widespread. Your sink or countertop will be pre-drilled to match one of these. You cannot put a widespread faucet on a sink drilled for a single-hole faucet. It simply won’t fit.

Before you buy anything, pull up the spec sheets for both your sink and your faucet online. Confirm they are compatible. Print them out and hold them next to each other if you have to. A two-minute check here can save you the massive headache and expense of having to return a heavy vanity top or a faucet you fell in love with. It’s the final piece of your planning puzzle.
Now that everything is installed beautifully, let’s make sure it stays that way.
Sustaining Beauty: Care, Maintenance & Problem Solving
Your stunning new bathroom is finished! But the work isn’t quite over. A little bit of regular care is all it takes to keep your investment looking brand new and functioning perfectly for years to come. Think of it as protecting the beautiful space you worked so hard to create.
18. Clean Sink Surfaces Regularly Using Non-Abrasive, Safe Products.
The number one rule of cleaning your new sink and vanity top is to be gentle. Harsh, abrasive cleaners like powdered cleansers or scouring pads can permanently scratch and dull the finish, especially on materials like acrylic, solid surface, or even the protective glaze on porcelain. Once that finish is gone, the surface becomes more porous, stains more easily, and is impossible to restore to its original shine.
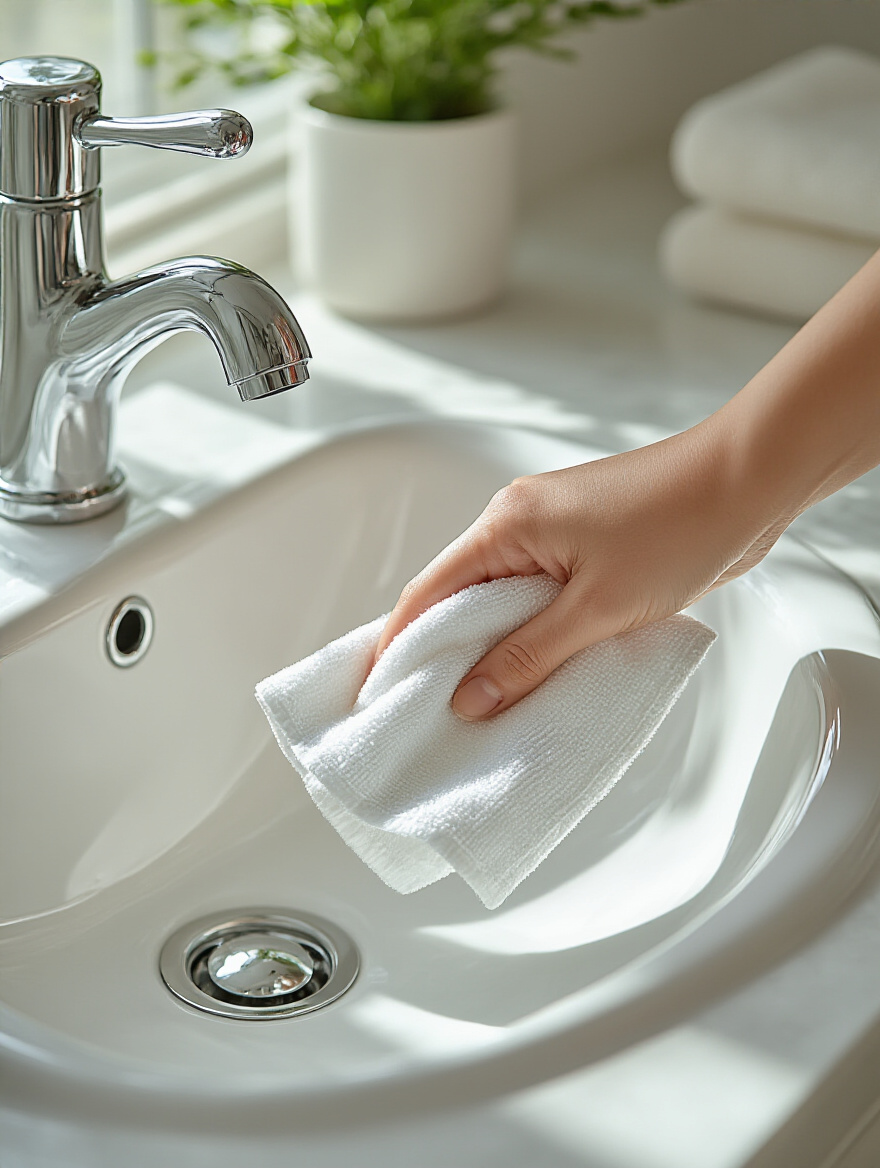
For daily cleaning, all you need is a soft cloth and a little mild dish soap and water. That’s it. For a deeper clean, use a pH-neutral cleaner that’s specifically recommended for your material. Read the labels! If you have a natural stone top like marble, never use anything acidic—no vinegar, no lemon juice. It will etch the surface instantly. A simple, consistent, gentle cleaning routine is the secret to a sink that looks as good in five years as it does today.
19. Protect Vanity Cabinets from Water Damage and Prolong Life.
Water is a vanity’s worst enemy. The most vulnerable spot is the inside of the cabinet, right under the sink. Small, slow drips from plumbing connections are notorious for causing silent but catastrophic damage over time. The best, cheapest insurance you can get is a plastic under-sink cabinet liner. It’s a custom-fit tray that will catch any minor drips and prevent water from seeping into the wood and causing swelling or mold.
Also, check the bead of silicone caulk where your sink and countertop meet the wall. Over time, it can shrink or crack. If you see any gaps, clean out the old stuff and apply a fresh bead. This simple task is your first line of defense against water splashing back and getting behind your vanity, which is a one-way ticket to water damage. A little vigilance goes a long, long way.
20. Address Minor Scratches and Chips Promptly for Aesthetic Longevity.
It’s bound to happen—you drop a perfume bottle and it leaves a tiny chip in your porcelain sink. The temptation is to ignore it, but don’t. That tiny chip is a breach in the sink’s protective armor. It can allow water to seep underneath the glaze, leading to rust stains (if the sink is cast iron) and providing a tiny pocket for grime and bacteria to hide. A small imperfection can grow into a bigger problem over time.
For just a few dollars, you can buy material-specific touch-up kits for porcelain, acrylic, or composite sinks. They’re like nail polish for your sink. You simply clean the area, apply a thin layer of the repair material, and let it cure. It takes about 15 minutes, seals the damage, and makes the imperfection virtually disappear. It’s one of the easiest ways to keep your bathroom looking pristine and prevent a small issue from becoming a big one.
21. Periodically Check Plumbing Connections to Prevent Costly Leaks.
Here’s your new biannual habit: every time you change the batteries in your smoke detectors, take a flashlight and a dry paper towel and inspect the plumbing under every sink in your house. Open the vanity cabinet and look closely at every single connection point—where the water lines connect to the shut-off valves and the faucet, and all the joints of the P-trap drain. Look for any active drips, mineral deposits, or water stains on the cabinet floor.
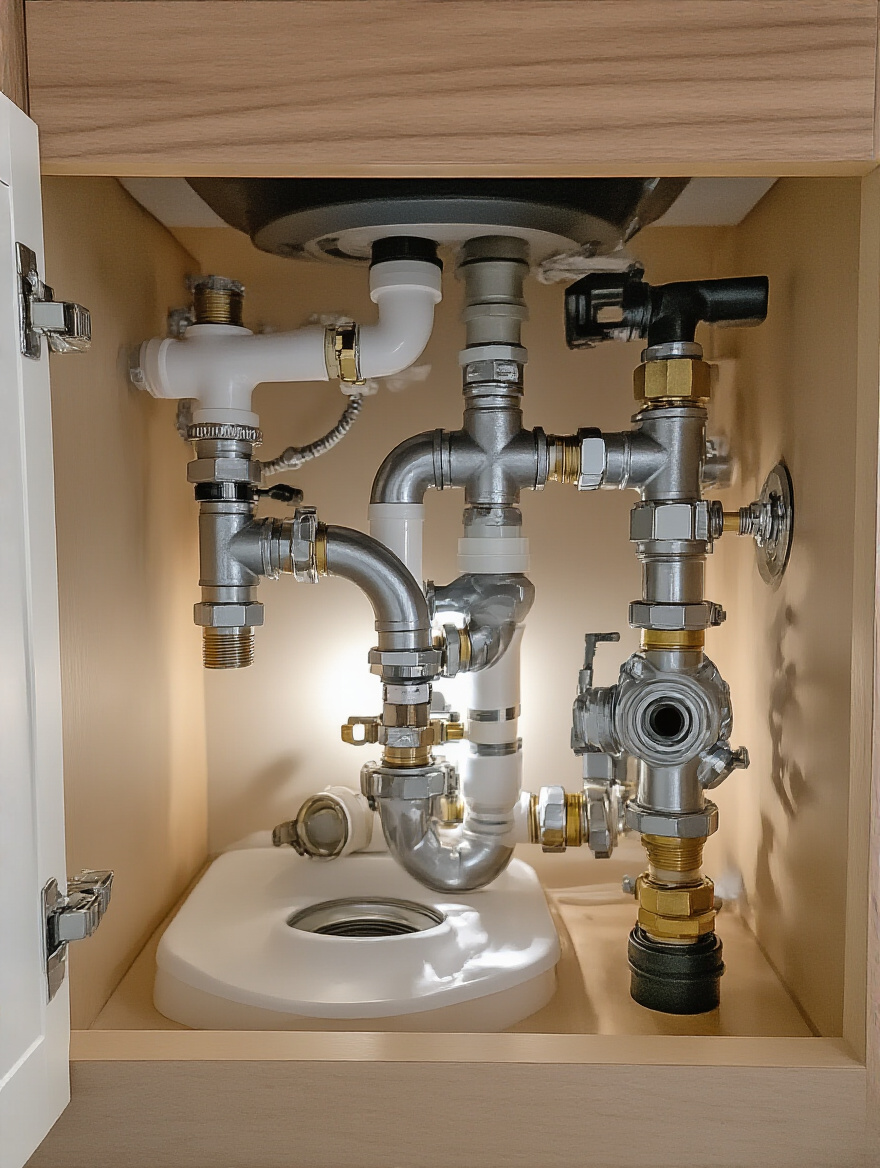
Then, run your dry paper towel along the underside of each connection. Often, a very slow leak won’t be visible, but it will make the paper towel damp. Catching a small leak early is the difference between a simple five-minute fix with a wrench and a multi-thousand-dollar claim for a warped vanity, ruined flooring, and mold remediation. This five-minute check-up is one of the most powerful things you can do to protect your home.
Your Beautiful Bathroom Awaits
Creating a bathroom you truly love is about so much more than picking out finishes. It’s a thoughtful process of blending beauty with the realities of your daily life. It’s about understanding that the right vanity can bring order to a chaotic morning, the right lighting can make you feel good, and the right materials can give you peace of mind. By planning carefully and making smart, intentional choices, you’re not just renovating a room—you’re investing in your own well-being. You’re creating a space that supports you, day in and day out. Now, take a deep breath, grab your tape measure, and get started. You’ve got this.


