You know the question people always ask me? It’s not about ergonomic chairs or standing desks, though we eventually get there. It’s about their living room. They’ll say, “Jesse, I work from home. My living room is my office, my break room, and where I’m supposed to relax at night. But right now, it’s just a chaotic mess and it’s killing my focus.” They think the solution is to just buy a bunch of “pretty” things they saw online and throw them on the walls.
That’s where they get it wrong. For a modern professional, your living room wall decor isn’t just about looking good for guests. It’s a tool. It has to actively support your focus when you’re working and help you fully decompress when you’re not. It’s about managing your mental energy. Get that balance right, and the aesthetics will follow. Forget the corporate speak and the endless scrolling on Pinterest—this is what actually works.
Laying the Groundwork: Planning Your Wall Decor Vision
Before you even think about picking up a hammer, you need a plan. This isn’t the boring part; it’s the most important part. This is where you prevent the mistakes that cost you time, money, and your sanity. A good plan means your space will feel intentional and calming, not like an accidental explosion of stuff.
1. Define Your Living Room’s Core Style First for Cohesion
The biggest lie in decorating is that you just need to find things you “love.” That’s how you end up with a room that feels fractured and mentally draining. Defining your style first isn’t about being trendy; it’s about creating a clear visual language for your brain. When everything speaks the same language, your mind doesn’t have to work so hard to process its surroundings, which frees up mental energy for your actual work.
A client of mine couldn’t focus and felt anxious in his own home. His living room was a mix of clunky bachelor-pad furniture, gifts from his family, and random “cool” art he’d bought. It was a visual screaming match. We used the “3-Word Rule” to nail down his vision: ‘Modern, Minimalist, Earthy.’ From then on, every single decision was filtered through those three words. If it wasn’t modern, minimalist, or earthy, it didn’t come in the door. The result? A space that felt calm, ordered, and finally let him think clearly.
This intentional approach naturally leads you to the next crucial step: getting the scale right by measuring your space.
2. Measure Wall Space Accurately for Balanced Layouts
Can we talk about the soul-crushing feeling of ordering a beautiful piece of art, waiting a week for it to arrive, and then realizing it looks like a tiny postage stamp on your giant wall? Or worse, it’s so massive you can’t even get it through the door. This isn’t just about aesthetics; it’s about avoiding wasted time, money, and the mental drain of frustration. Taking five minutes to measure is the ultimate productivity hack.
Get a tape measure. Measure the whole wall, but also measure the “negative space”—the actual blank area you intend to fill. Don’t forget to note where outlets and light switches are. My shortcut? Use painter’s tape to mock up the dimensions of the art or shelf on the wall. You can live with it for a day and see how the scale feels. It takes two minutes and saves you from a world of shipping-return headaches. Measure twice, hang once, and get back to your life.
Once you know your dimensions, you need a visual plan to bring all your ideas together in one place.
3. Create a Digital or Physical Mood Board for Theme Alignment
I used to think mood boards were just for fancy design agencies. Then I realized they are the single best tool for preventing expensive mistakes. A mood board, whether it’s a Pinterest board or photos tacked to a corkboard, is where your ideas either prove they can work together or reveal themselves as a terrible mismatch. It’s your project’s blueprint.
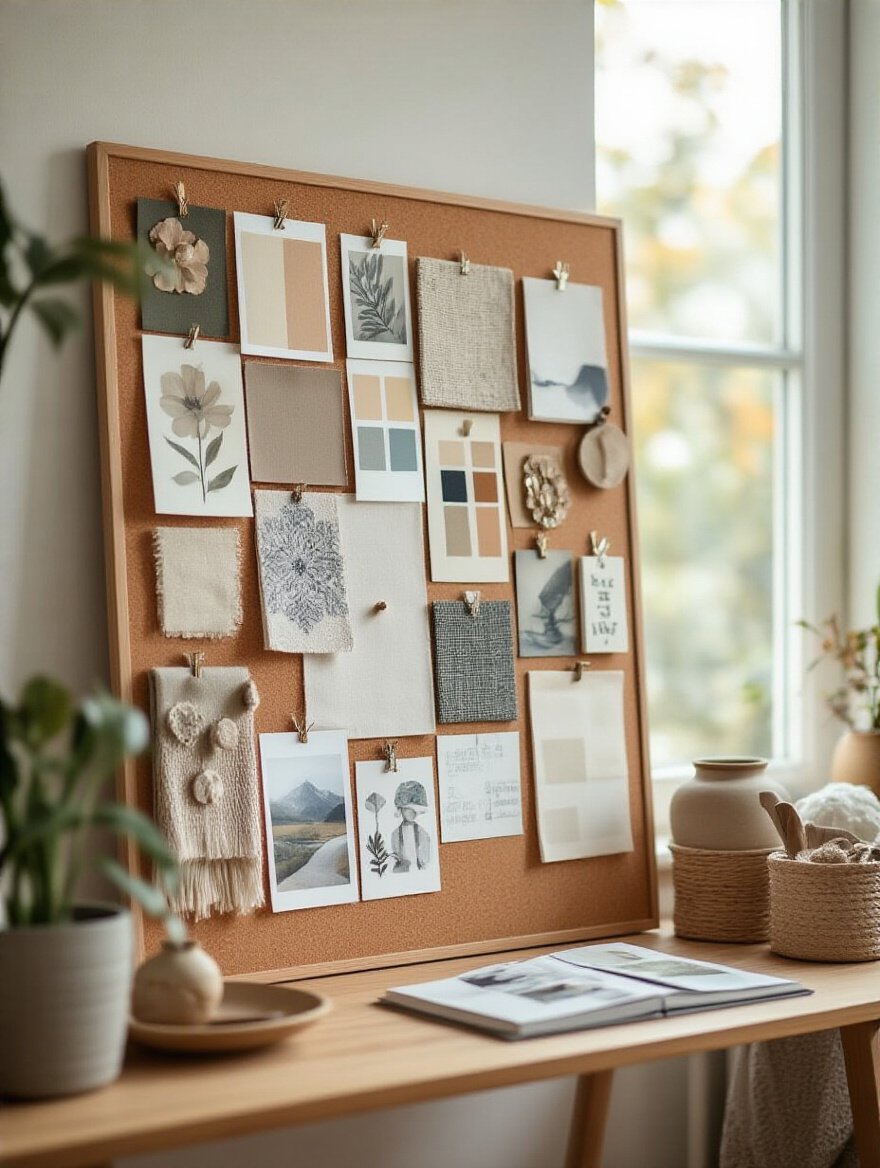
You get to see how that cool metal sculpture looks next to your rustic wood frames and your planned paint color before you spend a dime. I had a client who was about to spend $800 on a set of prints that looked great online. On her mood board, next to her sofa fabric and rug, the colors clashed horribly. The mood board saved her nearly a grand and weeks of regret. It turns an abstract feeling into a concrete plan, which is the most efficient way to design.
This visual plan helps you confirm your vision, which is essential for establishing the most important element on your wall: a focal point.
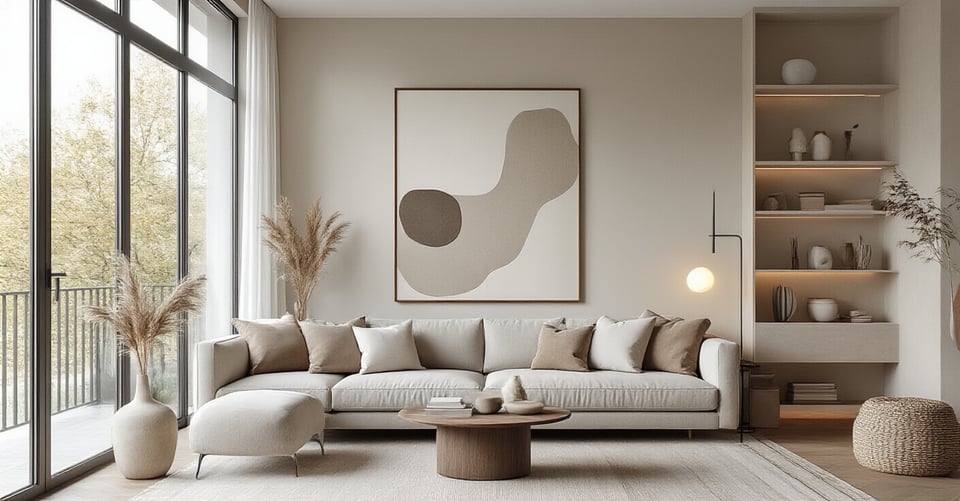
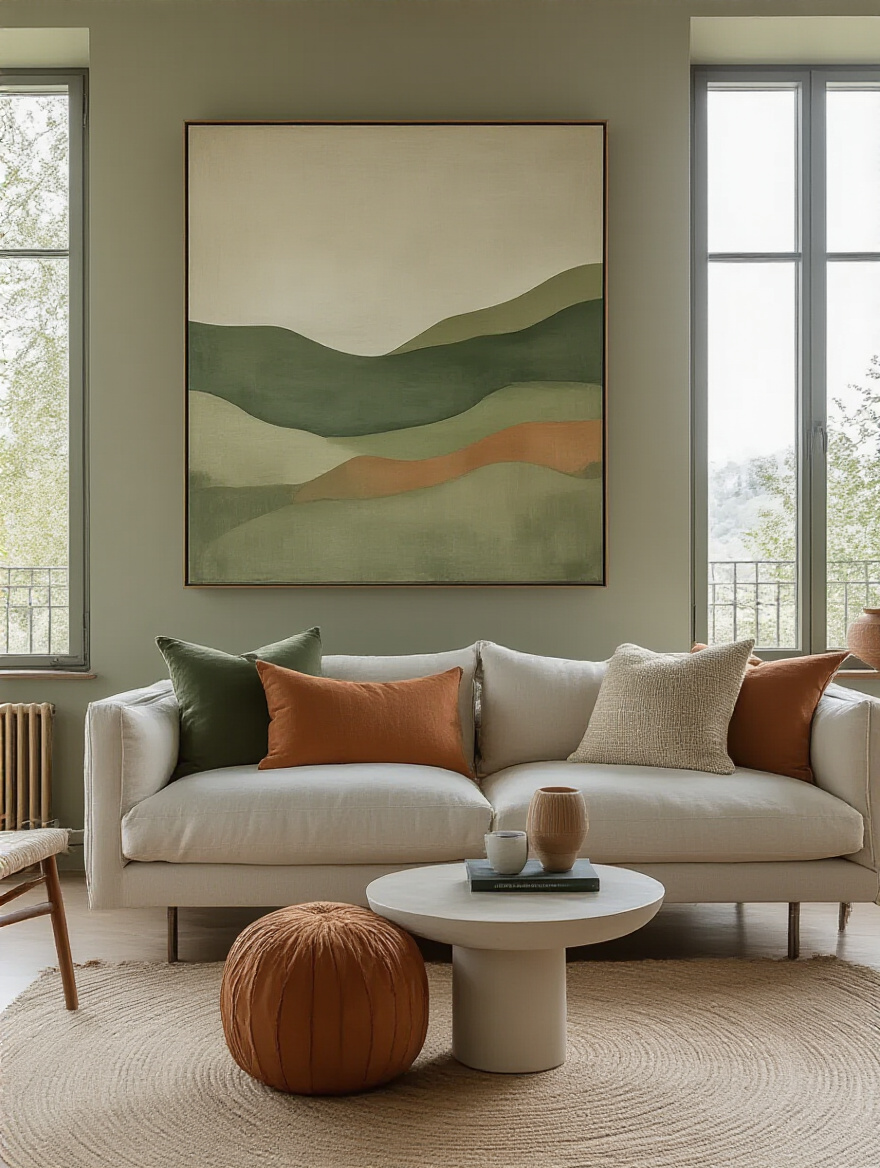
4. Establish a Focal Point to Anchor Your Wall Design Effectively
A room without a focal point is like a meeting without an agenda. Your eye doesn’t know where to go, so it bounces around chaotically, and your brain gets tired. A focal point is simply the star of the show. It’s the one thing that immediately tells your eye, “Look here. This is what matters.” It creates a sense of order and calm, which is non-negotiable for a productive space.
Your focal point might already be there, like a fireplace or a big window with a great view. If not, you create one. A single large piece of art, an amazing mirror, or even a bold accent wall with removable wallpaper can do the trick. Everything else you add to that wall should be a supporting actor. Its job is to complement the star, not compete with it. This single decision anchors your entire design and stops your wall from becoming a cluttered mess of visual noise.
And once you’ve decided what the star of your wall is, you have to make sure it’s properly lit.
5. Consider Lighting’s Impact on Wall Art Perception and Vibrancy
You can have the most incredible art in the world, but if your lighting sucks, it’s worthless. Worse, bad lighting can actively work against you. The glare from a poorly placed overhead light can cause eye strain and headaches, tanking your ability to focus for hours. Good lighting isn’t just about making your art “pop”; it’s a critical component of ergonomic design.
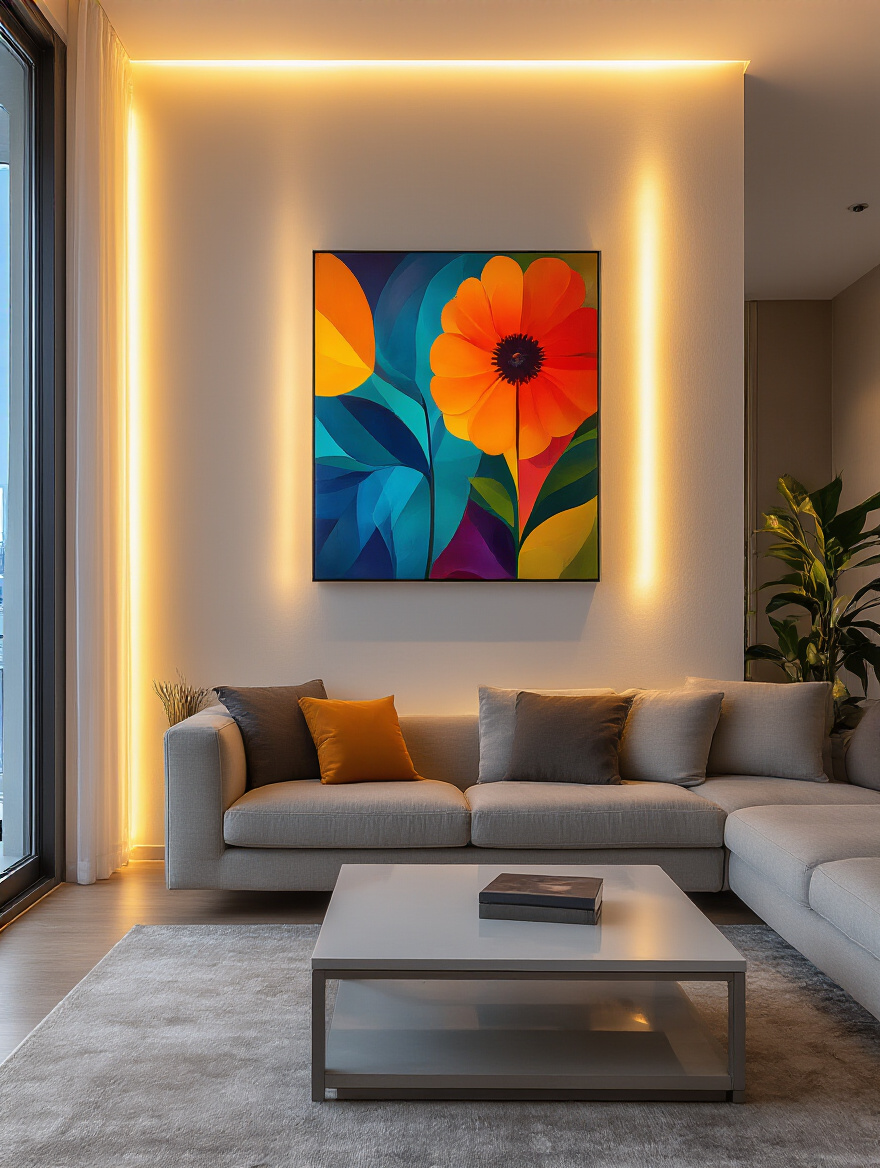
The goal is to light the art, not the wall or the viewer’s eyes. A picture light mounted above a frame or an angled track light is perfect. Always use LED bulbs with a high CRI (Color Rendering Index) of 90 or more—this ensures the colors look true and natural, not weirdly yellow or blue. My pro-tip? Put everything on dimmers. This lets you shift the room’s energy instantly. Bright, clear light for focused work during the day, and soft, warm ambient light in the evening to help your brain power down.
Mastering Art Selection & Gallery Wall Layouts
Okay, now for the fun part—actually picking things to put on the wall. This isn’t just about filling space. It’s about curating a visual environment that either inspires creativity or fosters calm. What you choose and how you hang it has a direct impact on your mental state.
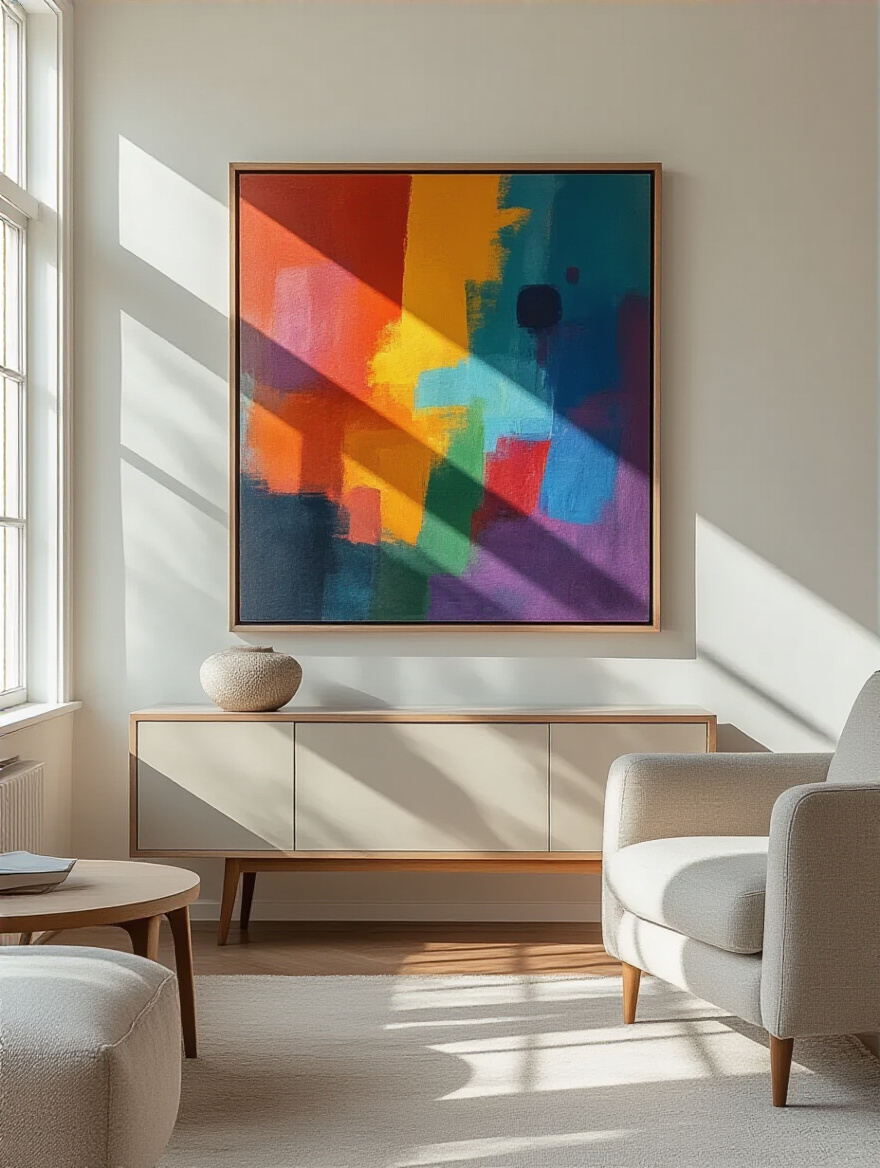
6. Choose Art Pieces Reflecting Personal Interests & Color Palettes
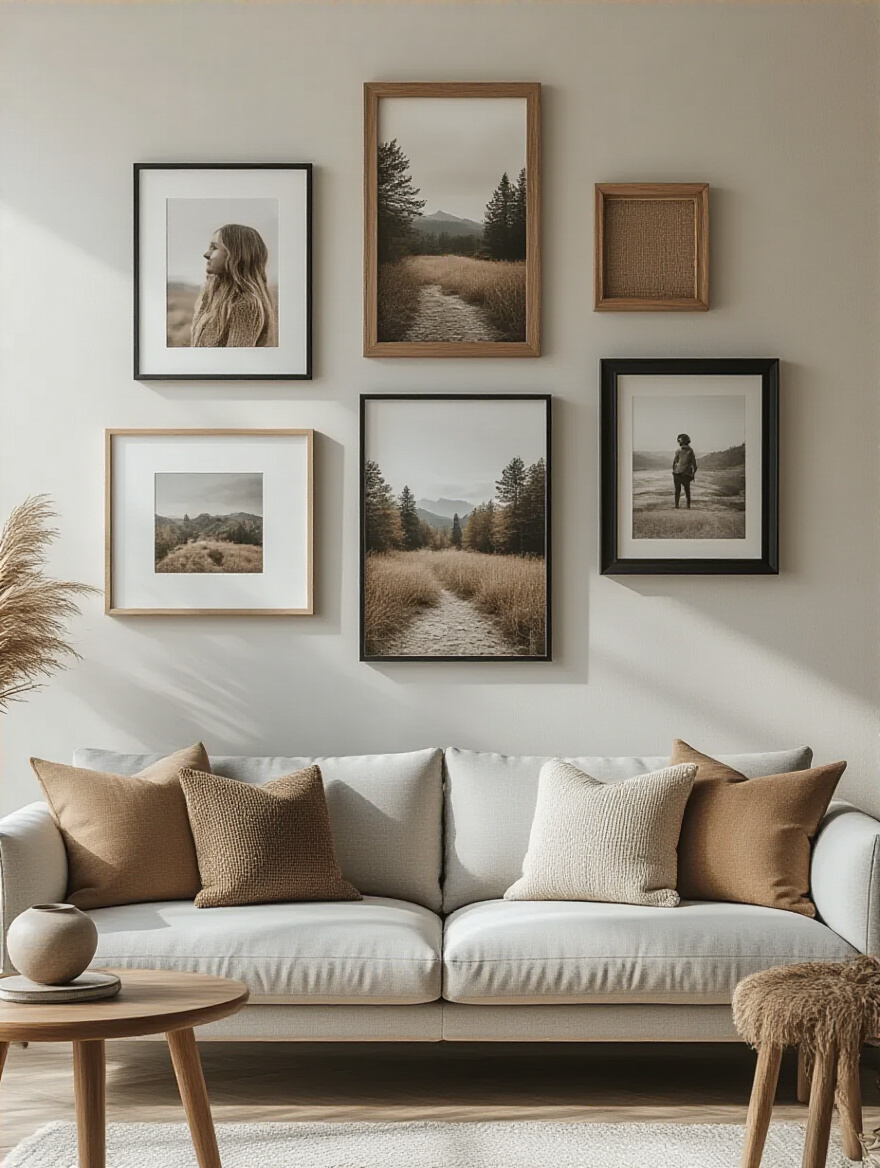
Please, do not buy art because it “matches your sofa.” That’s the fastest way to a soulless, generic room. Art should be a source of energy for you. Choose pieces that connect to your passions, your travels, or your goals. A photo from a favorite hike, a print from an artist who inspires you, or an abstract that just makes you feel calm. This is about surrounding yourself with things that feed your spirit, not just fill a blank space.
When I was designing my own home office, I was stuck. Then I realized the moments I feel most creative are when I’m out in nature. So, I built my entire wall decor around large-scale, minimalist photography of forests and mountains in calming green and gray tones. Now, when I feel stuck on a project, I just look up. The art is a visual cue that reminds me to breathe and reset. It’s not just decor; it’s a functional tool for my well-being.
Once you’ve found pieces that speak to you, the next challenge is making them speak to each other in a gallery wall.
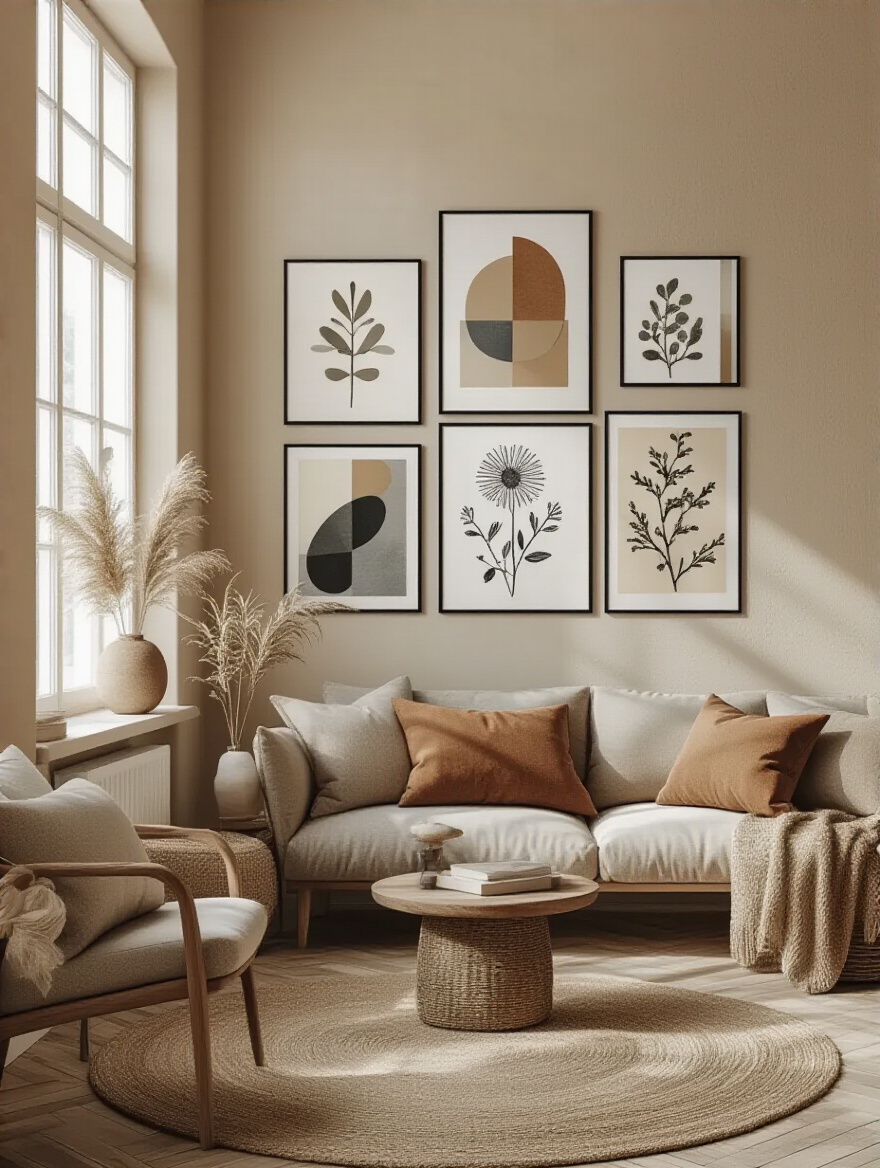
7. Design a Balanced Gallery Wall Layout on the Floor First
Here’s my “I learned this the hard way” story. Early in my career, I tried to hang a gallery wall for a client by just eyeballing it. It was a disaster. I ended up with a dozen extra nail holes to patch, crooked frames, and a layout that felt totally off-balance. I wasted three hours and my client’s patience. Never again. Now, this is a non-negotiable rule: lay it all out on the floor first.
Use painter’s tape to mark the wall’s dimensions on your floor. Then, arrange and rearrange your frames inside that box until the balance feels perfect. The biggest piece usually goes slightly off-center to act as an anchor, and then you build around it. Once you love it, take a photo. Then, trace each frame onto craft paper, cut out the templates, and tape those to the wall. You can then put your nail directly through the paper where it needs to go. No mistakes, no patching, no frustration.
Perfecting the layout is one thing, but making it visually interesting requires a mix of ingredients.
8. Mix Art Sizes and Frames for Dynamic Visual Interest and Depth
A gallery wall where every frame is the same size and color can look a little… sterile. Like a corporate hallway. To create something that feels personal and curated, you need variety. Mixing large statement pieces with smaller accents, and wood frames with sleek metal ones, creates rhythm and movement. It tells a much more interesting story.

The key is to have a single unifying element so it doesn’t look chaotic. Maybe all the frames are black, but they’re different styles and sizes. Or maybe all the mats are the same crisp white, even if the frames vary. In my living room, I have a mix of gold, black, and natural wood frames, but they all contain black-and-white family photos. That shared element ties it all together, making it look eclectic but intentional.
To take that intentionality one step further, you can tie your pieces together with a common theme.
9. Incorporate Thematic Art Prints for a Unified Narrative Flow
This is how you get a truly high-end, professionally designed look. Instead of a random assortment of things, you curate your collection around a single idea. It could be “Coastal Calm,” with seascapes, photos of seagrass, and art in shades of blue and sand. Or it could be “Urban Architecture,” with black-and-white photos of cityscapes and abstract prints of building schematics.
This approach makes your decor incredibly powerful because it communicates a clear story. It instantly sets a mood. A friend of mine wanted his space to feel more intellectual and calming for his writing work. We created a thematic wall with vintage patent drawings, prints of old book pages, and a few portraits of his favorite authors. The entire wall exudes a quiet, studious energy that actively helps him get into a focused mindset.
No matter the theme, getting the hanging height right is the final piece of the puzzle.
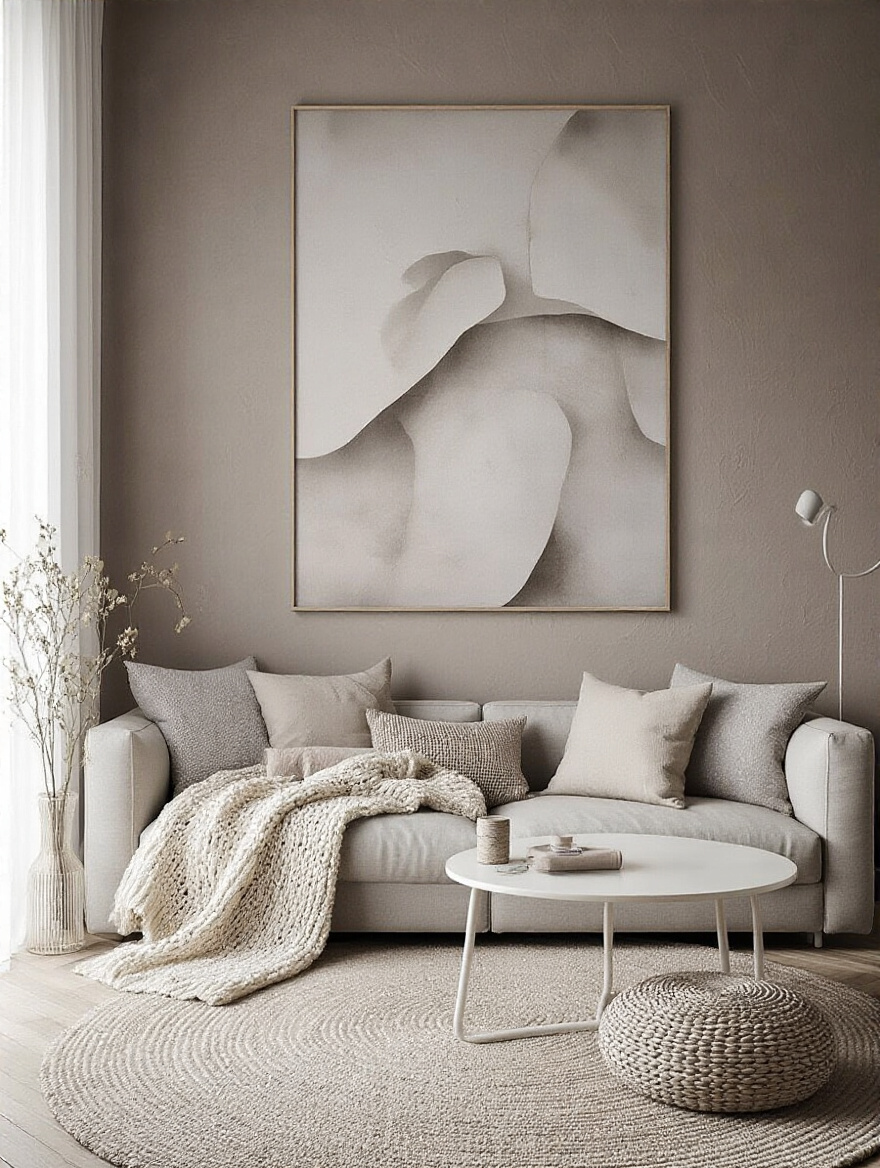
10. Hang Art at Eye Level for Optimal Viewing Comfort and Balance
This is the one rule you should never break. The center of your art piece (or the center of your entire gallery wall grouping) should be about 57-60 inches from the floor. That’s the standard eye level for the average person and it’s what every museum and gallery uses. It’s the most comfortable viewing height.
When people hang art too high—which they almost always do, especially over a sofa—it creates a sense of visual disconnection and makes the room feel unbalanced. It forces you to crane your neck, which is an ergonomic nightmare. Hanging art at the proper height connects it to the furniture and the rest of the room, creating a cohesive, grounded look. It’s a small detail that makes a massive difference in how professional and comfortable your space feels.
Beyond Pictures: Textural & Three-Dimensional Wall Decor
A wall with only flat, framed pictures can feel a bit one-dimensional. To create a space that’s truly engaging and sophisticated, you need to add depth and texture. This is about introducing elements that pop off the wall, play with light, and invite touch.
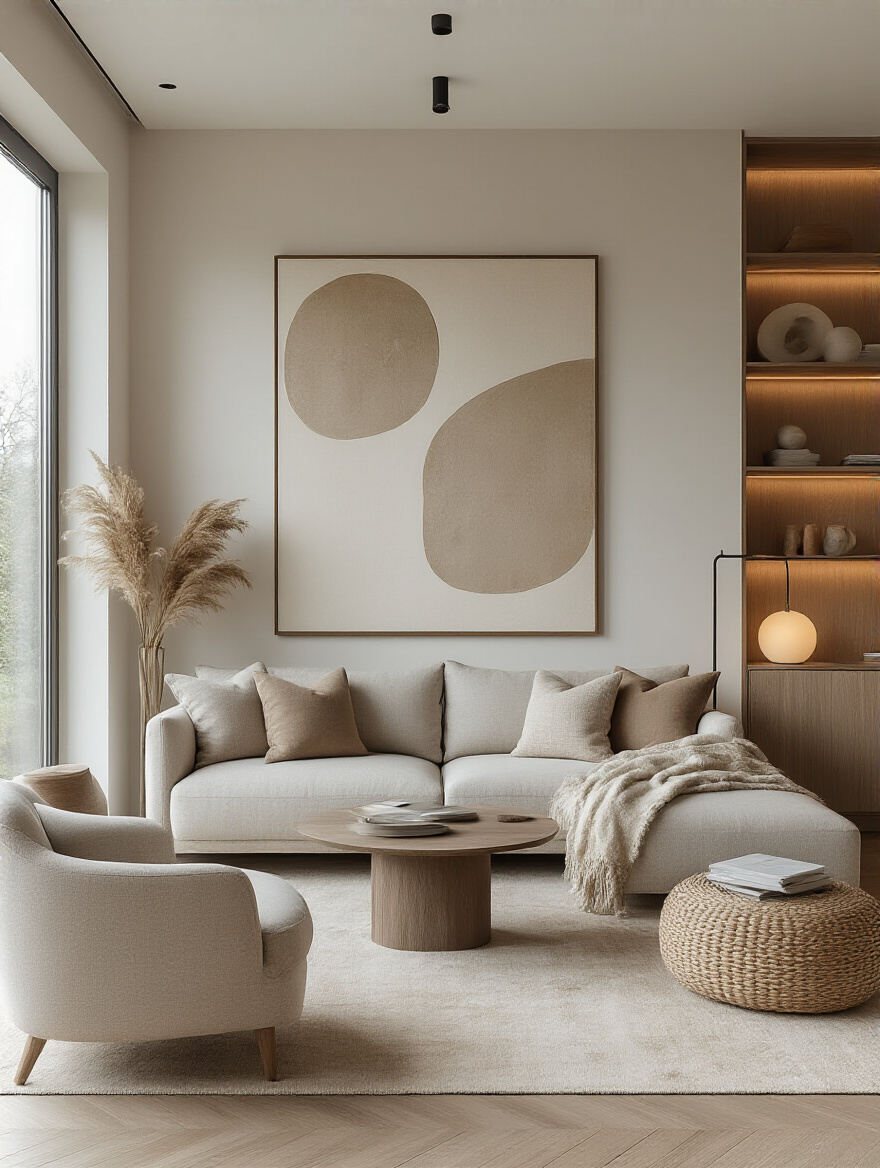
11. Install Decorative Wall Shelves for Curated Displays of Objects
Shelves are a fantastic tool, but they can quickly become clutter magnets if you’re not careful. The goal isn’t to display every single knick-knack you own. The goal is to create curated, beautiful little moments. A shelf is an opportunity to add a 3D element to your wall design, breaking up the flatness of framed art.
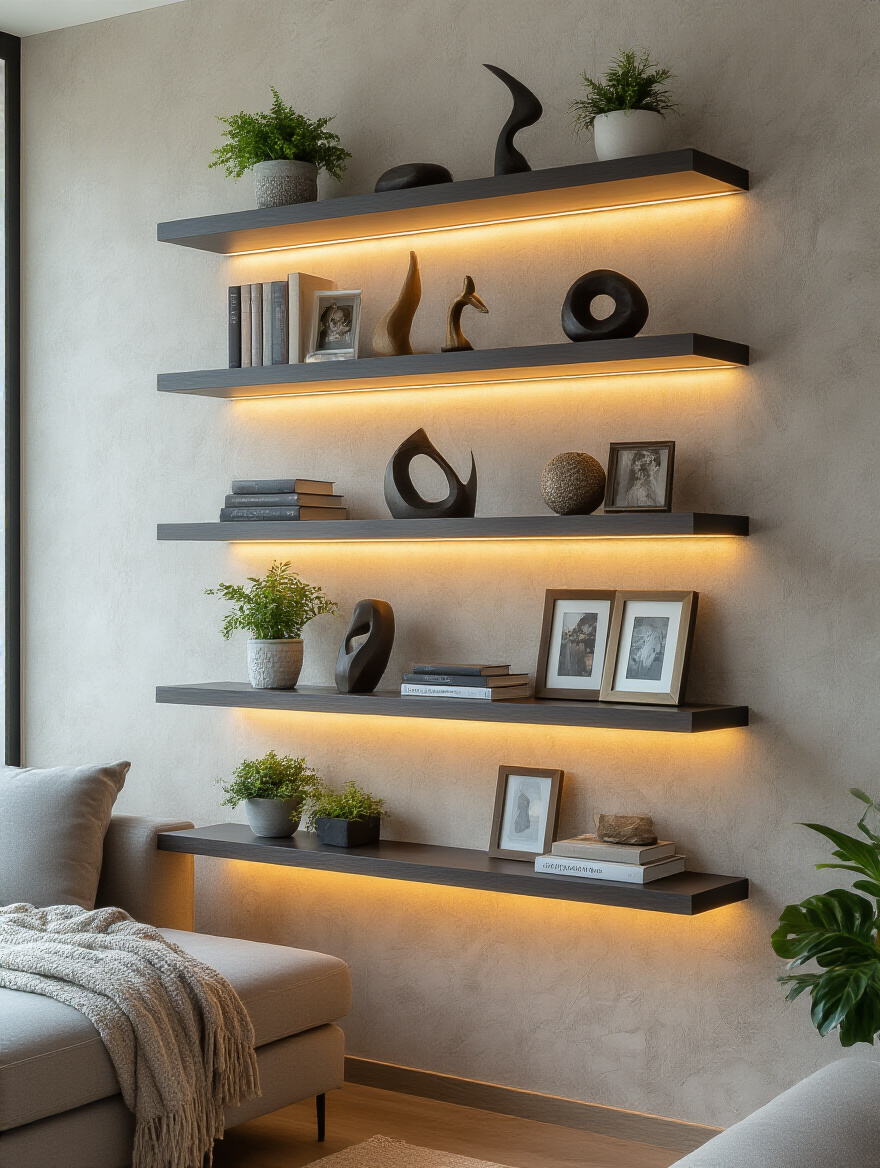
The secret to styling shelves is to think like a museum curator. Group items by color or theme. Vary the height and texture of objects. Use the ‘Rule of Threes’ (grouping objects in odd numbers is more visually appealing). And most importantly, leave some empty space! Negative space gives your cherished items room to breathe and makes the whole arrangement feel calmer and more intentional, not like a storage unit.
From the hard lines of shelves, we can soften things up by bringing in the warmth of textiles.
12. Hang Macrame or Woven Textiles for Bohemian Warmth and Texture
Bare walls and hard surfaces create echo. In a home office or a living room where you take calls, that’s a huge problem. Woven wall hangings, like a macrame piece or a beautiful tapestry, are a brilliant design solution. They look stunning, adding incredible texture and a sense of handmade warmth, but they also secretly work as acoustic dampeners.
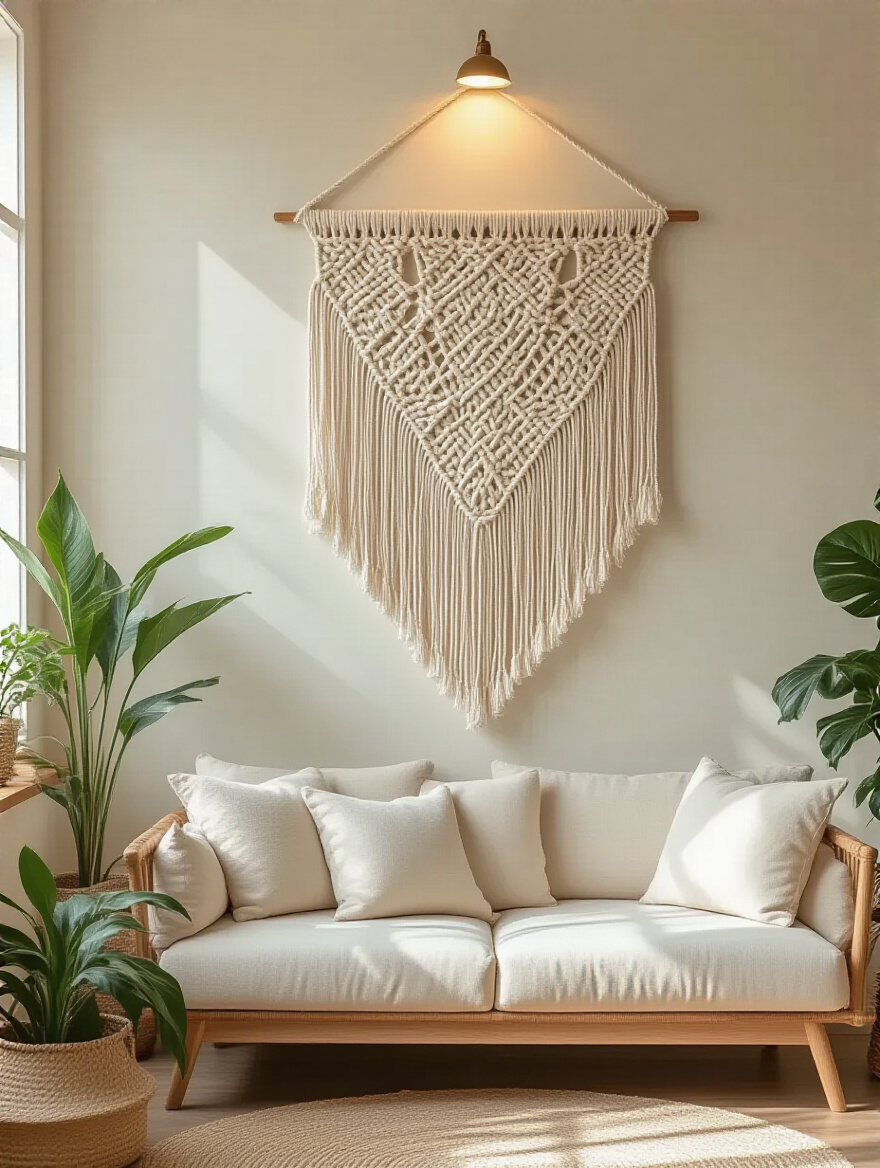
They absorb sound, reducing that sharp, distracting echo and making a room feel instantly cozier and quieter. I had a client whose living room/office had soaring ceilings and wood floors; every phone call was an echo-y nightmare. We hung a single, massive woven textile on the wall behind her desk. It not only became a gorgeous focal point but also cut the reverberation in the room by more than half. It’s decor that does double duty.
Textiles absorb light, but our next element does the complete opposite, making it a powerful tool in any space.
13. Utilize Large Decorative Mirrors to Expand Space and Reflect Light
If you do one thing to make a small or dark room feel better, make it this. A large mirror is basically like adding a new window. It bounces light around the room, making it feel brighter, larger, and more alive. For anyone working from home, maximizing natural light is a top priority for mood and productivity.
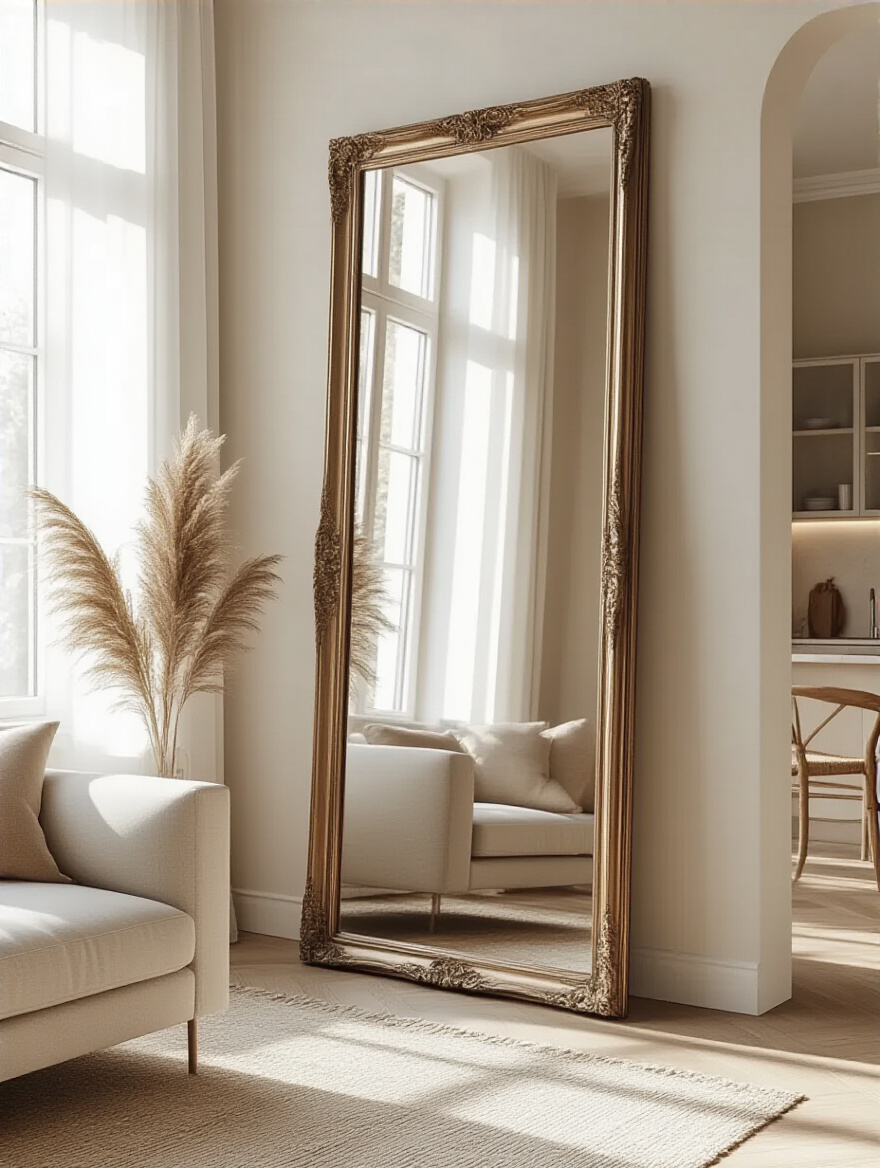
The trick is placement. Hang a mirror on the wall perpendicular to a window, not directly across from it. This way, it will catch the light and spread it throughout the room instead of just bouncing it back out the window. And think about what it’s reflecting. A mirror is only as good as the view it shows. Make sure it reflects something beautiful, like your favorite piece of art or a view of the trees outside, not a cluttered corner.
Mirrors add the illusion of depth, but for real dimension, nothing beats sculptural art.
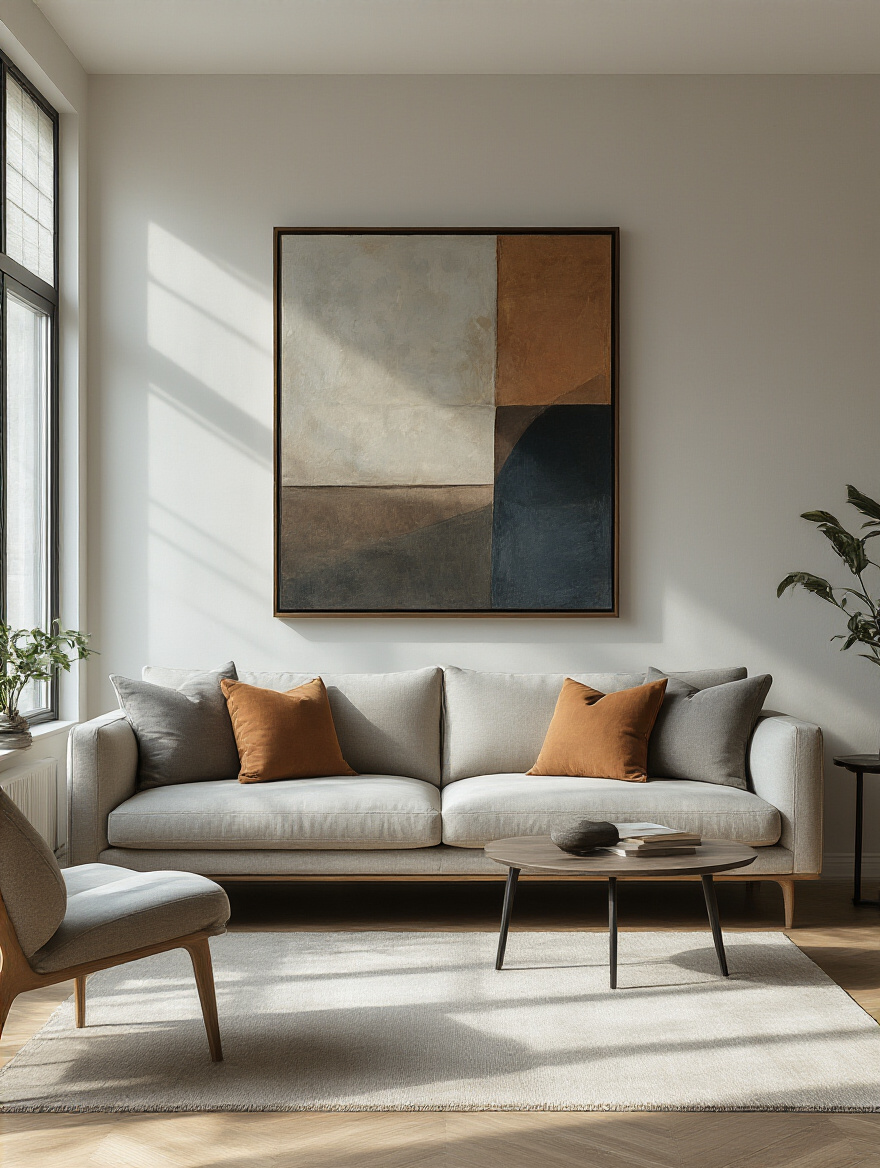
14. Integrate Sculptural Wall Art for Unique Focal Points and Dimension
Sometimes a wall needs something more interesting than a rectangle in a frame. Sculptural wall art—whether it’s a metalwork piece, a series of ceramic forms, or a carved wood panel—brings a wall to life. It adds real, physical depth and creates fascinating shadows that shift and change with the light throughout the day.
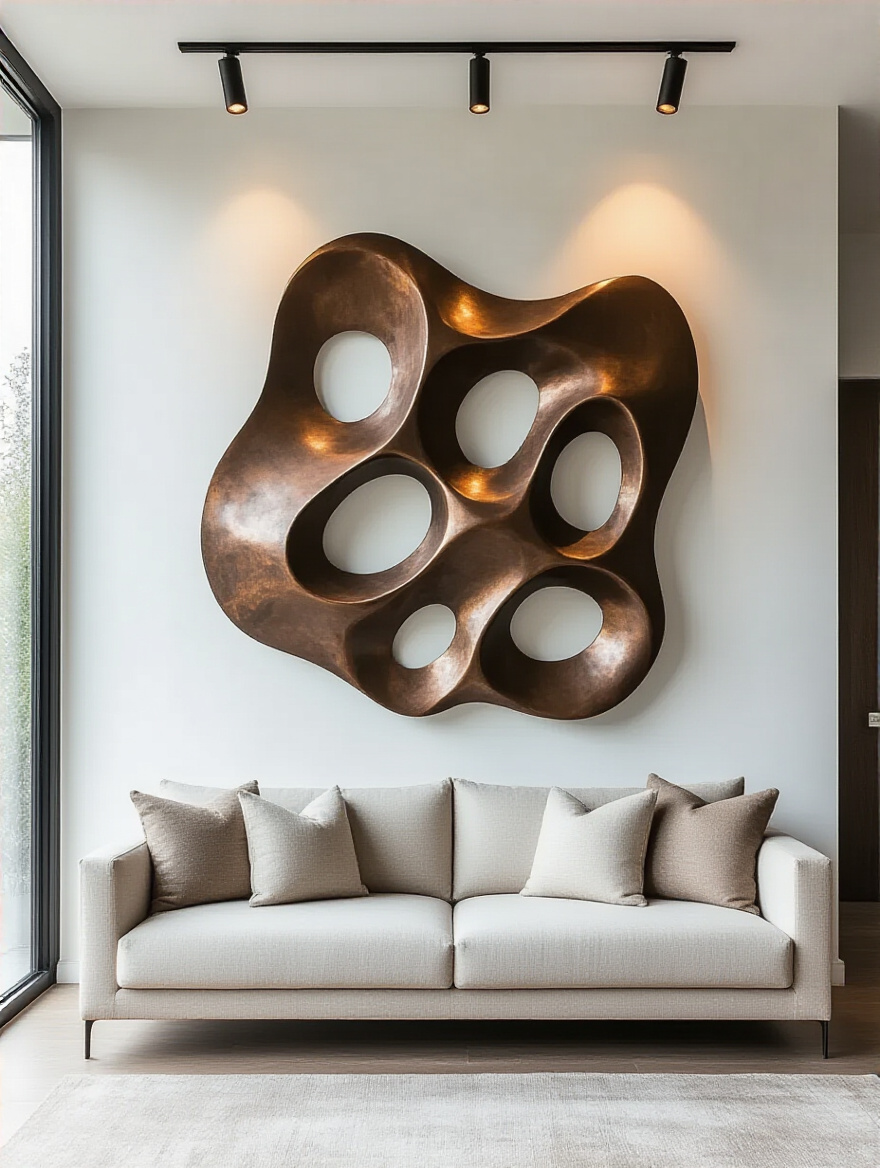
This is a great strategy for a minimalist space where you want a single, high-impact statement without adding a lot of color or busyness. The texture and form of the piece provide all the interest you need. I love using these in transitional spaces like entryways or on a large, blank living room wall. It feels less like decoration and more like a permanent architectural feature, elevating the whole room.
From permanent installations, let’s look at a solution that offers maximum impact with minimum commitment.
15. Apply Removable Wallpaper or Decals for Instant Pattern & Style
For renters, or for anyone who (like me) gets bored easily, removable wallpaper is a godsend. It allows you to make a huge, dramatic statement—like creating a stunning feature wall—without the terrifying commitment of traditional wallpaper. You can go bold with a large-scale pattern or a dark, moody color knowing that when you’re ready for a change, you can just peel it off.
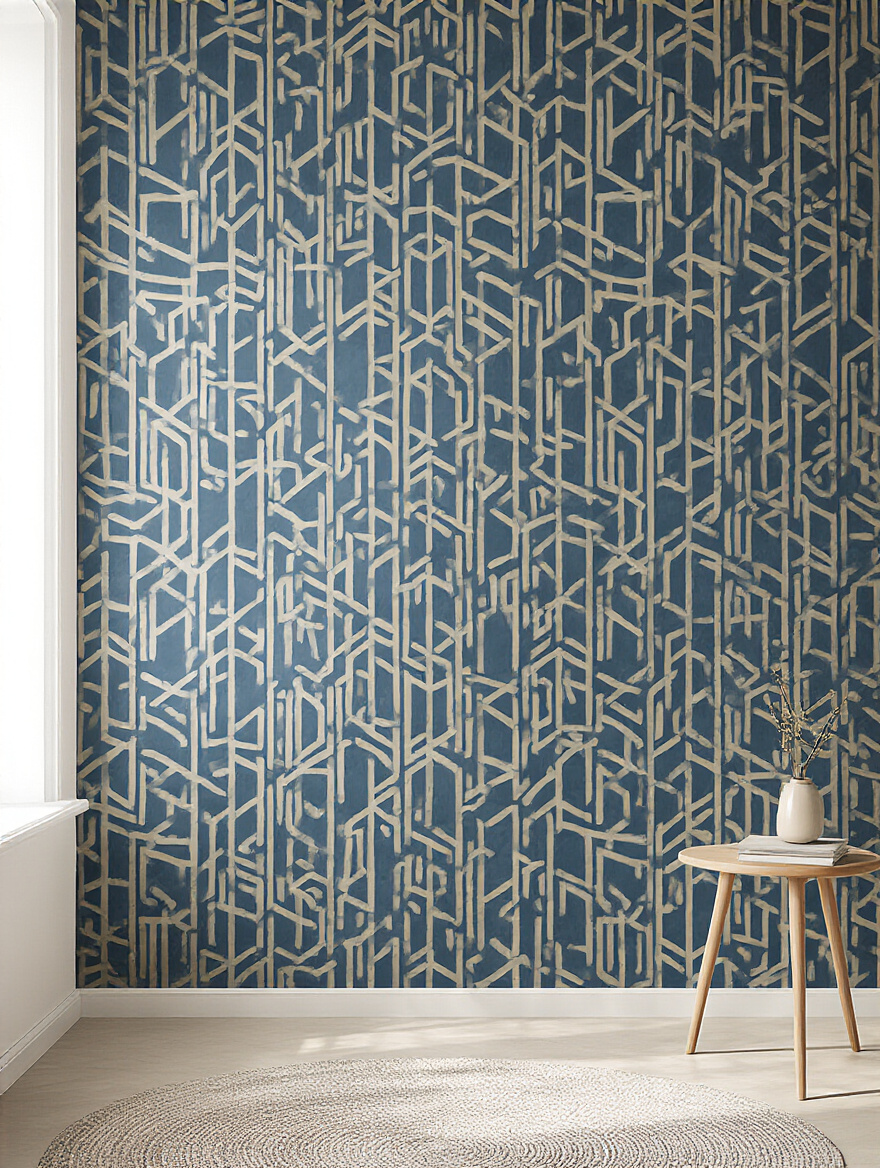
I often recommend this for creating “zones” in a multi-use room. Use a calming, textured wallpaper in a nook to create a dedicated reading or relaxation spot. Or put a bold, energizing pattern on the wall behind your desk to visually separate your “work zone” from your “living zone.” It’s an incredibly effective and low-risk way to add personality and function to your space.
Smart Decor: Combining Aesthetics with Practicality
This is where my world of design really shines. Smart decor isn’t about technology (though it can be); it’s about making choices that are not only beautiful but also make your life easier, more organized, and more comfortable. Every piece should pull its weight.
16. Mount a Stylish Wall-Mounted TV Console for Organization
A traditional TV stand can be a clunky, dust-collecting beast that eats up valuable floor space. A floating, wall-mounted console is the opposite. It creates an illusion of space and lightness by leaving the floor clear, which instantly makes a room feel larger and less cluttered. In the battle against mental distraction, visual clutter is a top enemy.
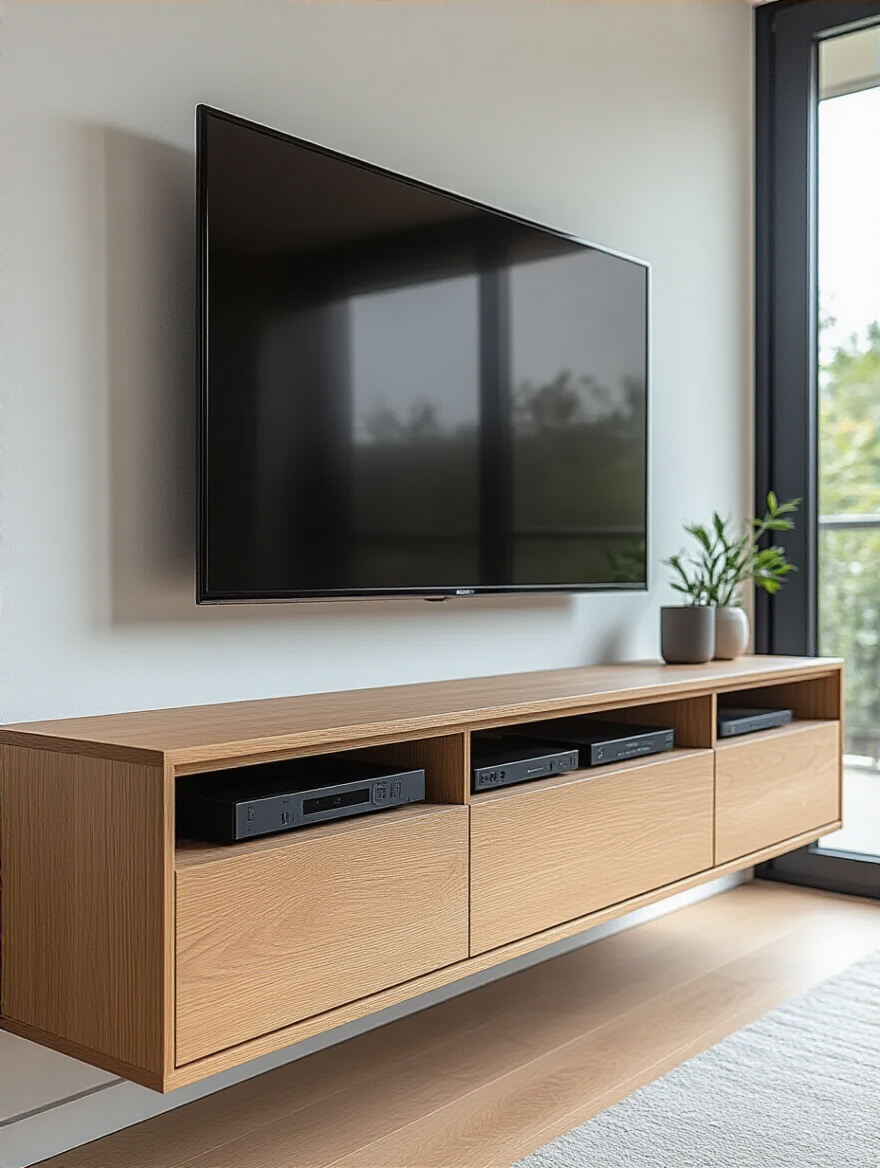
These units are also brilliant for hiding the rat’s nest of cords and cables that comes with modern entertainment systems. Everything is tucked away neatly inside, leaving you with a clean, minimalist look. It turns the TV wall from a zone of electronic chaos into a sleek, intentional design feature. For anyone striving for a calm, organized living space, this is a no-brainer.
While a console organizes your tech, our next idea organizes nature itself for your well-being.
17. Design a Vertical Indoor Garden for Natural Serenity and Air Quality
The science is clear: being around plants reduces stress, improves mood, and can even boost focus. This is the principle of biophilia. A living wall, or vertical garden, is the ultimate expression of this. It’s a stunning, vibrant piece of living art that brings the restorative power of nature right into your living room.
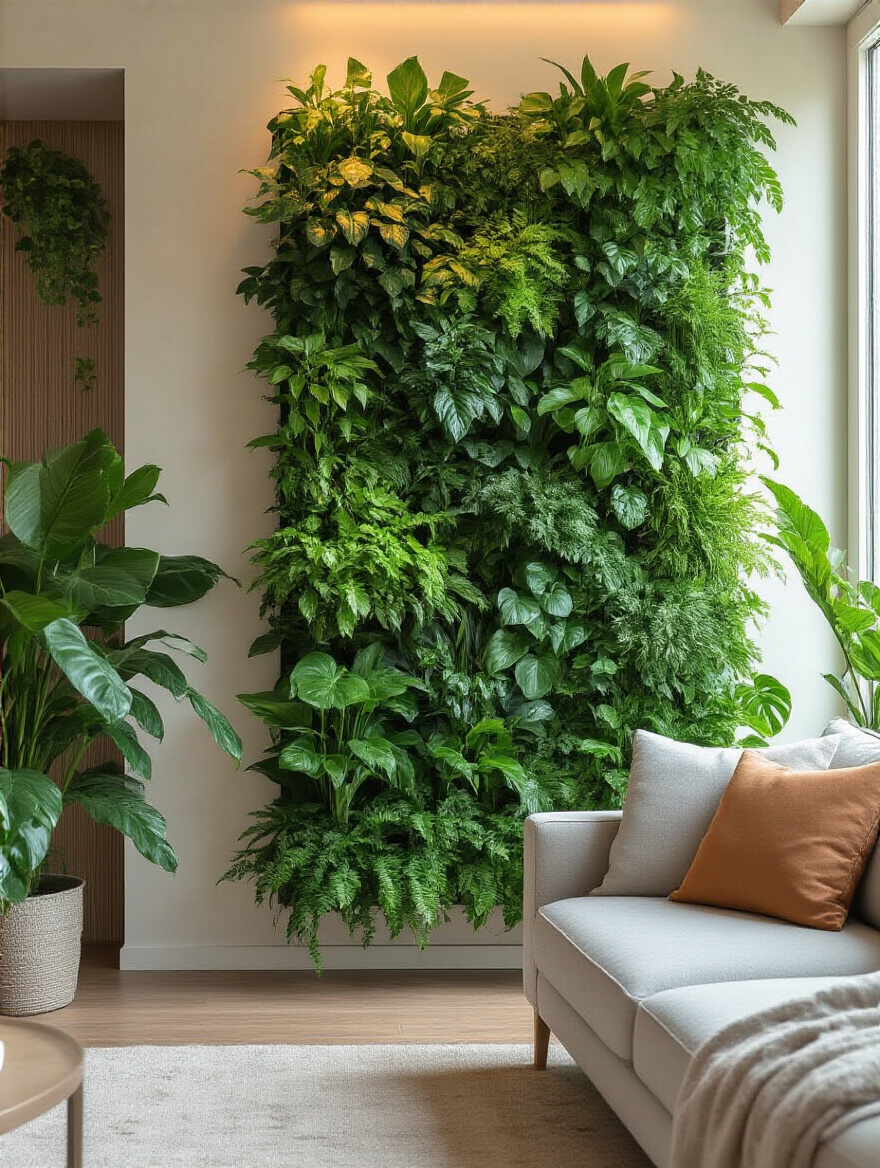
Beyond the aesthetics, a living wall acts as a natural air purifier, filtering out common indoor pollutants. For people spending 8+ hours a day inside, improving air quality is a huge well-being win. I had a client in a city apartment with no outdoor space install a self-watering living wall. He said it completely changed the feel of his home, making it a true sanctuary to escape the concrete jungle. It became the backdrop for his video calls, and everyone commented on the calming, beautiful environment.
From fostering tranquility, let’s pivot to a solution that champions efficiency.
18. Create a Practical Wall-Mounted Command Center for Efficiency
Let’s be honest, the living room often becomes a dumping ground for mail, keys, and miscellaneous life clutter. A command center puts a stop to that. It’s a designated, organized hub on your wall for managing the logistics of life. It’s not just for families with kids; it’s a productivity tool for any busy professional.
A good command center might include a small whiteboard or chalkboard for quick notes, slots for incoming and outgoing mail, hooks for keys, and a central calendar. The key is to get that chaos off your coffee table and into an organized system. By giving everything a home, you drastically reduce the “mental load” of remembering where things are and what needs to be done. You can even make it stylish by using matching frames for the boards and cool, minimalist organizers.
Command centers manage visual and mental clutter, while our next idea manages auditory clutter.
19. Install Discreet Acoustic Panels for Improved Sound Comfort
This is the biggest secret weapon for creating a truly comfortable and productive home environment. If you have hardwood floors, high ceilings, or big windows, you have an echo problem. That constant reverberation makes it hard to concentrate, drains your energy, and makes you sound terrible on video calls. Acoustic panels are designed to absorb that excess sound.

And they no longer look like ugly foam squares from a recording studio. You can now get high-performance acoustic panels that are wrapped in beautiful fabric or custom-printed with any artwork you want. You can literally hang a stunning piece of art that is secretly making your room quieter and more comfortable. It’s the absolute best example of decor that blends high function with high style. It solves a real, tangible problem that directly impacts your well-being.
Personalized Flourishes & Seasonal Styling Tips
Once you have the functional foundation in place, it’s time to add the final layers of personality. This is what makes a space feel uniquely yours. These are the touches that tell your story and keep the room from feeling static and boring over time.
20. Display Personal Photo Collections with Thoughtful, Artistic Layouts
A collection of personal photos is the ultimate way to make a house feel like a home. It’s a constant, visible reminder of your relationships, your joy, and your “why.” Seeing the faces of people you love can be a powerful antidote to a stressful workday. But how you display them matters.
Instead of a clutter of mismatched frames on a tabletop, elevate your photos by turning them into an artistic wall display. A symmetrical grid of black-and-white photos in identical frames creates a look that is classic, sophisticated, and timeless. Or, for a more casual feel, a gallery wall of candid shots in a mix of vintage frames tells a rich, evolving story. It’s about treating your memories with the importance they deserve.
These personal stories provide a wonderful foundation that you can then update with the changing seasons.
21. Implement Seasonal Wall Decor Changes for Fresh, Dynamic Vibes
Does your living room ever start to feel a little… boring? Like you don’t even “see” the decor anymore? That’s sensory habituation. Our brains are wired to tune out what’s constant. Periodically changing up your decor is a powerful way to combat this and keep your space feeling fresh and engaging.
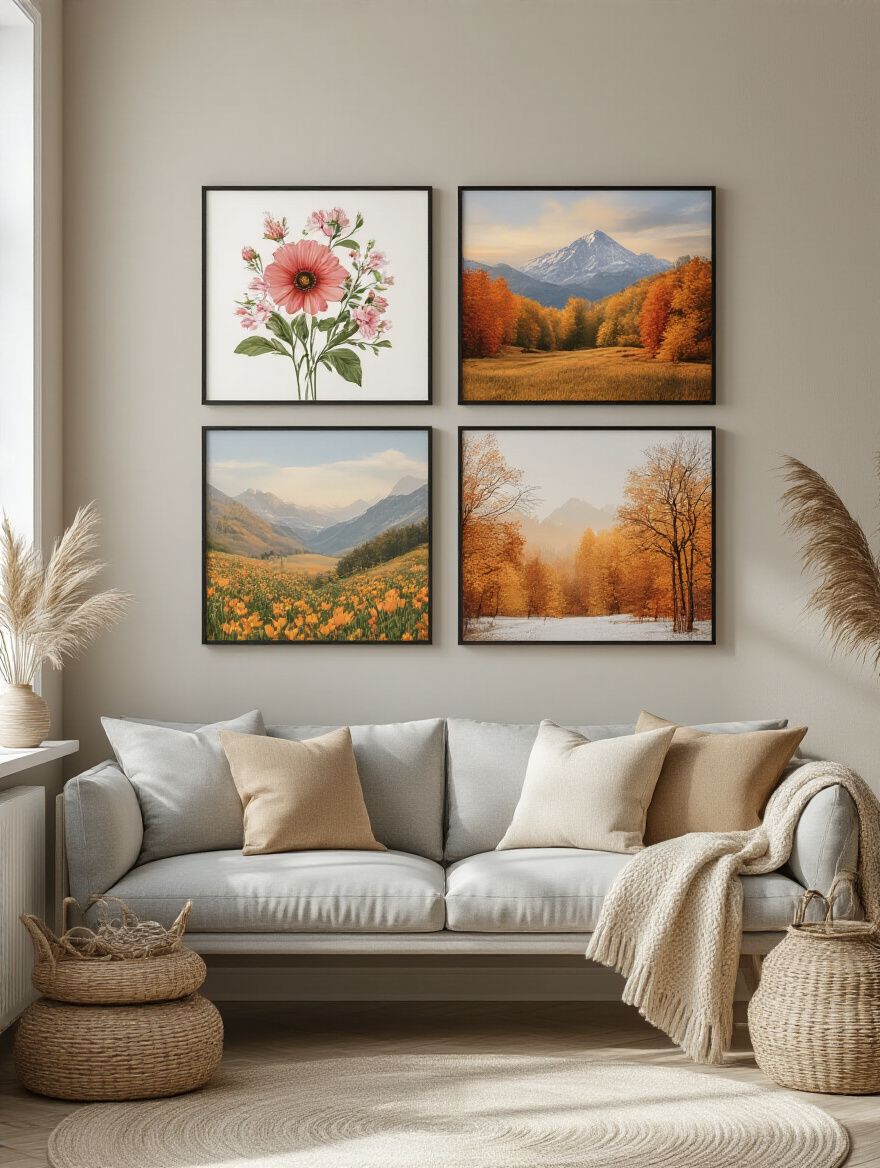
This doesn’t mean a complete overhaul every three months. It can be as simple as swapping out a few art prints in your gallery wall—maybe moody landscapes in the fall and bright botanicals in the spring. Or changing the throws and pillows to reflect a new color palette. My pro-tip: Use Etsy for downloadable art. For a few dollars, you can buy a beautiful digital print and have it printed locally. It’s a low-cost, high-impact way to keep your walls feeling new.
Some pieces, however, are meant to be timeless, anchoring your decor across all seasons.
22. Incorporate Heirloom Pieces for Unique Historical Charm and Character
In a world of mass-produced decor, an heirloom piece is your secret weapon. It’s something with history, with a story, that is 100% unique to you. It could be a vintage map that belonged to your grandfather, an antique mirror, or a quilt made by your great-aunt. These items give a room soul.
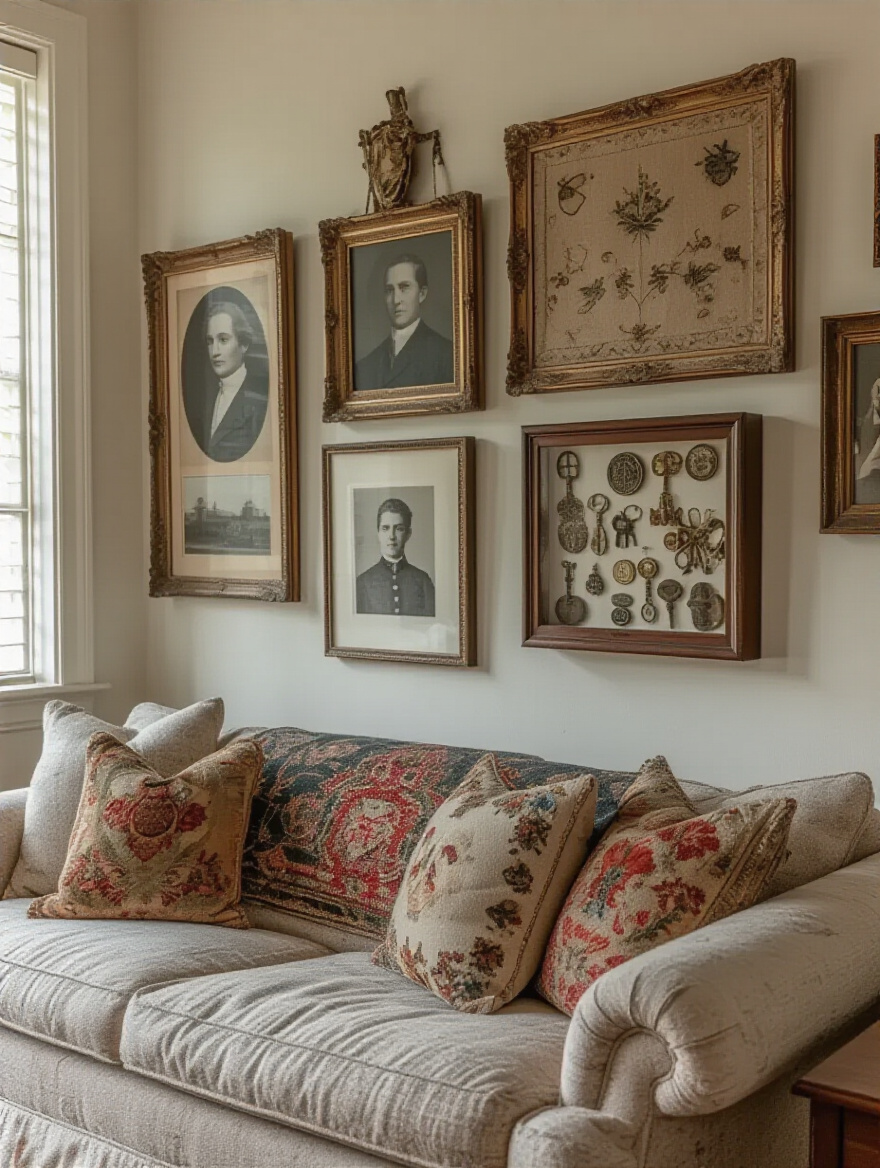
Integrating them into your modern decor creates a beautiful tension between old and new. The key is to treat them like the treasures they are. Have that old print professionally framed with UV-protective glass. Mount that beautiful textile carefully. When you mix these deeply personal, historical pieces with your contemporary decor, you create a space that feels layered, meaningful, and completely authentic.
To give these special pieces the spotlight they deserve, you can use modern lighting techniques.
23. Use LED Strip Lighting for Dramatic Backlighting and Mood Ambiance
LED strip lighting is one of the most versatile and affordable tools for creating a sophisticated, layered lighting scheme. You can use it to create a soft glow from behind a wall-mounted TV (which reduces eye strain—a technique called bias lighting), to backlight floating shelves, or to wash a whole wall with ambient color.
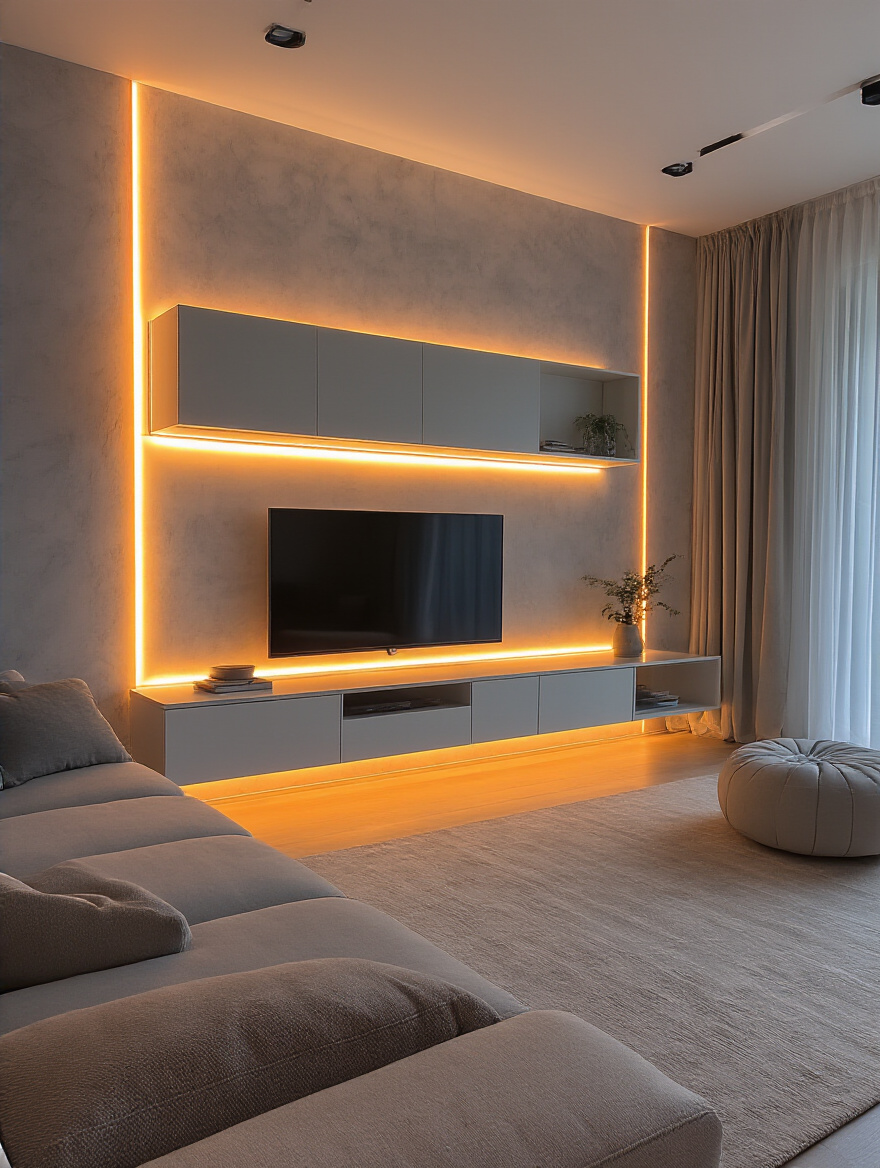
The best part is the control. With smart LEDs, you can create “scenes” in an app. You could have a “Focus” scene with bright, cool light for daytime work, and a “Relax” scene with a warm, dim glow for the evening. This ability to instantly change the entire mood and energy of your room with the tap of a button is a powerful tool for managing the transition between work life and home life.
This idea of evolution and change is the final and most important principle for a happy, healthy space.
24. Refresh Decor Periodically with New Accents and Rotating Art
Your home shouldn’t be a museum, frozen in time. It should evolve with you. The final, and perhaps most important, piece of advice is to give yourself permission to change things. That piece of art you loved five years ago might not speak to you anymore. That’s okay. Swap it out.
The easiest way to do this is to “shop your own home.” Take that vase from the bedroom and put it on your living room shelf. Move the art from the hallway into the gallery wall. Sometimes, just rearranging what you already own is enough to make a room feel completely new again. By constantly editing and refreshing, you ensure your space is always an accurate reflection of who you are right now.
Conclusion
So, there you have it. The real story on living room wall decor. It’s so much more than just making things pretty. It’s about creating an environment that actively works for you—a space that can be a hub for deep focus when you need it and a true sanctuary for rest when you don’t. Every choice, from the art you hang to the light you use, is an opportunity to reduce stress, eliminate distraction, and support your overall well-being.
Forget the pressure to have a “perfect,” magazine-ready room. Instead, focus on creating a space that feels intentional, functional, and deeply, authentically yours. Your walls are a canvas for your life. Use these ideas as a starting point, experiment, and build a living room that not only looks great but makes you feel great, too.


