Can we talk about why so many people get rustic design wrong? They think it means everything has to look like it came out of a dusty, 100-year-old cabin. Dark, clunky, and honestly, not that practical for a modern home where you actually want to, you know, live and have people over. The real magic happens when you build a space that feels warm and has history, but is also smart, functional, and ready for a party at a moment’s notice.
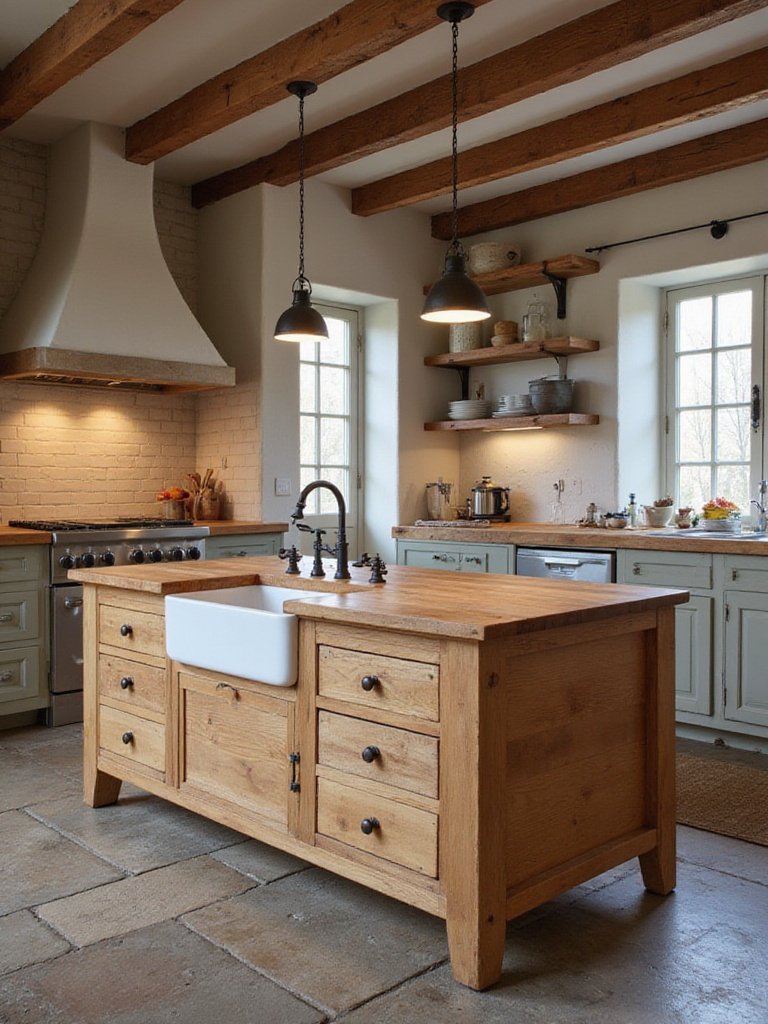
Your kitchen island is the heart of all that. It’s not just a countertop; it’s command central for every gathering. It’s where friends lean and share stories, where you lay out the snacks for the big game, and where the best conversations happen over a bottle of wine. I’m going to walk you through how to create a rustic kitchen island that’s not just a showpiece, but the most magnetic, functional, and social spot in your entire home. Let’s cut through the noise and talk about what actually matters.
Laying the Foundation for Your Rustic Oasis (Part 1)
Before you even think about what kind of wood you want, we have to talk strategy. This is the stuff that makes or breaks the whole project. A killer island isn’t just about looks; it’s about flow, function, and making your kitchen the easiest place to be. Get this part right, and everything else falls into place beautifully.
1. Assess Your Kitchen’s Footprint for Optimal Island Placement
Let’s be real: the biggest mistake I see people make is cramming an island into a space that’s too small for it. It becomes a roadblock instead of a hub. You need room for people to move, open the dishwasher, and grab a drink from the fridge without a ten-person traffic jam. The noise you can ignore is the idea that “bigger is always better.” It’s not. Better is better.
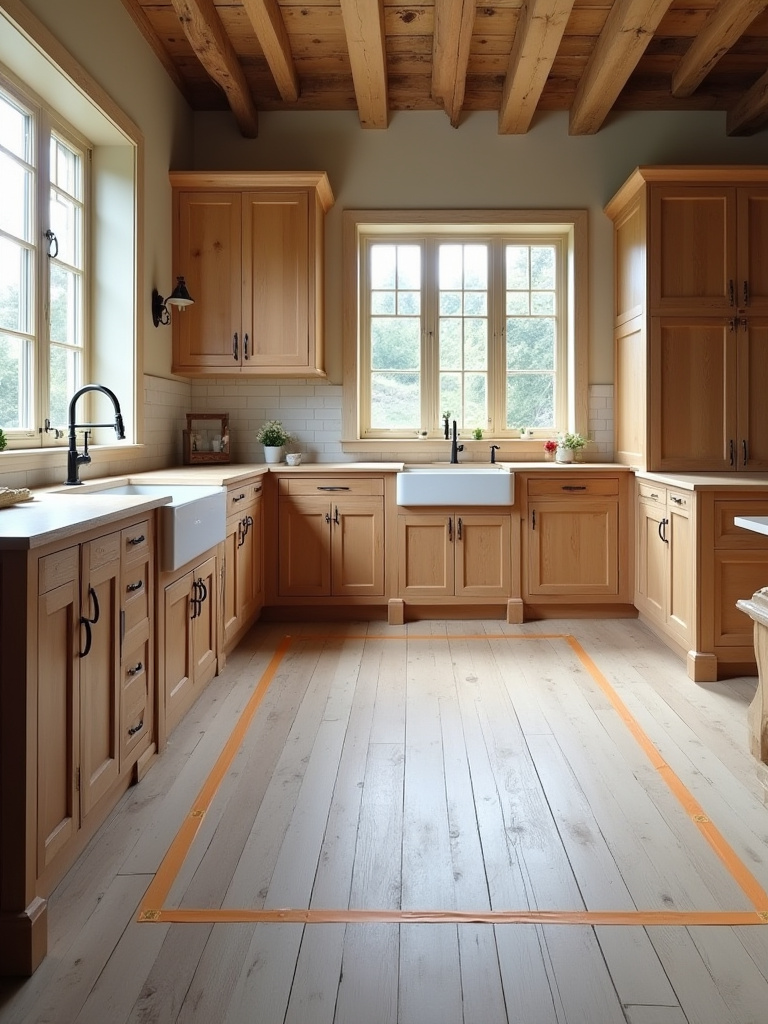
The shortcut I wish I’d known earlier? Get some painter’s tape and outline your dream island on the floor. Seriously. Live with it for a day. Try to cook. Have someone walk past you. Open the oven door. You will learn more in five minutes doing this than you will in five hours staring at a blueprint. Aim for at least 42 inches of clearance in your main walkways. Anything less and your parties will feel more like a crowded subway car.
With a solid plan for spacing, you can move on to defining the actual “vibe” of your social hub.
2. Define Your Preferred Rustic Style: Farmhouse, Industrial, or Woodland?
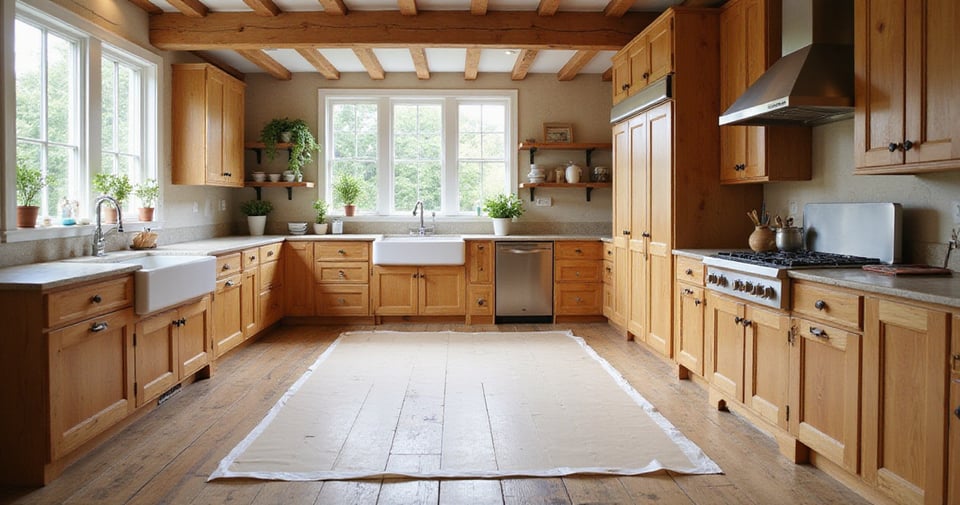
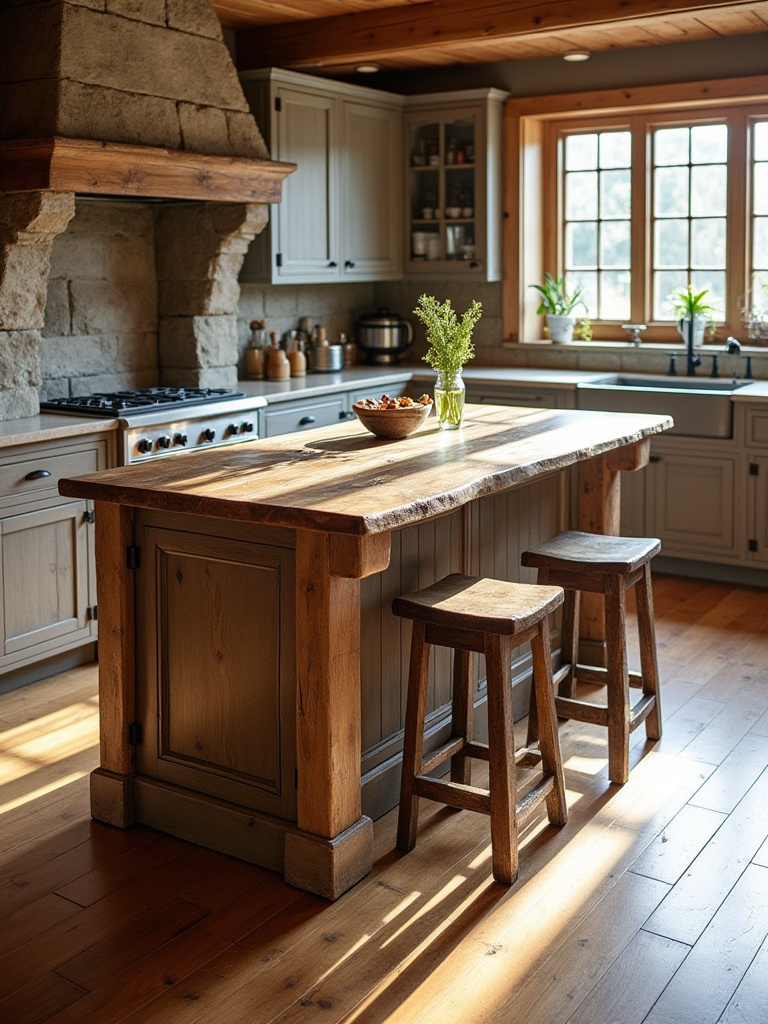
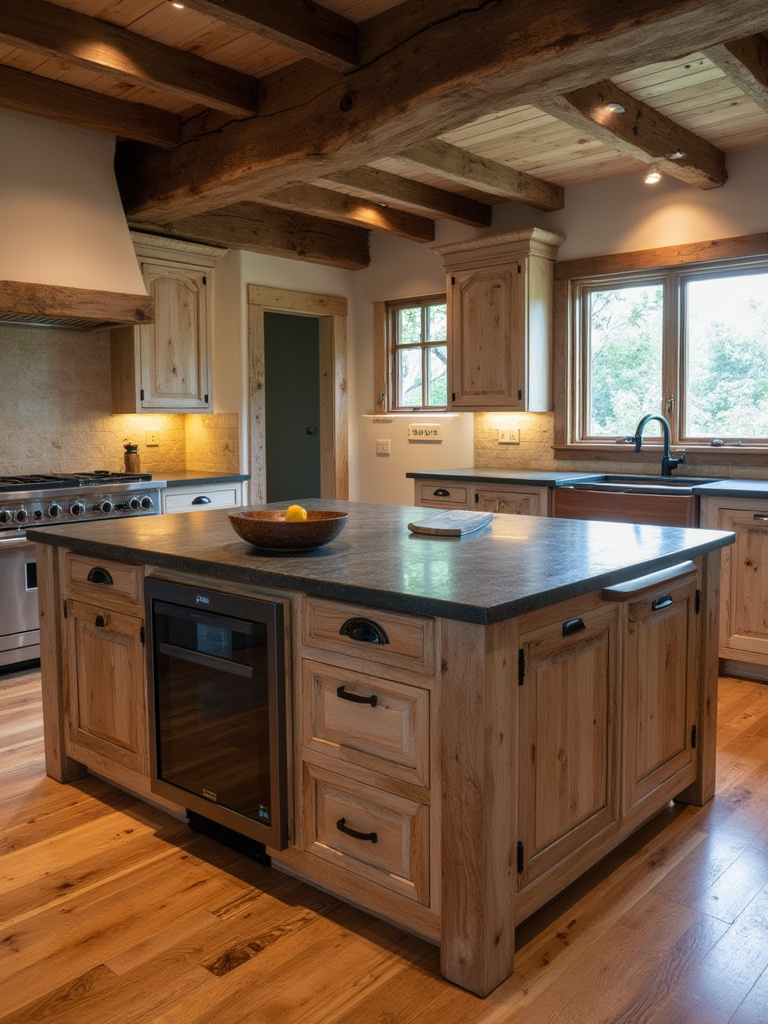
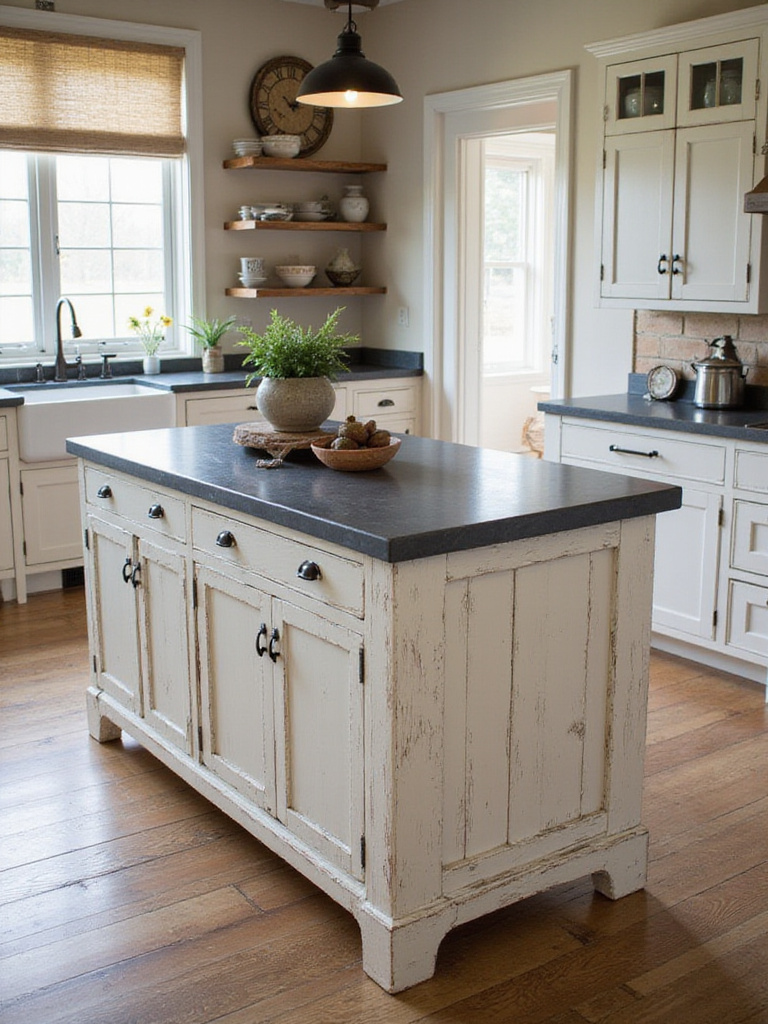
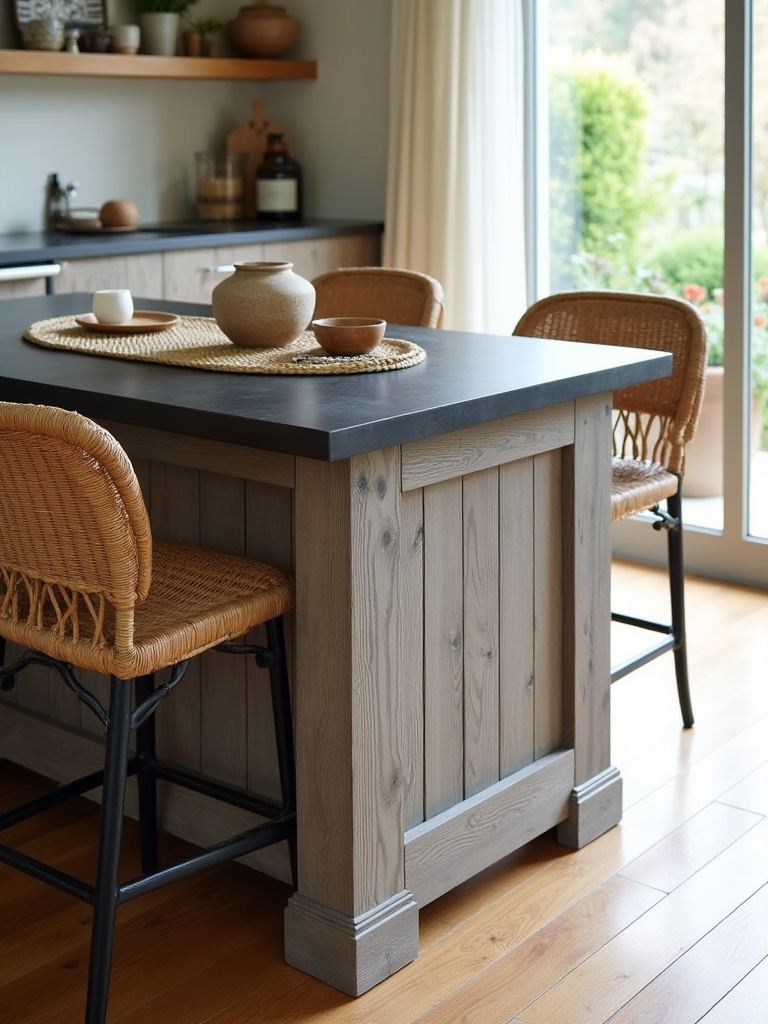
“Rustic” isn’t a single look; it’s a vibe. And you need to decide which one you’re going for before you buy a single thing. Are you aiming for a Farmhouse feel? That’s your warm, inviting, “everyone grab a drink and stay a while” look with painted woods and classic lines. Or are you more Industrial? Think reclaimed factory parts, exposed metal, and a bit of an edge—perfect for an urban loft party. Then there’s Woodland, which is all about bringing the outside in with live-edge wood and natural stone, creating a calm, organic feel.
The BS to ignore here is that you have to pick one and be a purist. Nah. The best designs often borrow a little. My pro tip is to pick a dominant style and then accent it with another. For example, a classic Farmhouse island with some rugged Industrial-style stools or lighting is a killer combo. It gives the space personality and makes it feel collected and intentional, not like you bought it all from page 47 of a catalog.
Once you know your vibe, it’s time to face the music and talk money.
3. Establish a Realistic Budget for Materials, Labor, and Features
You know what people always ask me? “How much will it cost?” The real answer is, “How much have you got?” A custom island is an investment, and the biggest pitfall is not accounting for the hidden costs. You’re so focused on the price of that gorgeous reclaimed wood top that you forget about the electrician needed to run power to it, or the plumber for the prep sink you just had to have.

Here’s the deal: materials are just one piece of the puzzle. Labor can easily be 40-60% of your total cost. So, get itemized quotes from at least three contractors. And whatever that final number is, add a 15% contingency fund. Just do it. I watched a client’s budget get completely blown because the reclaimed wood they ordered needed more prep work than expected. That contingency fund is what saves you from a heart attack and allows you to finish the project right.
That budget will directly influence the bones of your island, so let’s talk structure.
4. Choose Durable Base Materials Complementing Rustic Aesthetics
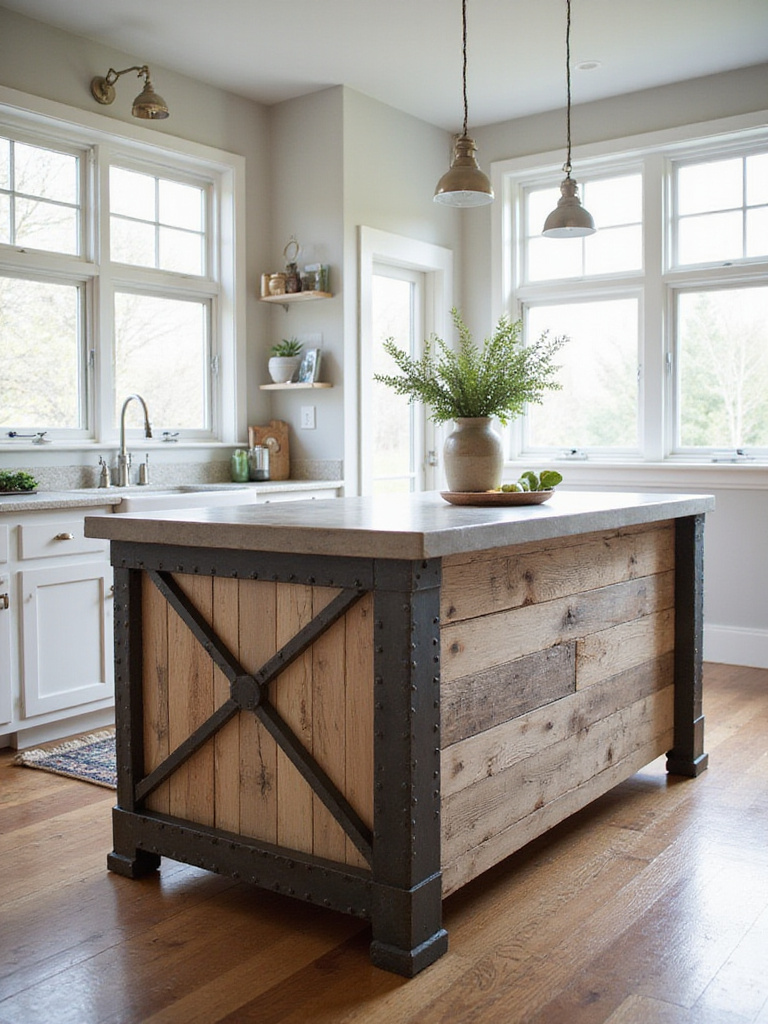
The base of your island is its backbone. This thing needs to be tough enough to handle someone leaning on it with a beer, a kid using it as a coloring table, and the general chaos of a busy kitchen. This is not the place to skimp. You want solid, durable materials like reclaimed timbers, natural stone, or heavy-gauge steel. They not only look the part but will genuinely last forever.
Forget the cheap particle board options you see at big box stores. They might look okay for a year, but they won’t hold up. I once had to replace an island for a client just two years after they installed it because the base, made of a cheaper engineered wood, started to wobble under the weight of their new quartz countertop. Invest in a solid base—like reclaimed oak or a welded steel frame—and it will become an heirloom.
Now that the island is solid, let’s make it smart by tackling the clutter.
Laying the Foundation for Your Rustic Oasis (Part 2)
We’ve got the big-picture stuff locked in. The island fits, it has a clear style, the budget is real, and it’s built on a rock-solid foundation. Now, we make it an organizational powerhouse, because nothing kills a party vibe faster than a cluttered countertop.
5. Plan Integrated Storage Solutions for Clutter-Free Countertops
The secret to a stunning rustic island isn’t just the beautiful wood top—it’s that the top is actually clear enough to see! Your island needs to be a workhorse of storage. I’m talking deep drawers for the stand mixer, a pull-out cabinet for trash and recycling, and maybe even a dedicated spot for the air fryer. The goal is to get as much stuff off your counter as possible so the rustic materials can shine.
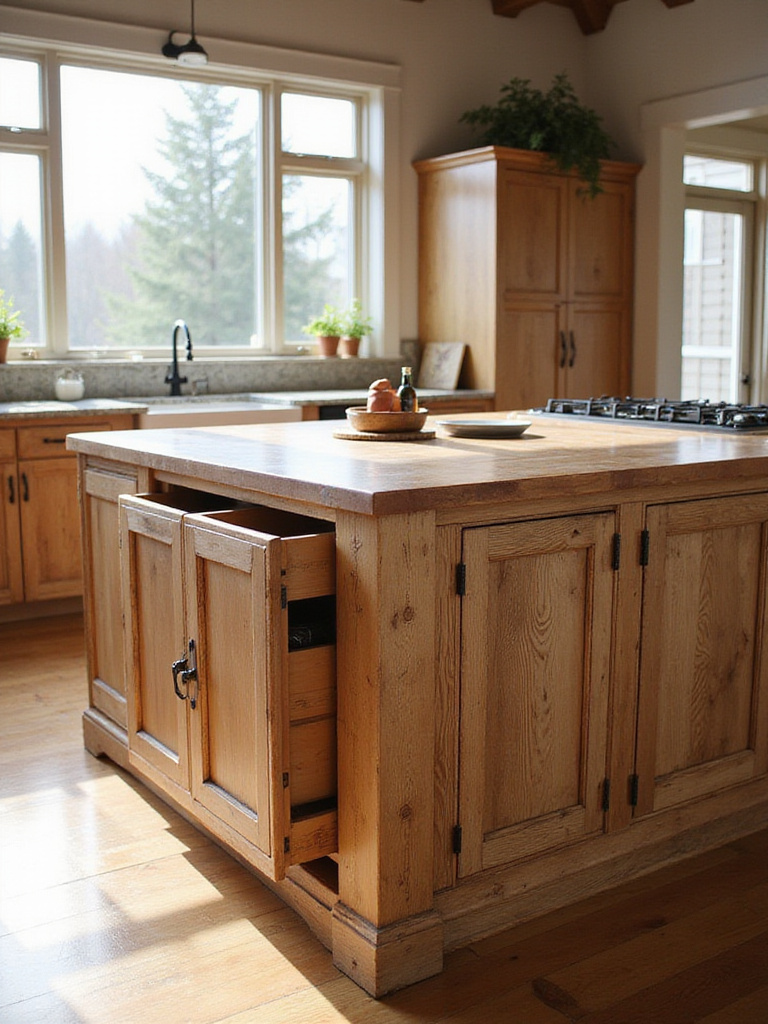
A client of mine was constantly complaining about clutter. The solution? We designed an island with an “appliance garage” on one end with a lift-up door. The toaster and coffee maker lived in there, plugged in and ready to go, but completely hidden from view. It was a total game-changer for their daily routine and made the kitchen look instantly cleaner and more serene for entertaining. It’s the difference between a kitchen that feels chaotic and one that feels effortlessly chic.
With storage handled, it’s time for the fun part: picking the materials that everyone will see and touch.
Crafting the Heart of Rustic Charm: Design & Selection (Part 1)
This is where the personality of your island really comes to life. We’re moving from the “bones” to the “skin,” choosing the elements that define its look and feel. These choices are what people will gather around, touch, and remember.
6. Select the Ideal Wood Species for Enduring Rustic Appeal
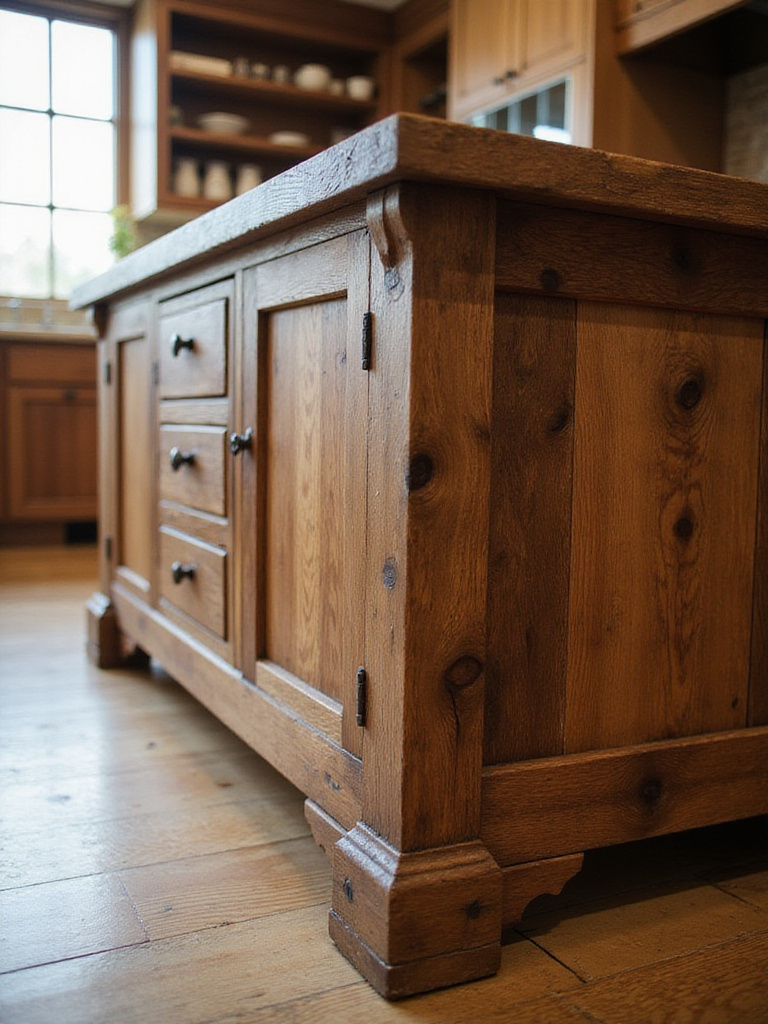
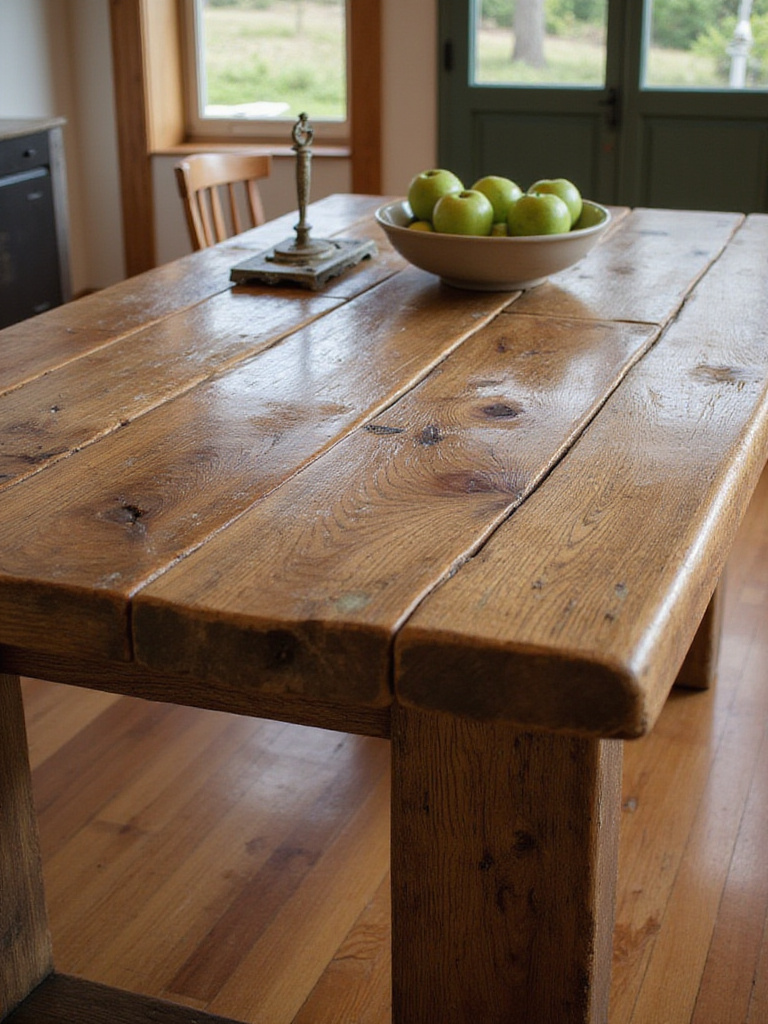
The wood you choose tells a story. Are you going with new knotty alder for a clean but textured look? Or are you opting for 150-year-old reclaimed barnwood that has visible saw marks and nail holes? The latter is an instant conversation starter. People will literally walk up, touch it, and ask, “Where did this come from?” It gives your island soul.
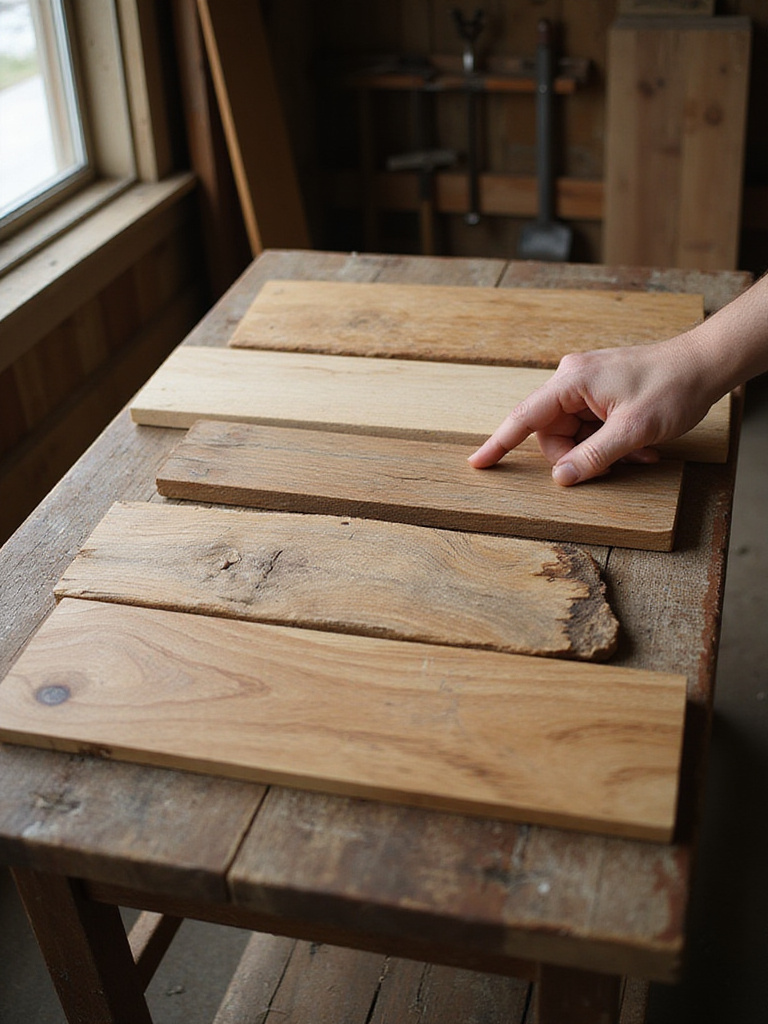
But it’s not just about looks. You need to consider durability. A kitchen island takes a beating. Softer woods like pine look great but will dent if you look at them too hard. Hardwoods like oak, maple, or hickory are workhorses. A pro tip is to use a super durable wood for the countertop and a more character-rich—but potentially softer—wood for the base. You get the best of both worlds: a top that can handle daily abuse and a base that brings all the rustic character.
That countertop is the main stage, so let’s dive into the top options.
7. Compare Butcher Block, Soapstone, and Concrete Countertop Options
The countertop is where the magic happens—it’s the main surface for prep, serving, and leaning. Your choice here sets the entire tone. Butcher Block is warm, inviting, and forgiving. Scratches? You can sand them out. It’s like a great pair of leather boots—it only looks better with age. It encourages a casual, hands-on vibe.

Soapstone is its moodier, more dramatic cousin. It’s dark, velvety, and develops a beautiful patina over time. It’s also non-porous and basically immune to heat and stains, making it indestructible for parties. Concrete brings an industrial edge. It’s raw, substantial, and can be customized with different colors and textures. It’s perfect if you want to contrast the warmth of a wood base with something cool and modern. Just make sure it’s sealed properly, or that red wine spill will become a permanent resident.
Now that we have our surface, let’s talk about what’s happening underneath it.
8. Design an Open Shelving Base for Accessible Visual Storage
Enclosed cabinets are great for hiding clutter, but open shelving is where you show off your personality. It’s the perfect spot for your stack of favorite cookbooks, a collection of cool ceramic bowls, or your best-looking cocktail glasses. It breaks up the visual bulk of the island, making it feel lighter and more like a piece of furniture.
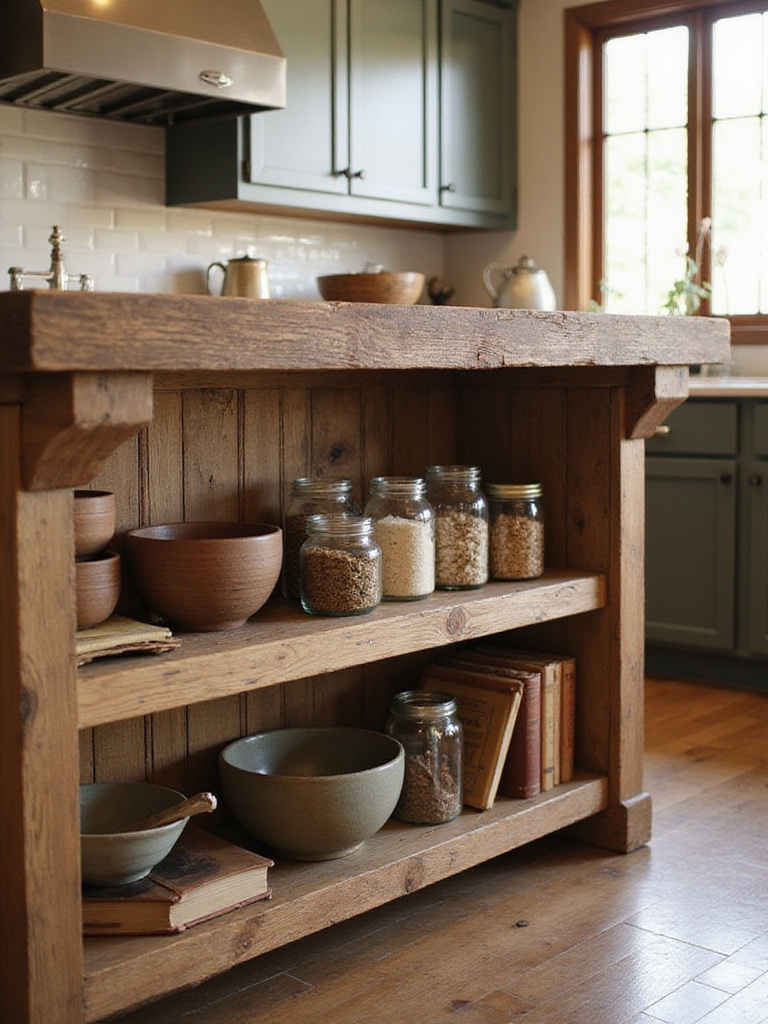
The trick is curation. This isn’t the place for your plastic Tupperware. I tell my clients to treat their open shelves like a little art gallery. A few carefully chosen items look amazing; a jumble of random stuff just looks messy. Use baskets to corral smaller items and add another layer of rustic texture. It’s functional decor that makes the island feel lived-in and loved.
Shelves are for stuff, but an island is really for people, which brings us to the most important element.
9. Incorporate Functional Seating: Stools That Blend with Your Design
If you build it, they will come—but only if the seating is comfortable. This is non-negotiable. Your island is where people will gravitate, so the stools can’t be an afterthought. They need to have the right height (leave 10-12 inches of legroom under the counter), they need to be sturdy, and for God’s sake, get ones with a footrest!
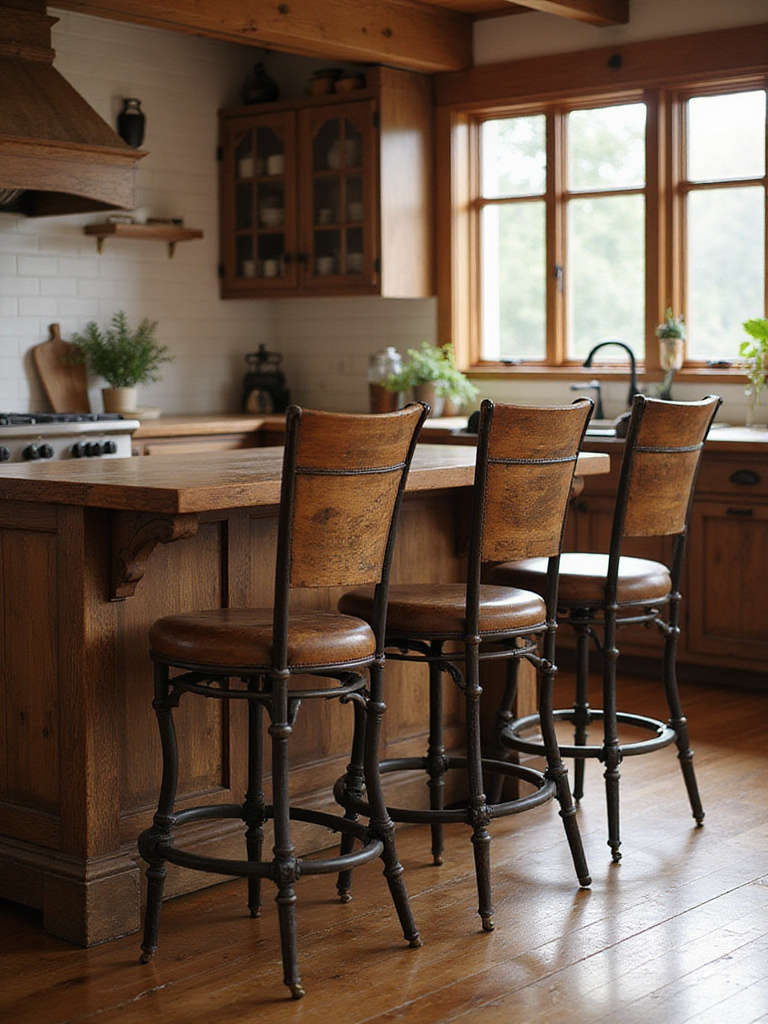
Think of stools as the final accessory that ties the whole look together. Got an industrial-style base? Go with metal stools that have a warm wood seat. Have a classic farmhouse island? Maybe something in a complementary painted finish or with a woven seat for texture. One of my clients found vintage science lab stools and had them restored. They’re comfortable, incredibly cool, and a total statement piece that perfectly complements their rustic island.
Making sure people are comfortable means giving them enough space, so let’s nail down the numbers.
Crafting the Heart of Rustic Charm: Design & Selection (Part 2)
We’re getting into the nitty-gritty now. The details here are what separate a “nice” island from a truly spectacular, hyper-functional one. It’s about blending ergonomics with smart tech to create a piece that works as beautifully as it looks.
10. Determine the Right Island Dimensions for Workflow and Socializing
I already mentioned the painter’s tape trick for walkways, but the dimensions of the island itself are just as critical. The rule of thumb for seating is to allow about 24 inches of width per person. This gives everyone enough elbow room to eat, drink, and chat without feeling like they’re on an airplane. The overhang for seating is also key—you need at least 12 inches, but 15 is better for real comfort.
And think about function zones. Maybe you want a two-tiered island: a lower, 36-inch-high section for food prep, and a raised, 42-inch-high bar section for guests. This is a brilliant social design. It creates a subtle barrier that keeps guests out of the “splash zone” while you’re cooking, but still lets them feel completely included in the action. It defines the space and makes the island a multi-purpose powerhouse.
Speaking of power, let’s get this thing wired for the 21st century.
11. Integrate Smart Power Outlets for Modern Appliance Use
Here’s my biggest pet peeve: a gorgeous, custom-built rustic island with an ugly plastic power strip sitting on top of it. No. Just no. Integrating power is one of the most important things you can do to make your island the true hub of your home. It’s where guests will charge their phones, where you’ll plug in the Sonos for party music, and where the blender for margaritas will live.
The coolest solution by far is pop-up outlets. They sit perfectly flush with your countertop, and with a light press, a tower of outlets and USB ports rises up. It’s pure stealth tech. When you’re done, you press it back down and it disappears, preserving that clean, rustic aesthetic. It’s the best of both worlds—modern convenience that doesn’t compromise the timeless look.
Now that the island is a functional beast, let’s make it look absolutely stunning.
Elevating Aesthetics and Functionality with Rustic Flair (Part 1)
This is all about the finishing touches that pull the whole vision together. We’re talking color, light, and accessories—the elements that create mood and make the space feel cohesive and thoughtfully designed.
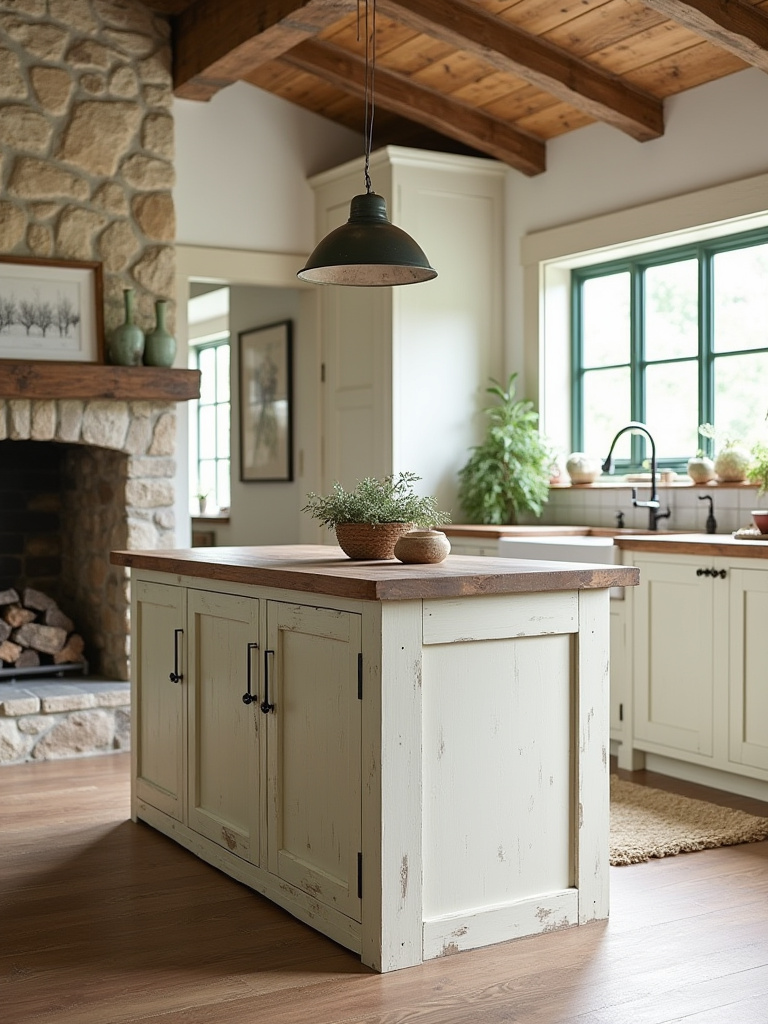
12. Master Rustic Color Palettes for a Cohesive Kitchen Look
The color of your island is a huge opportunity to make a statement. You don’t have to match it to your main cabinets! In fact, it often looks better if you don’t. Painting your island a contrasting color—like a deep forest green, a moody charcoal gray, or a classic navy—instantly makes it the star of the show. It anchors the room and gives it a custom-designed feel.
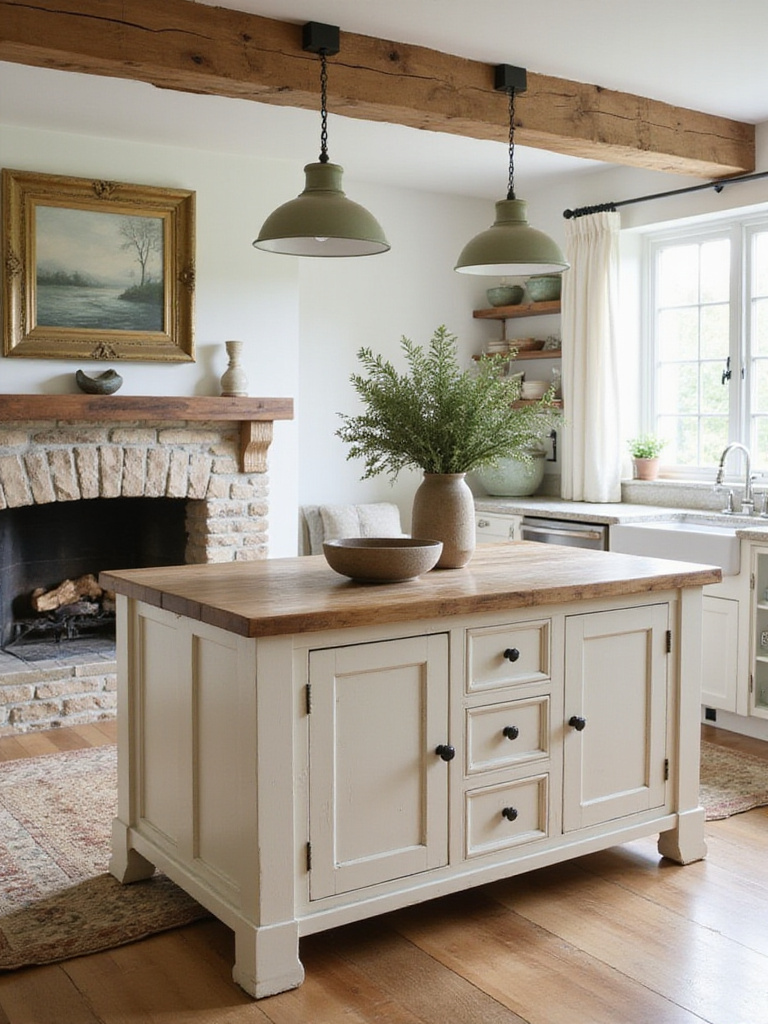
The key is to pull a color that works with the other elements in your space, like the veining in your countertops or the tones in your backsplash. Get samples. Paint a big poster board and live with it for a few days to see how the color changes in different light. A great color palette is what makes your kitchen feel warm, inviting, and a place where people naturally want to congregate.
Just as important as color is the light you cast upon it.
13. Add Pendant Lighting to Highlight and Define the Island Area
Lighting is everything. Good lighting can make a simple space look incredible, and bad lighting can ruin even the most expensive kitchen. Pendant lights over your island are a must. They act as jewelry for the room, defining the island as its own zone and providing crucial task lighting for everything you do there.
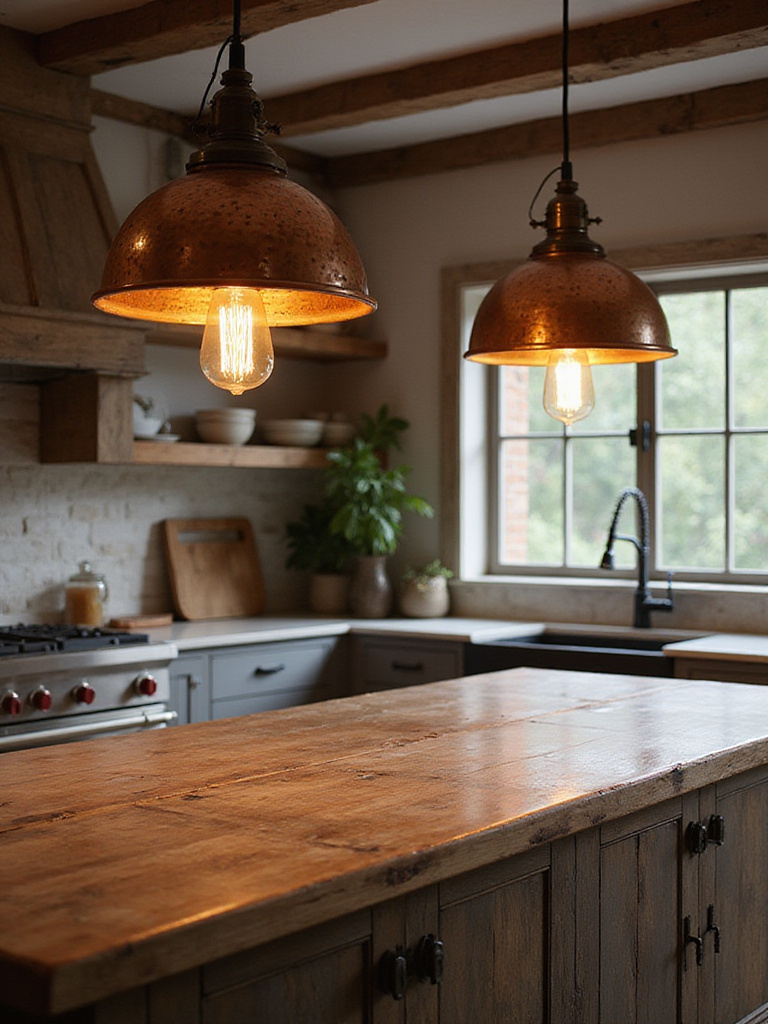
And for the love of all that is holy, put them on a dimmer! This is my #1 tip for any entertainment space. Bright light for chopping veggies, medium light for casual dinner, and low, ambient light for late-night cocktails. It lets you control the mood instantly. Look for pendants with rustic materials like hammered metal, seeded glass, or accents of wood or rope to tie the whole look together.
With the stage set and lit, it’s time for the final props.
14. Curate Rustic Accessories: Baskets, Bowls, and Greenery
Accessories are what keep a rustic space from feeling stark. Think of your island as a canvas. A big wooden bowl filled with seasonal fruit, a simple ceramic crock holding wooden spoons, or a small potted herb plant add life, color, and texture. It’s these little touches that make a space feel personal and welcoming.
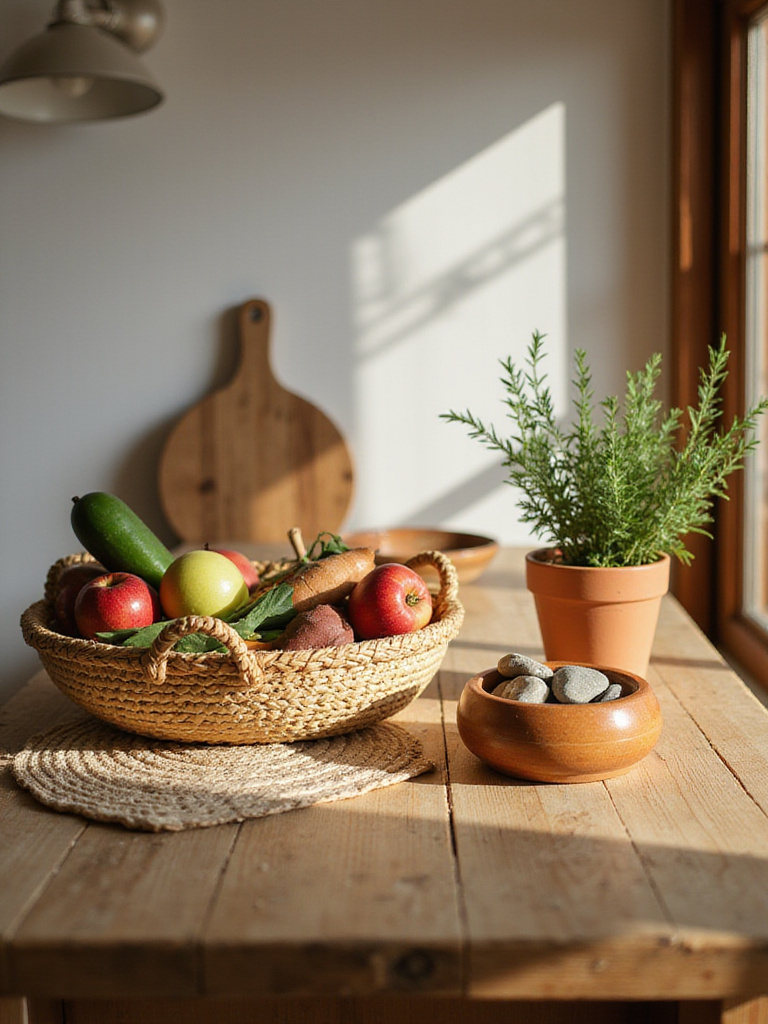
The secret is to keep it simple and functional. Everything on your island should feel like it has a purpose, even if that purpose is just to be beautiful. A hand-woven basket can hold cloth napkins for dinner, a vintage tray can corral salt, pepper, and olive oil. It’s about curating a few beautiful, useful objects that enhance the rustic vibe without creating clutter.
But what about the things you can’t accessorize away, like the dishwasher?
15. Blend Modern Appliances Seamlessly with Rustic Cabinetry
A giant slab of stainless steel can scream “modern appliance!” and completely kill your rustic vibe. The solution? Panel-ready appliances. This is one of the best investments you can make for a seamless look. You can get dishwashers, refrigerators, and wine fridges that are designed to be fitted with a custom cabinet panel that perfectly matches your island’s cabinetry.
The appliance literally disappears into the design. It’s the ultimate trick for getting high-tech functionality without sacrificing style. I did this for a client with a stunning reclaimed wood island, and we hid two refrigerator drawers and a dishwasher in it. You would never know they were there. It allows the beauty of the rustic materials to be the hero, which is exactly what you want.
Let’s push that custom look even further with some more advanced design tricks.
Elevating Aesthetics and Functionality with Rustic Flair (Part 2)
Ready to take your island from great to magazine-worthy? These next two tips are about creating visual interest and a rich, sensory experience. This is what interior designers do to make a space feel truly special.
16. Consider a Contrasting Base or Top for Visual Interest
We talked about using a contrasting paint color, but you can do the same thing with materials. Imagine a rustic island base made from rough, reclaimed wood beams, but topped with a sleek, smooth, waterfall-edge concrete countertop. The tension between the rough and the smooth, the old and the new, is visually stunning. It creates a dynamic energy that is incredibly sophisticated.
You can flip it, too. A smooth, painted base with a thick, live-edge wood slab on top is another fantastic combination. This isn’t just about making it look good; it’s about making it memorable. A contrasting design makes the island feel like a bespoke piece of furniture, a deliberate and artistic choice that elevates the entire kitchen.
The final layer of sophistication comes from something you can feel just as much as you can see.
17. Create a Dynamic Layered Look with Varying Textures
Great design engages more than just your eyes. Think about running your hand over a rough-hewn wood base, then feeling the cool smoothness of a stone top, then touching the woven fiber of a bar stool. Layering textures is what makes a space feel rich, warm, and real.
It’s the secret ingredient. You can add texture with your hardware (think hammered bronze pulls), your lighting (a wrought-iron fixture), your seating (leather or linen cushions), and your accessories (a coarse ceramic vase). A flat, one-note space is boring. A space with layered textures invites you in, makes you want to touch things, and feels incredibly cozy and complete. It’s the essence of the rustic aesthetic.
Now, let’s make sure this beautiful, textured masterpiece lasts a lifetime.
Personalization, Longevity, and Smart Rustic Island Care
You’re about to invest a lot of time and money into this island, so let’s make sure it’s not only a reflection of you but is also built to endure the parties, the homework sessions, and the spills of daily life for years to come.
18. Explore Salvaged Wood and Reclaimed Materials for Unique Character
If you want an island that is 100% unique, reclaimed materials are the way to go. Using wood from an old barn, beams from a decommissioned factory, or even an old bowling alley lane gives your island an irreplaceable history. Every nail hole, saw mark, and color variation tells a story. It’s the ultimate sustainable choice and an incredible conversation starter.
I worked on a project where we used flooring from a 19th-century textile mill for the island top. It had this incredible deep, rich patina that you just can’t replicate with new wood. That island isn’t just a piece of kitchen equipment; it’s a piece of local history, and it brought so much soul into a brand-new kitchen. It’s a bold choice, but the payoff in character is immense.
Whether your wood is old or new, you have to protect it.
19. Apply Proper Sealing Techniques for Long-Lasting Durability
I’m going to say this loud for the people in the back: SEAL. YOUR. COUNTERTOPS. A rustic wood island is a thing of beauty, but wood is porous. One spilled glass of red wine at a party can leave a permanent, tragic stain if your top isn’t properly sealed. This is non-negotiable.
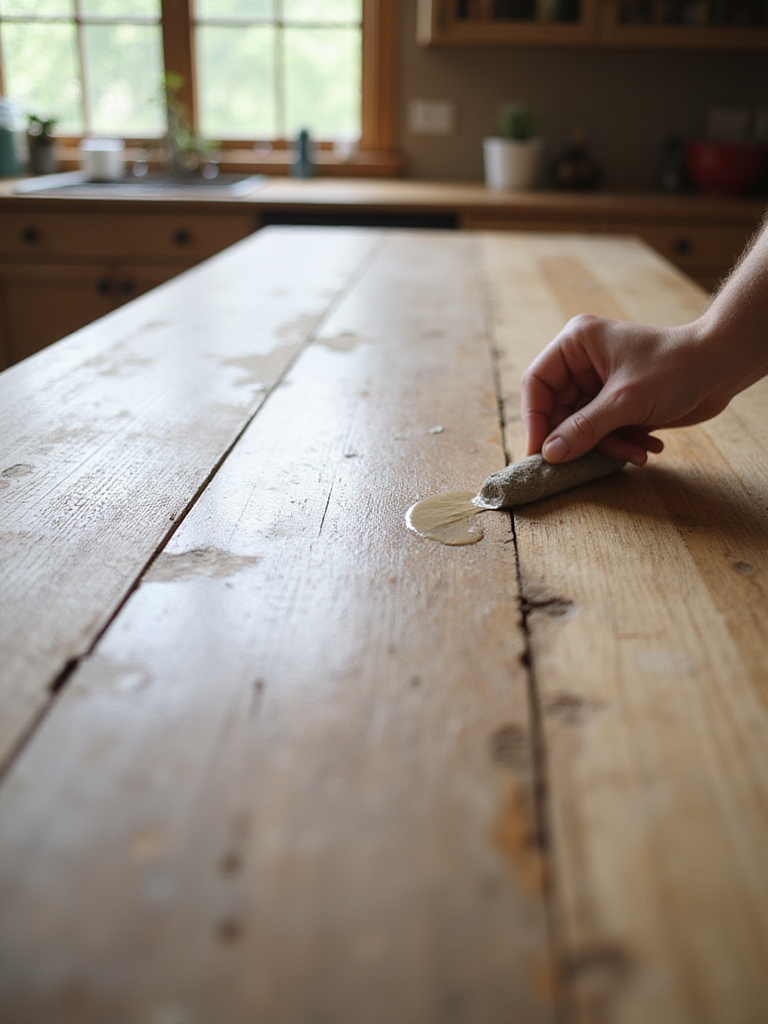
The type of sealer depends on the material and how you’ll use it. For a butcher block you’ll cut on, you need a food-grade mineral oil or wax, which you’ll have to reapply regularly. For a wood top that’s more for serving and congregating, a high-quality water-based polyurethane will provide a much tougher, more durable, and low-maintenance finish. Do the work upfront, and you won’t have to panic every time someone sets down a drink without a coaster.
A good seal makes daily care a breeze.
20. Learn Routine Cleaning and Maintenance for Rustic Surfaces
The great thing about rustic surfaces is that they’re meant to look lived-in. A few minor dings and scratches just add to the character. But you still need to care for them. The rule is simple: be gentle. Use a soft cloth and a mild, pH-neutral cleaner. Avoid harsh chemicals and abrasive scrubbers like the plague; they will strip your finish and ruin your surface.
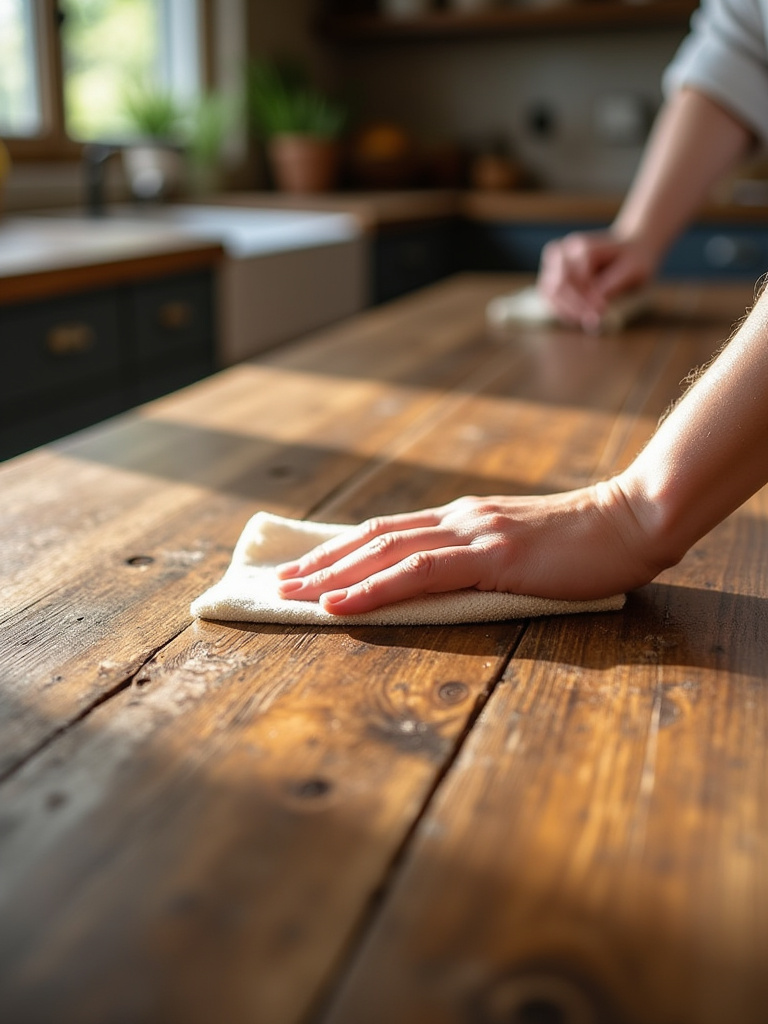
The most important thing is to wipe up spills immediately, especially on wood. Water is the enemy. Don’t let puddles sit. If you have an oil or wax finish on your butcher block, you’ll need to recondition it every month or so to keep it from drying out. It’s a five-minute job that will keep your island looking rich and nourished for decades.
Finally, for the ultimate in personal expression, let’s think outside the box.
21. Repurpose Vintage Furniture for a Unique, One-of-a-Kind Island
Want a rustic island with unparalleled soul? Find an old piece of furniture and give it a new life. A vintage workbench, a sturdy antique dresser, or a long console table can all be converted into an incredible island. You get the built-in character, the history, and a completely unique silhouette.
You’ll need to make sure it’s structurally sound and you’ll have to top it with a new, durable countertop, but the result is a piece that is 100% you. A friend of mine found an old printer’s cabinet with dozens of small drawers. They topped it with a slab of soapstone, and now it’s the most stunning and functional island you’ve ever seen, with a built-in wine rack and endless storage. It’s a testament to creativity and a centerpiece that can never be duplicated.
Conclusion
So there you have it. Building the perfect rustic kitchen island is about so much more than just slapping a wood top on some cabinets. It’s about creating a magnetic hub that makes your home the place everyone wants to be. It’s a strategic blend of timeless style and modern, party-ready function. When you balance durable materials, smart storage, comfortable seating, and the right tech, you create more than just furniture—you create the backdrop for future memories.
Don’t just dream about it. You now have the blueprint. Start taping out the dimensions on your floor, create a Pinterest board with your favorite vibe, and begin the journey. Your perfect rustic kitchen island—that warm, inviting, conversation-starting centerpiece—is waiting for you. Go build the heart of your home.


