Can we talk about the biggest mistake I see people make with their small kitchens? They treat them like big kitchens that just got shrunk in the wash. They try to cram in the same bulky appliances, the same deep cabinets, and the same layouts, and then they wonder why it feels like cooking in a phone booth. It’s a complete misunderstanding of the problem. A small kitchen isn’t a flaw; it’s a high-efficiency workspace waiting to be properly designed.
As someone who designs functional office spaces for a living, I see your kitchen the same way I see a high-performance work environment. It’s all about workflow, ergonomics, and eliminating wasted movement. Every single inch has a job to do. Forget what you see in magazines showing off kitchens the size of my first apartment. What matters is how you move, how you cook, and how the space supports your life. Here’s the real story—the shortcuts and non-negotiables I share with my clients to create small kitchens that punch way above their weight class.
Intelligent Planning & Layout Optimization (Part 1)
This is where the magic really happens, long before you pick out a single cabinet pull. Getting the layout right is the foundation for everything. If the bones of your kitchen are wrong, no amount of clever storage or fancy paint will save you from the daily frustration of an inefficient space. It’s about thinking like a professional chef, where every step is deliberate and every tool is exactly where you need it.
These first few principles are about engineering your kitchen for flow. We’re talking about mapping your movements, choosing a layout that eliminates wasted steps, and placing your major appliances in a way that makes cooking feel intuitive, not chaotic. Nail this part, and you’re already 80% of the way to a kitchen that feels twice its size and works a million times better.
1. Conduct a Detailed Kitchen Zone Audit
You know how you and your partner do that awkward shuffle-dance every time you’re both in the kitchen? That’s not a space problem; it’s a workflow problem. Before you change anything, you need to understand how you actually use your kitchen. A “zone audit” sounds formal, but it just means paying attention. For a couple of days, notice your path. Where do you put down groceries? Where do you chop veggies? How many steps is it from the fridge to the stove with a handful of ingredients?
This is the most important step everyone skips. You’ll immediately spot the bottlenecks—like the spice drawer being on the opposite side of the stove or having nowhere to put a hot pan down next to the oven. You’re essentially creating a motion map of your cooking process. By identifying the pain points, you can design a layout that solves real problems instead of just guessing what might look nice. It’s pure data-driven design, and it works.
Forget generic advice for a moment and focus on your real-life habits. The next step is turning these observations into a blueprint for a more intuitive and productive kitchen.
2. Embrace the Galley or L-Shape Layout for Efficient Workflow
In office design, we create “desire paths”—the shortest, most logical routes people naturally take. In a small kitchen, Galley (two parallel walls) and L-Shape layouts are the ultimate desire paths. They’re popular for a reason: they are incredibly efficient. These layouts naturally minimize the distance you have to travel between the fridge, sink, and stove, which are the three points of the all-important “work triangle.”
Think of it this way: less walking means less wasted time and energy. It means you can pivot between washing vegetables at the sink and sautéing them on the stove instead of taking three steps back and forth. This concentrated workspace keeps everything within arm’s reach, making you faster and more organized. The biggest lie people believe is that a U-shaped kitchen or an island is always better. In a small space, those often create dead ends and traffic jams. A simple L-shape or galley is the lean, mean, workflow-optimizing machine you need.
With the right layout chosen, the next piece of the puzzle is placing your big-ticket items for maximum efficiency.
3. Strategically Place Major Appliances to Form an Optimized Work Triangle
The “Work Triangle” is not some dusty old design rule; it is the holy grail of kitchen functionality. It’s the imaginary triangle you draw between your refrigerator, sink, and stove. In a perfect world, the three legs of that triangle add up to no more than 26 feet, with no single leg being too long or too short. When it’s optimized, you move between your food storage (fridge), prep/cleaning area (sink), and cooking station (stove) seamlessly.
This is the single biggest thing that separates a kitchen that works from one that drives you crazy. I once worked with a client whose fridge was placed at the very end of the kitchen for aesthetic reasons. He had to walk 12 feet every time he forgot an ingredient. It sounds trivial, but that adds up to miles of extra steps and tons of frustration over a year. Your goal is to make cooking feel like a fluid dance, not a series of sprints across the room. Don’t let an island or a trash can block these sacred paths.
Once your core layout is set, it’s time to add in features that offer flexibility for a space that needs to adapt on the fly.
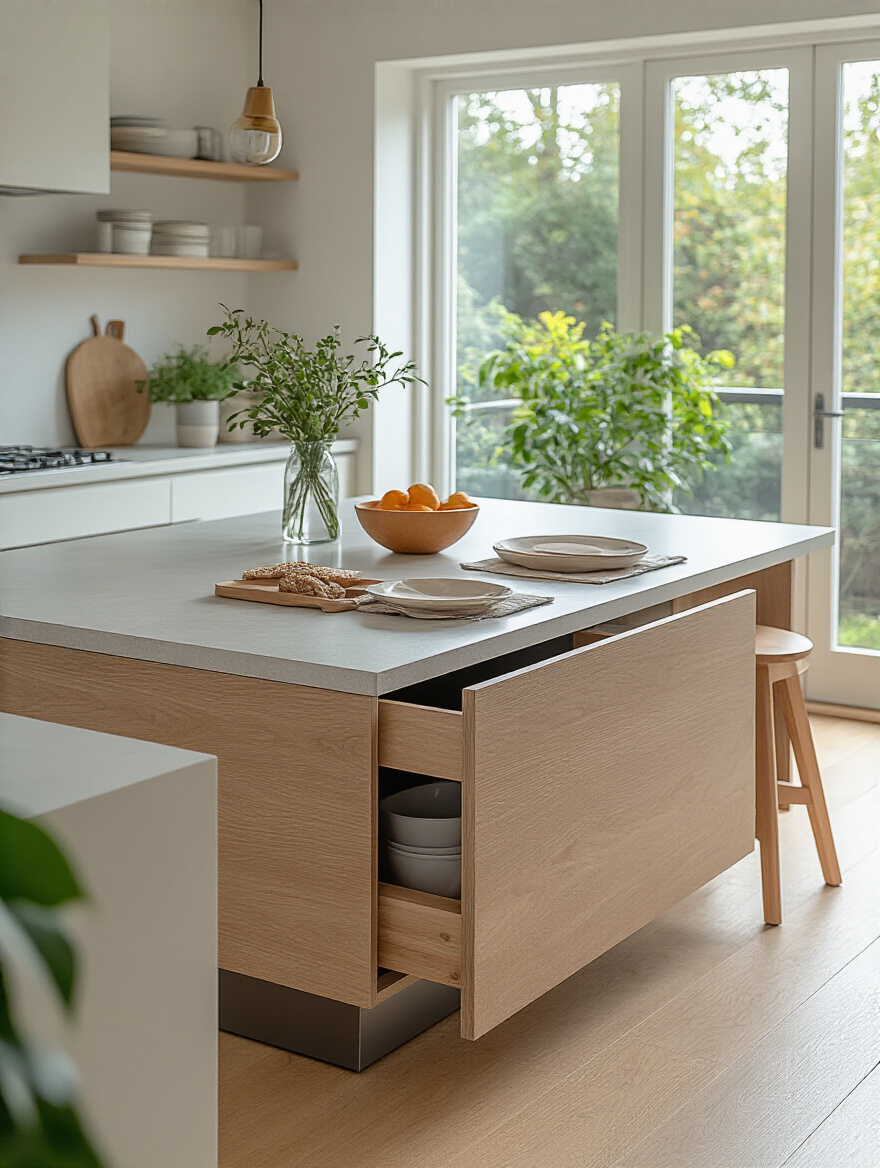
4. Incorporate an Extendable Counter or Collapsible Island for Flexible Prep Space
The reality of a small kitchen is that you need a ton of prep space one minute and clear floor space the next. The solution isn’t a massive, permanent island; it’s a “now you see it, now you don’t” workspace. Think pull-out cutting boards that slide out from under the counter, a rolling cart that can be moved out of the way, or a wall-mounted drop-leaf table that folds down when you’re done.

This is the ultimate shortcut for getting the best of both worlds. You get that generous surface area for rolling out dough or chopping a mountain of veggies, but you aren’t sacrificing your walkway for it 24/7. When I was living in a 500-square-foot studio, my rolling island was my saving grace. It was my prep station, my dining table, and sometimes, my standing desk. The flexibility it provided was worth more than any fixed piece of cabinetry could ever be. It’s about making your kitchen adapt to the task at hand.
This idea of adapting your space perfectly leads us to the nitty-gritty of making every single corner count.
Intelligent Planning & Layout Optimization (Part 2)
Okay, so we’ve established the big picture: your kitchen’s flow and the placement of your main appliances. Now, let’s zoom in on the details that truly separate a good small kitchen from a great one. This is about tackling the weird, awkward spots that most people write off as unusable.
Think of this as the advanced level of layout planning. We’re going to turn those “dead corners” into storage powerhouses and find clever ways to integrate custom solutions that make your kitchen feel like it was tailor-made for you—because it will be.
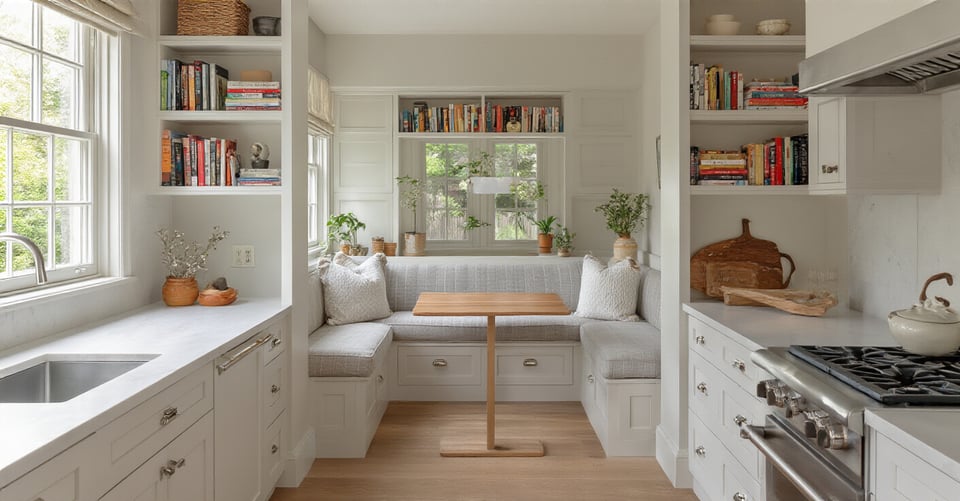
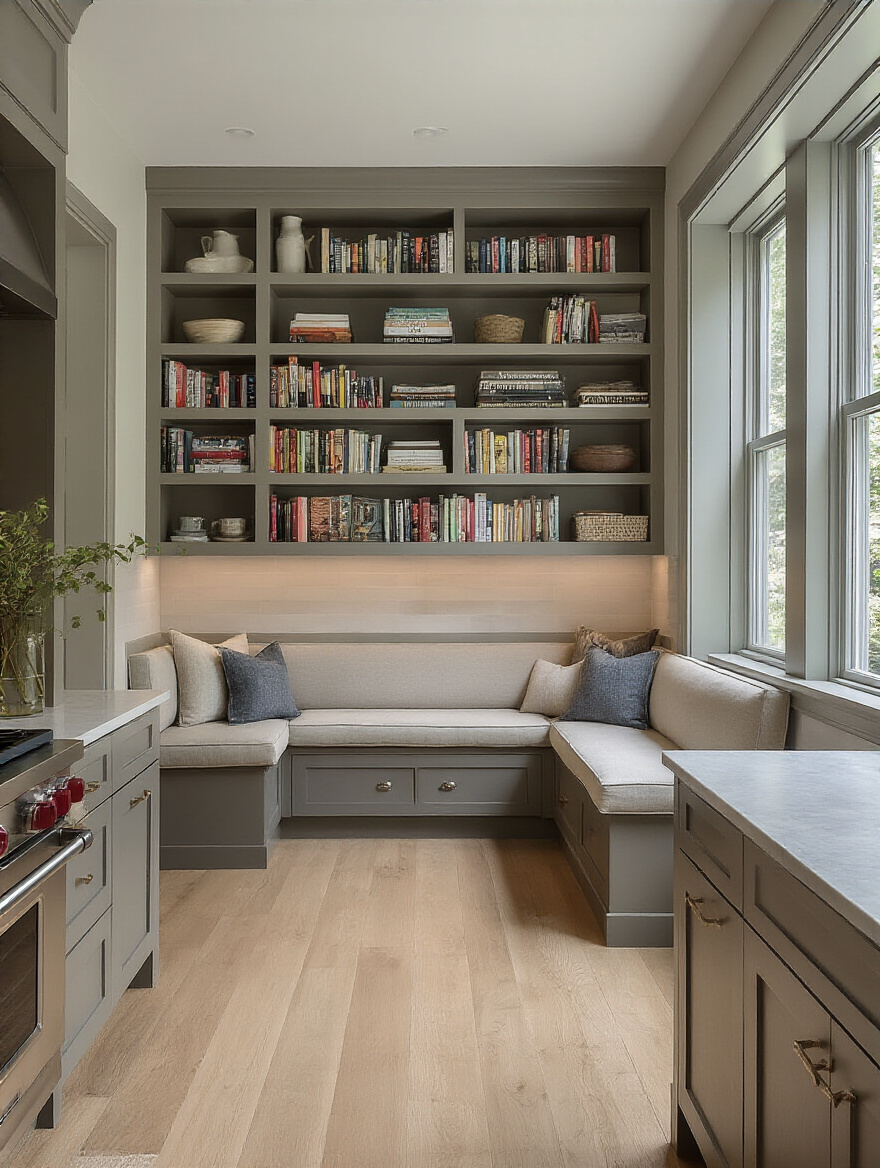
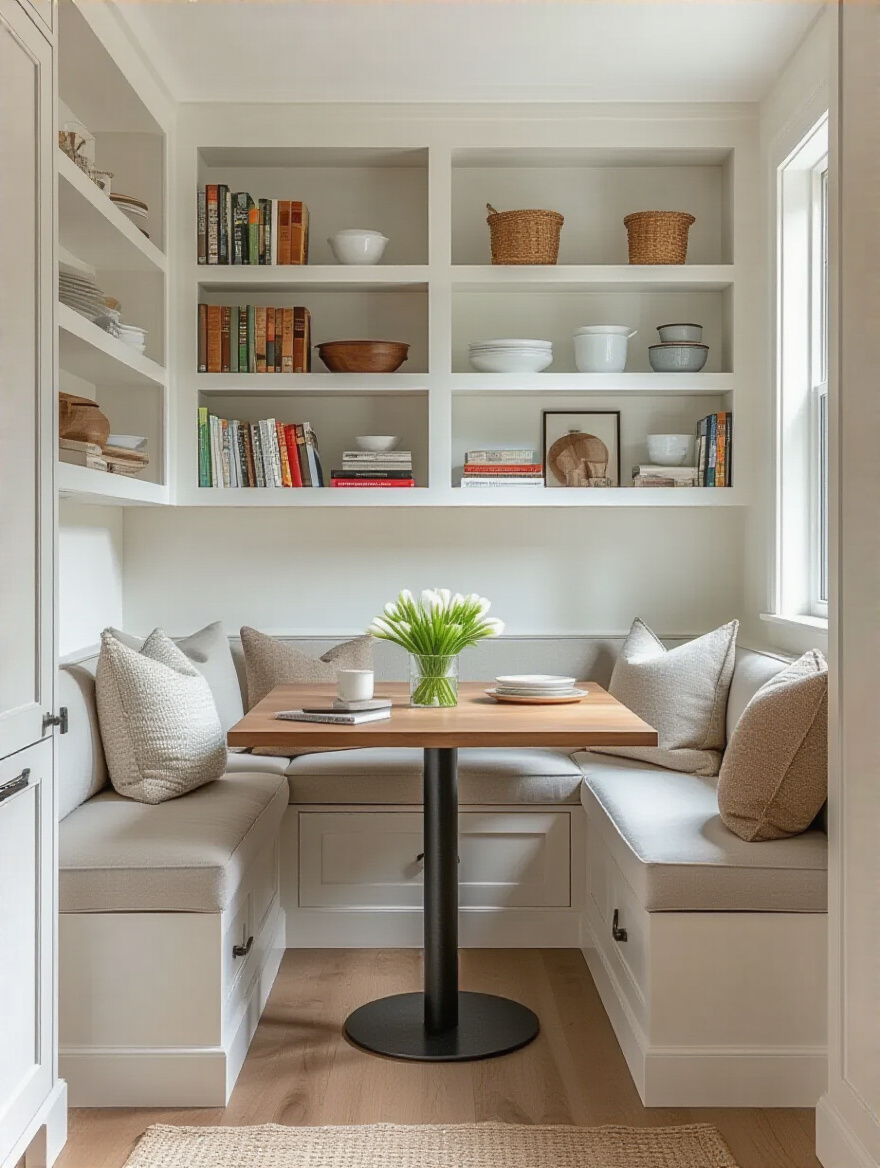
5. Design Custom Built-Ins for Awkward Nooks and Unused Corners
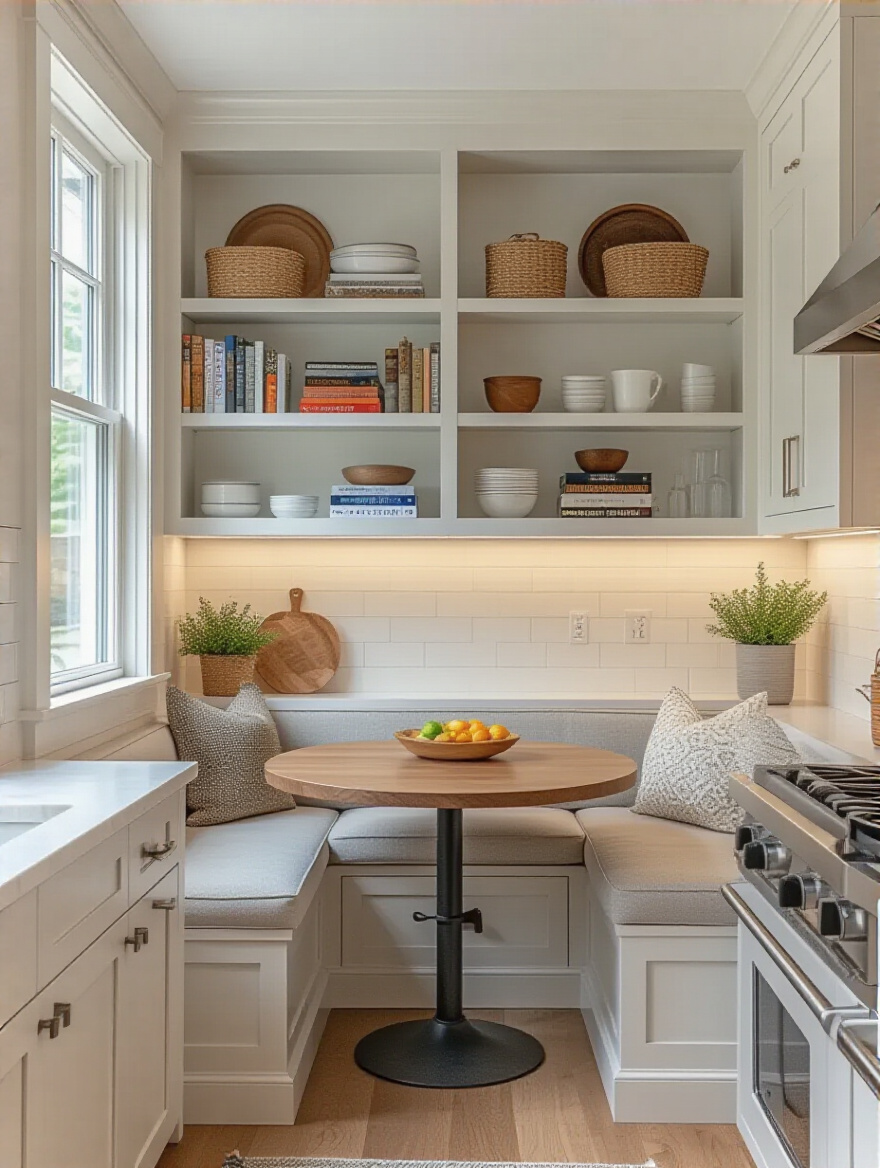
Every small kitchen has them: that weird 8-inch gap next to the fridge, the awkward space above a window, or the corner that’s too deep to be useful. Most people just ignore them. This is a massive mistake. These are not dead spaces; they are opportunities for custom solutions. A shallow, floor-to-ceiling shelf can become the perfect spice rack or cookbook library. A custom-built bench with storage underneath can turn a strange nook into a cozy breakfast spot.
This is where you stop thinking about off-the-shelf solutions and start thinking like a custom builder. Custom doesn’t have to mean expensive, either. A skilled carpenter or even a clever DIY project can transform these useless spots into your favorite features. It makes the kitchen feel intentional and integrated, eliminating the visual clutter of standalone furniture while squeezing out every last drop of functionality. It’s about making the space work for you, not the other way around.
Speaking of wasted space, let’s talk about the absolute worst offender in most small kitchens.
6. Avoid Bulky Corner Pantries: Opt for Slim Pull-Outs or Lazy Susans
The traditional corner cabinet is where Tupperware lids and forgotten cans of beans go to die. It’s a black hole. In a small kitchen, you cannot afford to have a single inch of inaccessible space, so please, I’m begging you, avoid bulky corner pantry designs that you have to step into. Instead, make that corner work for you with modern hardware. A Lazy Susan or, even better, a blind corner pull-out shelf system (often called “magic corners”) will change your life.
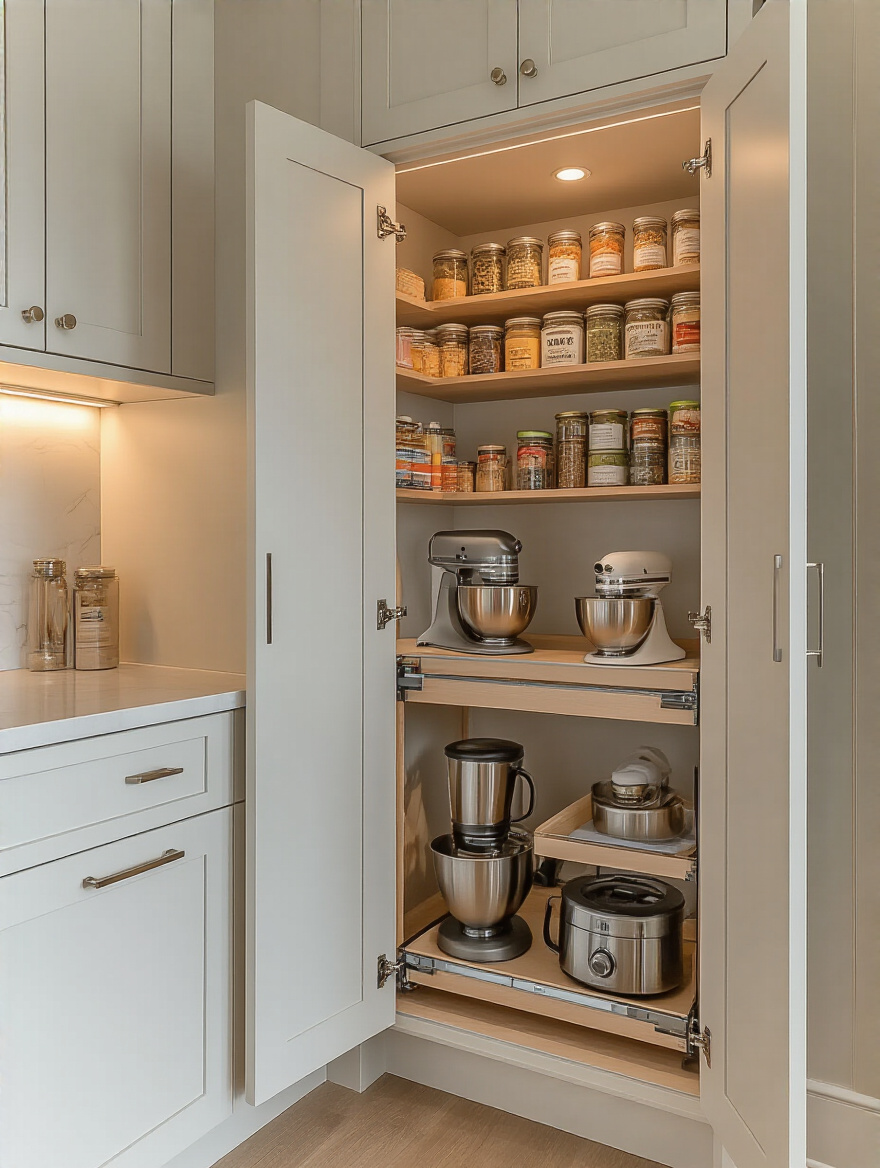
These mechanisms bring the contents of that deep, dark corner right out to you. Suddenly, you can see and reach everything you own. The other hero here is the slim pull-out pantry. Got a 6- or 9-inch gap next to your oven? Don’t put a fake filler panel there. Install a tall pull-out cabinet. It’s the perfect place for oils, vinegars, spices, and baking sheets—all perfectly visible and accessible. These solutions turn the most frustrating parts of a kitchen into storage all-stars.
Once your layout is optimized and every nook is accounted for, the next battleground is what you fill it with.
Smart Storage & Appliance Selection (Part 1)
This is where we get into the nitty-gritty of fitting everything you need into the layout we’ve so carefully planned. Choosing the right appliances and storage hardware isn’t just about what fits—it’s about selecting pieces that actively contribute to the feeling of spaciousness and efficiency. This part is less about demolition and more about smart, strategic choices that have an outsized impact.
We’ll start with the sink, the unsung hero of the kitchen workflow, and move on to the major appliances that often eat up the most physical and visual space. Think of these choices as investments in your daily sanity.
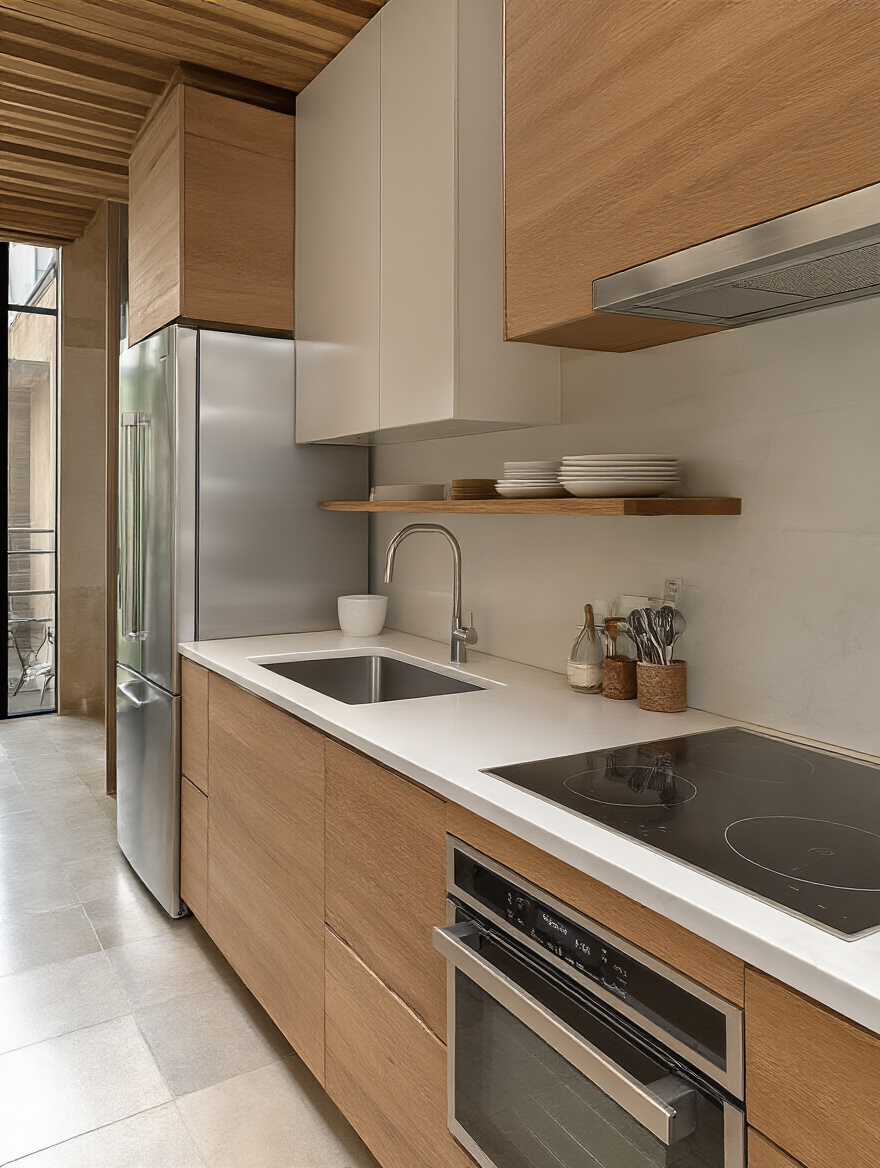
7. Integrate Undermount Sinks for Seamless Countertop Space
This is one of my non-negotiables for any kitchen, but it’s an absolute game-changer in a small one. A traditional top-mount sink has a raised lip that sits on your counter. That lip does two terrible things: it creates a crumb-trapping gunk magnet, and it visually chops up your precious counter space. An undermount sink is installed below the counter, creating a clean, seamless surface.
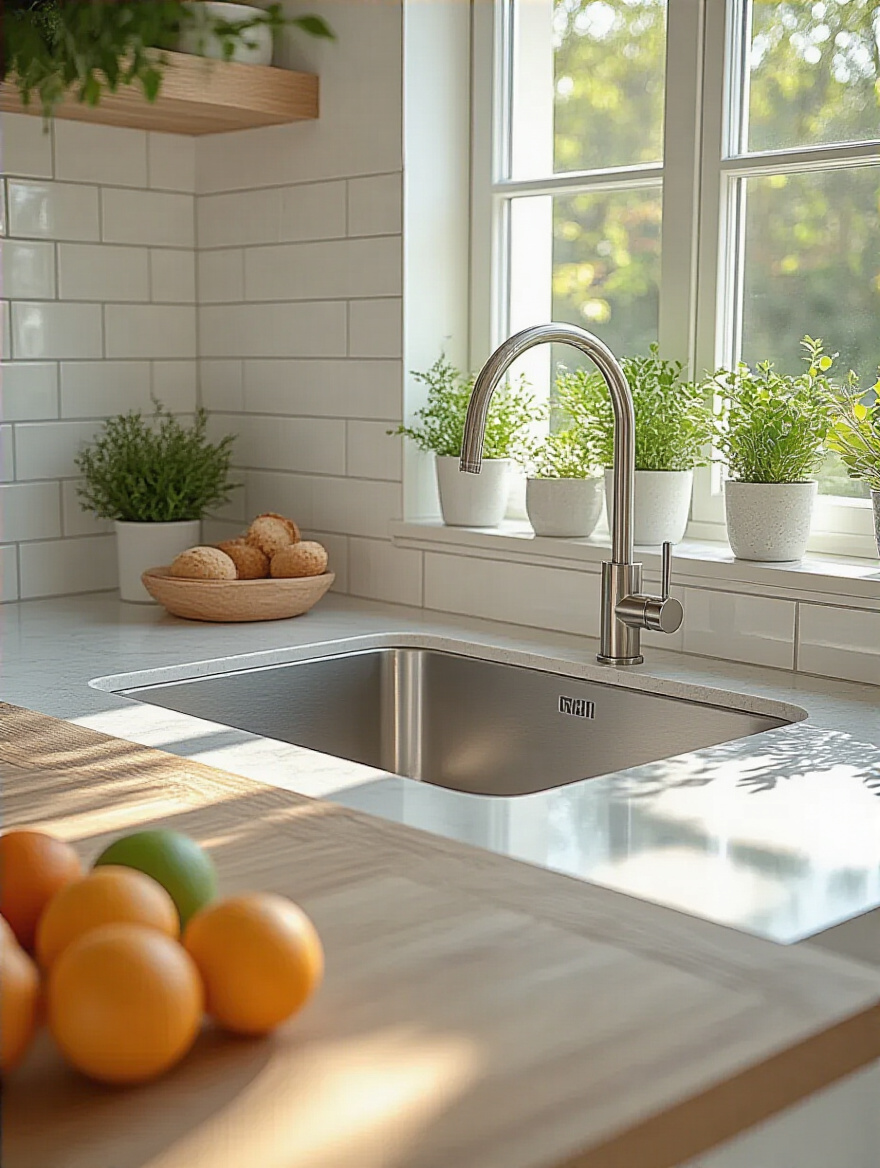
The benefit is immediate. You can wipe crumbs and spills directly into the sink with zero obstruction. More importantly, it gives you back those few inches around the sink, making the entire area feel bigger and more usable as a prep space. A well-designed workstation is about eliminating friction, and that little lip on a top-mount sink is pure friction. Go undermount. You will never regret it.
Now, let’s tackle the biggest bully in the small kitchen: the refrigerator.
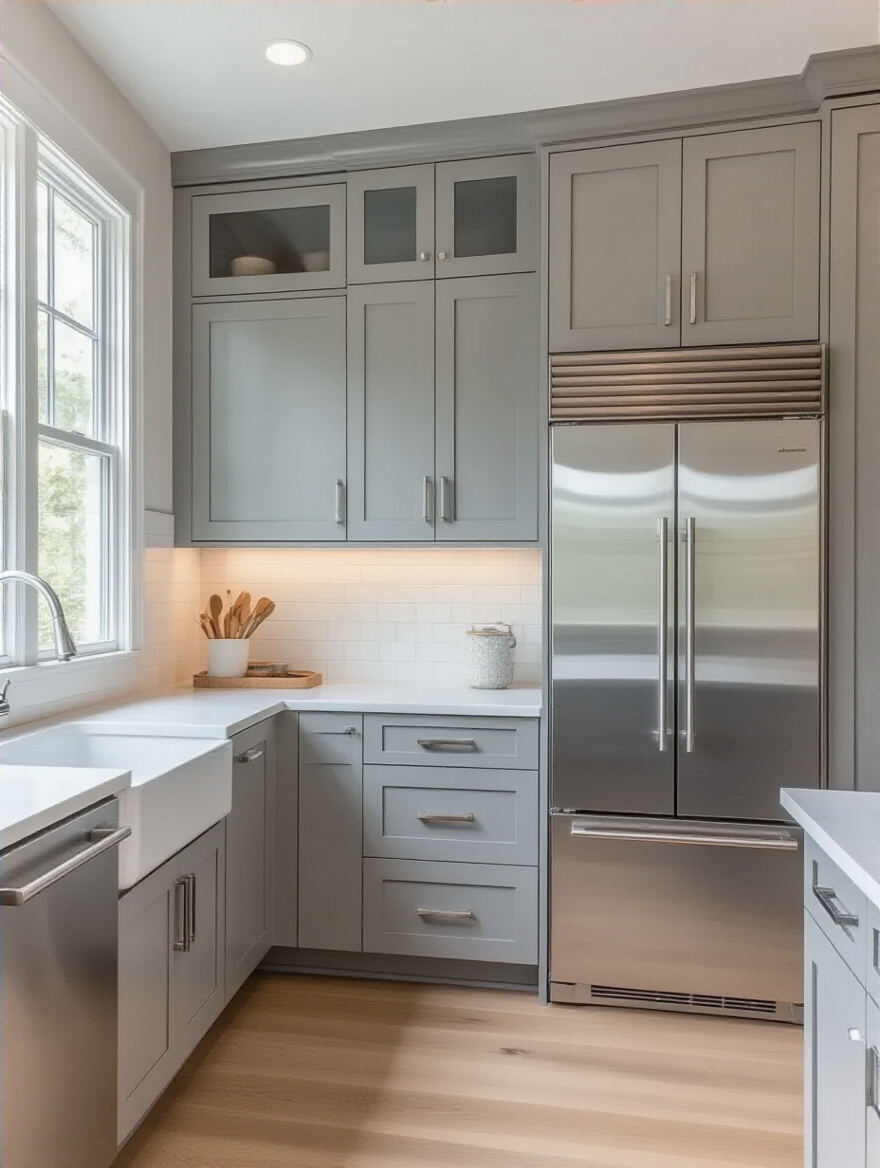
8. Install Slim-Profile or Counter-Depth Refrigerators to Maintain Kitchen Flow
Have you ever done the “hip check” on your refrigerator? That’s when you have to turn sideways and squeeze past it because it juts out a good 6 inches past your cabinets. A standard-depth fridge in a small kitchen is a design crime. It breaks the clean line of your cabinetry, disrupts the flow of traffic, and makes the whole room feel cramped. The solution is a counter-depth refrigerator.
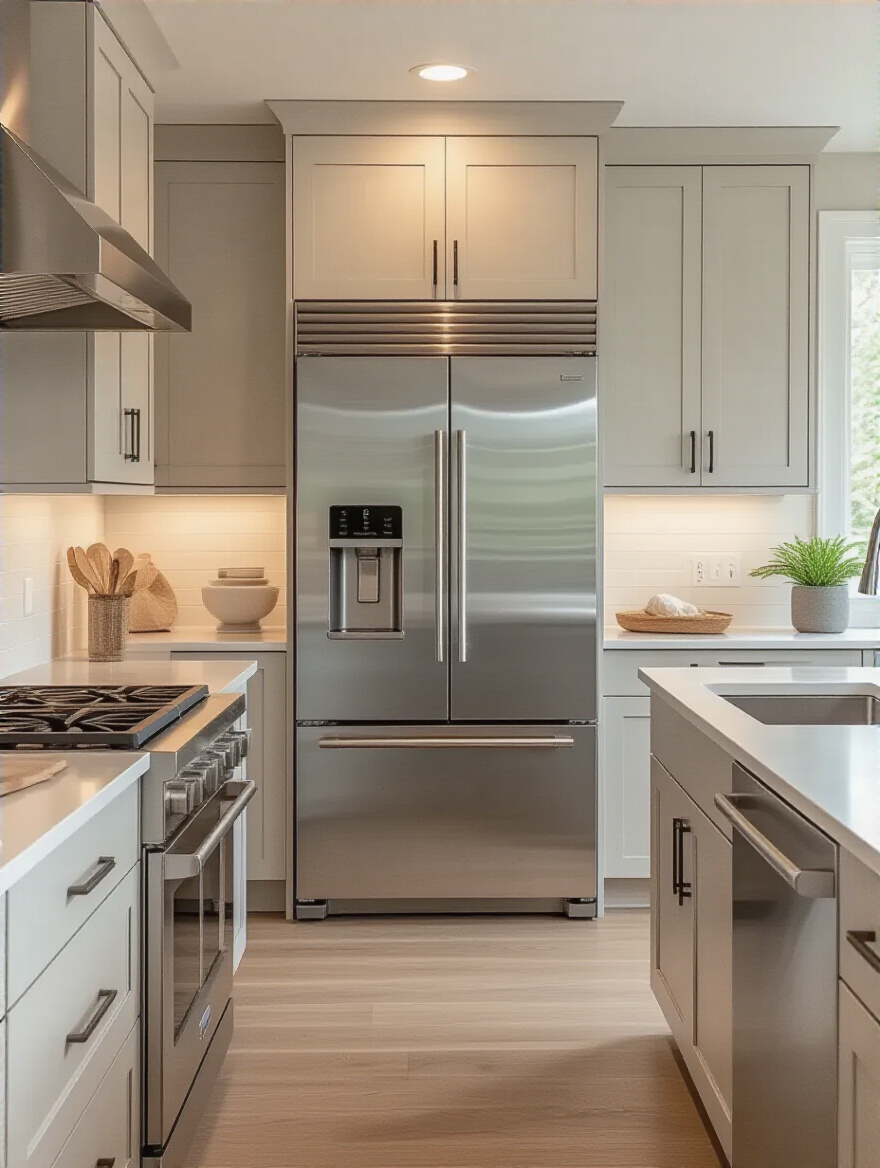
These units are designed to sit nearly flush with your cabinets, creating a streamlined, built-in look without the custom price tag. Yes, they can be a bit pricier and might have slightly less internal capacity, but the inches you gain back in your walkway are worth their weight in gold. A kitchen that you can move through comfortably and safely is infinitely more functional. It’s a perfect example of prioritizing livability and flow over raw storage volume.
Continuing with that “less is more” appliance philosophy, let’s talk about the dishwasher.
9. Utilize Drawer Dishwashers for Flexible Installation and Smaller Loads
Most people think of a dishwasher as a standard 24-inch box. But for small kitchens, and especially for small households, a drawer dishwasher is a brilliant alternative. These are exactly what they sound like: dishwasher drawers that can be installed as single units or stacked as a double. They are perfect for running smaller, more frequent loads, which saves water and energy.
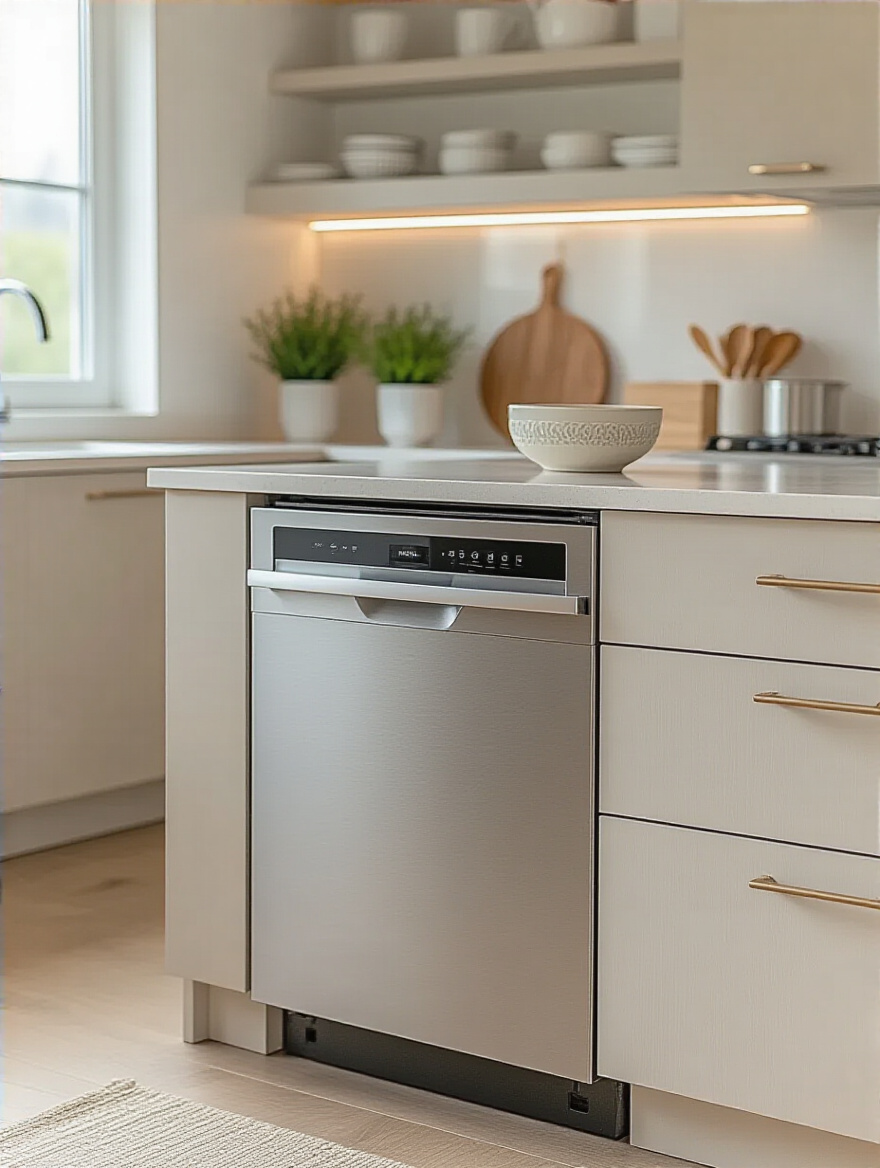
But the real magic is the installation flexibility and ergonomics. You can install a single drawer at counter height, completely eliminating the need to bend over to load and unload it. This is a massive win for comfort and accessibility. You could even split two single drawers in different parts of your kitchen—one for glasses near your beverage station and another for plates near the dining area. They blend seamlessly into your cabinetry and provide functionality exactly where you need it.
Let’s turn our attention from horizontal space-saving to one of my favorite strategies: going vertical.
10. Opt for Vertical Storage with Tall Pantry Pull-Outs
In a small footprint, the only way to expand is up. This is where tall, narrow pantry pull-outs become your secret weapon. I mentioned them for corners, but they are spectacular anywhere you have a slim vertical space—even a 6-inch gap can become a powerhouse of storage. These floor-to-ceiling units slide out completely, giving you a perfect view of everything from top to bottom.
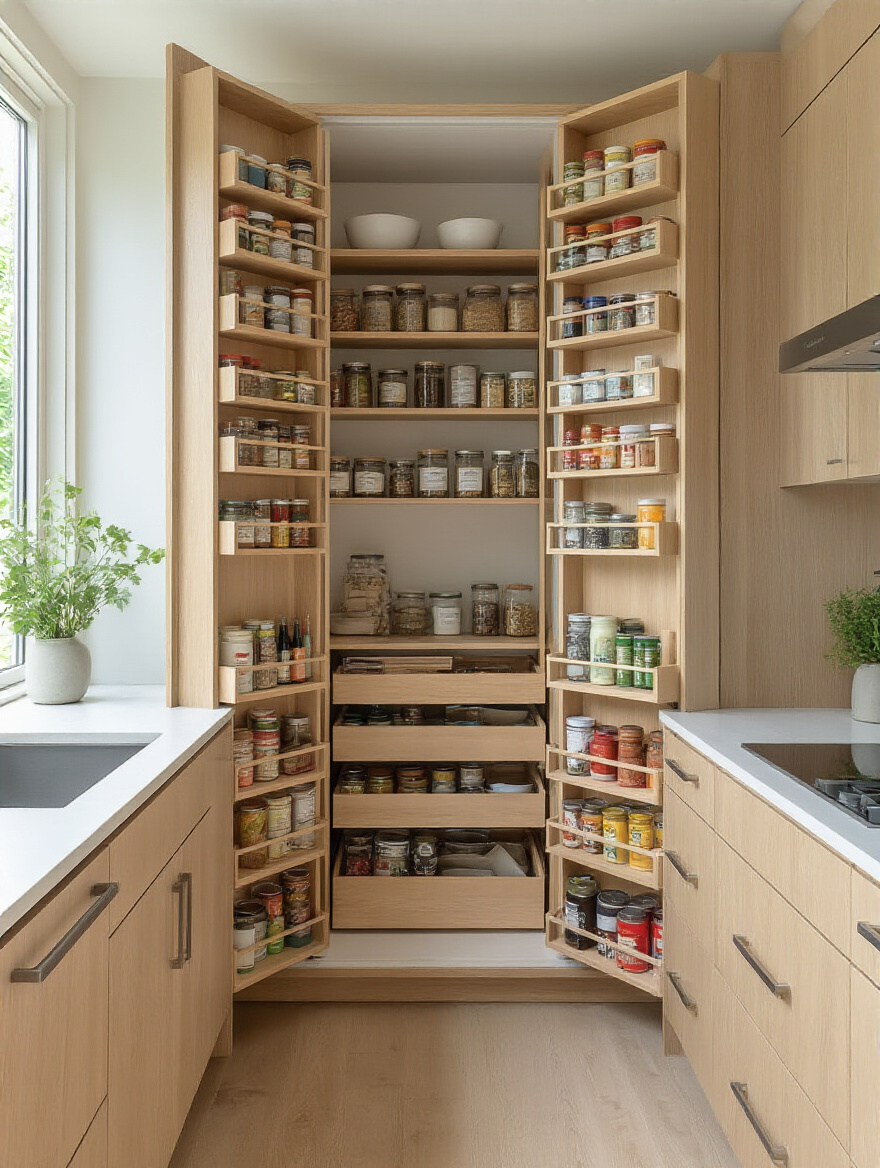
Think of it: no more kneeling on the floor and digging through the back of a deep cabinet for that one can of tomatoes. Everything is organized, visible, and instantly accessible. A client of mine with a tiny galley kitchen was convinced she had no pantry space. We replaced a 12-inch wide broom closet with a tall pull-out, and it now holds all of her dry goods. She literally gained a full pantry without adding a single square foot to her kitchen. It’s one of the most efficient uses of cubic footage, period.
Now that we have our core appliances and heavy-duty storage sorted, it’s time to fine-tune the organization for everyday items.
Smart Storage & Appliance Selection (Part 2)
We’ve covered the big stuff, but a truly functional kitchen is won or lost in the details. This is about tackling the everyday clutter—the knives, the pots, the mixing bowls—that can quickly overwhelm a small space. The goal here is to get as much as possible off your countertops and into clever, designated homes.
Think of this as the decluttering and optimization phase. Every item we find a home for is another square inch of clean, usable prep space we get back. We’re going to use smart tools, choose double-duty furniture, and implement systems that make staying organized feel effortless.
11. Install Wall-Mounted Magnetic Knife Strips to Declutter Countertops
If you have a bulky knife block sitting on your counter, I want you to go evict it right now. Seriously. That block is taking up prime real estate that you could be using for food prep. The single best replacement is a wall-mounted magnetic knife strip. It gets your knives off the counter and onto an unused bit of wall space, freeing up a significant chunk of your workspace.
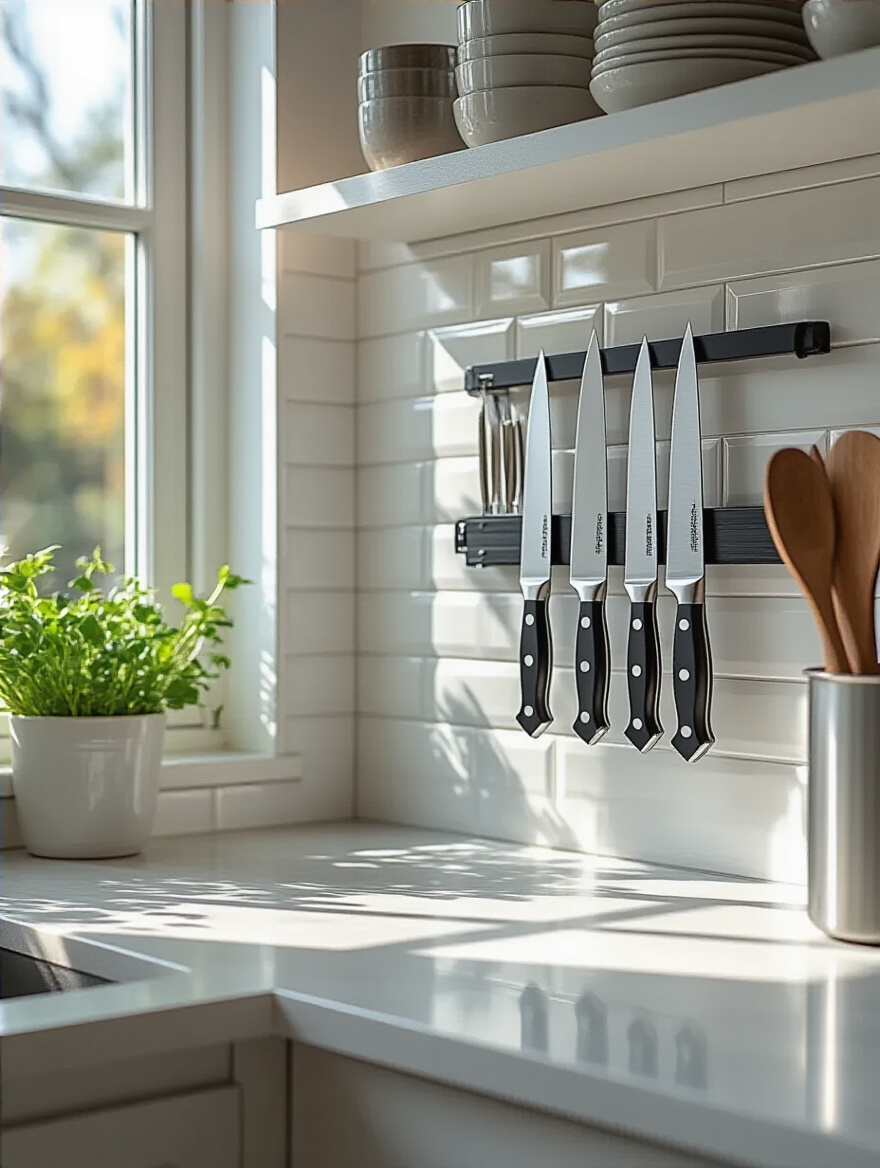
Beyond the space savings, it’s also more hygienic—there are no dark slots for gunk to build up in. Plus, you can instantly see and grab the exact knife you need. Professional chefs use them for a reason: they are ruthlessly efficient. Just make sure to install it securely and in a spot where you won’t accidentally bump into it. This is a five-star, high-impact, low-cost upgrade for any small kitchen.
With the knives sorted, let’s talk about the other big space hogs in your cabinets.
12. Choose Multifunctional Furniture Pieces with Hidden Storage
In a small home, every piece of furniture should be working two jobs. That goes for your kitchen, too. A simple set of chairs and a table might work, but a built-in banquette with lift-top seats that hide your less-used small appliances? That’s a game-changer. A small kitchen island on wheels that has drawers for utensils and a fold-out leaf for dining? That’s smart design.
My personal rule is this: “If it only does one thing, it’s probably not earning its rent in a small space.” Look for opportunities to combine seating with storage, or prep space with dining. This approach drastically reduces the number of separate items you need, which in turn frees up floor space and makes the entire area feel less cluttered and more cohesive. It’s about being incredibly intentional with every single item you bring into the space.
This philosophy of “more function in less space” extends directly to your cookware.
13. Implement Stackable & Nesting Cookware and Mixing Bowls
There is nothing more frustrating than a cabinet full of mismatched pots, pans, and lids that you have to excavate every time you want to make dinner. The solution is beautifully simple: nesting cookware. These are sets designed specifically to stack neatly inside one another, taking up the footprint of just the single largest pot. It’s like Russian dolls for your kitchen.
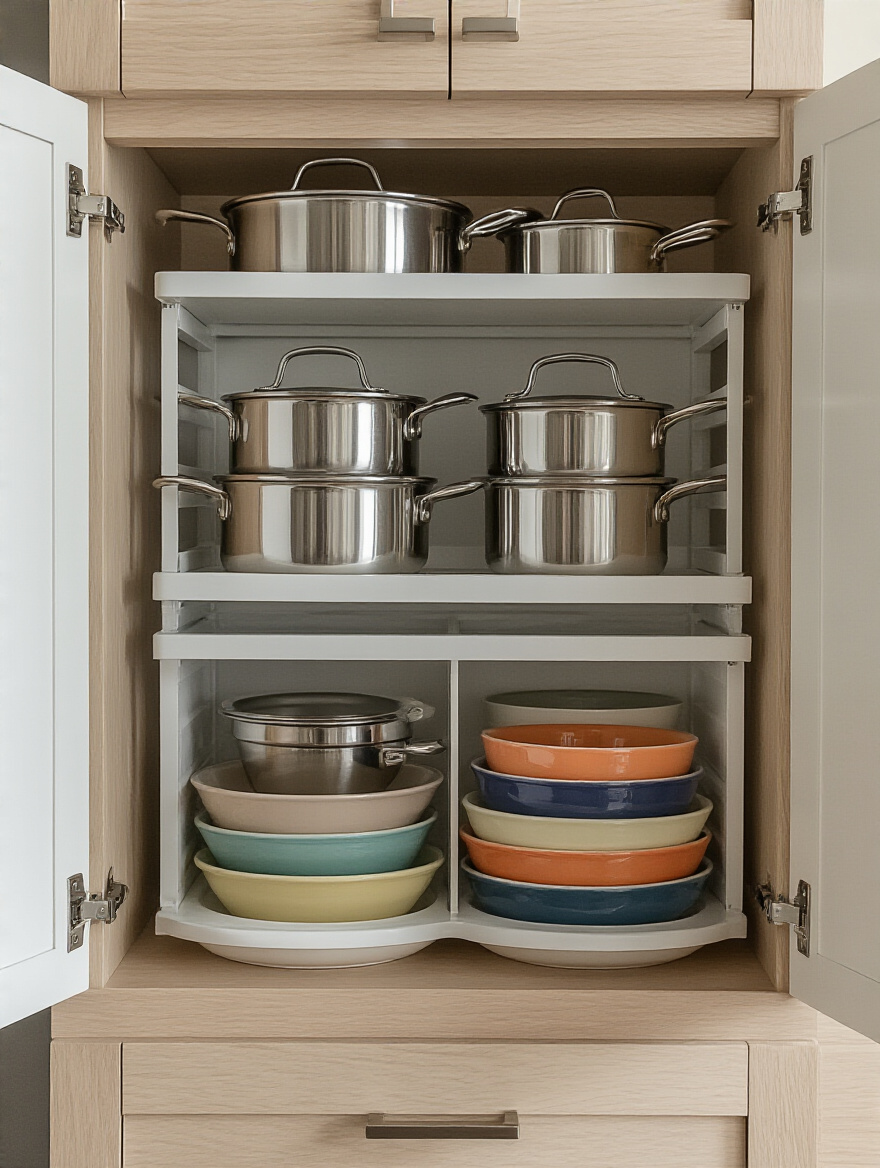
The same goes for mixing bowls and measuring cups. A set that nests perfectly can reduce the storage space required by over 50%. It seems like a small thing, but the calm and order it brings to your cabinets is profound. When you can open a drawer and simply lift out the exact pan you need without a clatter and an avalanche of lids, you’ve won. It’s a small investment that pays huge daily dividends in your peace of mind.
Now that we’ve mastered physical space, let’s move on to my favorite part: playing tricks on the eye to make the space feel bigger.
Visual Illusions & Aesthetic Enhancements (Part 1)
This is where the psychology of design comes into play. We’ve maximized the physical function of your kitchen, and now we’re going to maximize its perceived size. How your brain interprets a space is heavily influenced by light, color, and visual continuity. These next few tips are all about manipulating those elements to create a feeling of openness, brightness, and depth.
You’d be shocked at how much larger a space can feel without moving a single wall. We’re going to bounce light around, erase visual boundaries, and create focal points that draw the eye up and out, making your compact kitchen feel airy and expansive.
14. Paint Walls and Cabinetry in Light, Reflective Hues to Maximize Brightness
This might be the oldest trick in the book, but it’s also one of the most effective. Dark colors absorb light, making a room feel smaller and more enclosed. Light colors—whites, soft greys, pale blues, and creamy beiges—do the opposite. They reflect light, whether it’s natural light from a window or artificial light from your fixtures, bouncing it around the room and making the entire space feel brighter and more open.
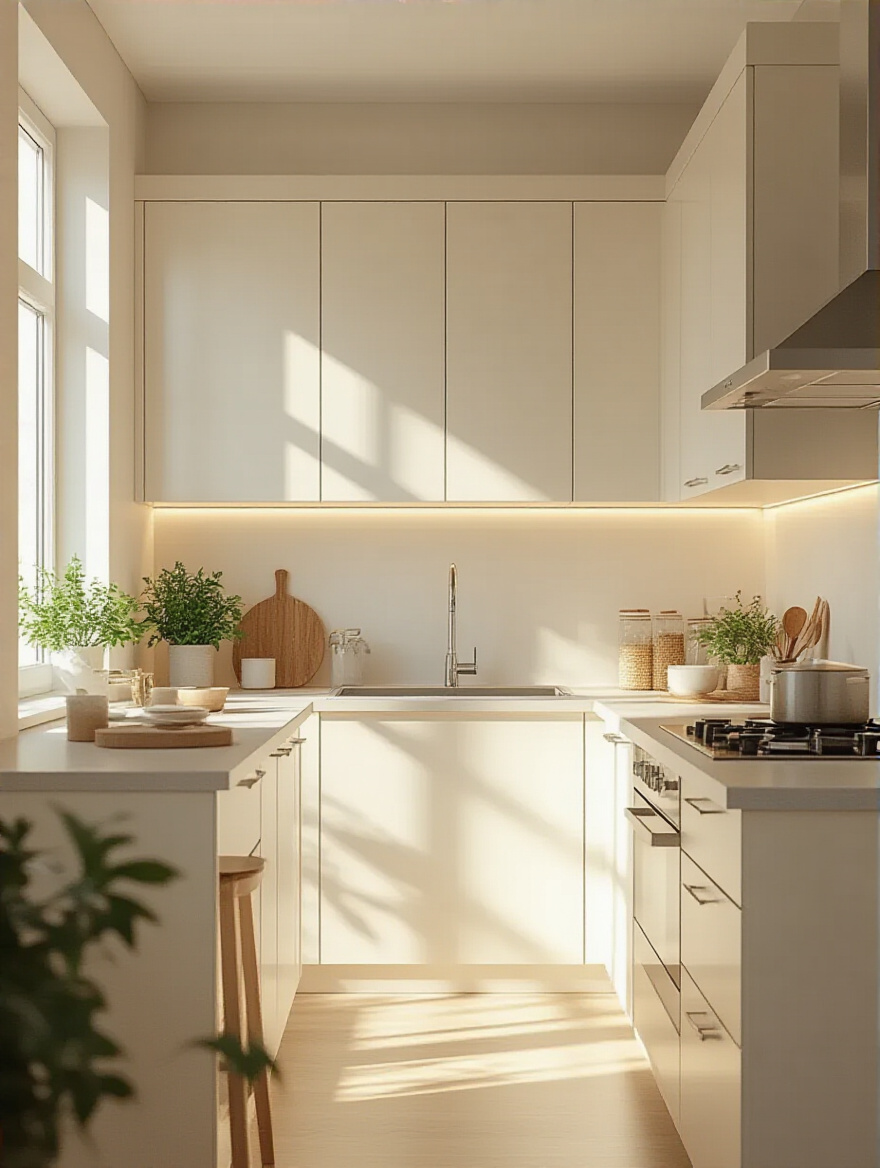
For maximum impact, paint the walls and cabinets the same light color, or very similar shades. This creates a seamless visual flow, erasing the lines between where the walls end and the cabinetry begins. Your eye glides across the surfaces without interruption, which tricks your brain into perceiving the space as one continuous, larger area. Think of your paint as a dimmer switch: dark colors turn the brightness down, and light colors turn it all the way up.
With a bright canvas established, the next step is to break up any remaining visual bulk.
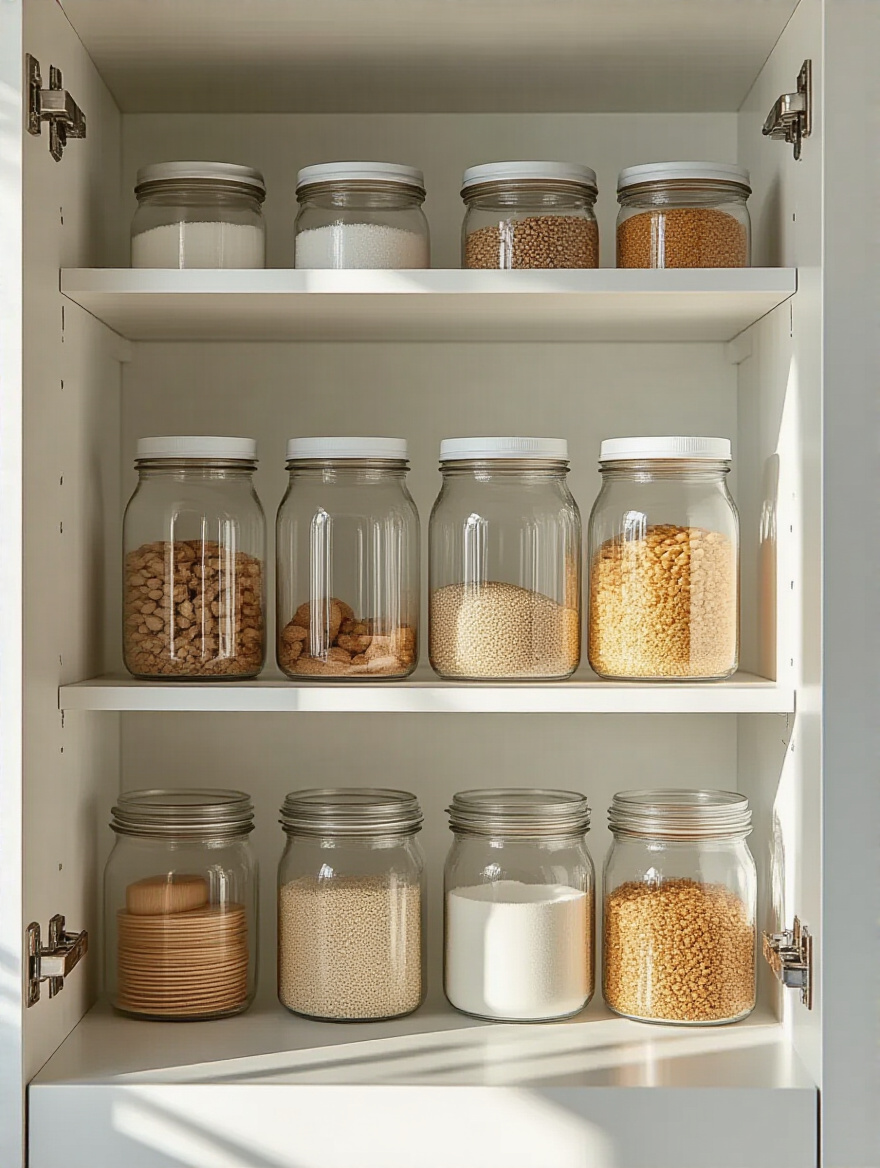
15. Install Glass Cabinet Fronts or Open Shelving to Visually Lighten Upper Walls
Solid rows of upper cabinets can feel like a heavy, monolithic block looming over you in a small kitchen. A brilliant way to break this up is to strategically replace some of those solid doors with glass fronts or remove them entirely in favor of open shelving. This technique instantly lightens the visual weight of the upper half of your room.
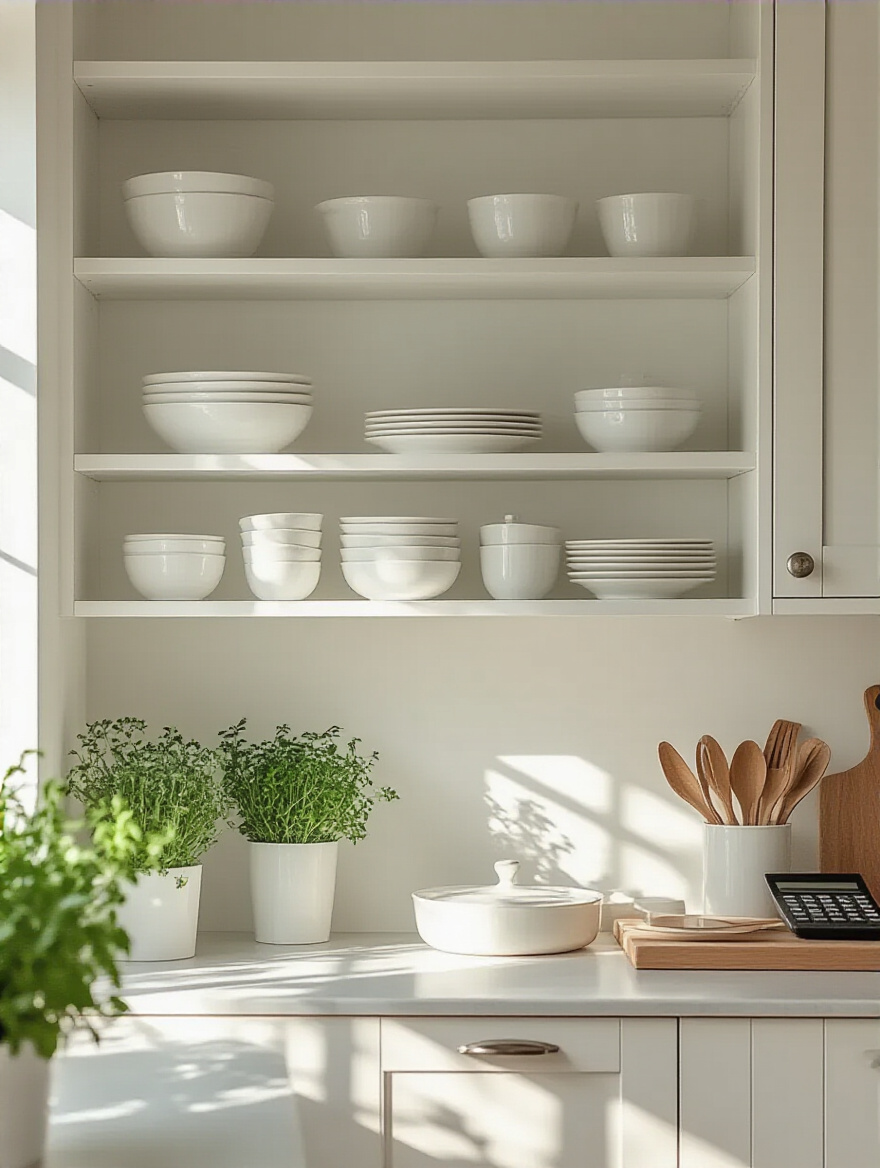
Your eye is no longer stopped by a solid door; it can travel through the glass or past the shelf to the wall behind it, creating an immediate sense of depth. This does come with a small catch: it forces you to be neat. Open shelves and glass cabinets are perfect for displaying your beautiful, everyday dishes or glassware, but they’re not the place for your mismatched Tupperware collection. It’s a built-in incentive to stay organized while making your kitchen feel twice as wide.
Next, we need to ensure that our bright, open space is properly illuminated, especially where it counts the most.
16. Incorporate Strategic Under-Cabinet and Task Lighting to Brighten Workspaces
If you only make one lighting upgrade in your kitchen, this is it. Relying on a single overhead light is a huge mistake, as it casts shadows on your countertops exactly where you need to see what you’re doing. Under-cabinet lighting is a non-negotiable for functional kitchen design. It illuminates your entire prep surface, eliminating shadows and making tasks like chopping and measuring safer and easier.
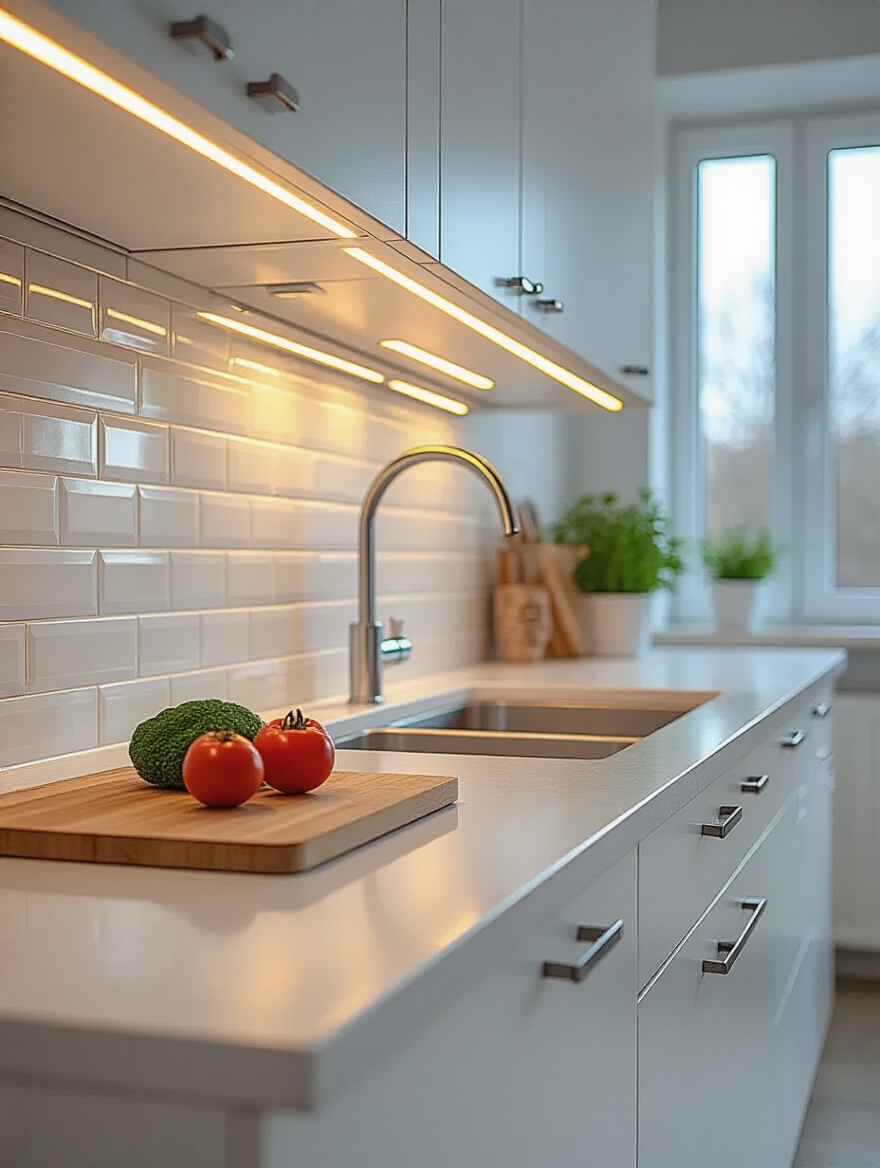
Beyond the pure functionality, it also works a visual magic trick. Lighting the area beneath your cabinets makes the entire kitchen feel brighter and more expansive. It washes the backsplash and countertops with light, creating depth and a high-end, layered feel. It’s the difference between cooking in a gloomy cave and working in a bright, efficient studio. Dimmable LED strips are inexpensive, easy to install, and will fundamentally change how your kitchen feels.
To take that light-bouncing effect to the next level, let’s talk about the surface right in your line of sight.
17. Select Mirrored or Reflective Backsplashes to Bounce Light and Add Depth
This is a power move for making a small kitchen feel dramatically larger. A backsplash made from a reflective material—like a mirrored tile, high-gloss ceramic, or even a sheet of polished stainless steel—acts like a visual amplifier. It grabs all the light in the room, both natural and artificial, and shoots it right back, instantly making the space feel brighter.
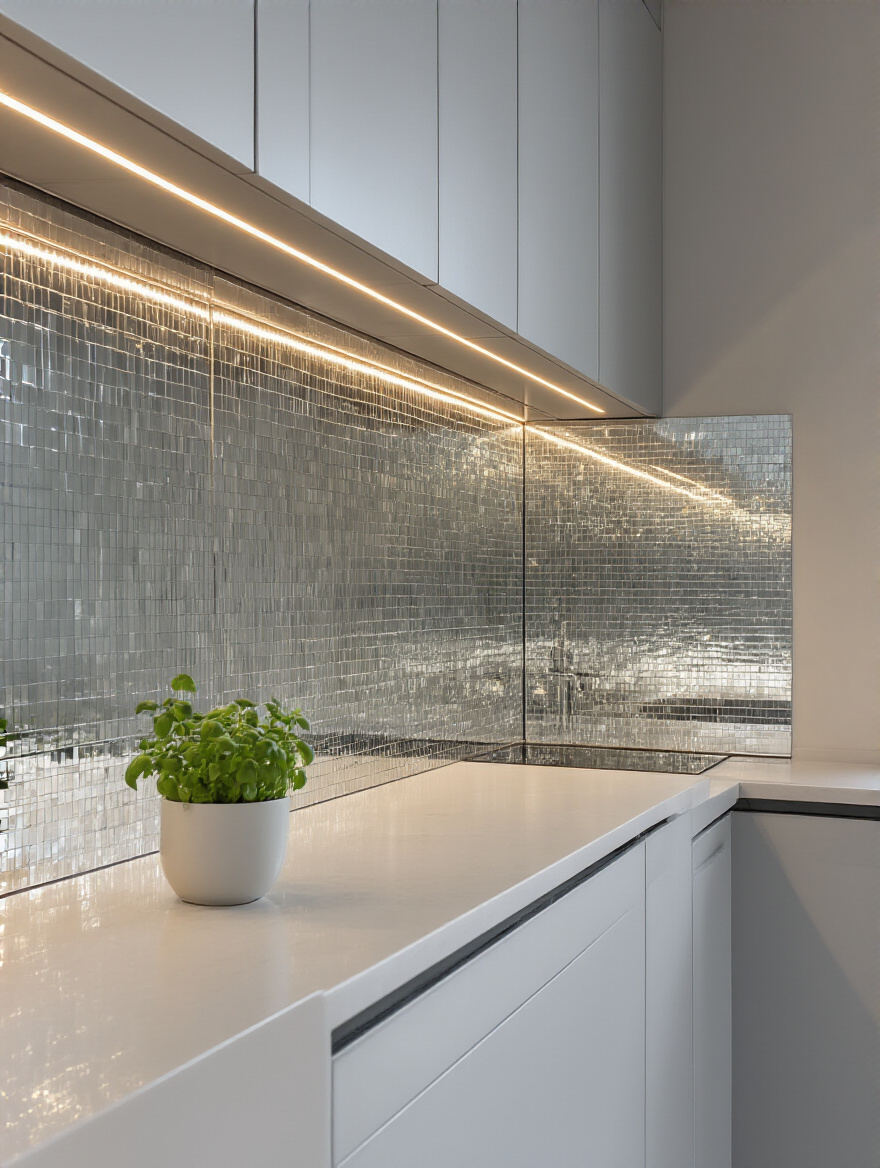
But it does more than that. A mirrored surface also reflects the room itself, creating an illusion of depth that can make your kitchen feel almost twice as deep as it actually is. It’s a bit of a bold choice, but the payoff is huge. If a full mirror feels like too much, consider tiles with a pearlescent or metallic finish to get a similar, but more subtle, light-catching effect.
Now, let’s apply this same principle of reflection and seamlessness to some of the biggest visual elements in the kitchen.
Visual Illusions & Aesthetic Enhancements (Part 2)
We’re in the home stretch of visual wizardry. These final tips are about creating a cohesive, uninterrupted aesthetic that is the hallmark of sophisticated small-space design. It’s all about blurring the lines—between appliances and cabinets, and between the kitchen and the rest of your home.
Think of this as creating a seamless visual canvas. By minimizing jarring transitions and visual breaks, you encourage the eye to take in the entire space as a whole, making it feel more integrated, serene, and, most importantly, much larger than its measurements would suggest.
18. Choose Appliances with Integrated Panels for a Seamless, Uniform Look
This is the “stealth bomber” approach to appliance design, and it’s incredibly effective. panel-ready appliances are designed to be fitted with a custom cabinet panel that matches the rest of your kitchen. Your refrigerator and dishwasher literally disappear, blending perfectly into the cabinetry. The result is a clean, continuous, and uninterrupted visual line that is a minimalist’s dream.
In a small kitchen, where a big stainless steel fridge can dominate the room, this creates an incredible sense of calm and spaciousness. It’s a higher-end option, but the impact is undeniable. It elevates the entire kitchen to a custom, built-in standard and is the ultimate tool for reducing visual clutter. When your eye isn’t stopping to register “fridge,” “dishwasher,” “cabinet,” the whole space just feels more harmonious and expansive.
The same principle of creating uninterrupted lines applies underfoot as well.
19. Use Consistent Flooring Throughout Adjoining Spaces to Blur Room Boundaries
This is a subtle but powerful psychological trick. If your kitchen opens up to a dining area or living room, using the same flooring material throughout both spaces can make the entire area feel enormous. When you switch from tile in the kitchen to hardwood in the dining room, you’re creating a visual “border” that tells your brain, “The kitchen stops here.”
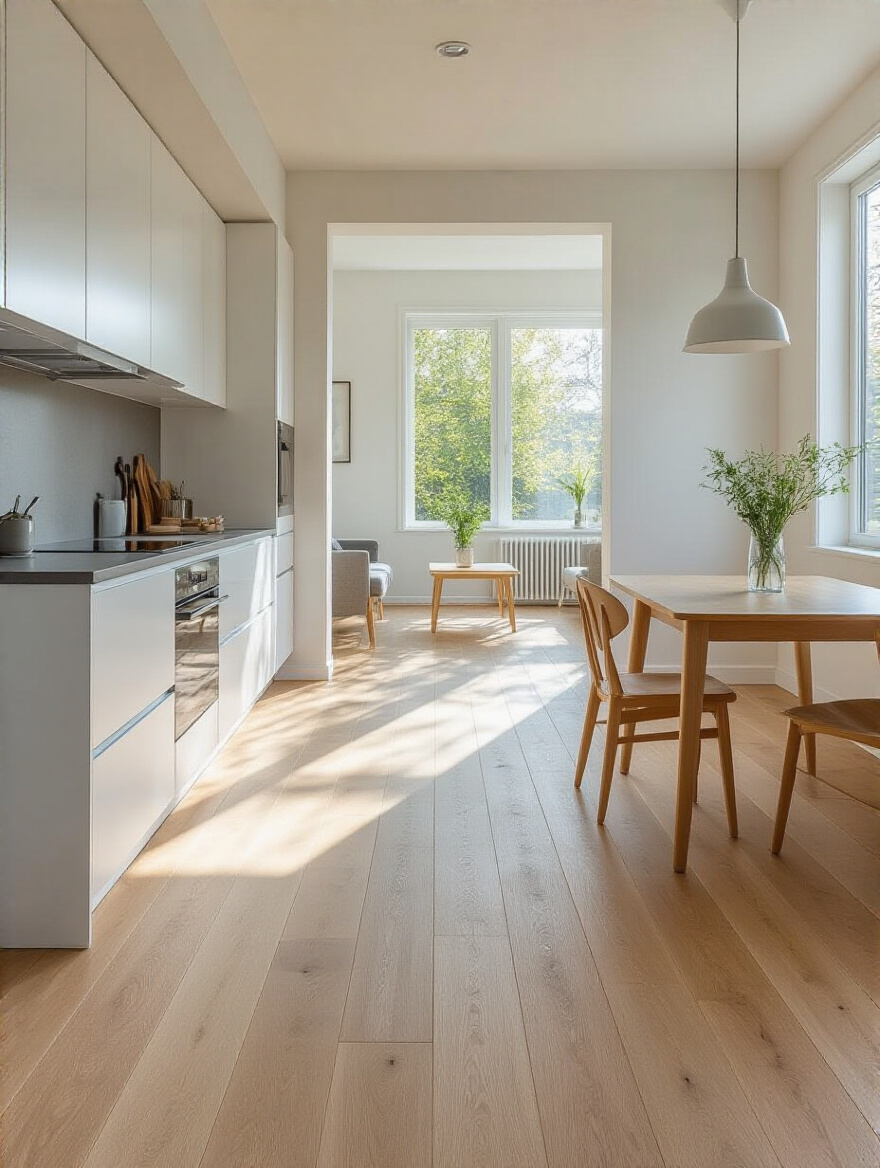
By running the same flooring seamlessly from one space to the next, you erase that border. Your eye travels uninterrupted across the entire floor plan, tricking your brain into perceiving it as one single, large room rather than two smaller, distinct ones. It’s an incredibly effective way to enhance flow and create a cohesive, open-concept feel, even in a small home. Just be sure to choose a material that is durable enough for kitchen use, like engineered hardwood or luxury vinyl plank.
With the design in place, our final challenge is to keep it looking this good for the long haul.
Advanced Organization & Long-Term Optimization
You can have the most brilliantly designed small kitchen in the world, but if it gets buried under clutter, none of it matters. This final section is about the systems and habits you need to adopt to maintain your beautifully efficient space. This is the discipline that makes all the other design choices stick.
Think of this as your kitchen’s operating system. These are the rules and tools that will prevent the slow creep of clutter and ensure your kitchen remains a functional, joyful place to be, day after day.
20. Curate Your Kitchen Inventory Ruthlessly to Free Up Crucial Storage
You do not need three different kinds of vegetable peelers, a melon baller you used once in 2014, or that collection of “maybe one day” novelty serving dishes. In a small kitchen, every single item has to earn its right to be there. This is where you have to be ruthless. I recommend the “one-year rule”: if you haven’t used an item in the last year (seasonal items like turkey basters excluded), it’s time for it to go.
Go through your cabinets and drawers one by one and be honest with yourself. Get rid of duplicates, broken gadgets, and single-purpose tools that could be replaced by something more versatile. The space you will free up is astonishing. A curated collection of high-quality, frequently used tools is infinitely more functional than a cluttered museum of kitchen gadgets you never touch.
Speaking of underutilized space, let’s revisit your cabinets for one more trick.
21. Employ Door-Mounted Organizers for Maximum Cabinet Interior Efficiency
The inside of your cabinet doors is some of the most valuable and most underutilized real estate in your entire kitchen. Don’t let it go to waste. Slim, door-mounted organizers can instantly create a home for so many things that currently clutter your shelves or drawers. Use them for your collection of spices, rolls of aluminum foil and plastic wrap, cutting boards, or cleaning supplies.
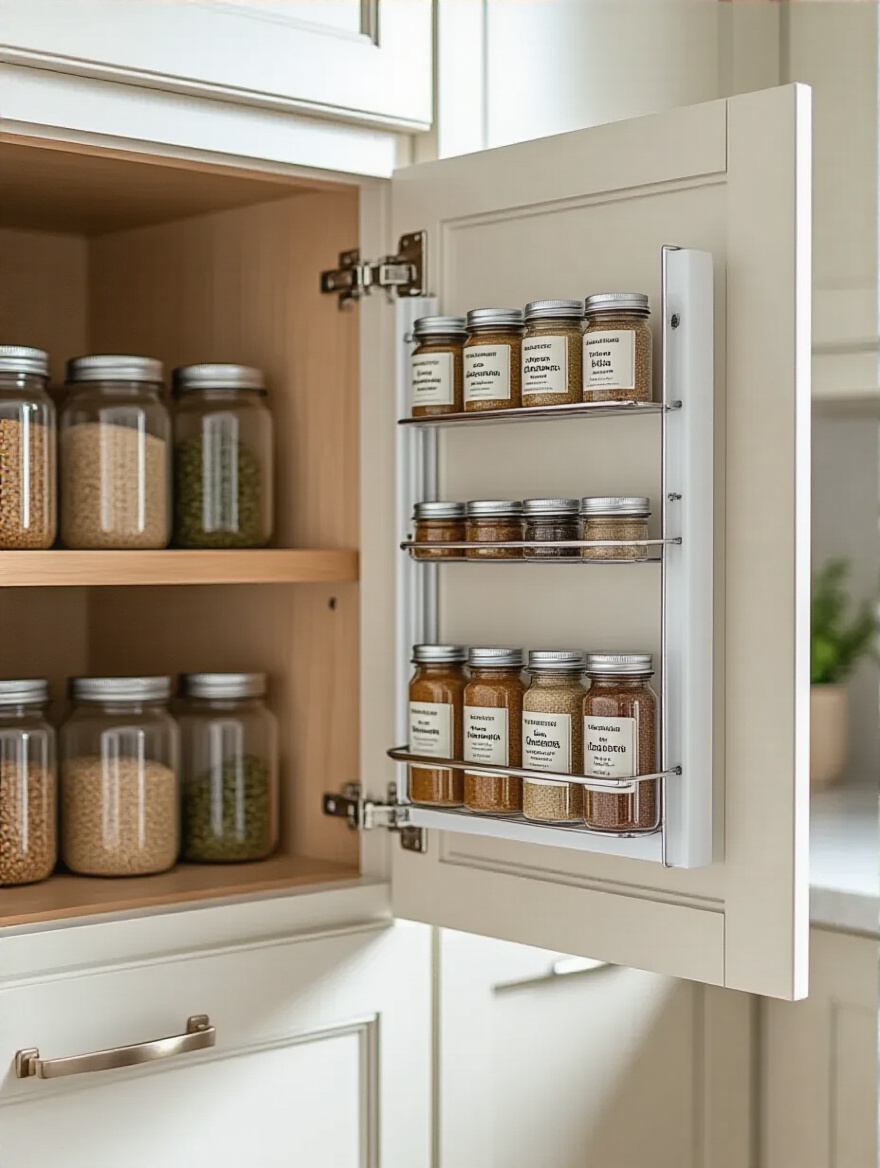
This simple addition gets those items out of the way, freeing up your main shelves for larger things like pots, pans, and plates. It also makes frequently used items incredibly easy to see and access. A client once told me that installing a spice rack on the inside of her upper cabinet door was the single best $30 she ever spent on her kitchen. It’s a high-impact solution that requires nothing more than a screwdriver.
From the insides of your cabinets to the open walls, let’s keep that vertical momentum going.
22. Leverage Pegboards or Pot Racks for Vertical Display and Storage
Getting bulky items off your counters and out of your cabinets is a huge win. A wall-mounted pegboard, famously beloved by Julia Child, is an incredibly versatile way to do this. With a system of hooks and small shelves, it can hold everything from pots and pans to utensils, mugs, and even small herb planters. It’s infinitely customizable and turns your everyday tools into a stylish and functional display.
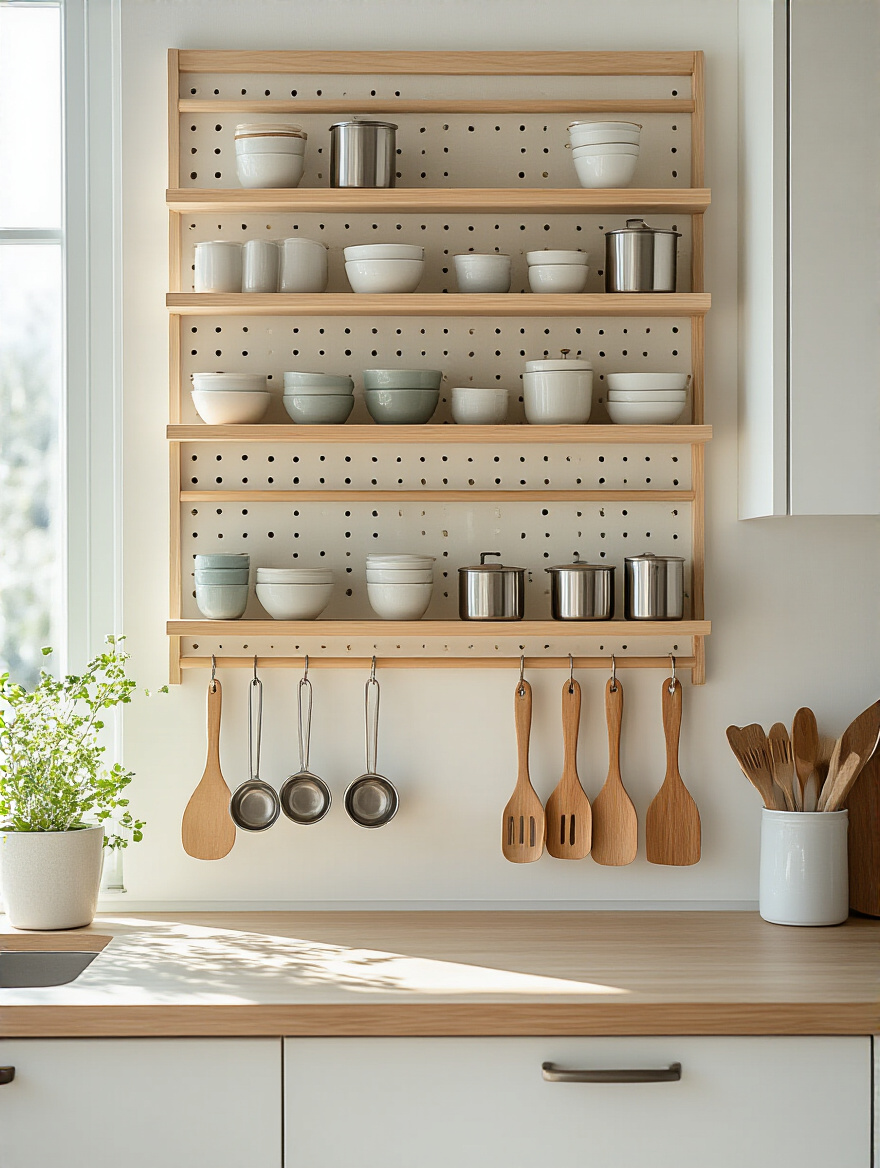
Similarly, a ceiling-mounted or wall-mounted pot rack can free up an entire base cabinet’s worth of space. Hanging your pots and pans keeps them within easy reach, prevents them from getting scratched up in a drawer, and adds a professional, culinary feel to your kitchen. The key is to draw the eye upward, which not only provides storage but also enhances the feeling of height and openness in the room.
Finally, the single most important habit to keep your perfectly designed kitchen from slipping back into chaos.
23. Maintain a “One In, One Out” Policy for New Kitchen Gadgets to Prevent Clutter
This is the golden rule for preventing future clutter. It’s simple: for every new kitchen item you bring into your home, one old item of a similar type must leave. If you buy a new, better blender, the old one gets donated or sold immediately. It doesn’t get relegated to the back of a cabinet “just in case.”
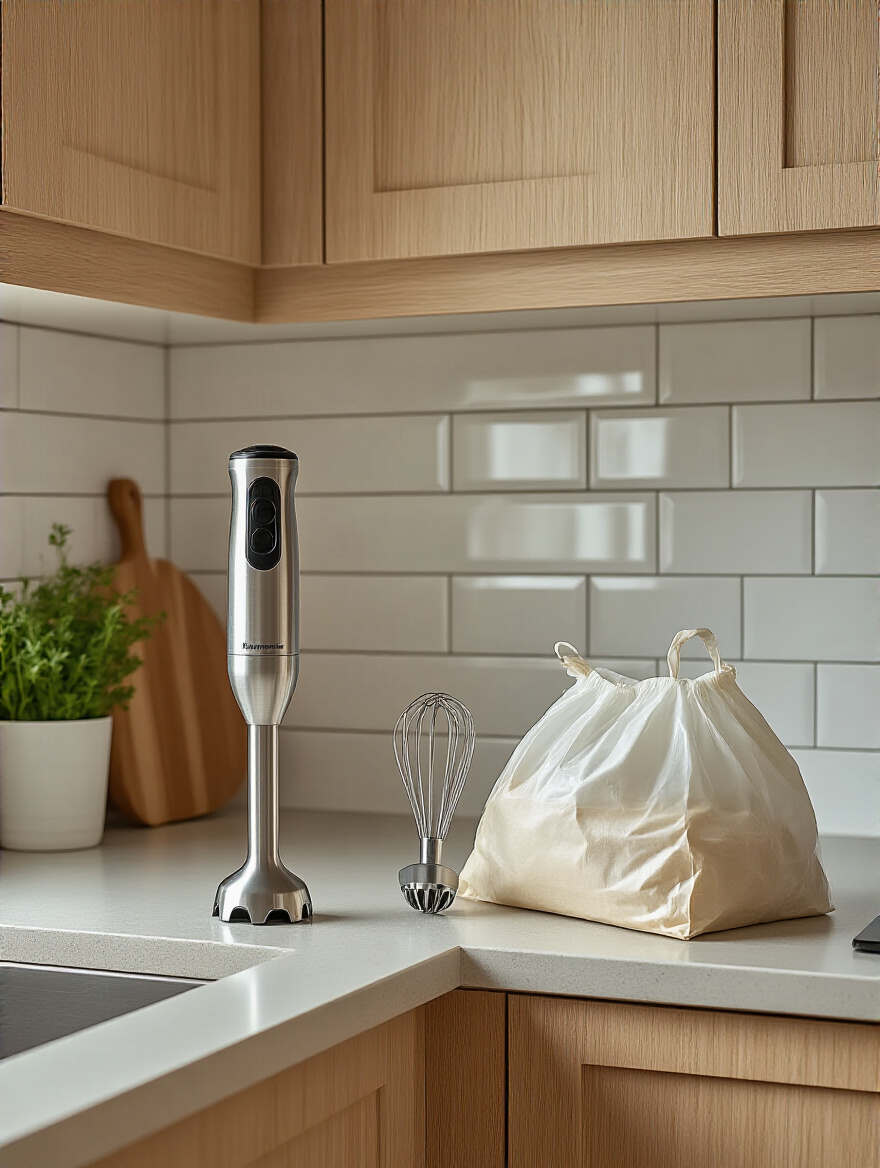
This policy forces you to be incredibly mindful about your purchases. Is this new gadget truly better than what you have? Is it worth giving something else up? It stops the slow, unconscious accumulation of stuff that is the root cause of clutter. It’s the single best long-term strategy for ensuring your beautifully and efficiently designed small kitchen stays that way forever.
Conclusion
See? A small kitchen is a design challenge, not a life sentence. As we’ve walked through these ideas, the core principle is always the same: be intentional. It’s about optimizing flow, making every inch work harder, and using smart visual tricks to create a feeling of space and calm. You don’t need a bigger kitchen; you need a smarter one.
By thinking of your kitchen as a high-performance workspace, you shift the focus from what you lack to what you can achieve with clever, purposeful design. Stop fighting with your space and start designing it to support the way you actually live. Take one or two of these ideas that resonated with you and start there. You’ll be amazed at the impact a few strategic changes can have, transforming your compact kitchen into the functional, stylish, and joyful heart of your home.


