Bathrooms are tough spaces to decorate. We spend countless hours picking out the perfect tile and hardware, but the walls usually stay blank. Adding refined bathroom art ideas completely changes the feel of the room. However, there is a major catch. Showers generate heavy steam, and humidity destroys traditional art. Historically, Victorians just hung varnished oil paintings and hoped for the best. Today, we have much better options. I always recommend dye-sublimation metal prints for wet spaces. The printing process permanently locks the image directly into aluminum. Therefore, it completely resists swelling and warping. Also, if you must frame something, swap the glass for acrylic. Acrylic warms up much faster than traditional glass. Consequently, it drastically reduces the internal condensation that ruins paper over time.
Placing art in a bathroom requires a bit of strategy. First, keep pieces at least eighteen inches above the bathtub. This simple gap stops capillary action from wicking moisture up the walls. Moreover, it keeps your art safely above concentrated steam plumes. However, you also want to avoid tight, stagnant corners. Instead, try hanging pieces opposite the shower to ensure healthy air circulation. Never hang framed art directly under an air conditioning vent. Sudden cold blasts cause thermal shock. In fact, that is exactly how you get those ugly water stains inside a frame.
Ventilation is ultimately your best friend here. A powerful exhaust fan needs makeup air to function properly. Therefore, make sure your bathroom door has a standard half-inch undercut. This lets fresh air flow inside to actively scour moisture off the walls. Next, think about the sensory atmosphere. Ancient Roman baths used mosaics to set a calming tone for traditional cleansing rituals. Modern bathrooms need that same tactile depth. However, high-gloss finishes can cause visual glare and eye fatigue. Satin or matte pieces offer a much softer, museum-like vibe. Indeed, acoustic canvas panels even absorb the harsh echoing sounds of water. Meanwhile, 3D ceramic wall art adds beautiful, moisture-proof depth. It also pairs perfectly with other bathroom wall decoration strategies.
1. The Moisture-Resistant Mandate: Selecting Humidity-Safe Mediums Like Acrylic and Metal Prints
Paper and canvas act like giant sponges. They constantly absorb moisture from the humid air. Over time, they swell, shrink, and eventually invite mold growth. Therefore, decorating a bathroom requires non-porous mediums with archival quality.
Wealthy Victorians famously hung oil paintings in their bathrooms. Predictably, poor ventilation caused rapid decay. Today, we expect our homes to function as durable sanctuaries. Fortunately, high-definition metal prints solve this exact problem. They rely on a unique dye sublimation process. Heat turns solid dyes into gas, locking the image permanently into an aluminum coating. The result is an artwork completely impervious to steam. Plus, recessed float mounts keep these metal pieces safely off damp walls. Ultimately, this prevents trapped moisture while adding a sleek silhouette that matches bathroom decor modern trends perfectly.
Alternatively, face-mounted acrylic prints work wonders. A thick plexiglass shield completely encases the high-quality image. Acrylic also possesses incredible optical properties for bathroom lighting. Rather than bouncing off the surface, light actually refracts internally. Consequently, the artwork appears to glow softly from within. This backlit effect creates a deeply serene, spa-like atmosphere.
However, even tough mediums require some basic care. Evaporating condensation can leave cloudy mineral spots behind. Therefore, wipe acrylic gently with a soft microfiber cloth. Above all, keep that exhaust fan running. Even durable prints need a dry environment to thrive long-term. Ultimately, these modern materials let you safely bring gallery-quality art into any room.
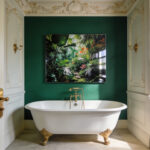
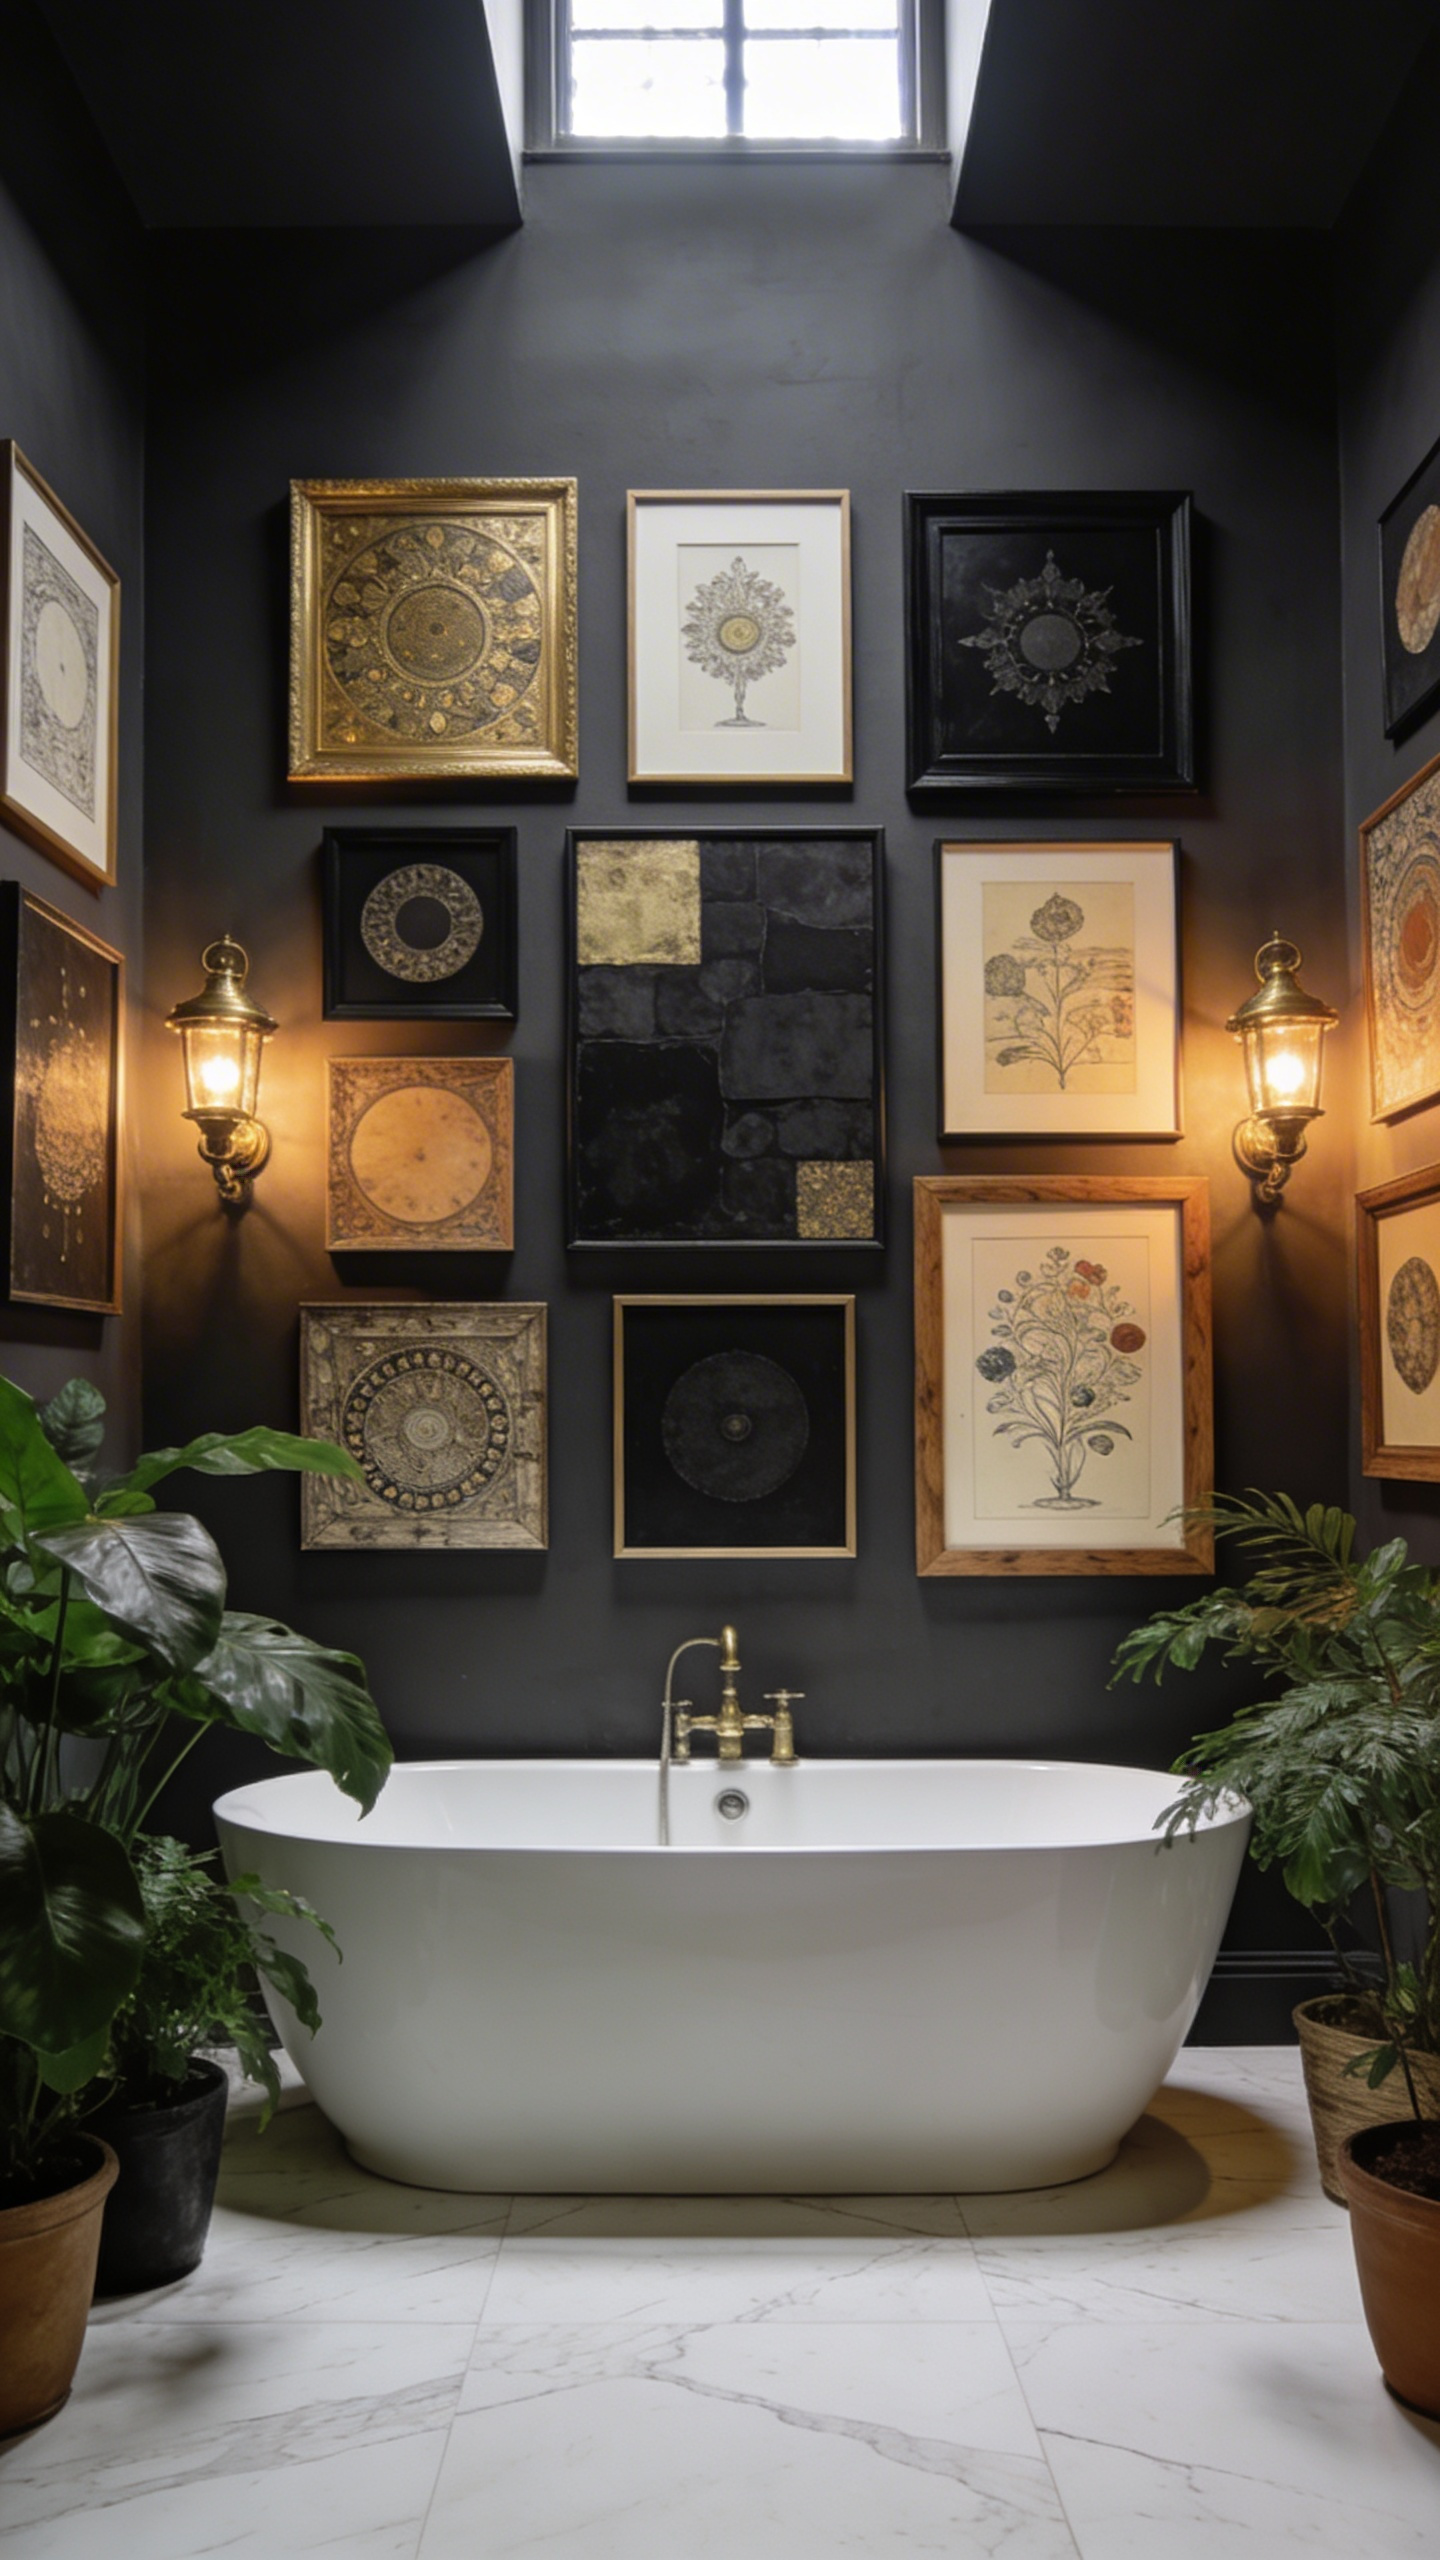
2. The Solitary Statement Canvas: Grounding Your Space with a Single High-Impact Piece Above the Tub
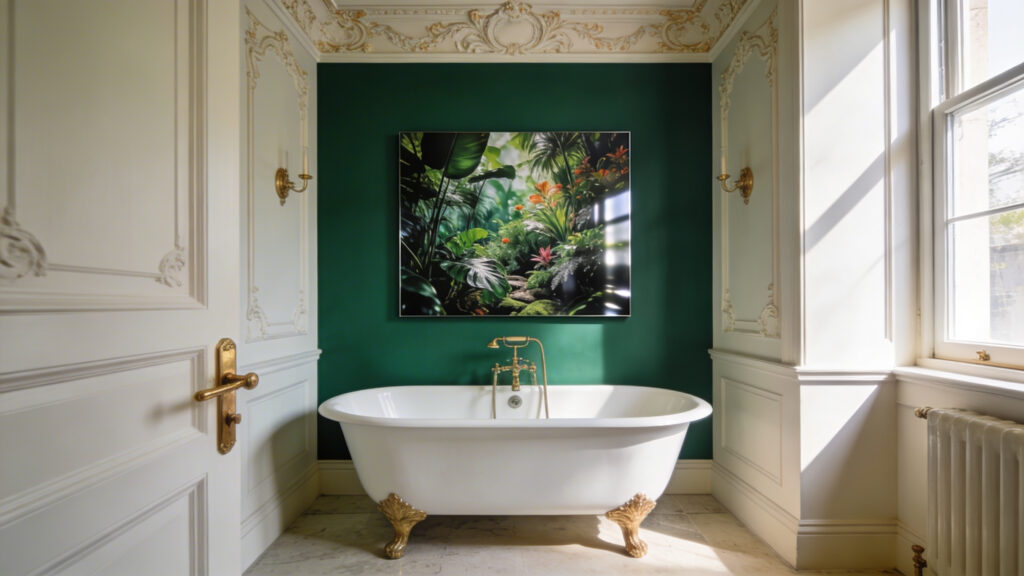
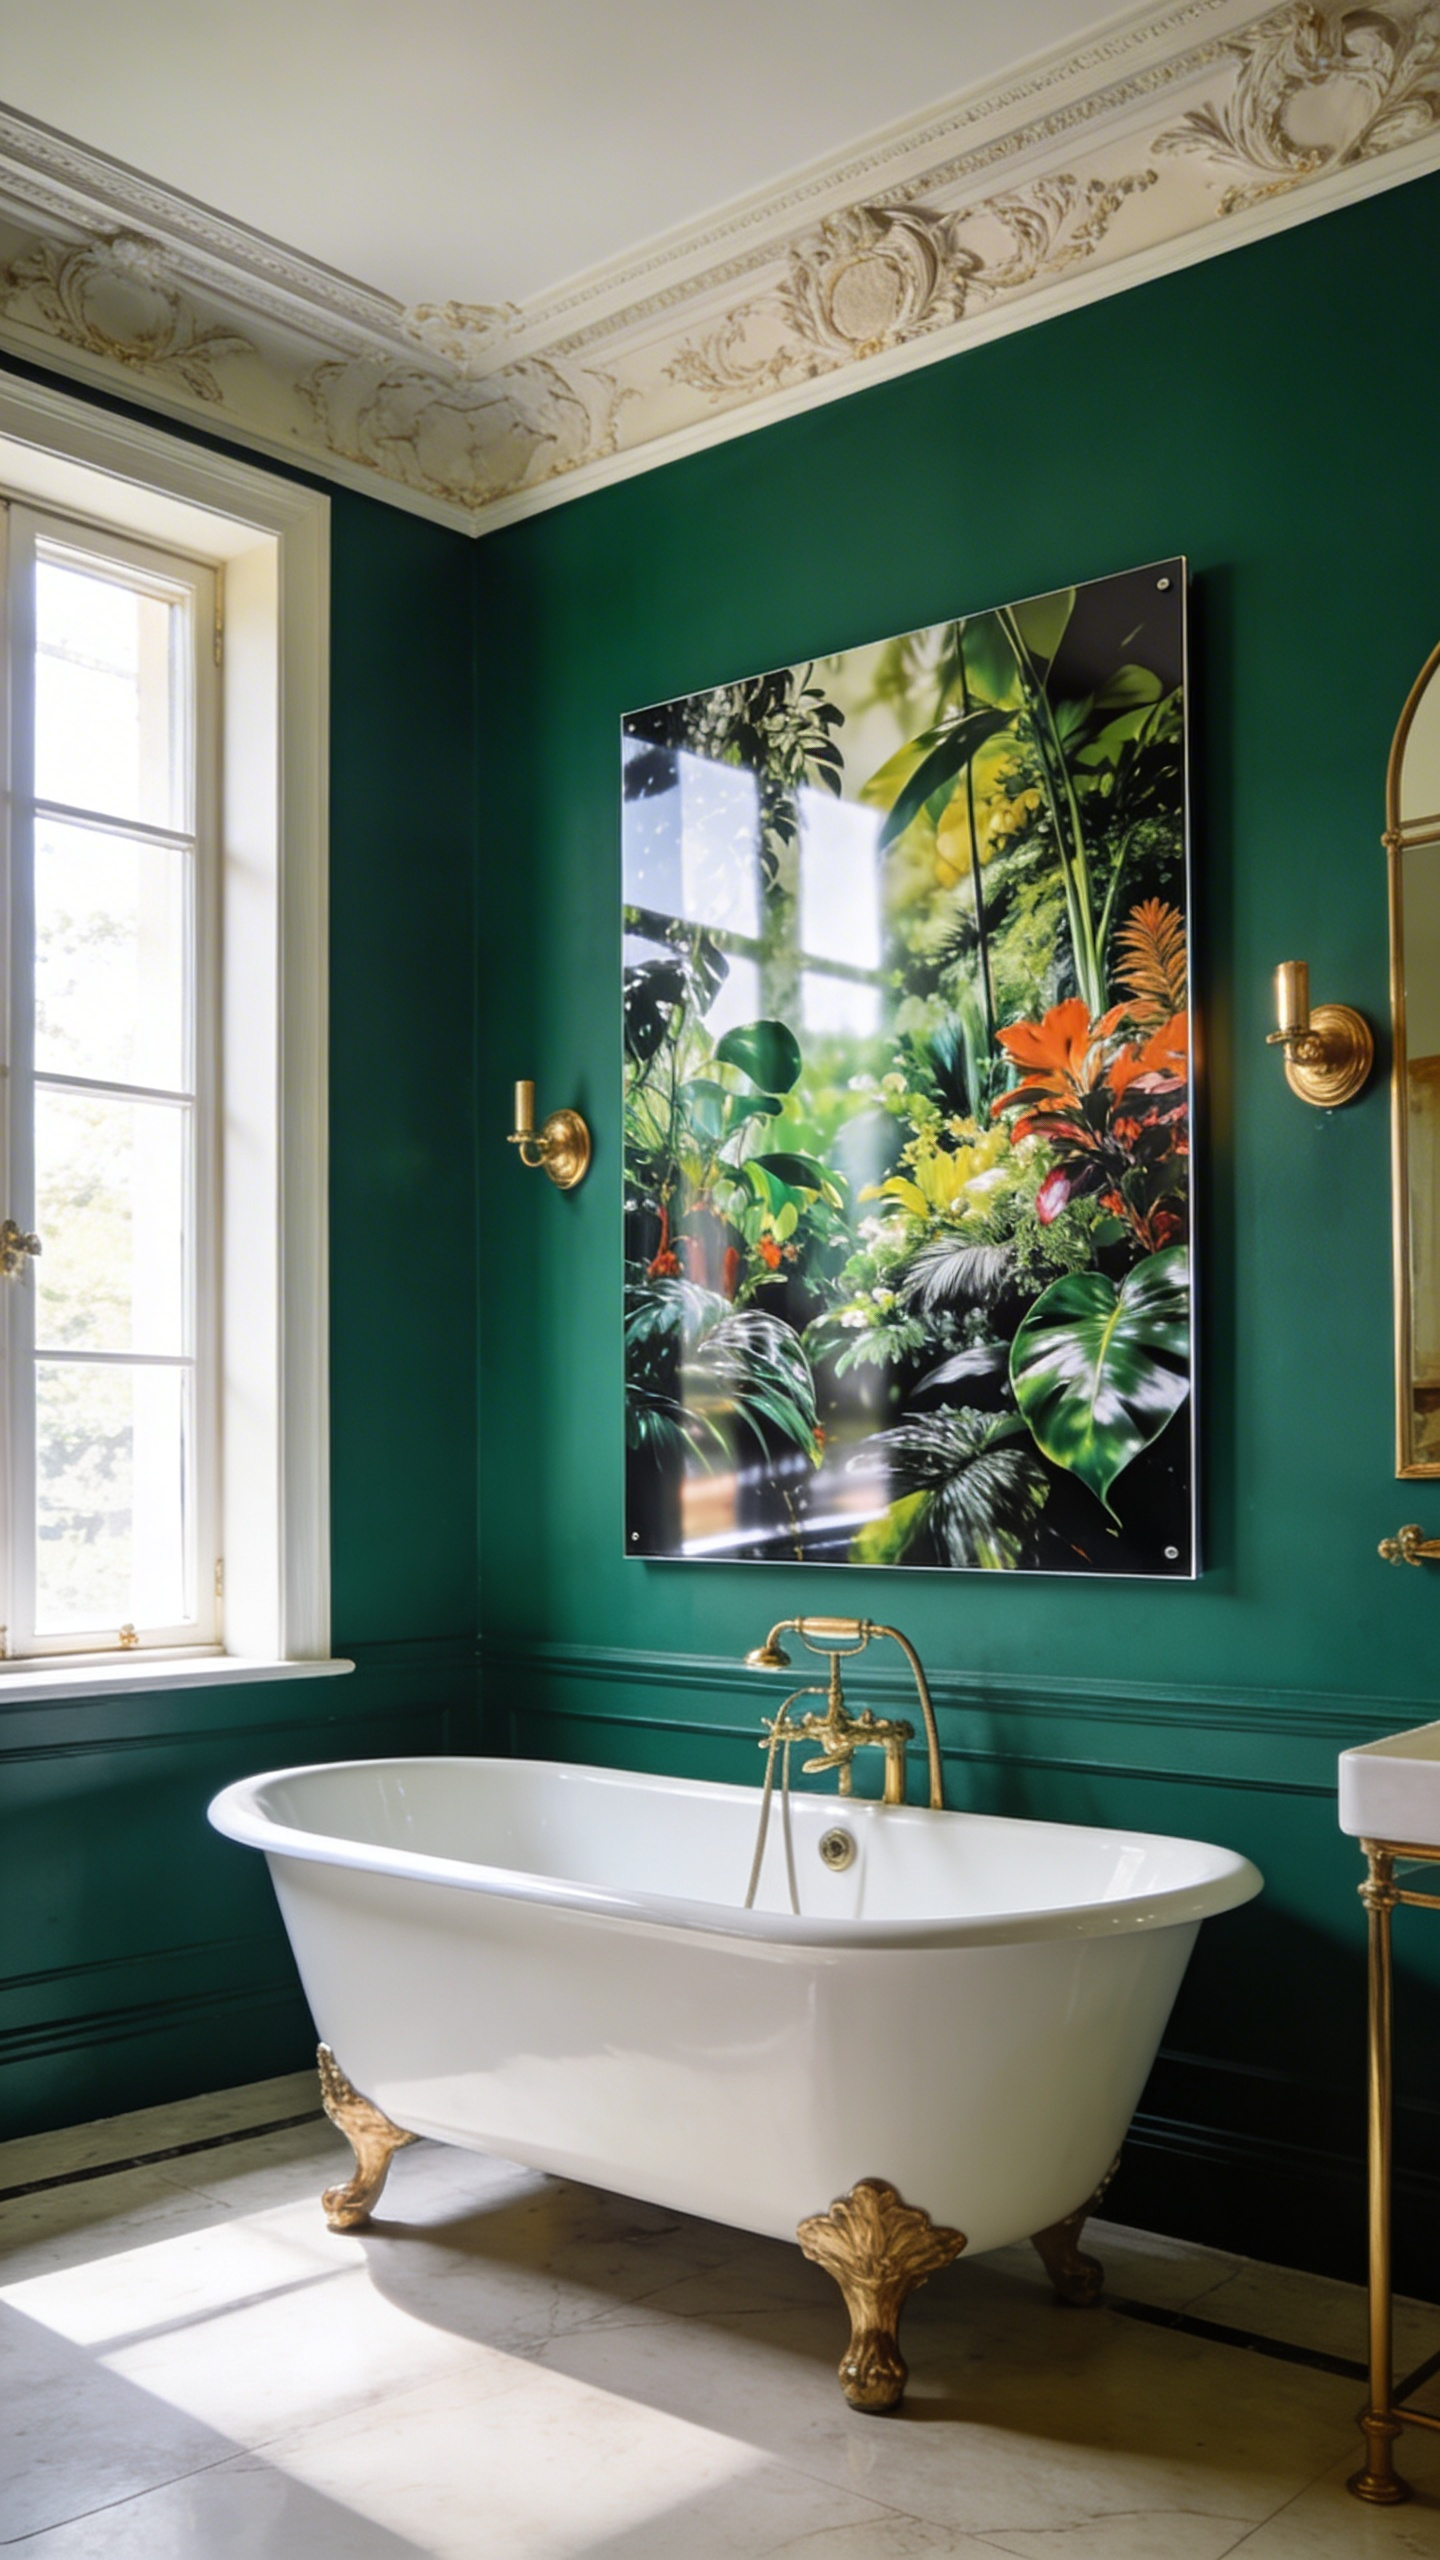
There is something incredibly luxurious about a massive piece of art over a bathtub. It revives the ancient grandeur of Roman bathhouses. Psychologically, a single large canvas gives your tired brain a soft place to land. It massively reduces your overall cognitive load. Indeed, one solitary piece feels far more restful than a busy gallery wall. Therefore, it replaces daily mental chatter with quiet, meditative focus.
Getting the scale right is absolutely crucial. The canvas should span roughly two-thirds of the bathtub’s total width. Otherwise, the art ends up looking awkwardly top-heavy or totally lost. Standard gallery heights simply do not work here, either. Instead, position the center of the piece right at a seated bather’s eye level. This lower height builds an intimate, relaxing connection with the artwork.
Hues matter just as much as placement. Cool blues and greens biologically lower your resting heart rate. Meanwhile, a deeply textured canvas brings physical warmth to a room full of cold porcelain. However, trapped moisture remains the biggest technical challenge. Always source exterior-grade canvases printed on durable, waterproof polyester. Finally, add small rubber spacers directly behind the wooden frame. Specifically, this tiny airflow gap stops condensation and prevents mold from destroying the back.
3. Floating Ledge Leaning: A Casual, Damage-Free Approach to Displaying Framed Prints
Bathrooms easily feel cold and clinical. Leaning art on a floating ledge instantly softens the room. It gives off a relaxed, artist-studio vibe. In fact, a slight tilt breaks up rigid, predictable tile lines beautifully.
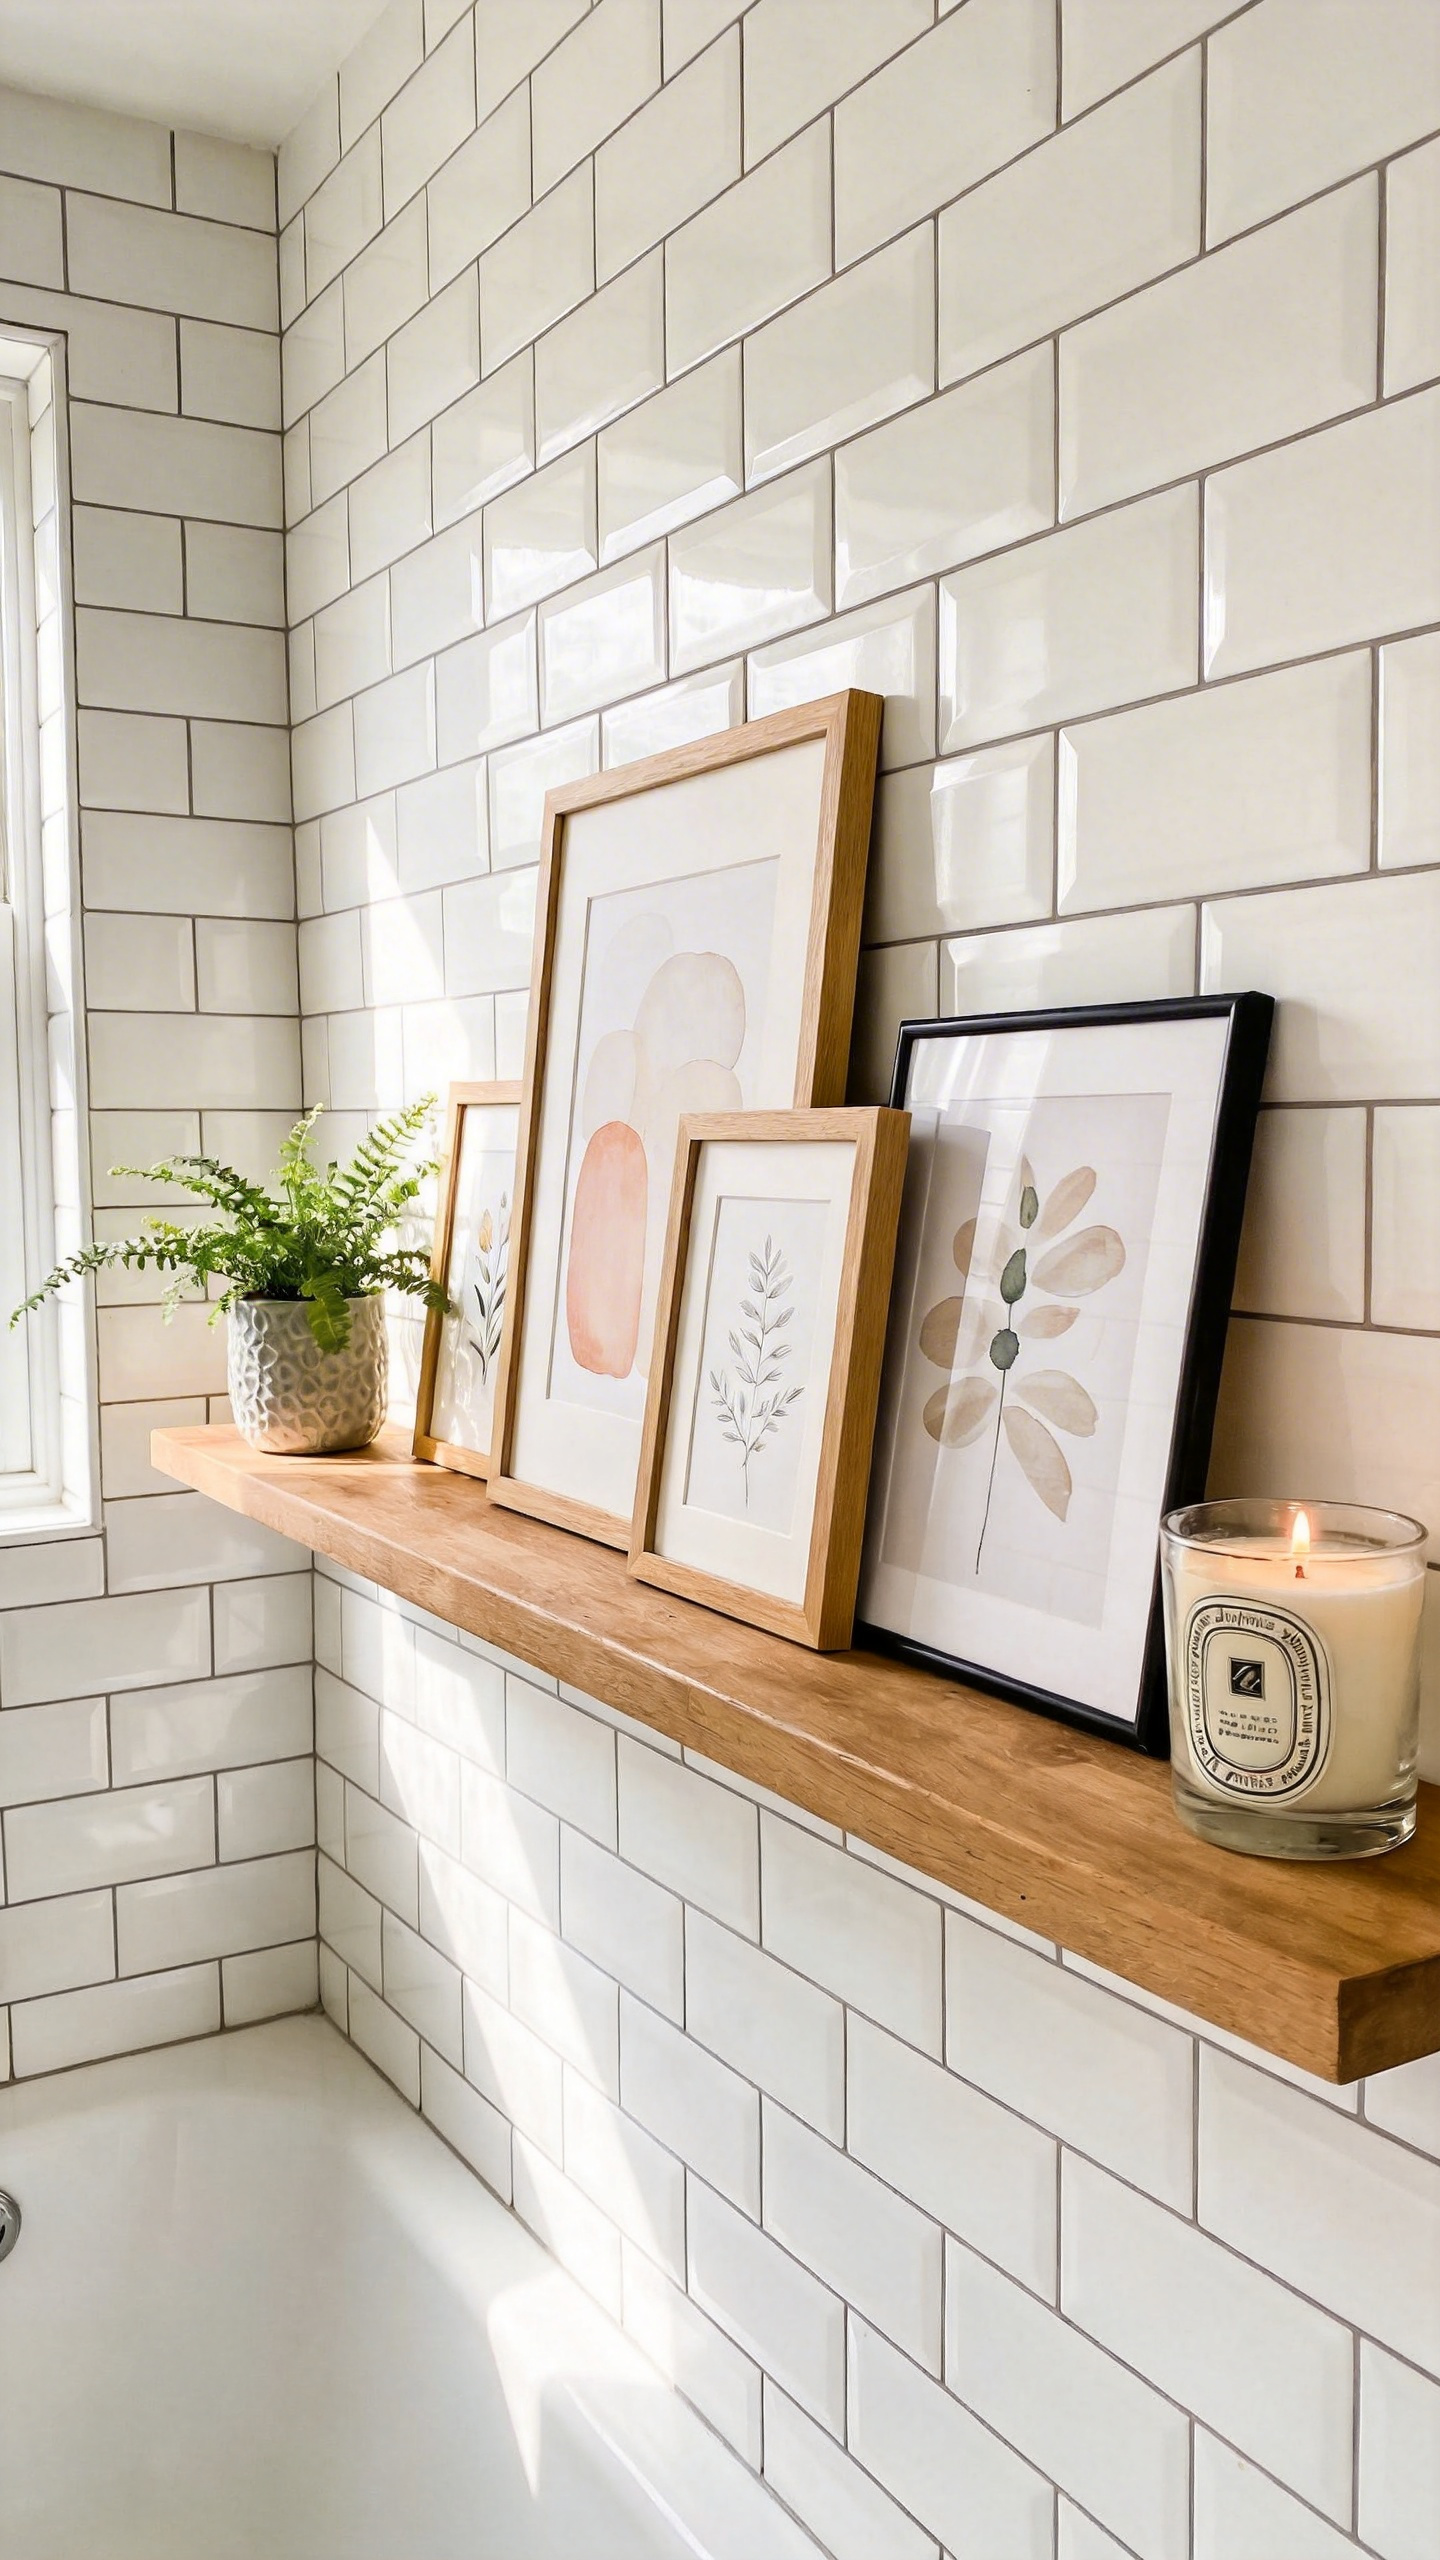
Drilling into bathroom tile is a terrifying prospect. Fortunately, modern adhesive technology offers a brilliant, damage-free alternative. You can use moisture-resistant VHB tape to secure sleek aluminum ledges directly to porcelain. Alternatively, rest your pieces on existing wainscoting trim.
Next, try layering your frames. A rigid, single-file row looks stiff and unnatural. Instead, overlap your frames by an inch or two. Put a small, textured print right in front of a larger landscape. This simple trick creates real physical depth and dynamic shadows. Additionally, integrate tactile elements to anchor the arrangement. A ribbed apothecary jar or a trailing pothos plant softens sharp frame corners beautifully. These additions complement any small bathroom decor scheme perfectly.
Finally, remember to swap out standard glass. Replace it with lightweight, UV-protective acrylic. Acrylic strongly resists condensation buildup. More importantly, it will not shatter into a million pieces if a frame slips onto the hard floor. Ultimately, pairing waterproof prints with an adhesive ledge ensures casual, lasting elegance.
4. Powder Room Portraits: Why Half-Baths Are the Perfect Canvas for Intimate, Character-Rich Subjects
Powder rooms are fascinating spaces. They are essentially tiny, captive chambers for your guests. The limited square footage forces a very close physical distance between the viewer and the wall. Therefore, character-rich portraits truly shine here. Forced proximity transforms a portrait from mere decoration into an engaging visual conversation.
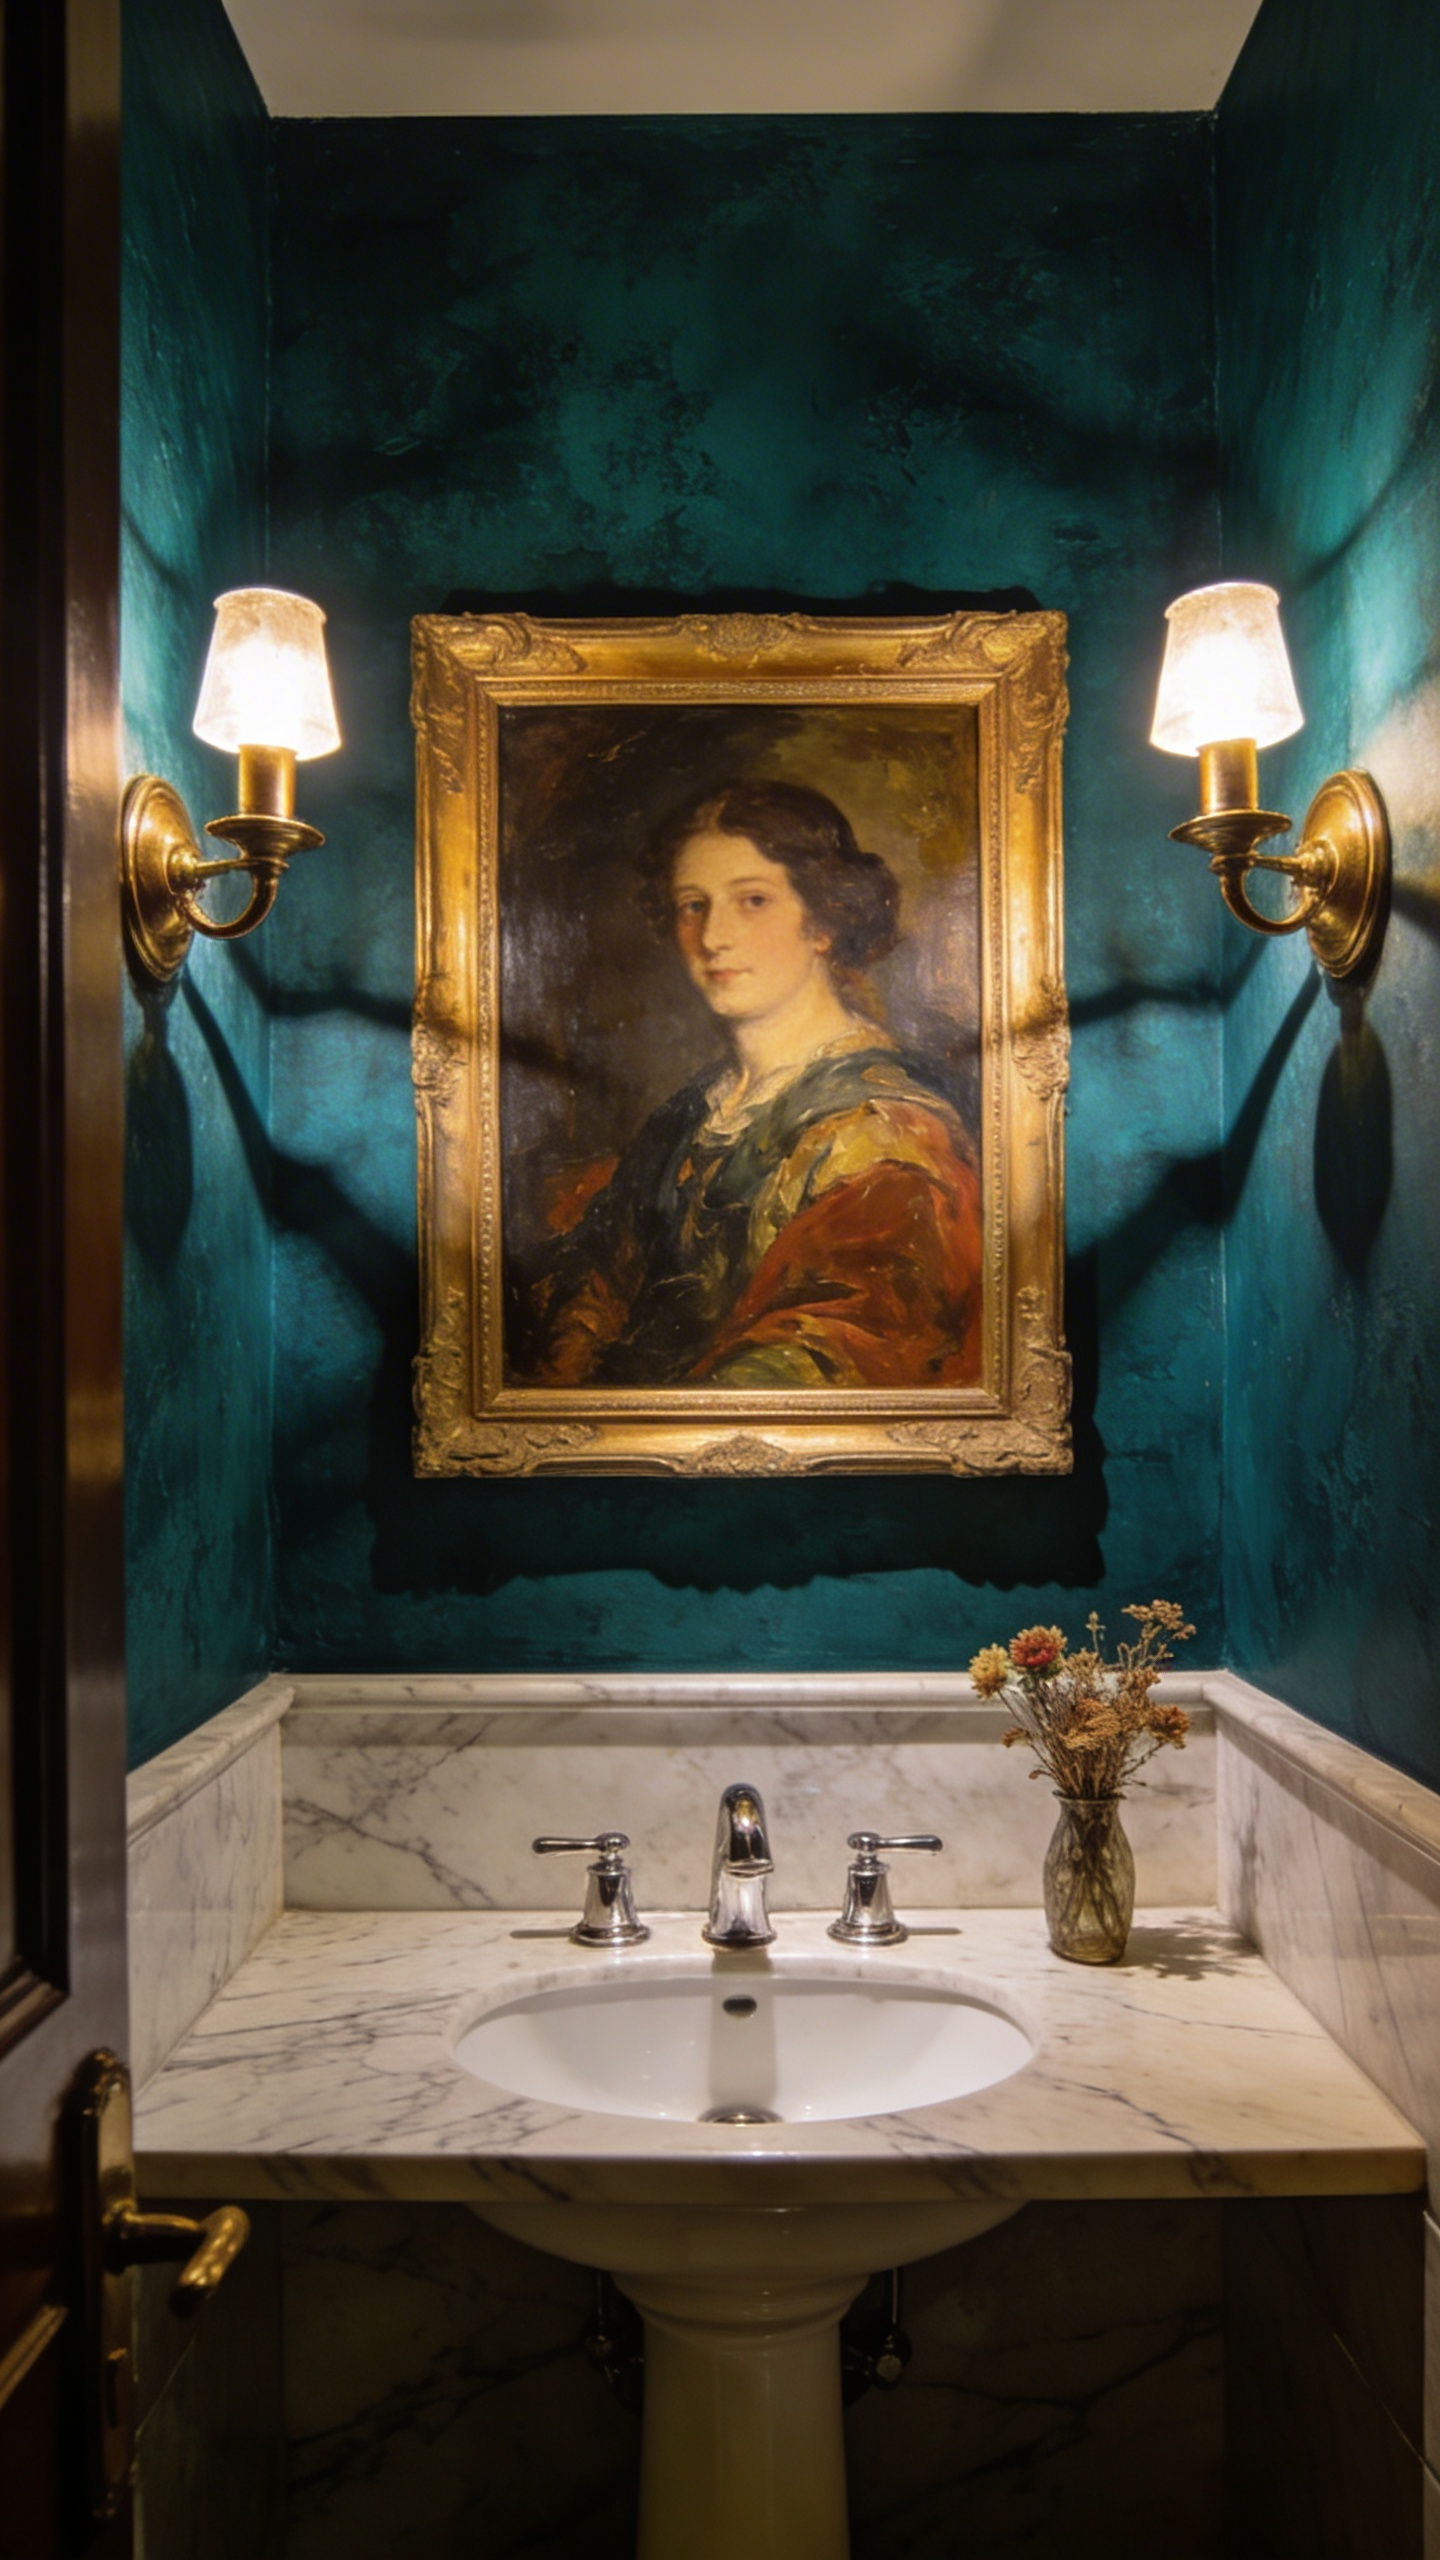
A classic portrait completely shifts a small room’s energy. Direct eye contact from a painted subject adds a quirky, human element. It acts as a fun proxy for your own personality. Since half-baths do not have showers, you also bypass the usual steam damage. Consequently, you can safely hang traditional paper prints or delicate original oils.
I actually love breaking the rules by hanging one beautifully oversized portrait. A massive face makes a tiny room feel instantly grand and deeply curated. Next, frame the artwork with eye-level sconces instead of harsh overhead lights. This warm, targeted glow brings the subject’s features to life. Finally, pair it with a tactile, cold brass frame to complete the immersive experience.
5. Budget-Friendly Vintage Reproductions: Achieving Curated Sophistication Without Restricting Humidity Anxiety
Nobody wants to hang a valuable original painting next to a humid shower. That kind of humidity anxiety ruins the joy of decorating. Luckily, digital archives from the Met and the Rijksmuseum are completely free. You can download high-resolution classic masterpieces legally. Then, print moody Dutch landscapes on cheap, synthetic polyester-blend canvas. This modern material beautifully resists the moisture and sagging that ruins paper.
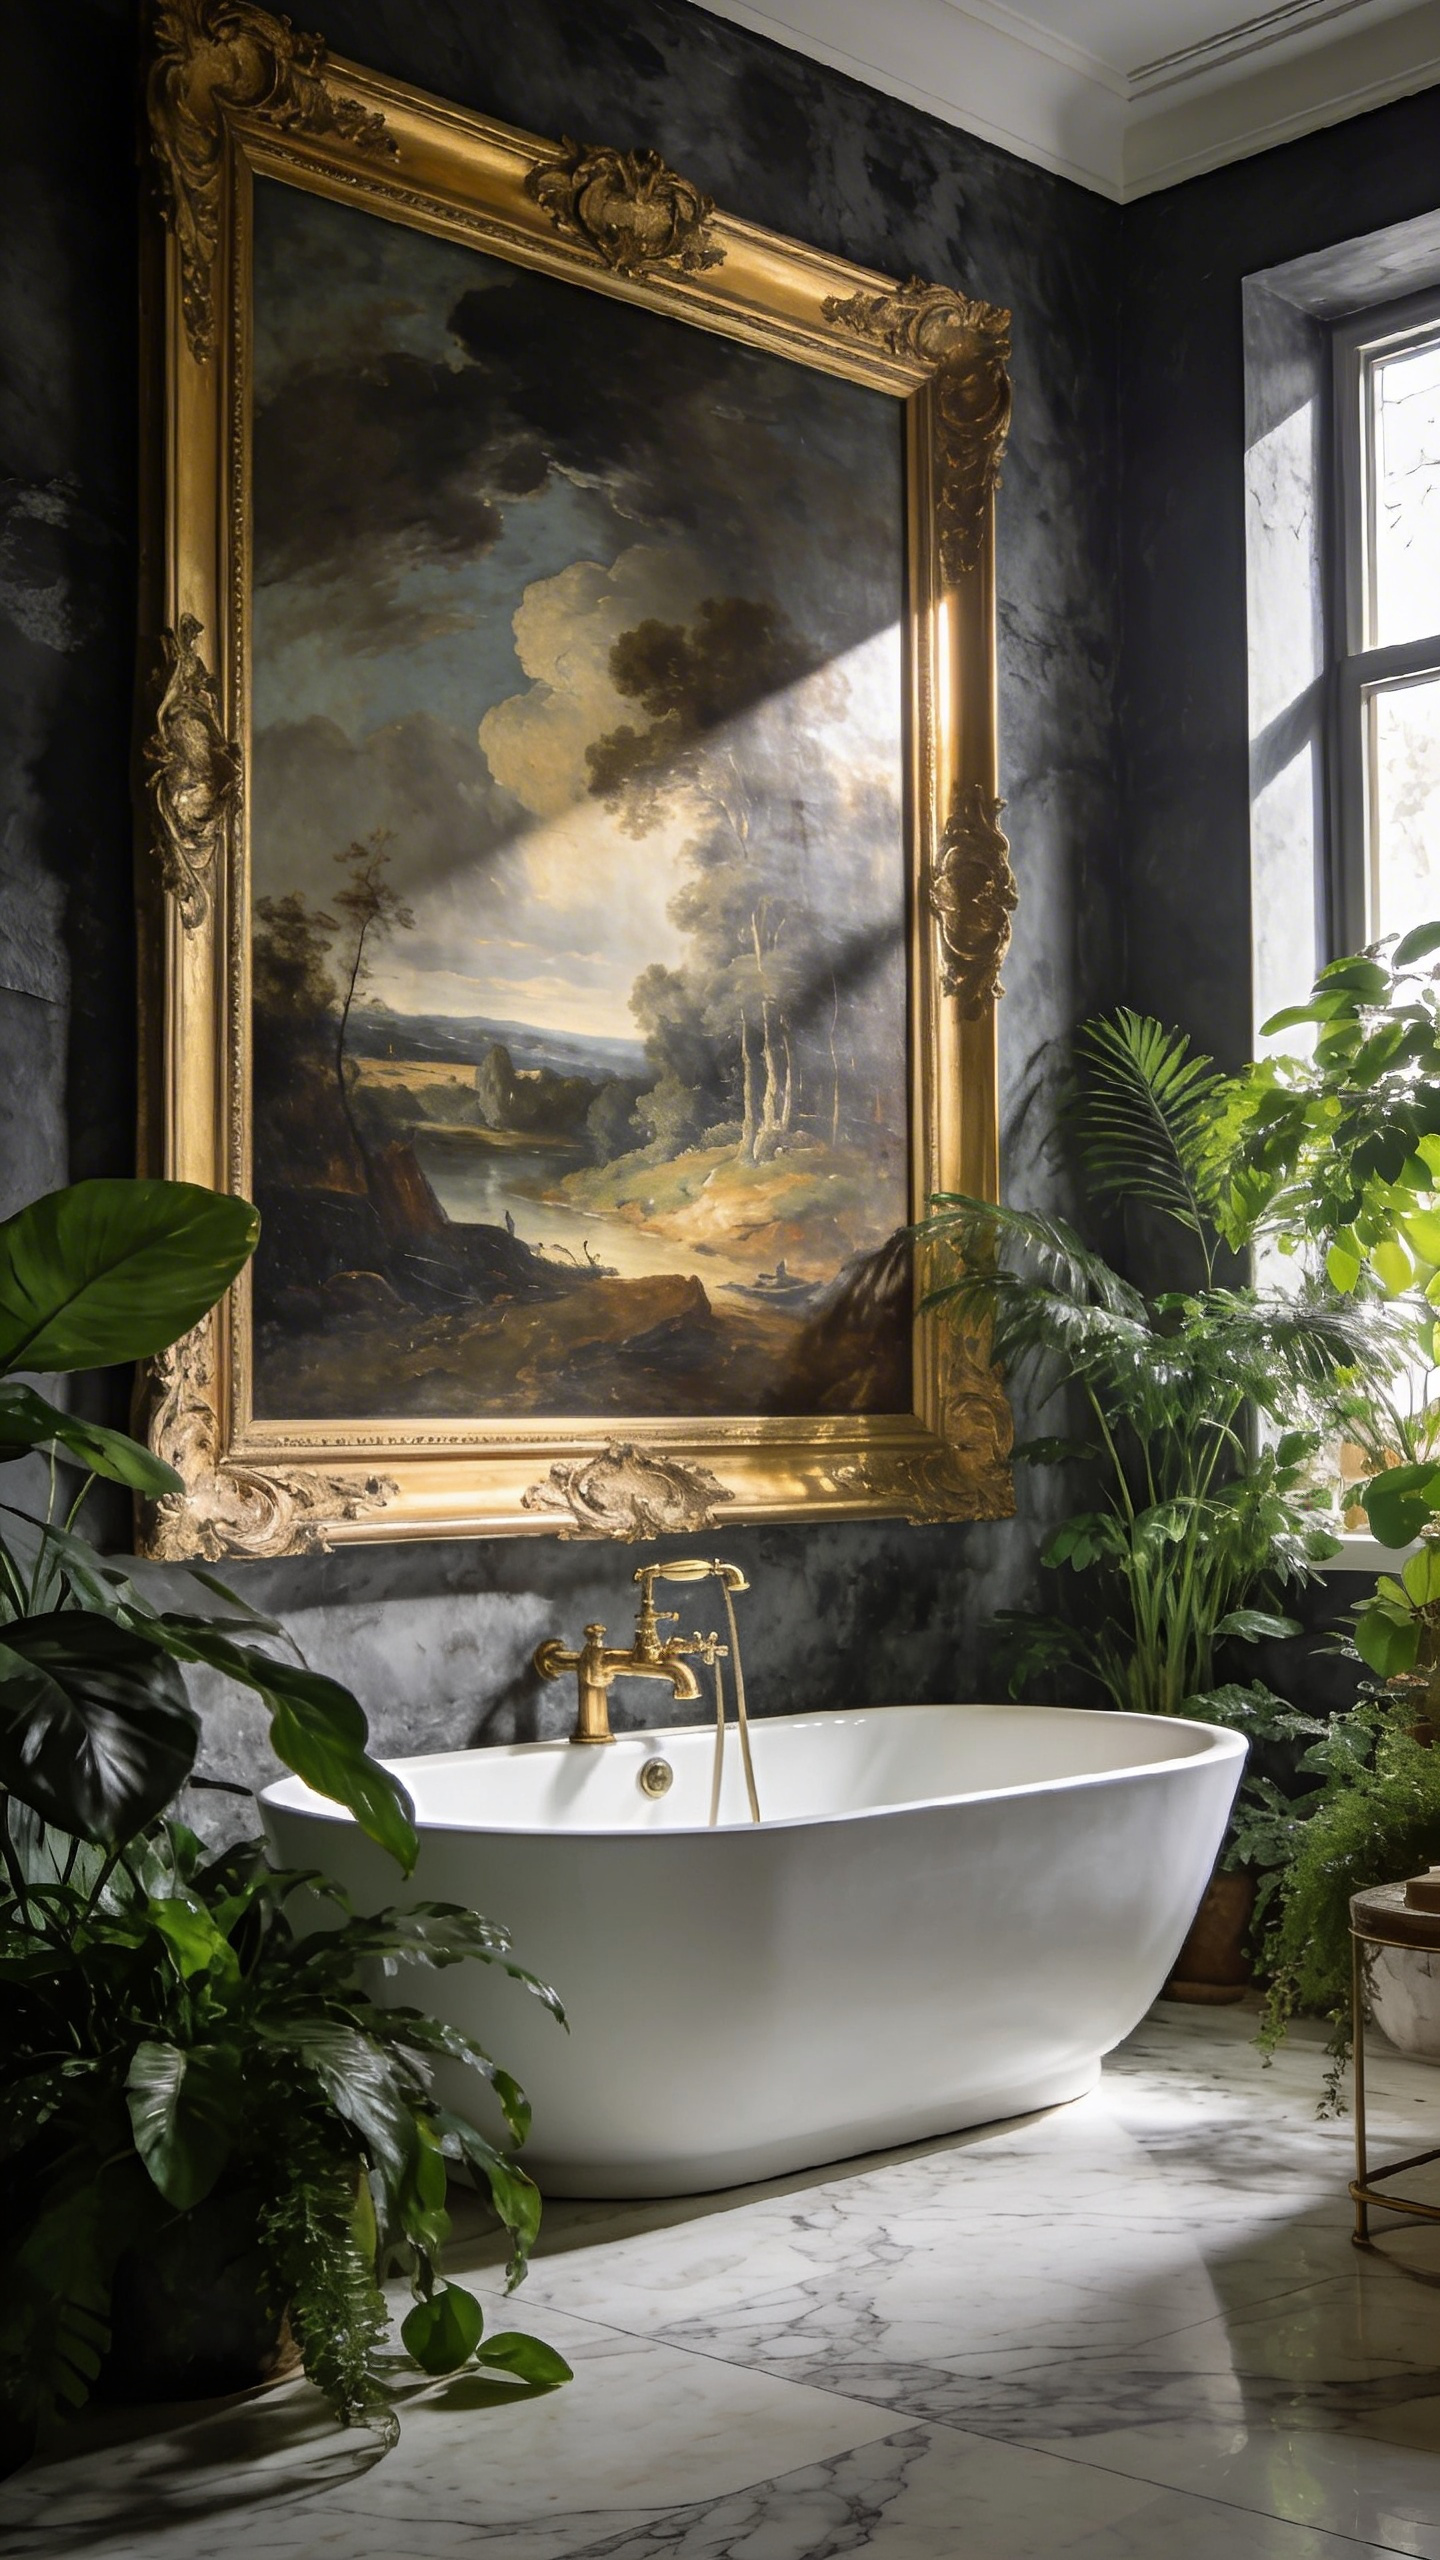
However, flat prints usually lack a vintage soul. To fix this, brush a clear matte acrylic gel medium straight over the print. Follow the original brushstrokes to create actual, physical texture. Furthermore, this gel acts as a permanent waterproof sealant. It perfectly protects the pigment from lingering steam. When warm bathroom lighting hits the gel, realistic highlights emerge. Indeed, the cheap print suddenly mimics a highly valuable antique painting.
Next, find some heavy, vintage resin frames at a local thrift store. Resin brings necessary maximalist weight to sterile spaces, and it is entirely immune to rot. Additionally, leave the back of the frame unsealed so the canvas can breathe. Ultimately, this clever strategy achieves high-end sophistication with zero stress.
Phase II: Intermediate Development—Scale, Lighting, and Thematic Movement
At a certain point, you move beyond just hanging pictures. You start integrating art seamlessly into the architecture. Most people treat bathroom walls as an afterthought. Instead, we must treat the wall as a deliberate canvas built for bespoke finishes.
Scale plays a surprisingly massive role in small spaces. Cramped powder rooms actually handle oversized art beautifully. Placing a massive canvas that covers two-thirds of the wall acts like a window. Ultimately, it pushes the boundaries outward so the room feels like a real gallery.
Next, you have to tackle your gallery lighting. High humidity makes standard artificial light look incredibly muddy. Therefore, buy bulbs with a Color Rendering Index (CRI) of 95 or higher. This ensures deep teals and rich reds pop properly. Also, aim your fixtures using the 30-degree rule. Angling a narrow beam at 30 degrees kills specular glare on the glass. Thus, the light washes the canvas perfectly without blinding you.
Finally, think about thematic movement. Hanging a three-piece triptych creates a clear visual pathway. Visually, fluid kinetic art perfectly mimics the flow of water. It gently guides you from the functional sink area straight to the relaxing tub zone.
6. Sizing for the Over-Toilet Void: Proportional Placement Strategies for Stubborn Blank Spaces
That blank wall above the toilet is notoriously awkward. It sits right at eye level, yet it feels strange to decorate. You have to balance the heavy porcelain tank with proportional artwork. First, avoid pieces that are too skinny or overly wide. Experts recommend spanning roughly two-thirds of the tank’s width. For example, a twenty-inch tank pairs perfectly with a twelve-inch frame.

Hanging height also gets tricky here. Standard gallery rules say to hang art fifty-seven inches high. However, you need to leave eight to twelve inches of clearance above the toilet lid. Otherwise, the frame looks like it is floating awkwardly away. In guest powder rooms, try lowering the art by two inches. This caters perfectly to a seated sightline.
Historically, people just ignored this wall entirely. Today, filling it introduces much-needed personality. A matte-finished canvas works great here because it naturally dampens bathroom echoes. Moreover, nature-inspired patterns actually reduce physiological stress levels. Consequently, that stubborn blank space easily becomes a calming focal point.
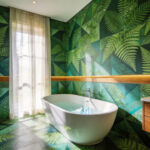
7. Botanical and Organic Curation: Amplifying a Tranquil, Spa-Like Atmosphere Through Natural Motifs
Creating a true sanctuary requires more than just nice tile. Human brains are hard-wired to relax when they see natural patterns. In fact, looking at the mid-range fractals in fern leaves drops physiological stress drastically. Macro photography of leaves acts as a biological shortcut to relaxation.
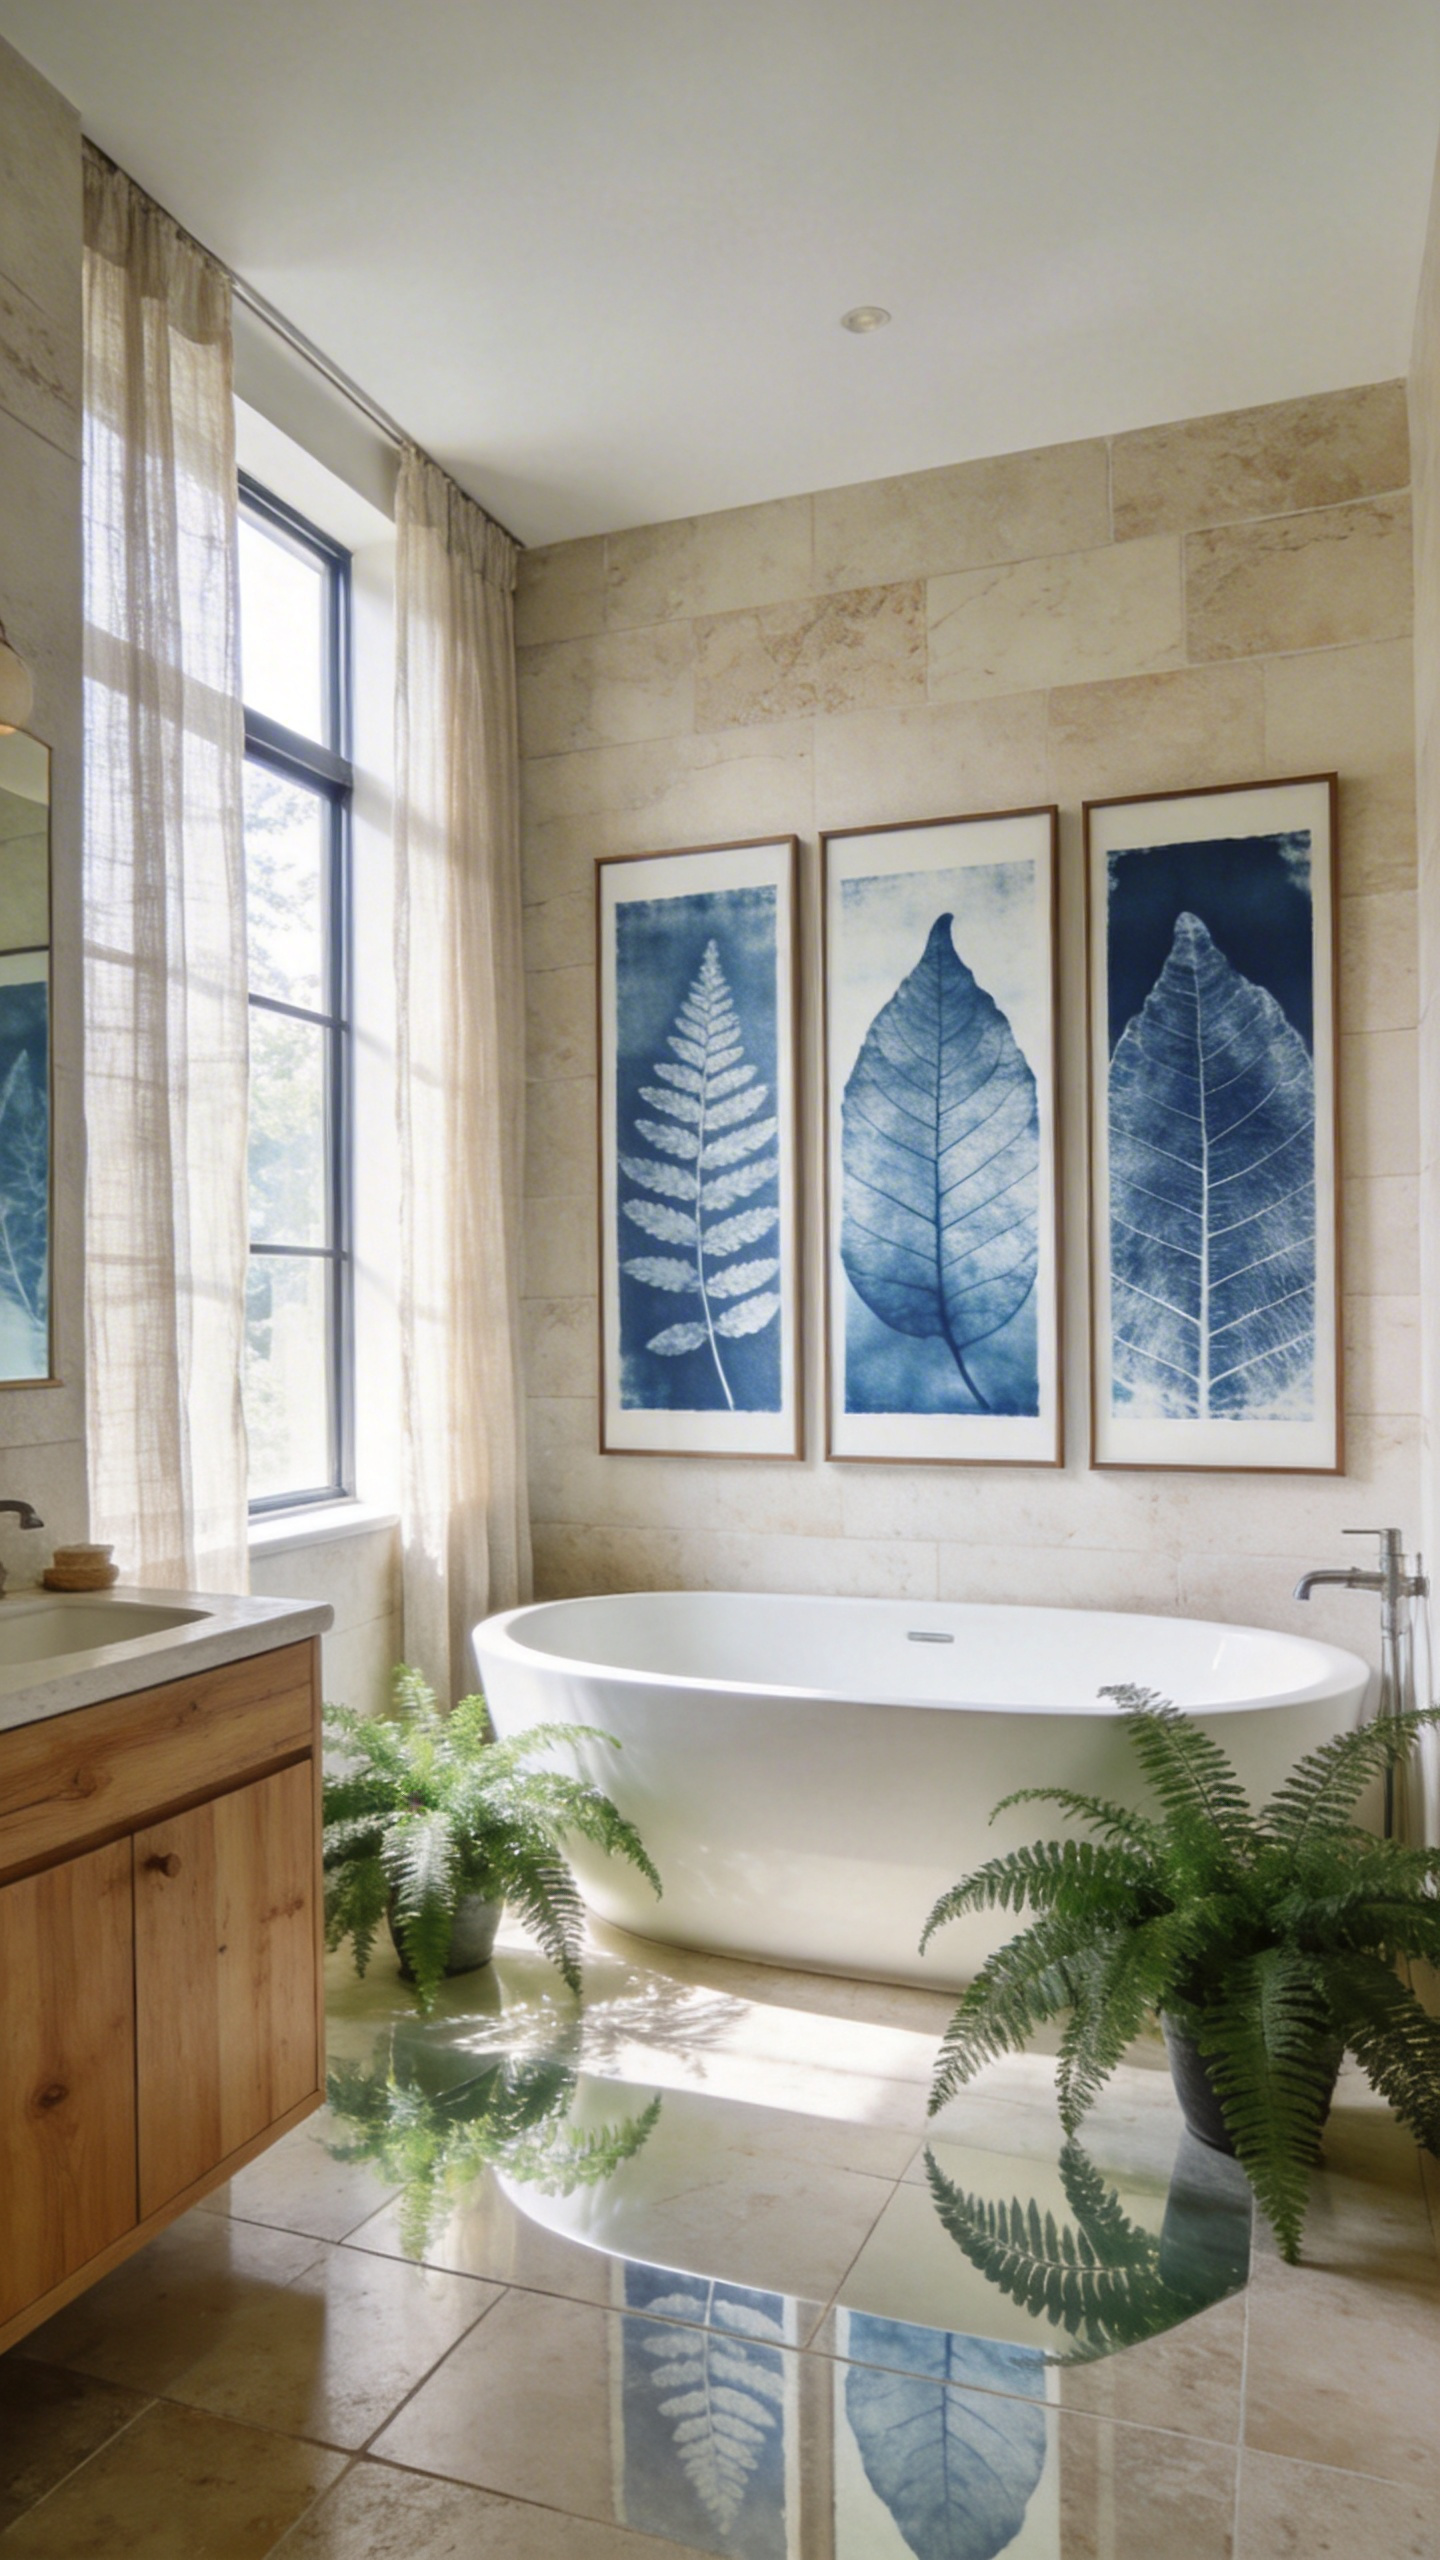
Historically, cyanotypes fit wet environments perfectly. Their deep Prussian Blue tones evoke the feeling of water beautifully. Bathrooms are packed with hard tile and cold chrome. Therefore, organic art printed on handmade paper adds a vital, soft contrast. The rough edges of Japanese Washi paper look stunning here.
Instead of one massive piece, try hanging a vertical trio of botanical prints. This classic design trick draws the eye upward and makes the room feel much taller. However, preservation remains absolutely critical. Always use museum-quality frames with sealed moisture-barrier backings. Similarly, UV-filtering acrylic stops the glass from fogging up during a hot shower. Finally, mix your framed prints with preserved moss panels to add incredible texture.
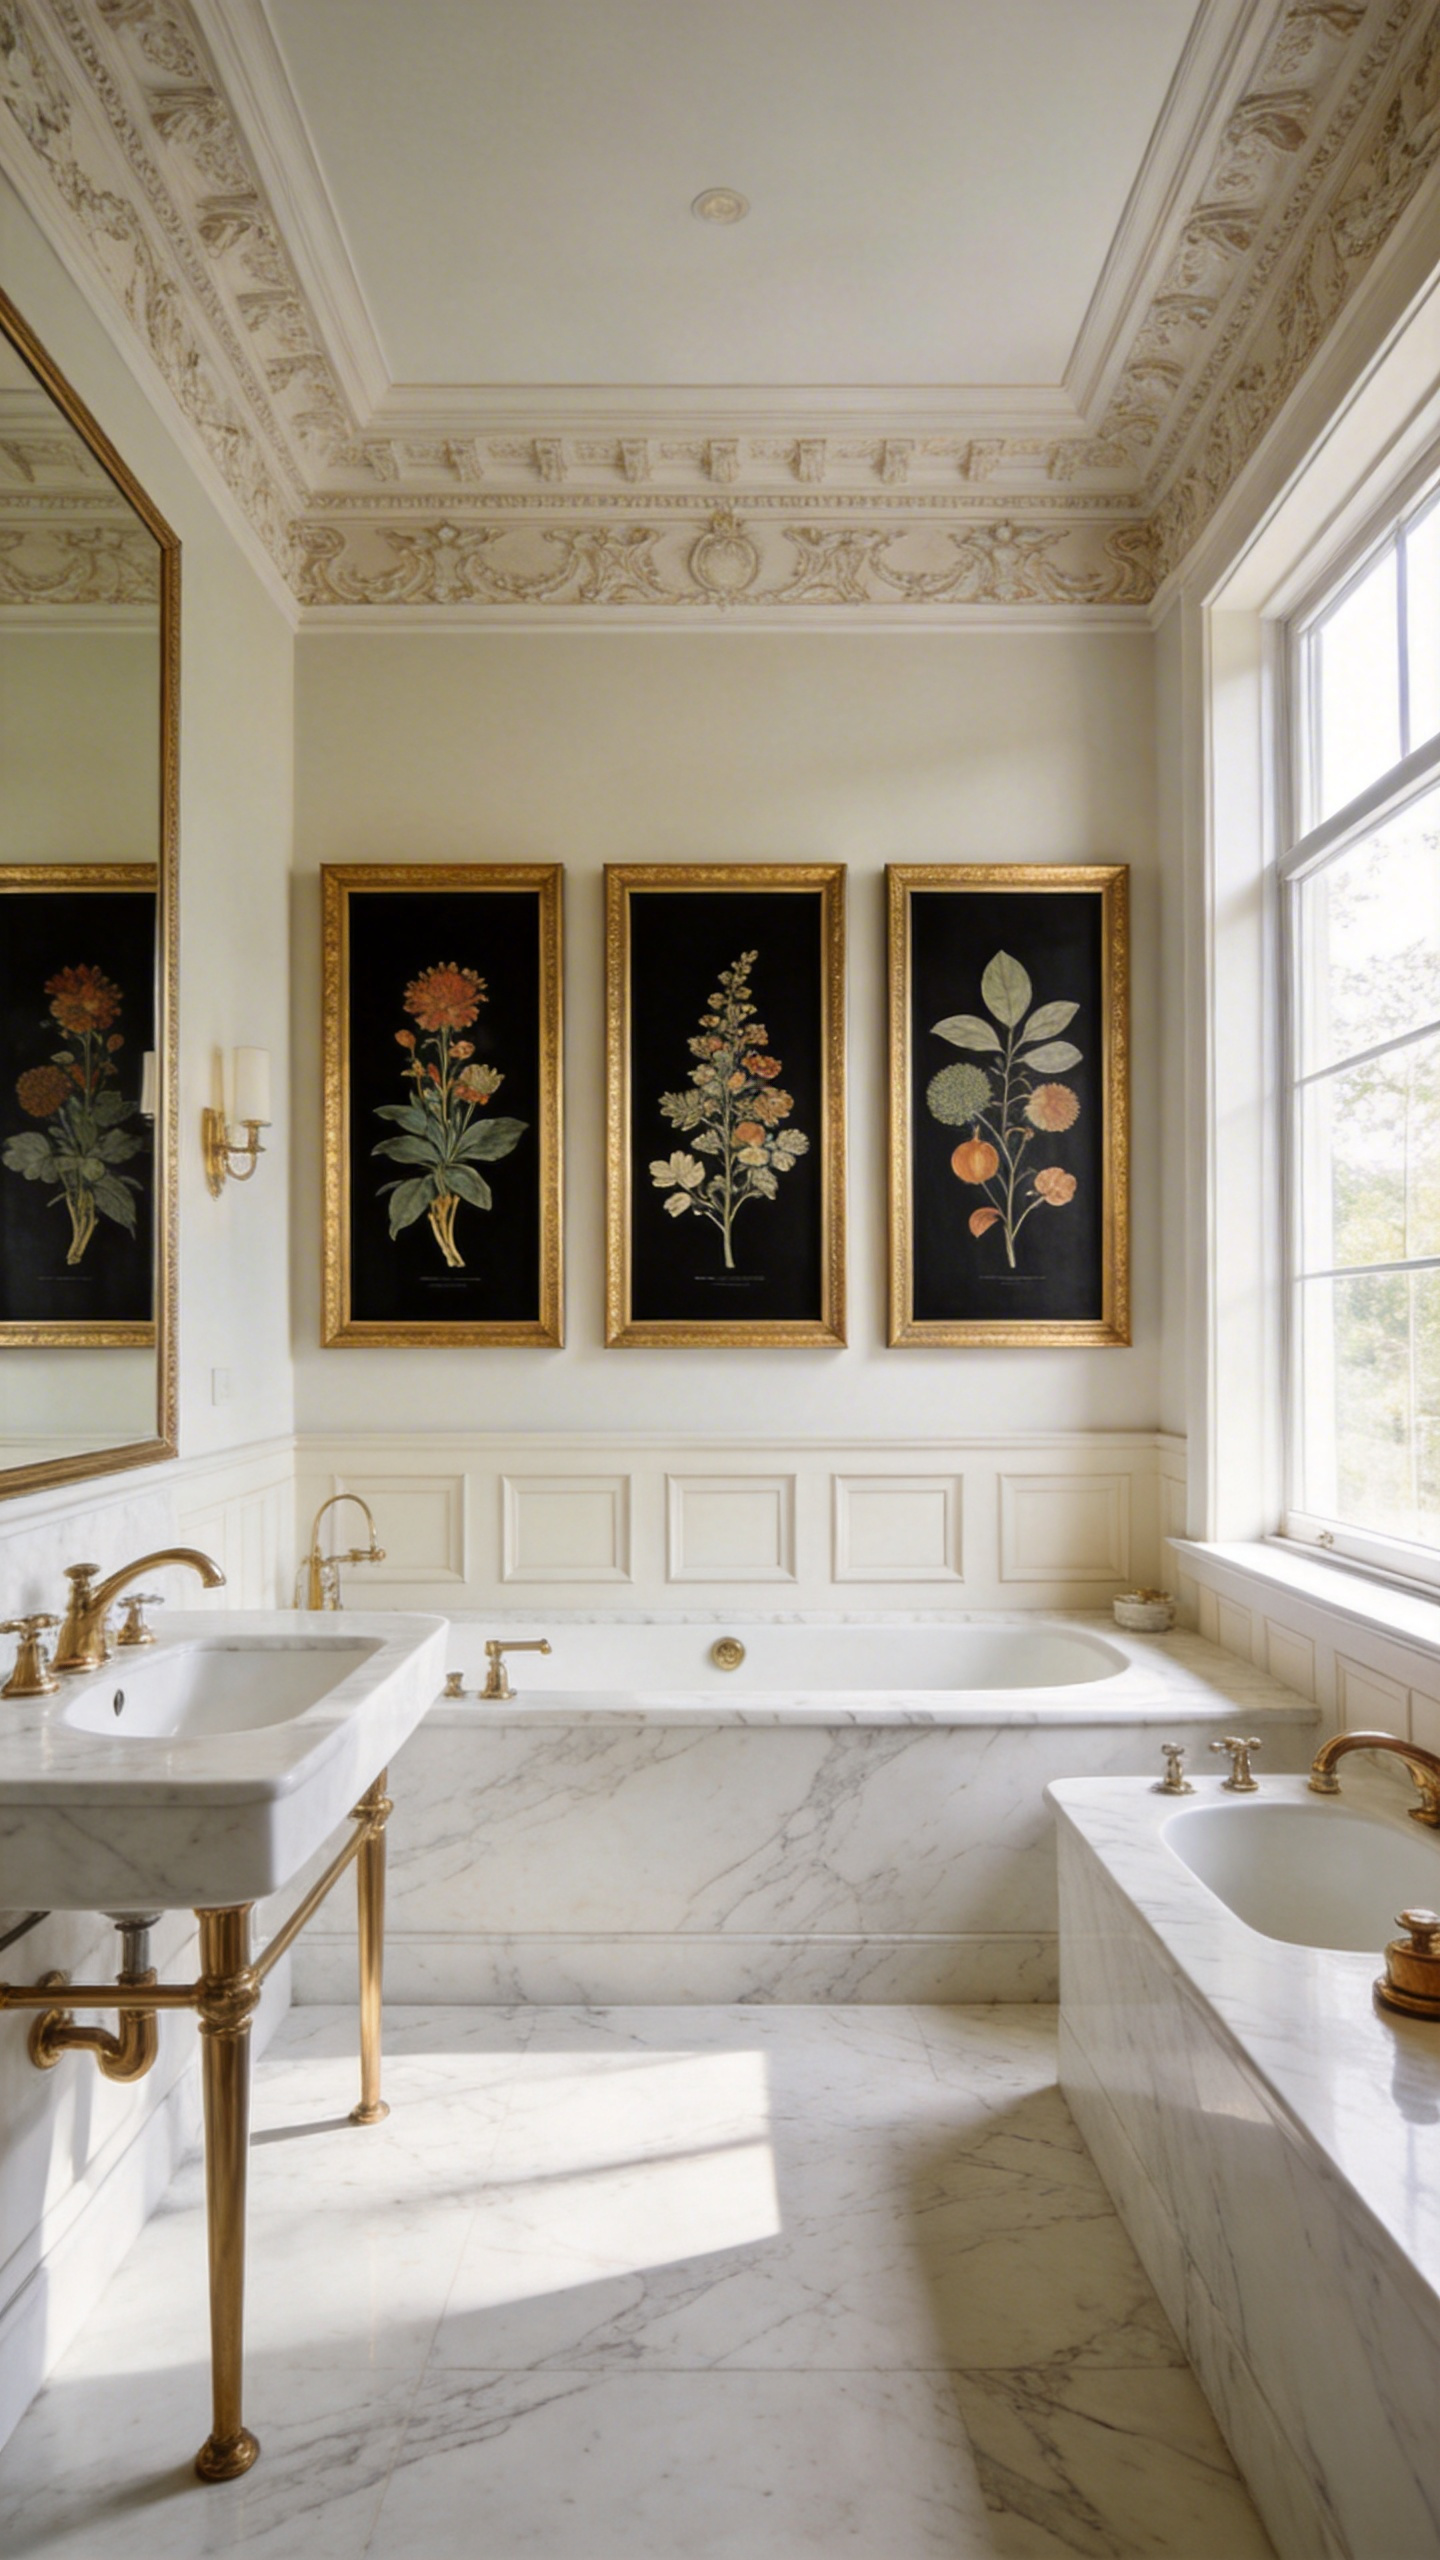
8. The Vanity-Flanking Duo: Using Symmetrical Art Pairings to Elevate the Mirror Space
Morning routines are chaotic enough. Framing your vanity mirror with a symmetrical pair of prints helps lower your cognitive load. Bilateral symmetry tells the human brain that everything is organized. It immediately creates a calming atmosphere. In fact, your mirror simply becomes the center of a functional triptych.
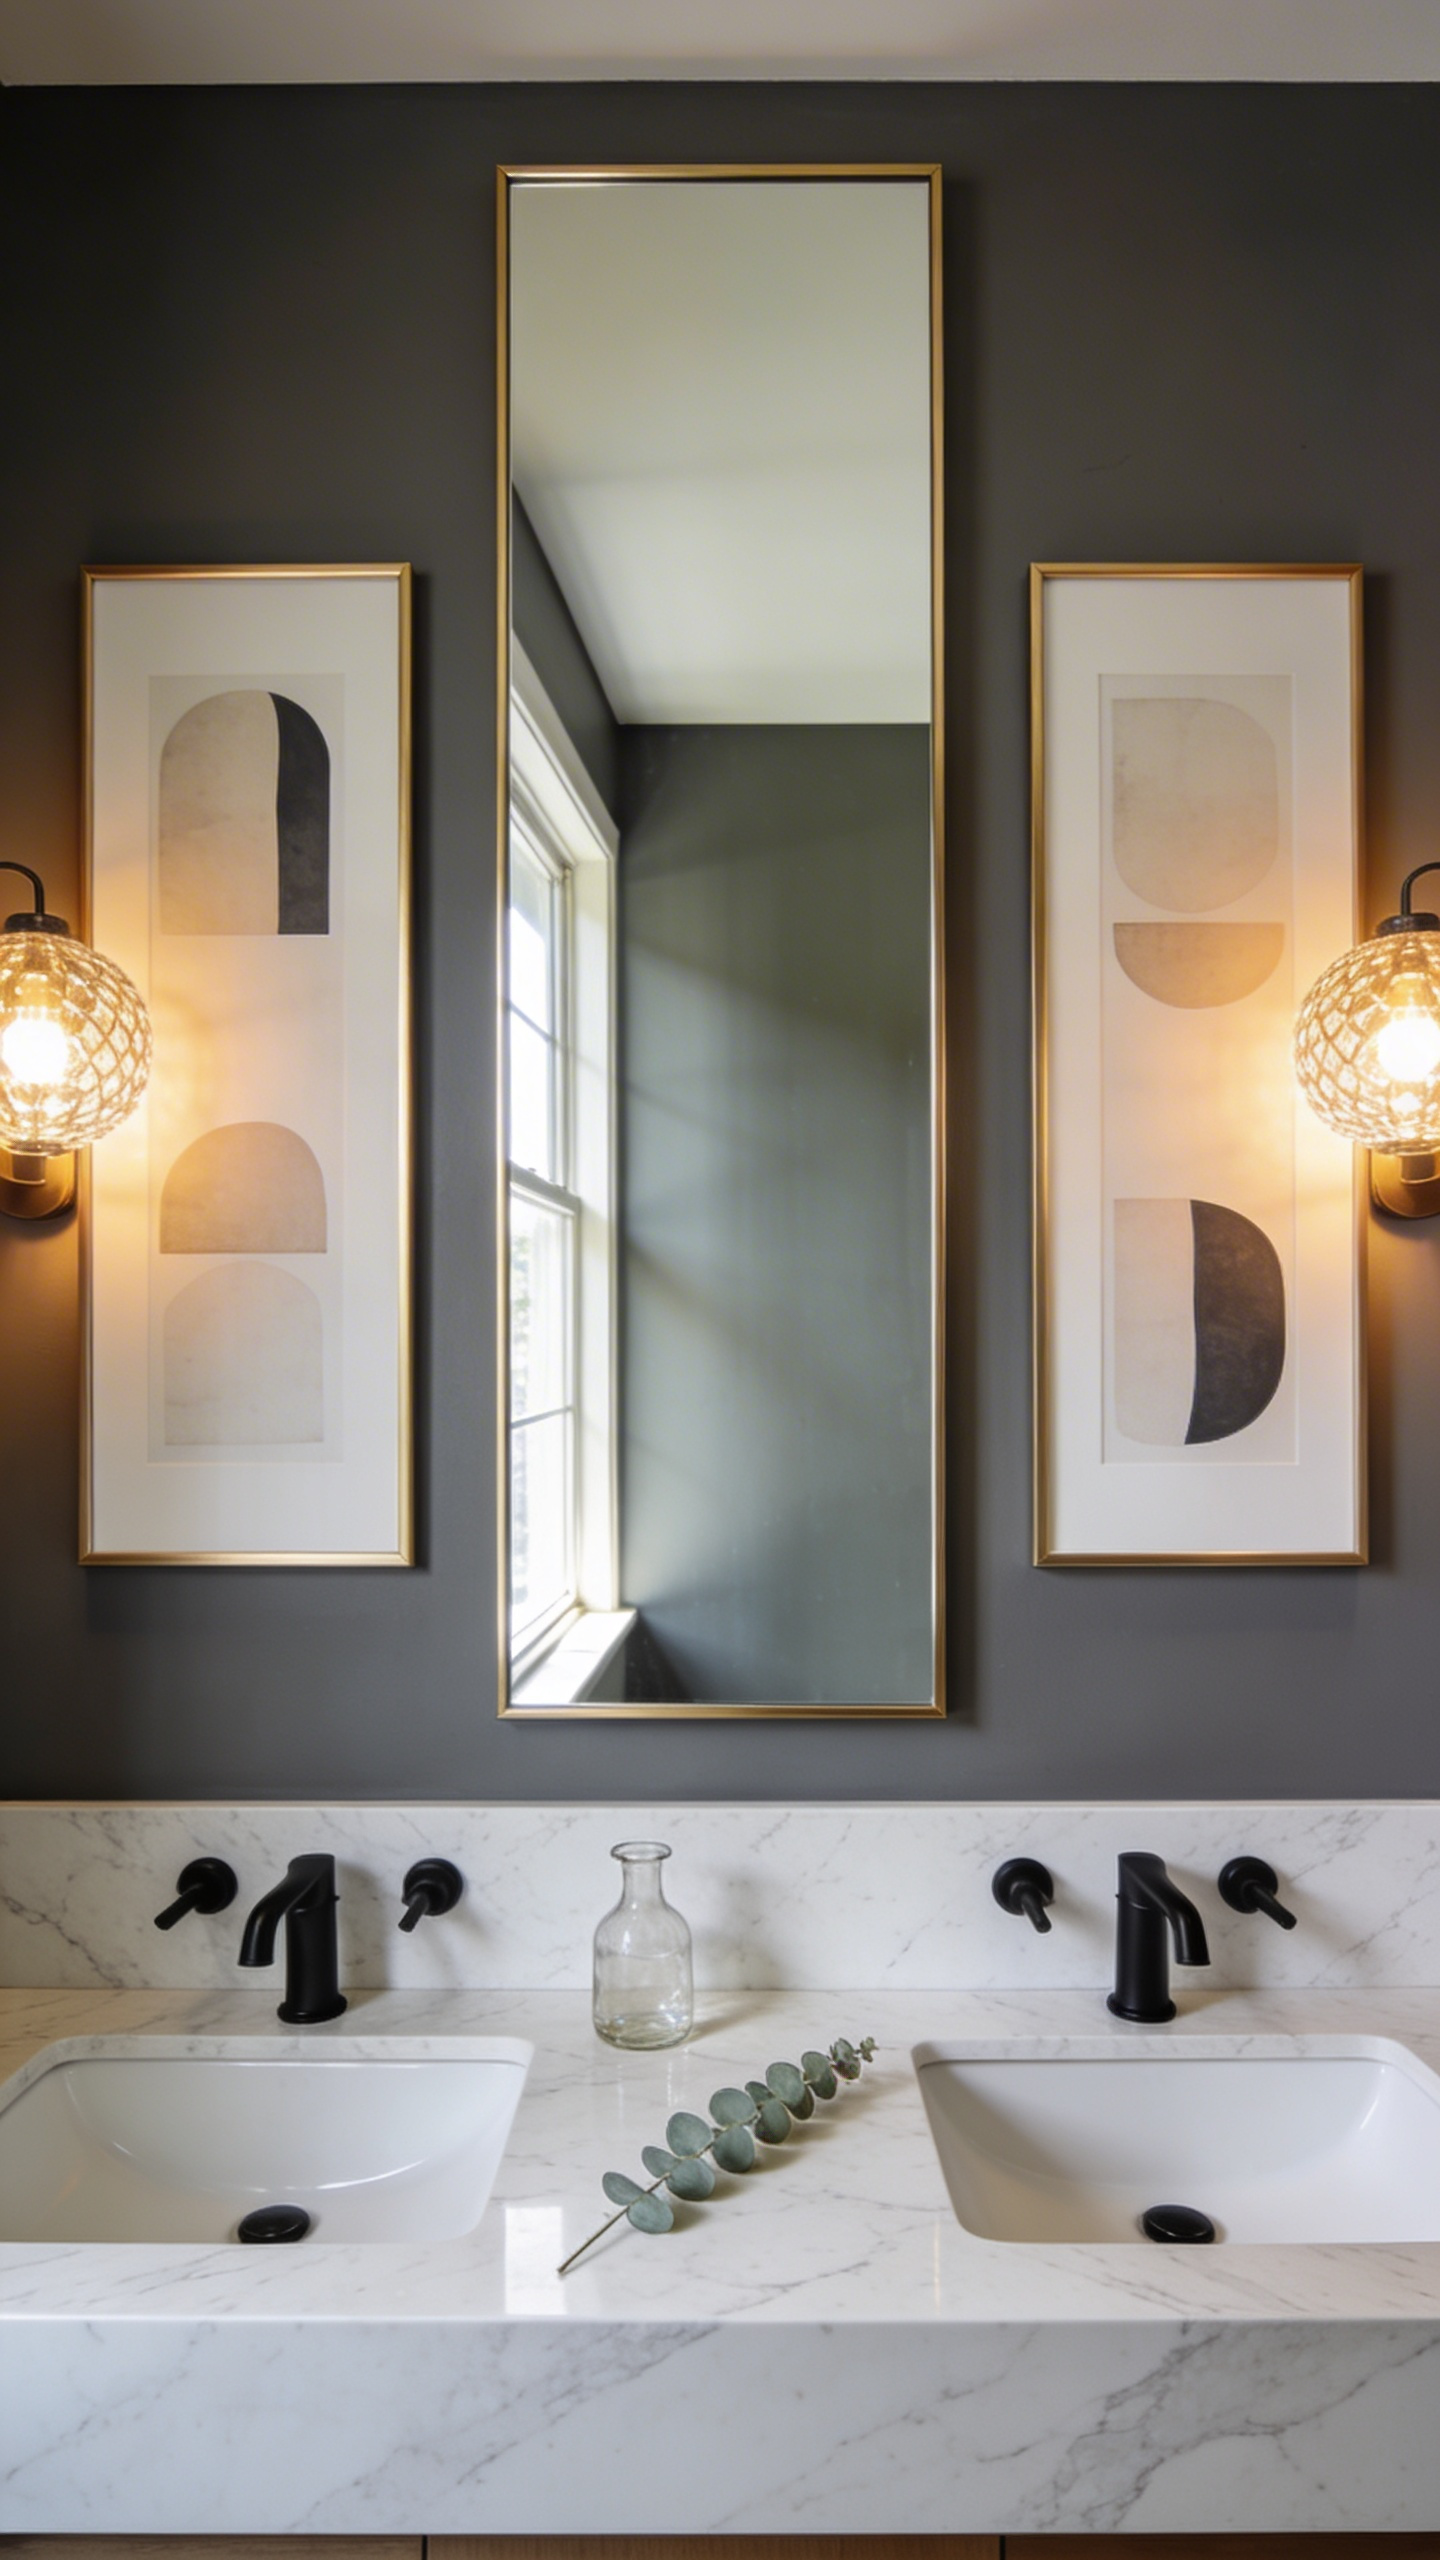
Choosing art with a slight inward directional pull is a great trick. It subtly points attention back to your reflection. Additionally, flanking your vanity brings necessary warmth to a very clinical zone. Contrast cold porcelain with linen matting or textured wood frames. Deep shadow boxes also add fantastic architectural depth to flat walls.
Naturally, scale is everything here. A good rule of thumb is the one-to-three ratio. Each artwork’s width should be exactly one-third the width of your mirror. This strict proportion keeps the vanity from feeling crowded. Finally, always use non-reflective, anti-glare glass. Otherwise, your bright vanity sconces will create blinding hot spots. Anti-glare glazing keeps the art visible and works beautifully with various bathroom mirror ideas.
9. Art-Specific Lighting Techniques: Positioning Vanity Sconces to Double as Gallery Illumination
Functional vanity sconces can easily double as gallery lighting. It just takes a little spatial planning. You have to master the peripheral spill coming from the fixture. Try choosing translucent glass sconces and mounting them around 64 inches high. This aligns the bulb perfectly with eye-level art. Placing a frame perpendicular to the mirror creates a gorgeous side-grazing wash. Indeed, this highlights thick paint and rough paper textures beautifully.
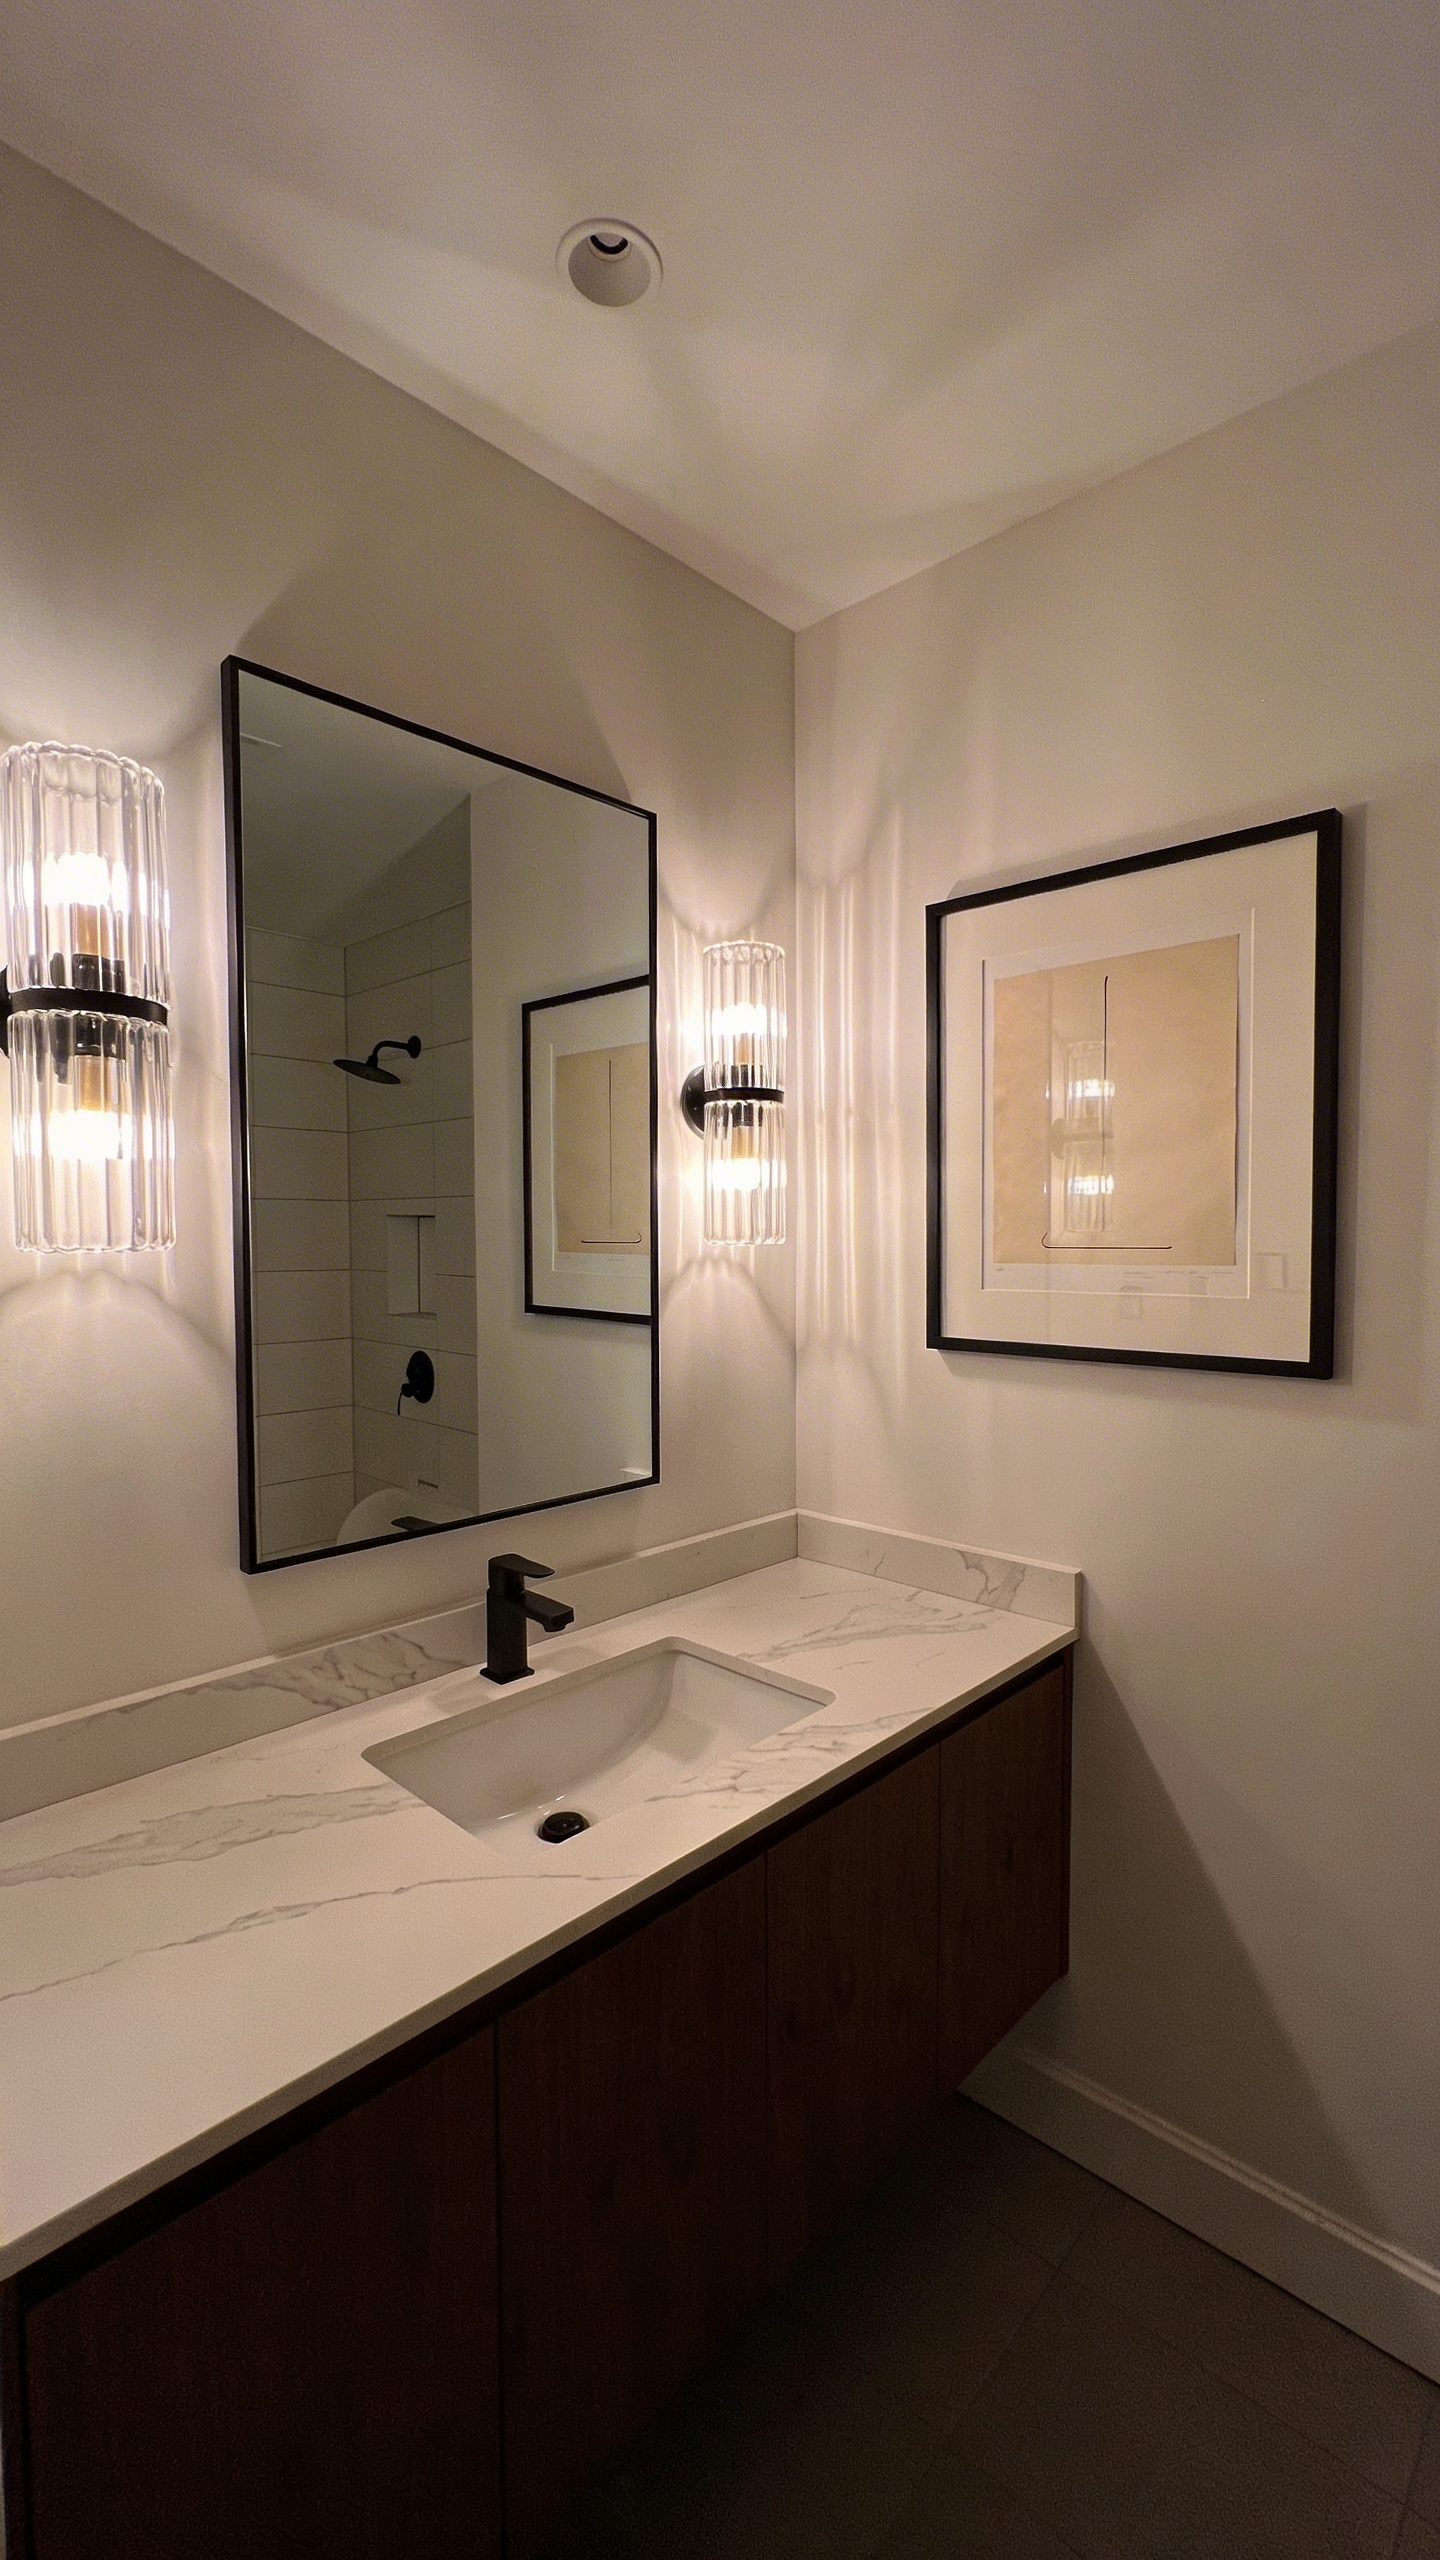
However, standard bulbs will slowly ruin delicate art. You must select LEDs with a high Color Rendering Index (above 95). To avoid mirror glare, position the artwork just below the sconce’s midpoint. Alternatively, tilt the frame forward by two degrees using tiny rubber bumpers. This trick bounces harsh reflections straight down to the floor.
Heat is another major enemy. Never use halogen vanity lights near your collection, as they will literally bake your prints. Instead, stick to UV-filtered LEDs. Finally, put everything on an electronic dimmer. Dimming your sconces at night casts a warm, relaxing gallery glow. Thus, your functional bathroom effortlessly becomes a private gallery.
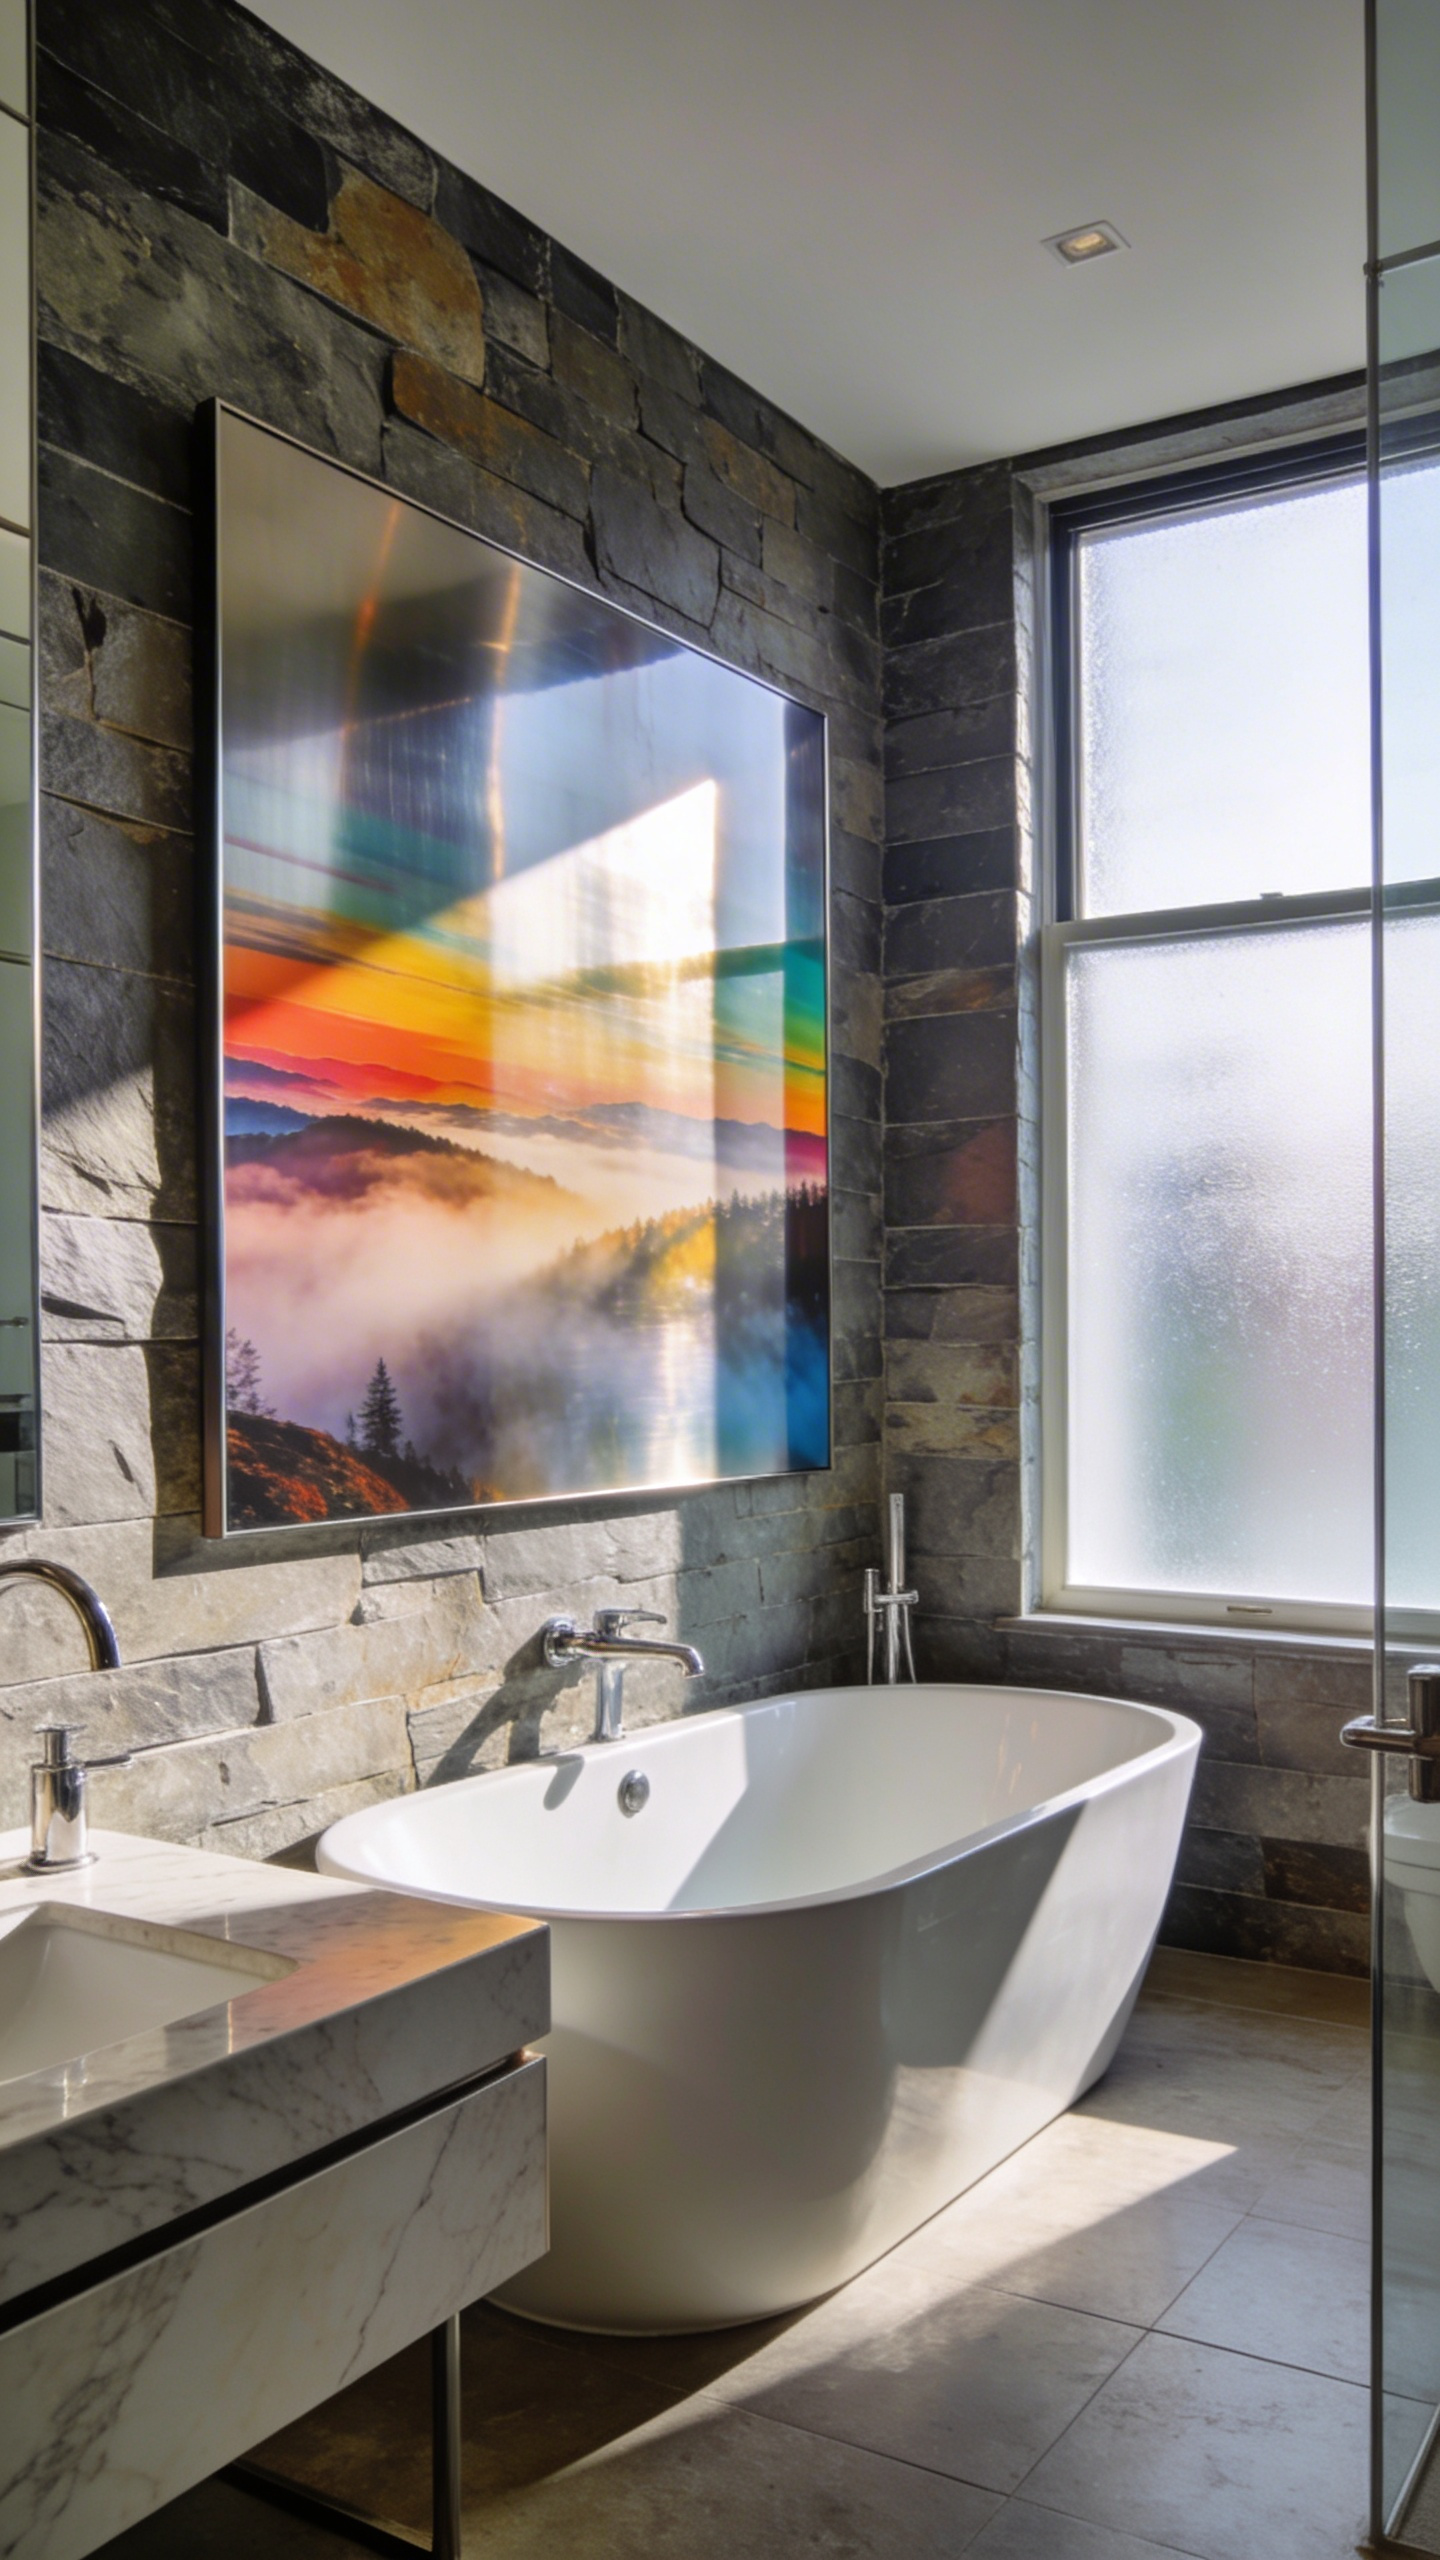
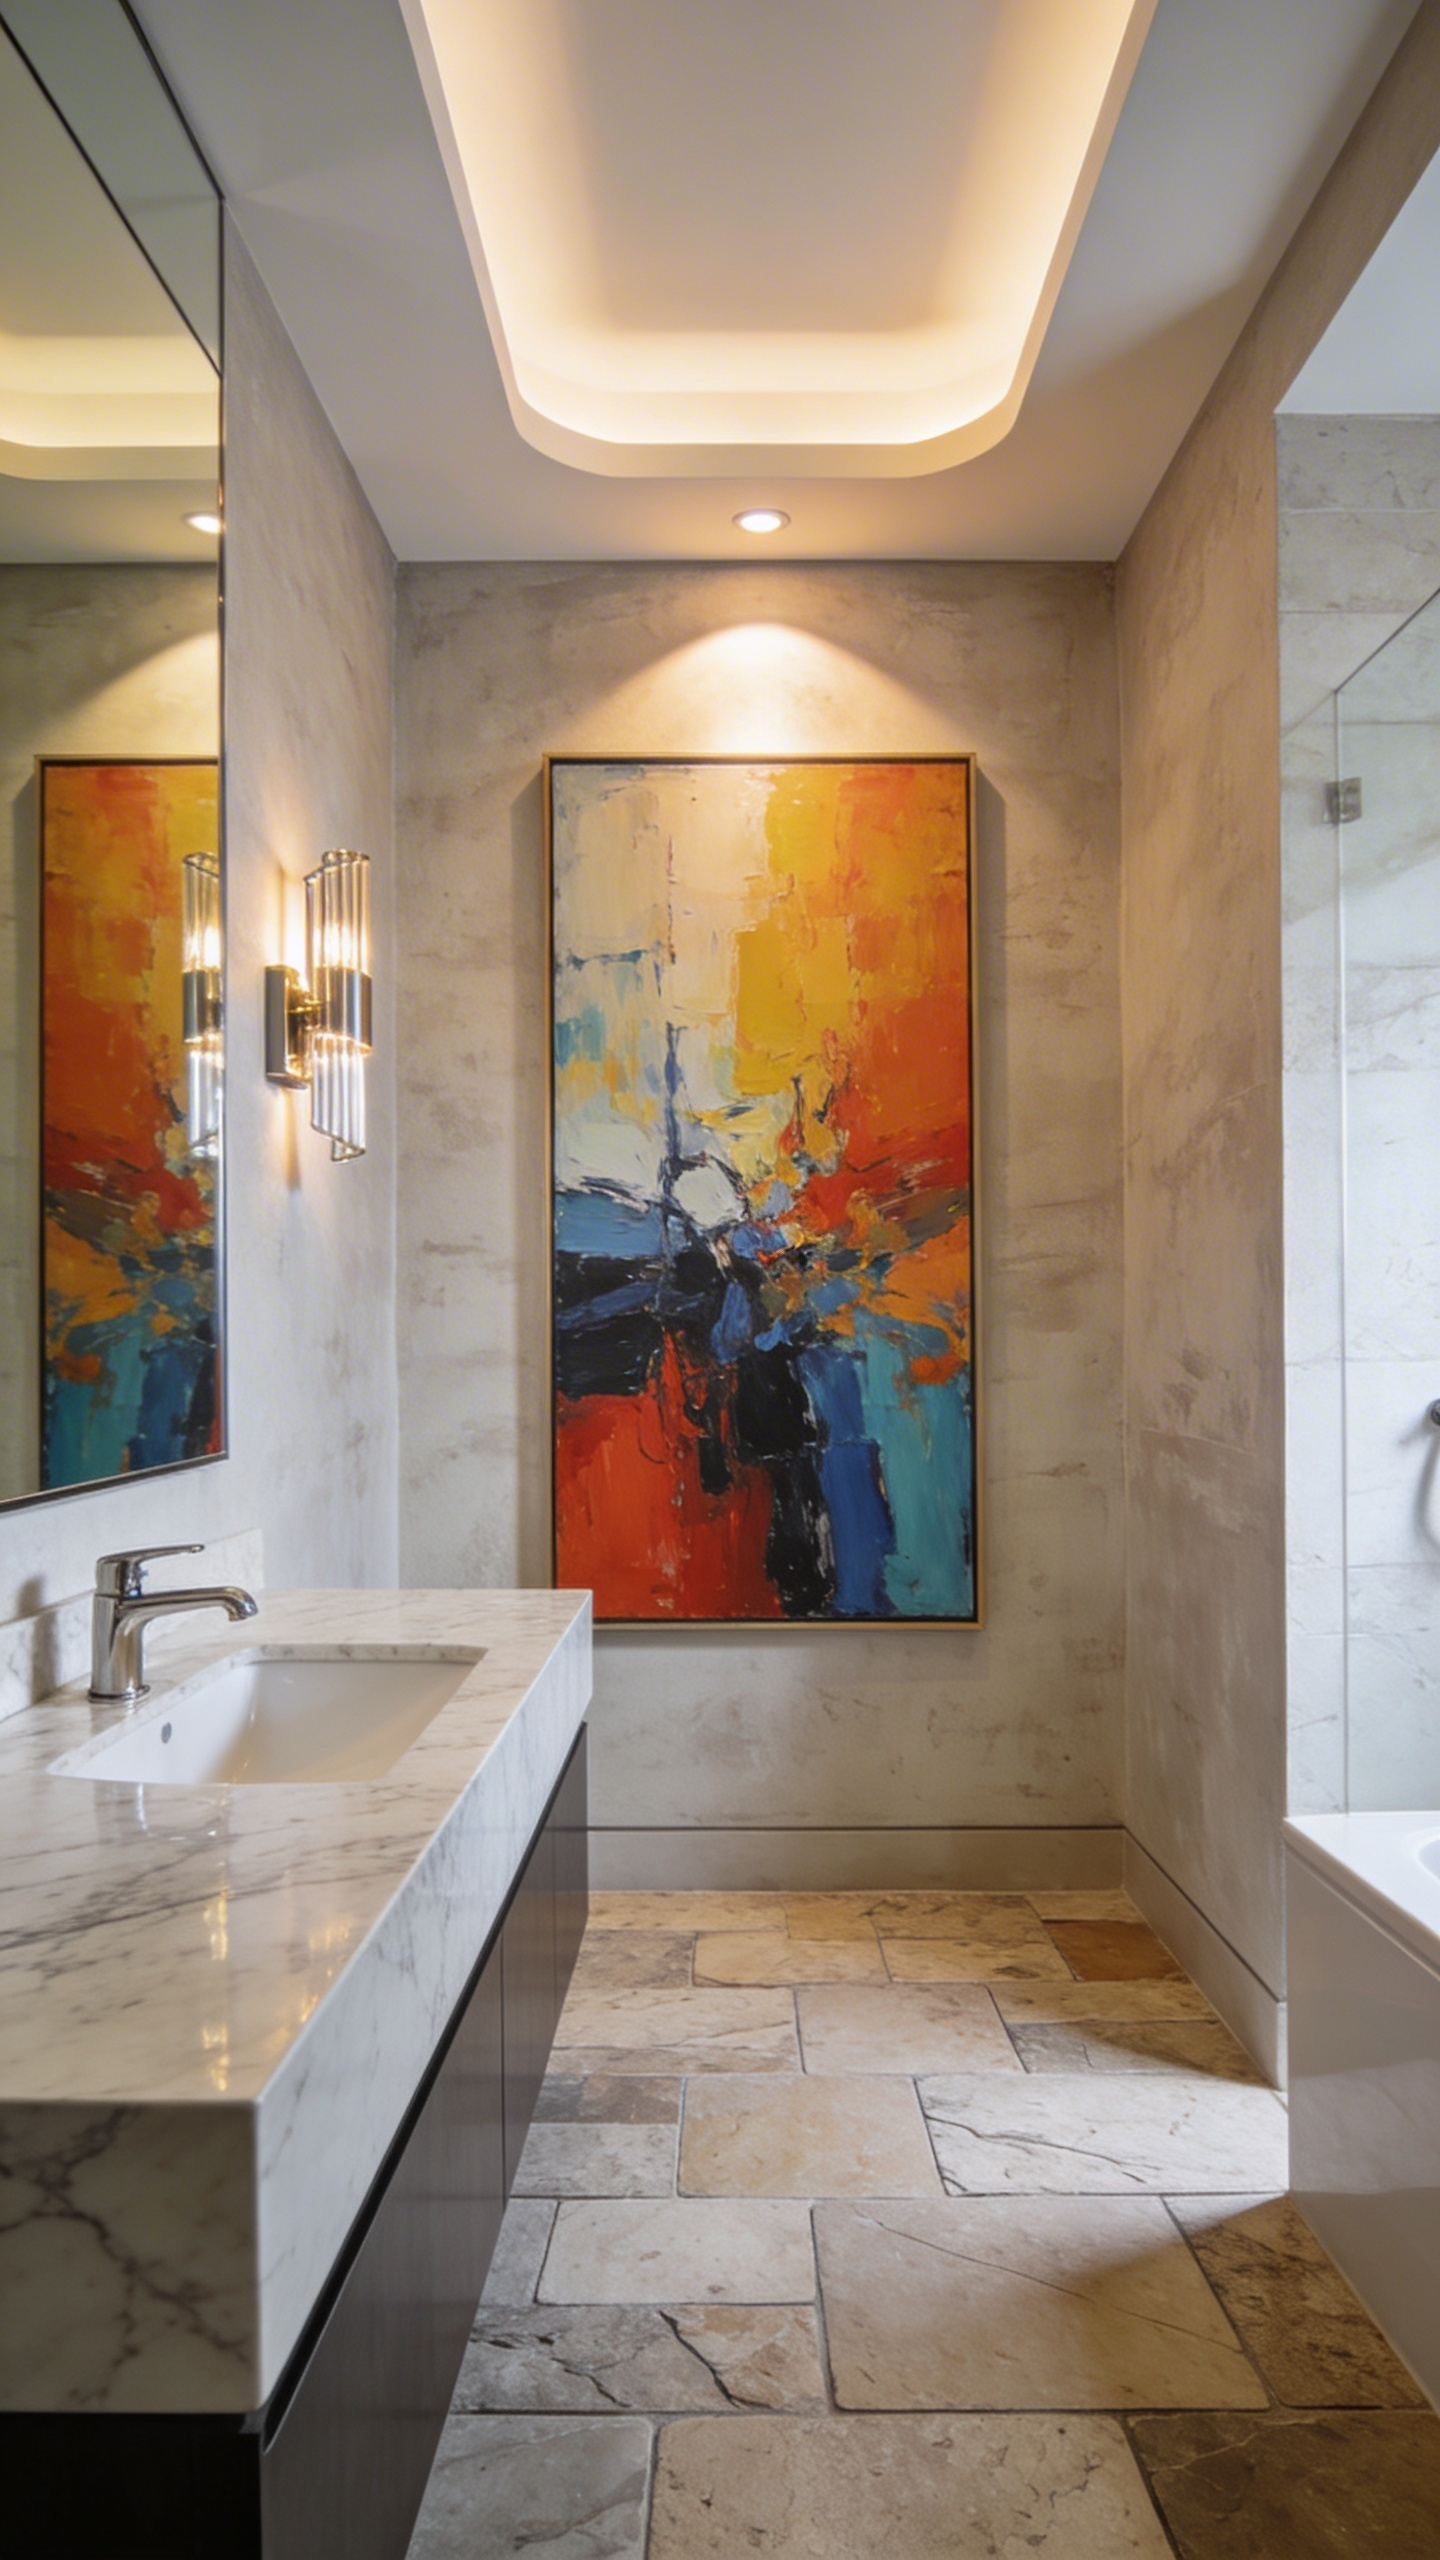
10. Abstract Expressionism in Confined Spaces: Using Non-Representational Art to Visually Expand a Small Bath
Designers usually push strict minimalism for small bathrooms. But honestly, total immersion can actually make a confined space feel bigger. Jackson Pollock made the “all-over” composition famous. This painting style completely lacks a single focal point. Because your eye doesn’t get stuck on one corner, you just keep scanning the vibrant canvas. The brain starts to interpret the flat wall as a deep, dynamic arena.
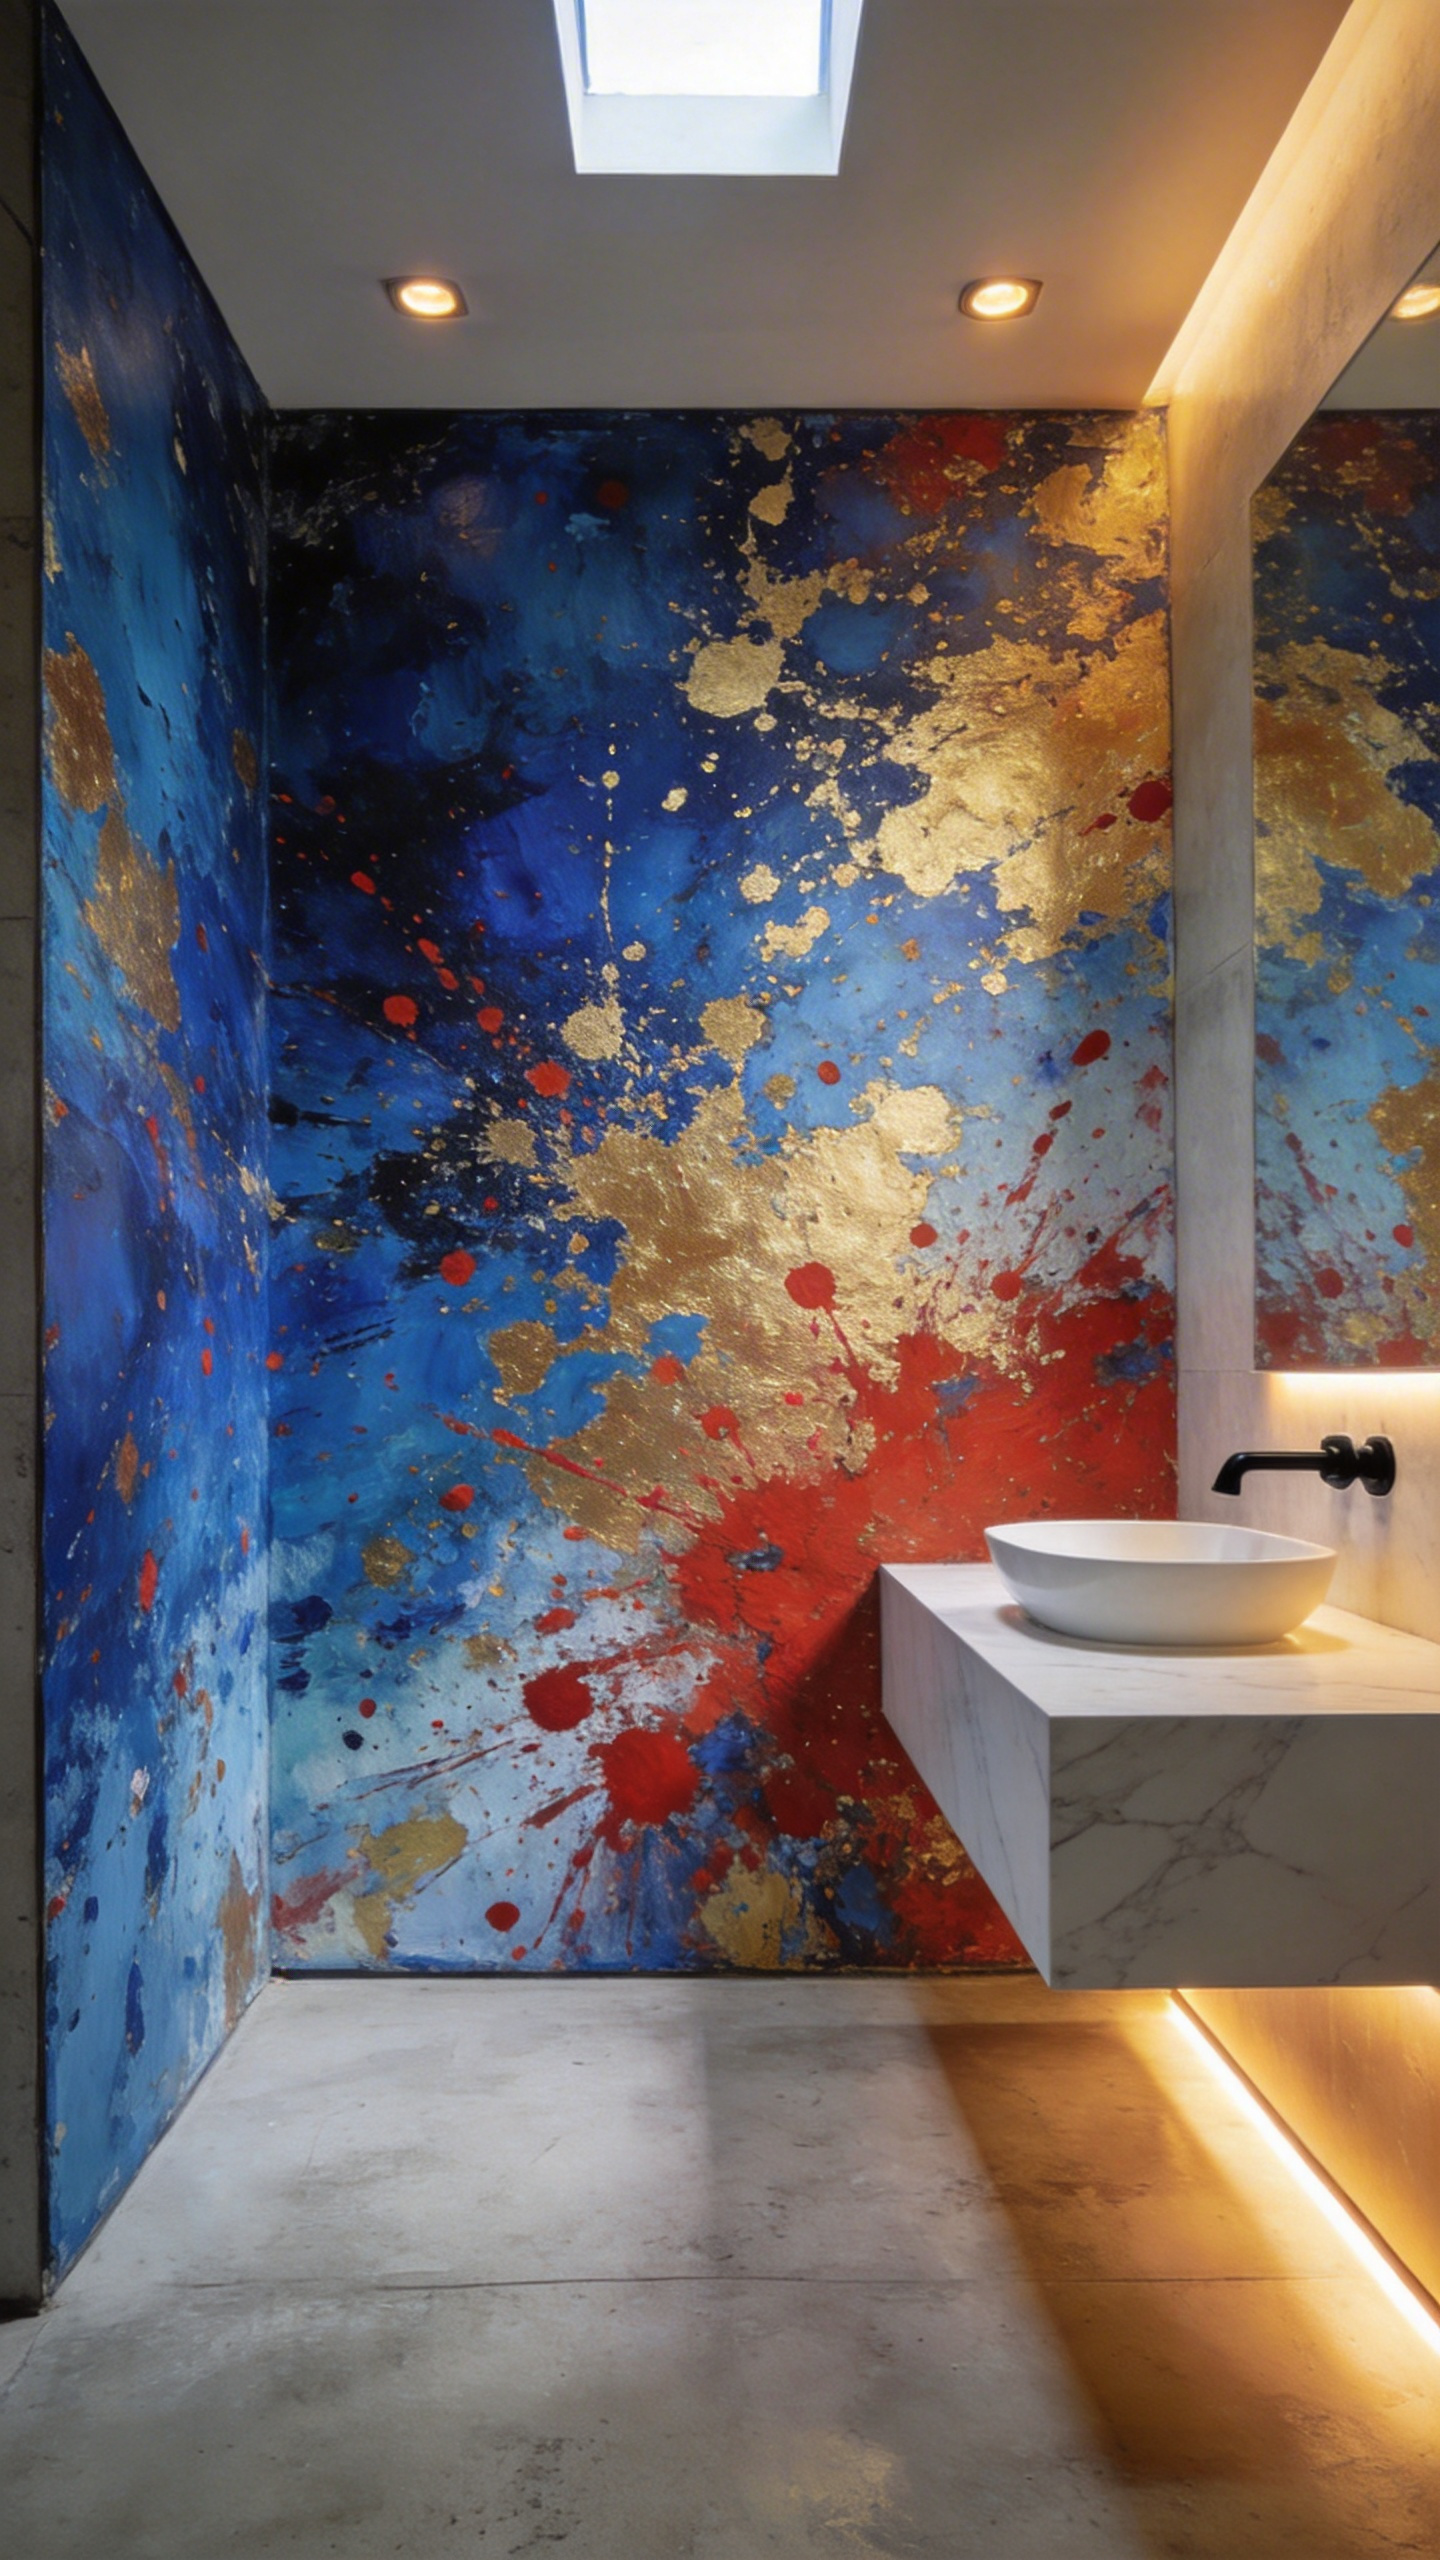
Non-representational art also creates essential psychological distance. Think of Mark Rothko’s soft color fields. Deep teals and receding blues act like a visual portal, mimicking a distant horizon.
The bathroom is also a highly unique sensory space. Steam catches the light and reflects beautifully off abstract pieces. I highly recommend large acrylic face-mount prints here. These glossy, moisture-resistant materials brilliantly amplify the shimmering colors. They basically turn a static wall into a shifting pool of liquid. You can also use vertical brushstrokes to visually lift a low ceiling. Ultimately, abstract art bends the rigid boundaries of the room.
Phase III: Advanced Application—Gallery Walls and Mixed Media
Building a gallery wall in the bathroom is a bold move. It completely transforms a purely functional room into a private retreat. Because you are essentially a captive audience in here, intricate mixed media works perfectly. Tiny visual details reward slow, quiet observation.
High humidity, however, destroys standard paper and water-soluble glues quickly. Encaustic art is a fantastic alternative. Hot beeswax and damar resin fuse materials into solid, waterproof blocks. It is incredibly tactile and naturally repels moisture.
If you must hang traditional paper, you have to build a climate shell. Swap heavy glass for lightweight, UV-protective acrylic. It will not shatter on tile, and it actively resists condensation. Seal the back of the frame entirely with a moisture barrier. Then, wrap the internal edges with archival tape. This ensures delicate pieces survive the splash zone perfectly. Hang this protected collection directly opposite your vanity mirror. This visual trick instantly doubles the depth of the room.
11. The Asymmetrical Powder Room Gallery Wall: Achieving Maximum Curatorial Impact in Minimal Square Footage
Old-school design rules say to keep tiny rooms simple. Curators today completely disagree. An asymmetrical gallery wall actually expands a powder room. By heavily populating the wall, the physical boundaries begin to blur. Your brain has to travel through the entire eclectic collection. Consequently, a tiny footprint feels like a sprawling journey.
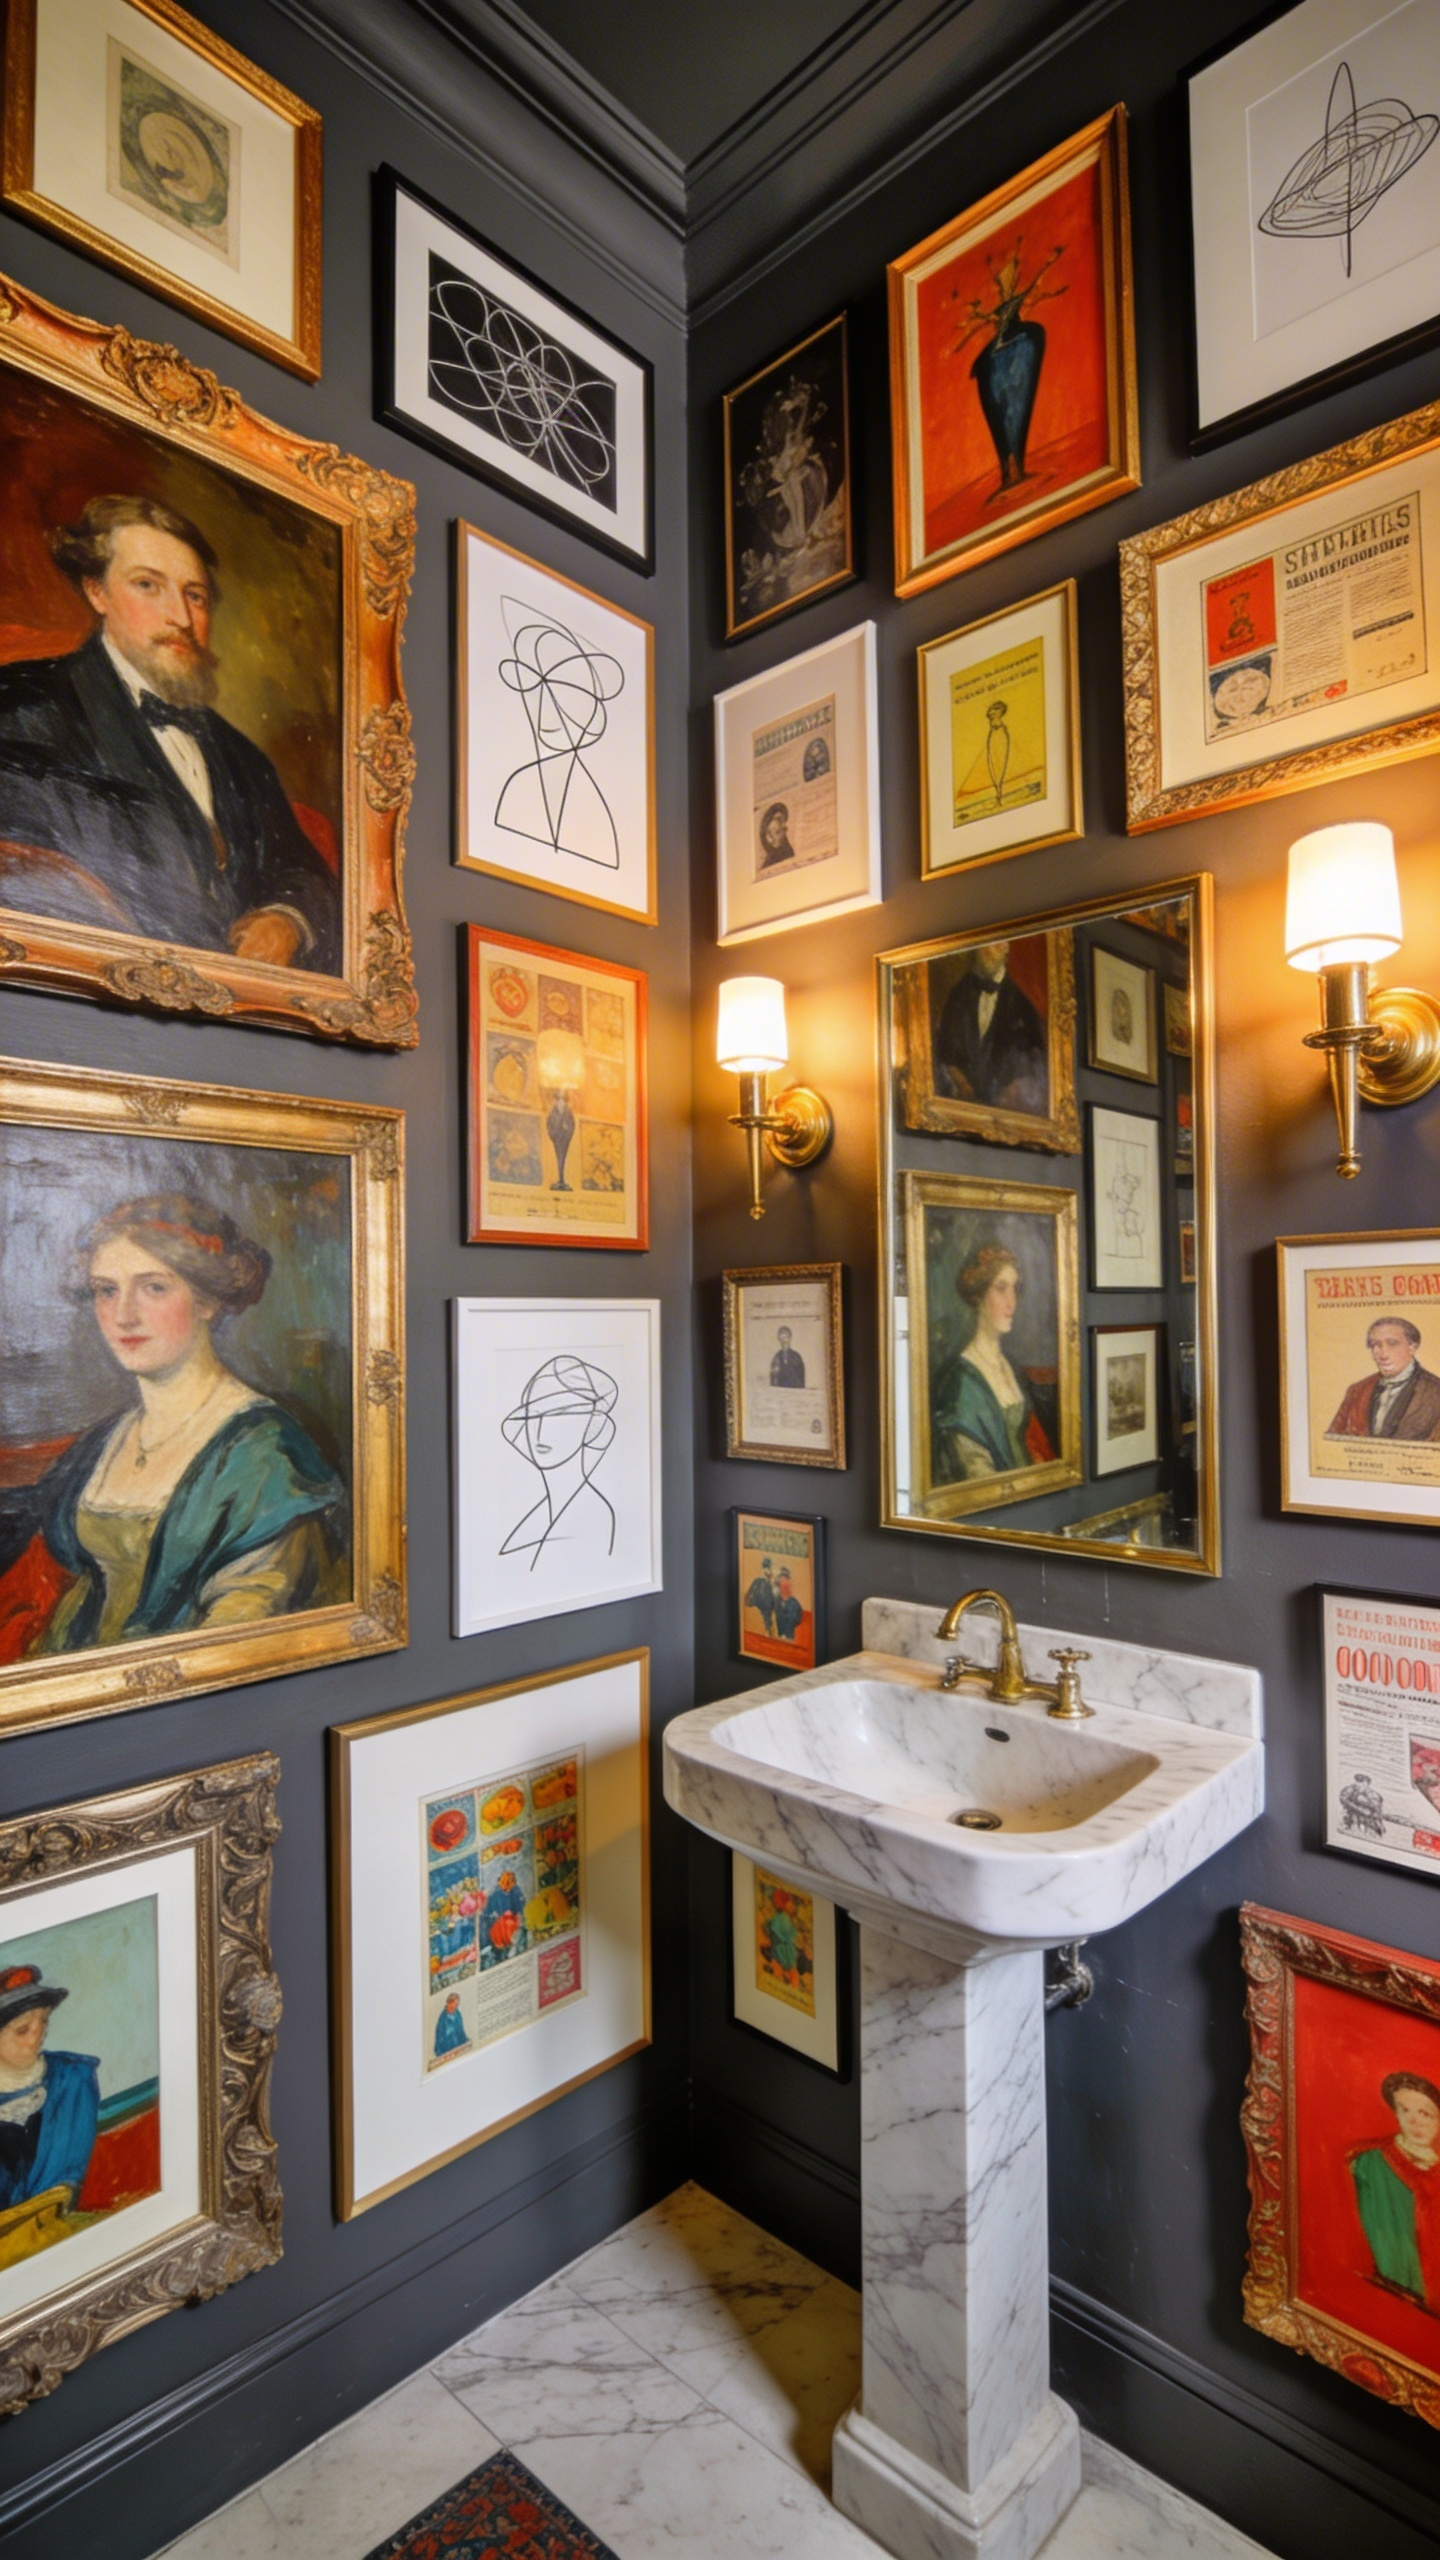
Since powder rooms prioritize a seated perspective, visitors view the art from just inches away. Therefore, pool your micro-art lower on the wall. Place pieces with tiny text or fine details right at eye level. Conversely, hang big, bold graphics higher up to catch standing guests.
Treat this space like a weird cabinet of curiosities. Mix heavy gilded frames with raw, unfinished wood. Throw in framed antique keys or old postcards. Next, try wrapping the gallery seamlessly around a corner. This softens sharp architectural lines and makes the room feel less boxy. Finally, ditch the flat overhead lighting. Use a dimmable picture light to create soft, moody shadows across the asymmetrical frames.
12. Integrating Functional Mirrors into Art Arrangements: Creating Seamless Wall Constellations
We used to treat the bathroom mirror as a boring, utilitarian necessity. Today, a wall constellation gracefully blends functional mirrors with actual artwork. Fragmenting your reflection into multiple smaller mirrors reduces that clinical, early-morning scrutiny. It turns daily grooming into a mindful, artistic ritual.
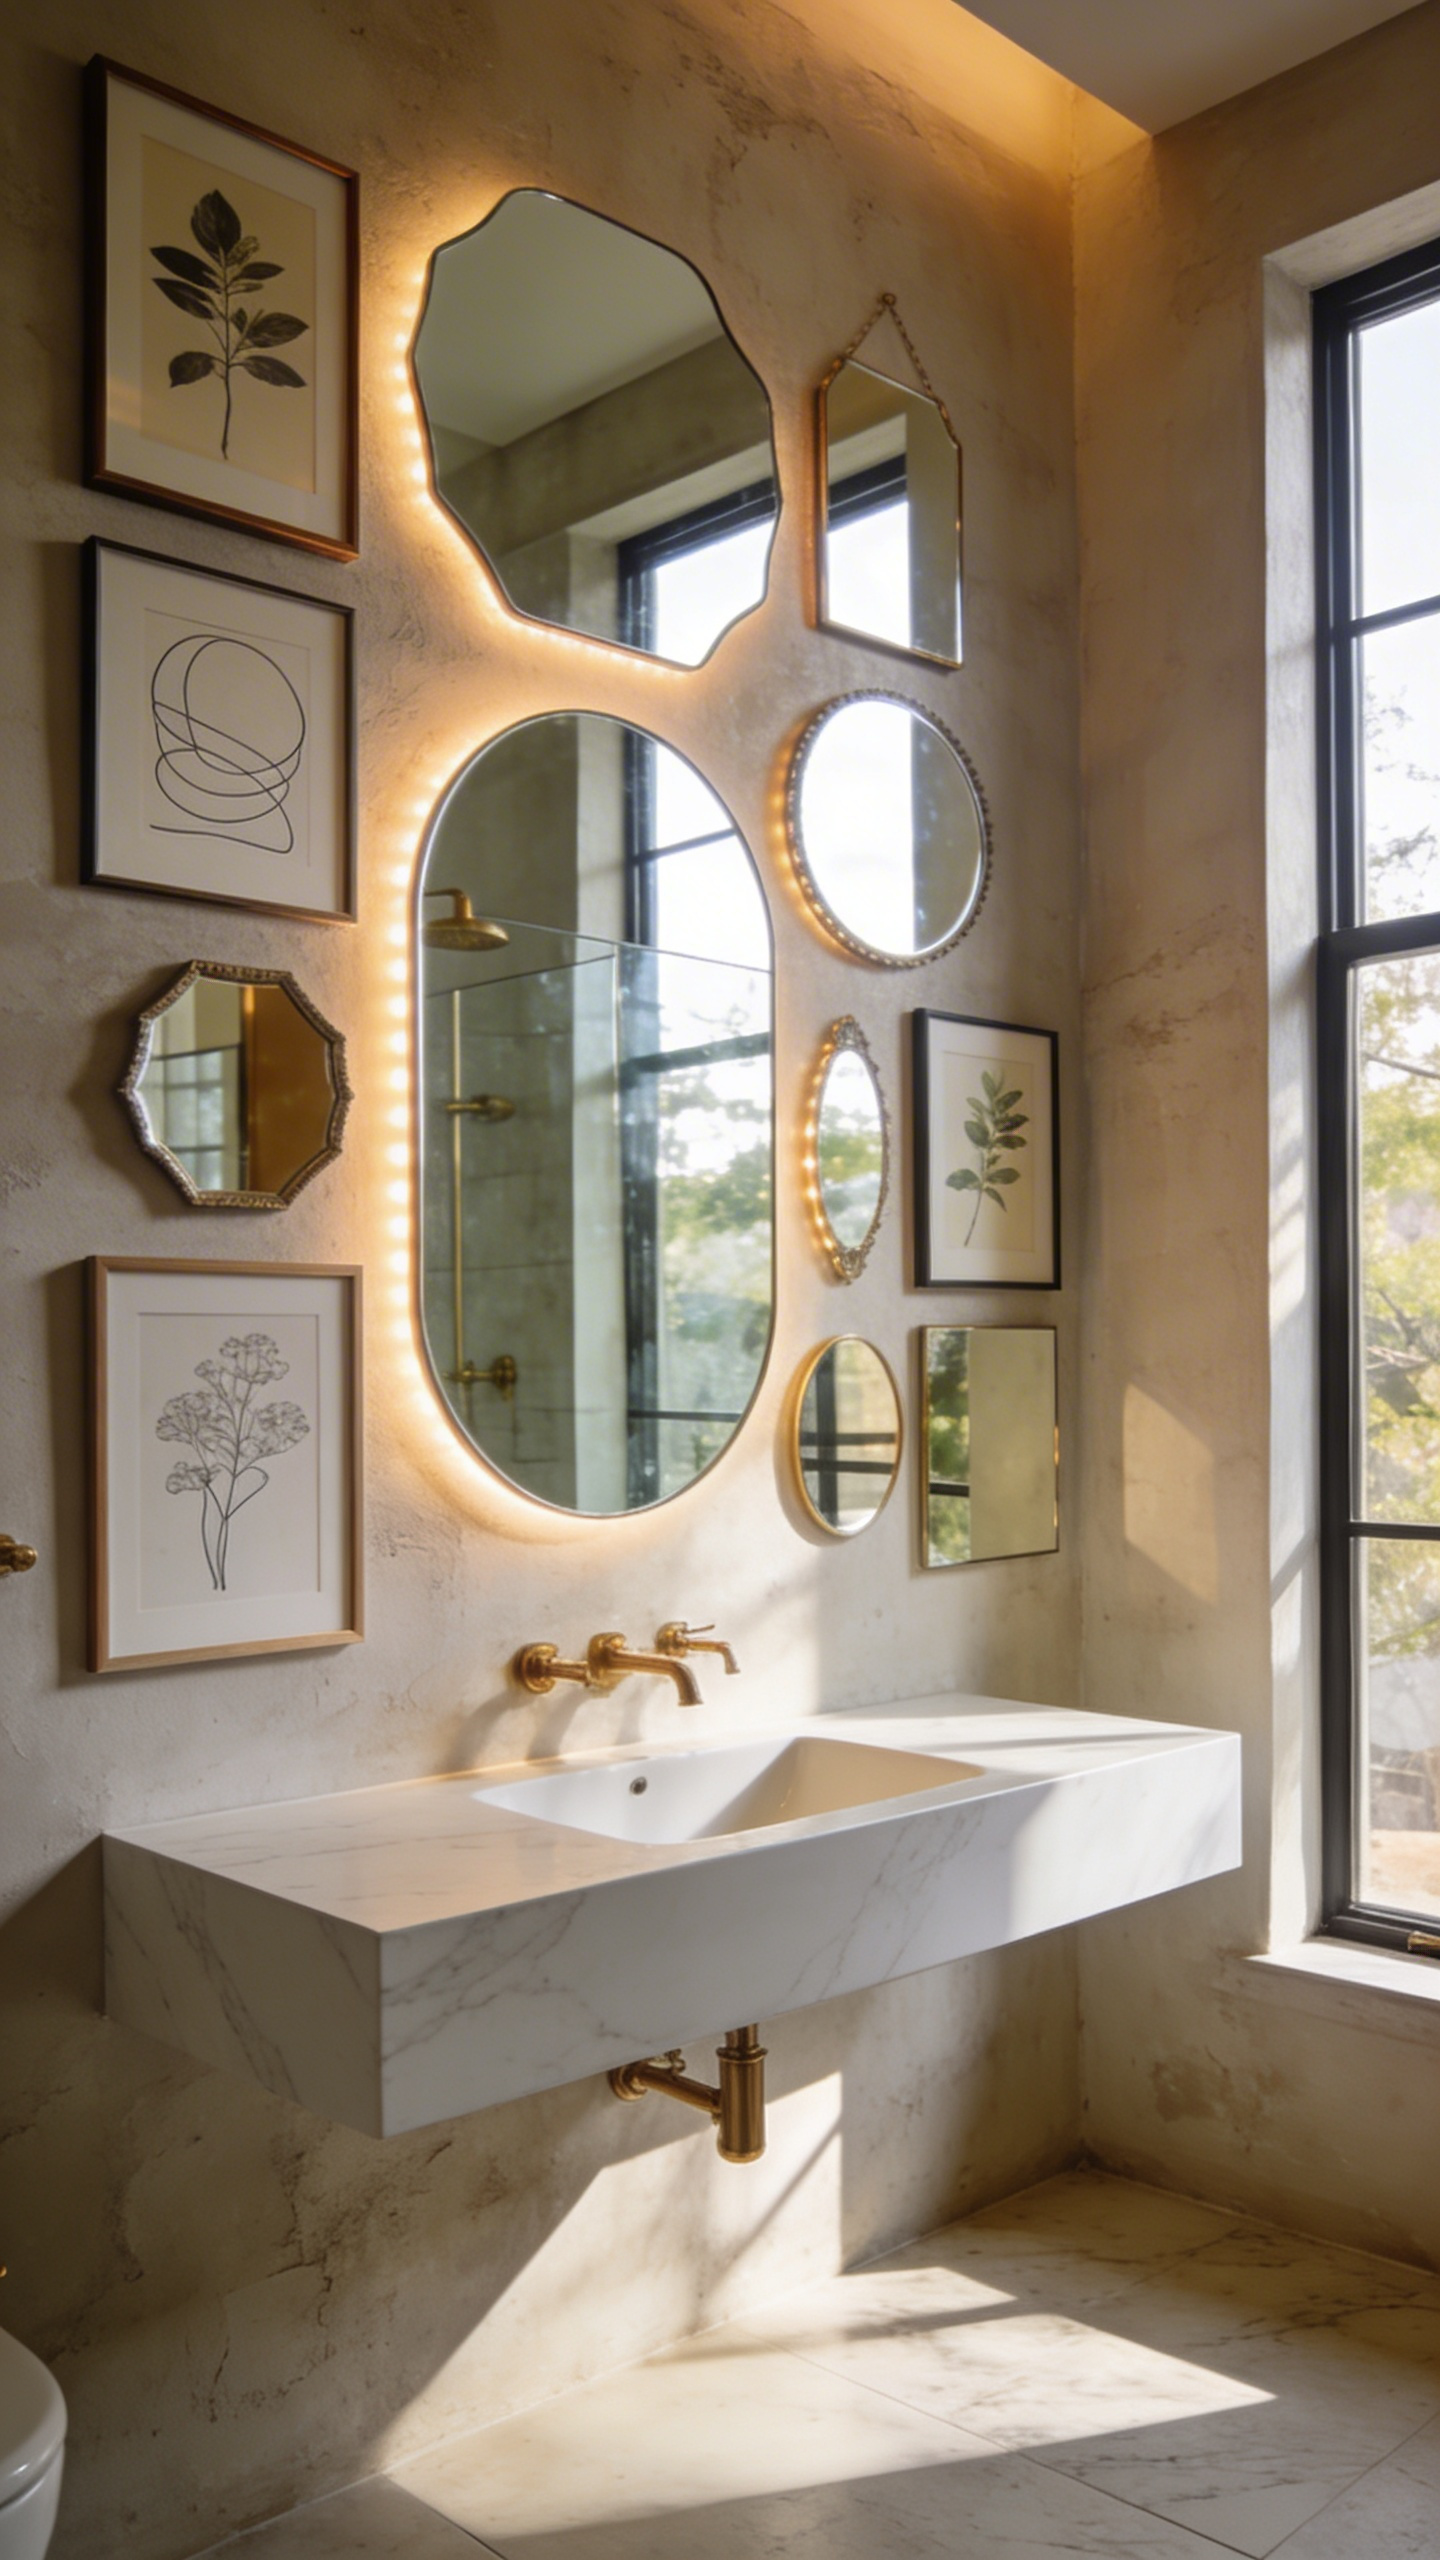
Careful light mapping is absolutely essential for this to look intentional. Place your mirrors at a 45-degree angle to the wall sconces. This bounces soft light deep into dark corners. Next, try overlapping your pieces. Place a small, ornate vintage mirror slightly over a sleek, frameless one. Suddenly, an everyday tool becomes a curated focal point.
Mix these mirrors with highly textured abstract watercolors. The mirror adds bright, airy light, while the canvas provides heavy, grounding texture. This contrast keeps the wall from feeling like a shiny funhouse. Always buy high-quality mirrors with copper-free silvering to stop black oxidation spots. Finally, use thick frame spacers to let steam escape from behind the glass.
13. Moisture-Sealed Sculptural Elements: Incorporating Ceramic and 3D Wall Art for Textural Contrast
Framed prints are great, but three-dimensional wall art brings a totally different energy. Sculptural pieces interact beautifully with shifting light and rising steam. Unfortunately, humidity destroys delicate canvas and porous paper fast. 3D art needs to survive extreme dampness.
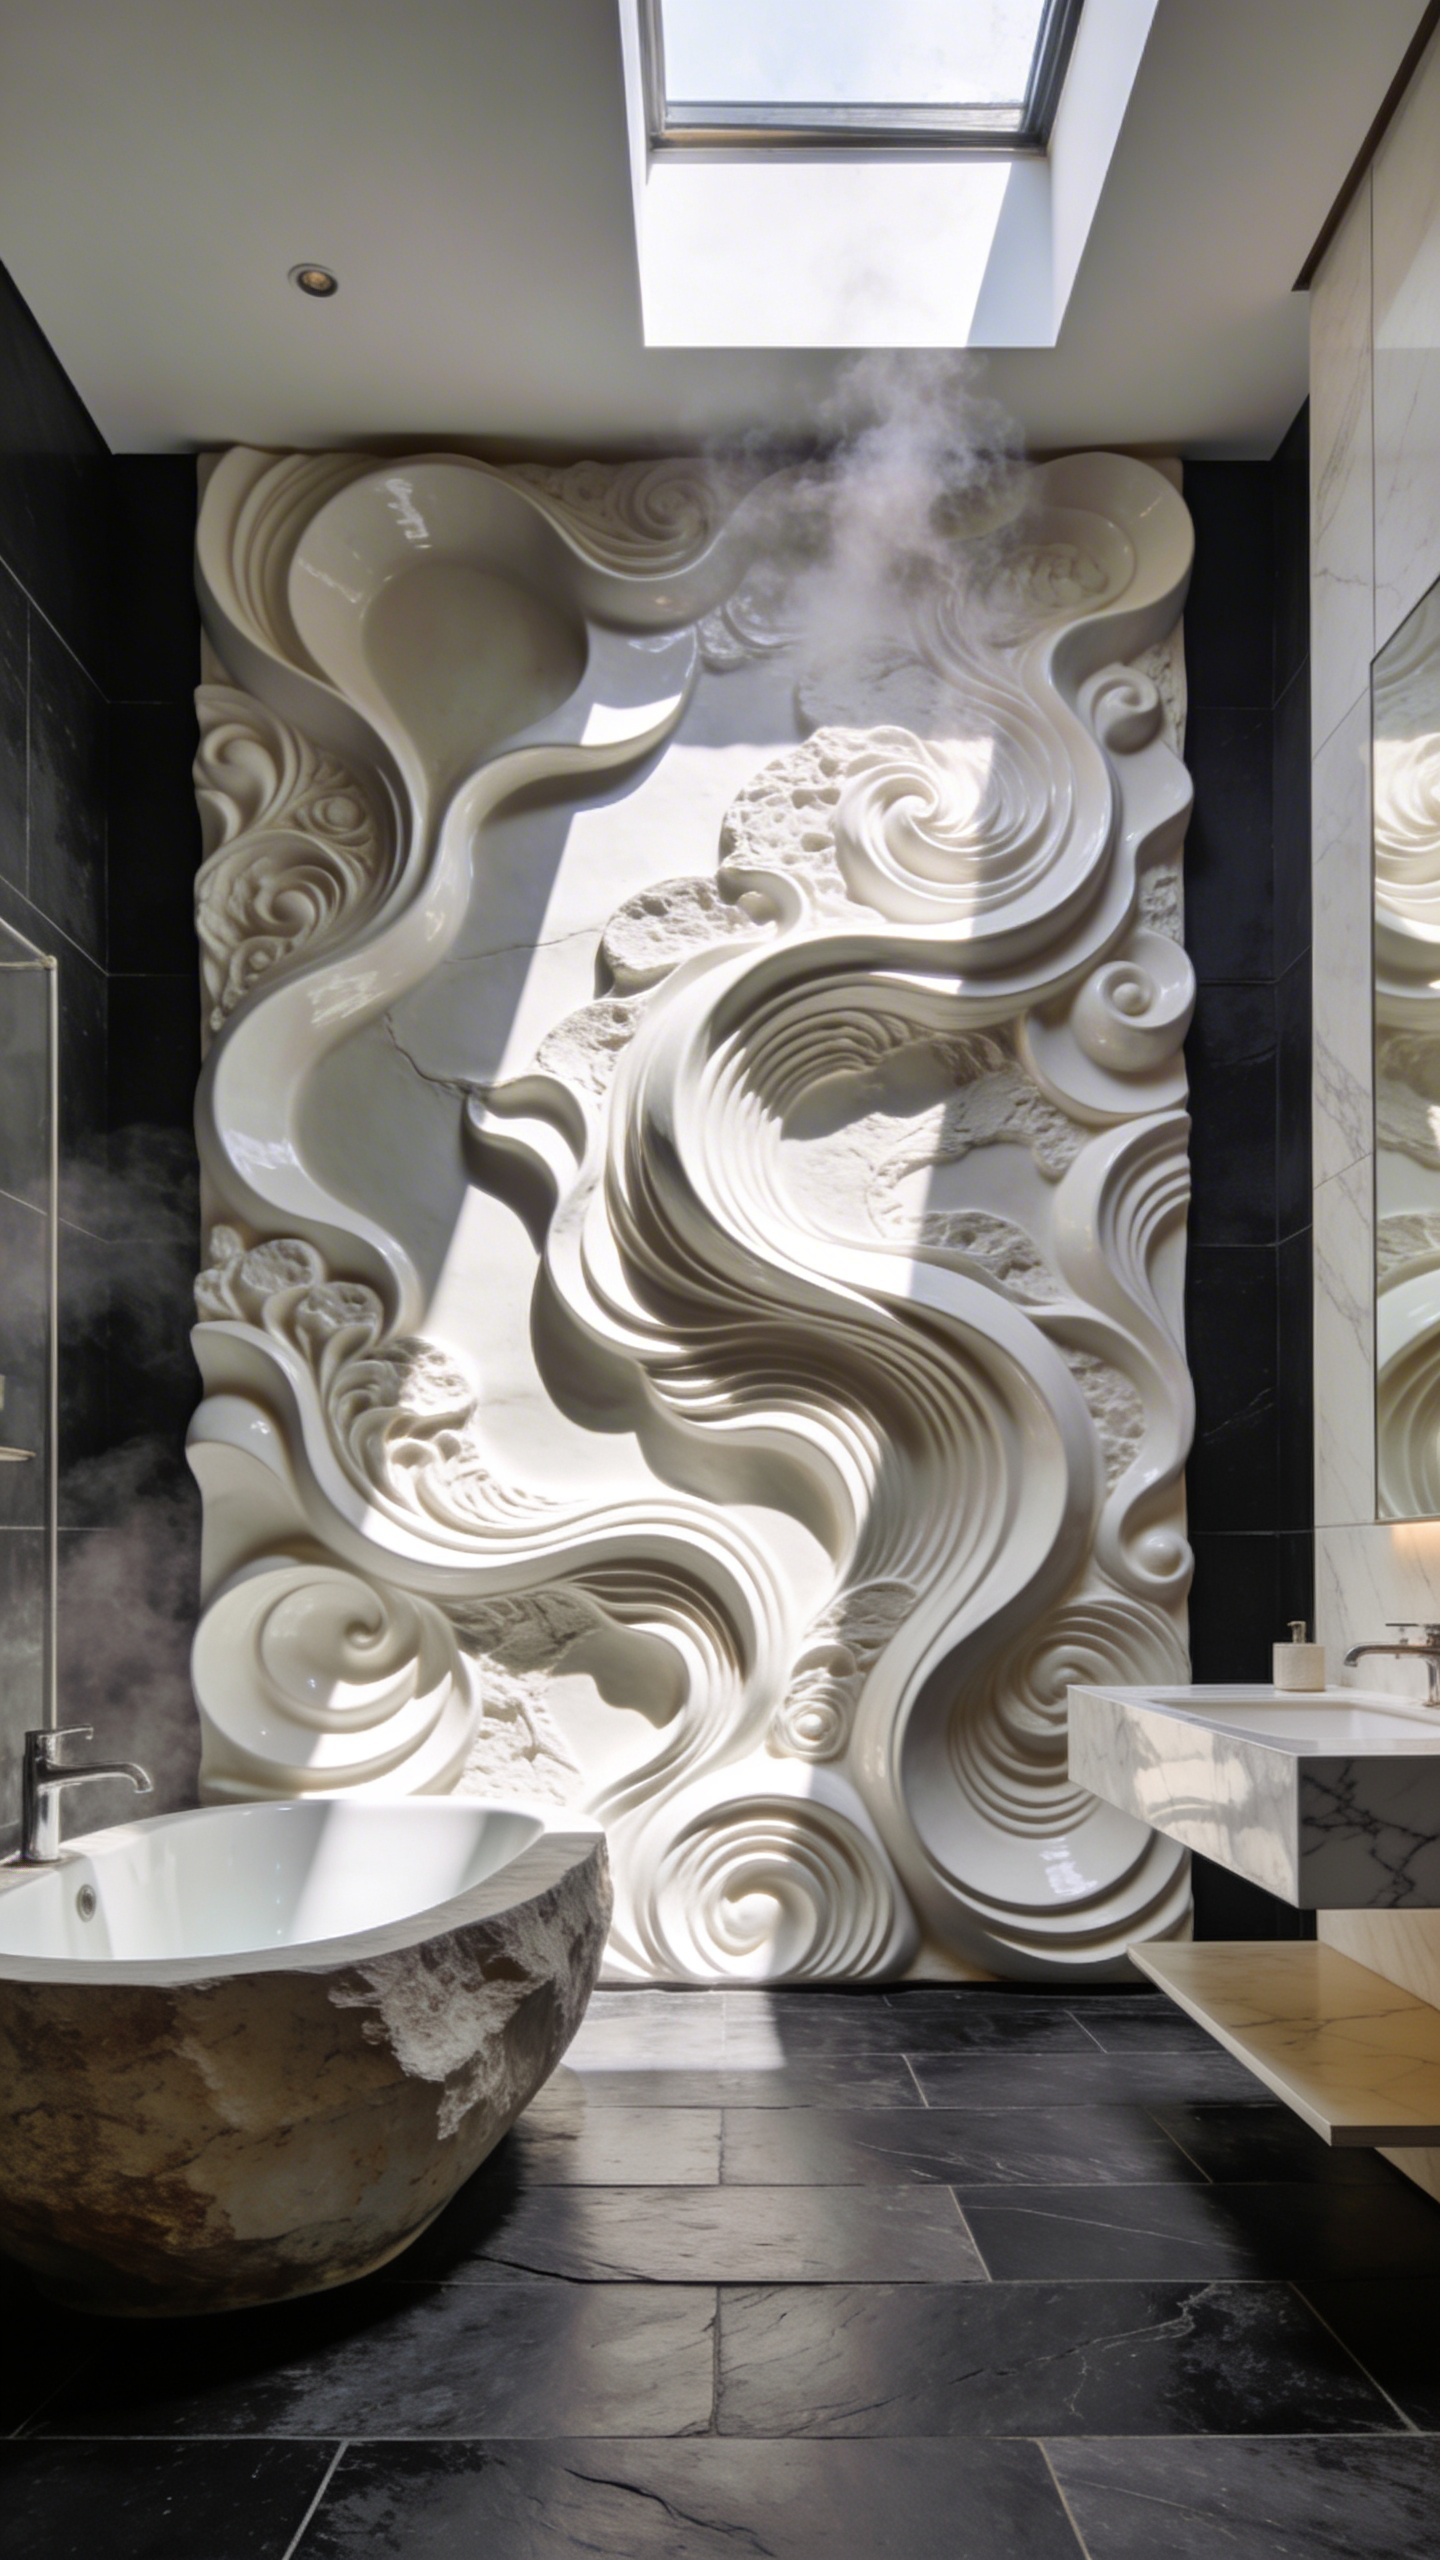
Historically, Roman baths used carved stone bas-reliefs for waterproof decor. High-fire ceramics like stoneware are the perfect modern equivalent. Firing clay above 2,200 degrees turns it into glass. This vitrification makes the sculpture completely immune to moisture. You can even apply a hydrophobic nano-coating to unglazed clay to instantly repel hard water stains.
Raised textures break up the endless flat surfaces of glass and tile beautifully. A hand-pinched ceramic piece adds a wonderful tactile anchor. Furthermore, 3D elements create incredible shadows. As steam moves, the shadows shift playfully across the recessed clay. Installation is serious business, though. For heavy ceramics, use waterproof epoxy-resin adhesives instead of basic thin-set. Marine-grade stainless steel standoffs are another great option to float the art away from stagnant moisture traps.
14. Photography Display Design: Protecting and Styling Fine Art Photography in Humid Environments
Black and white photography looks incredibly elegant in a bathroom. But raw cotton paper absorbs shower steam like a sponge. It expands when wet and shrinks as it dries. Over time, this daily cycle causes awful wavy ripples called cockling. To prevent this, dry mount the photograph directly to an aluminum backing. This literally locks the fibers in place.
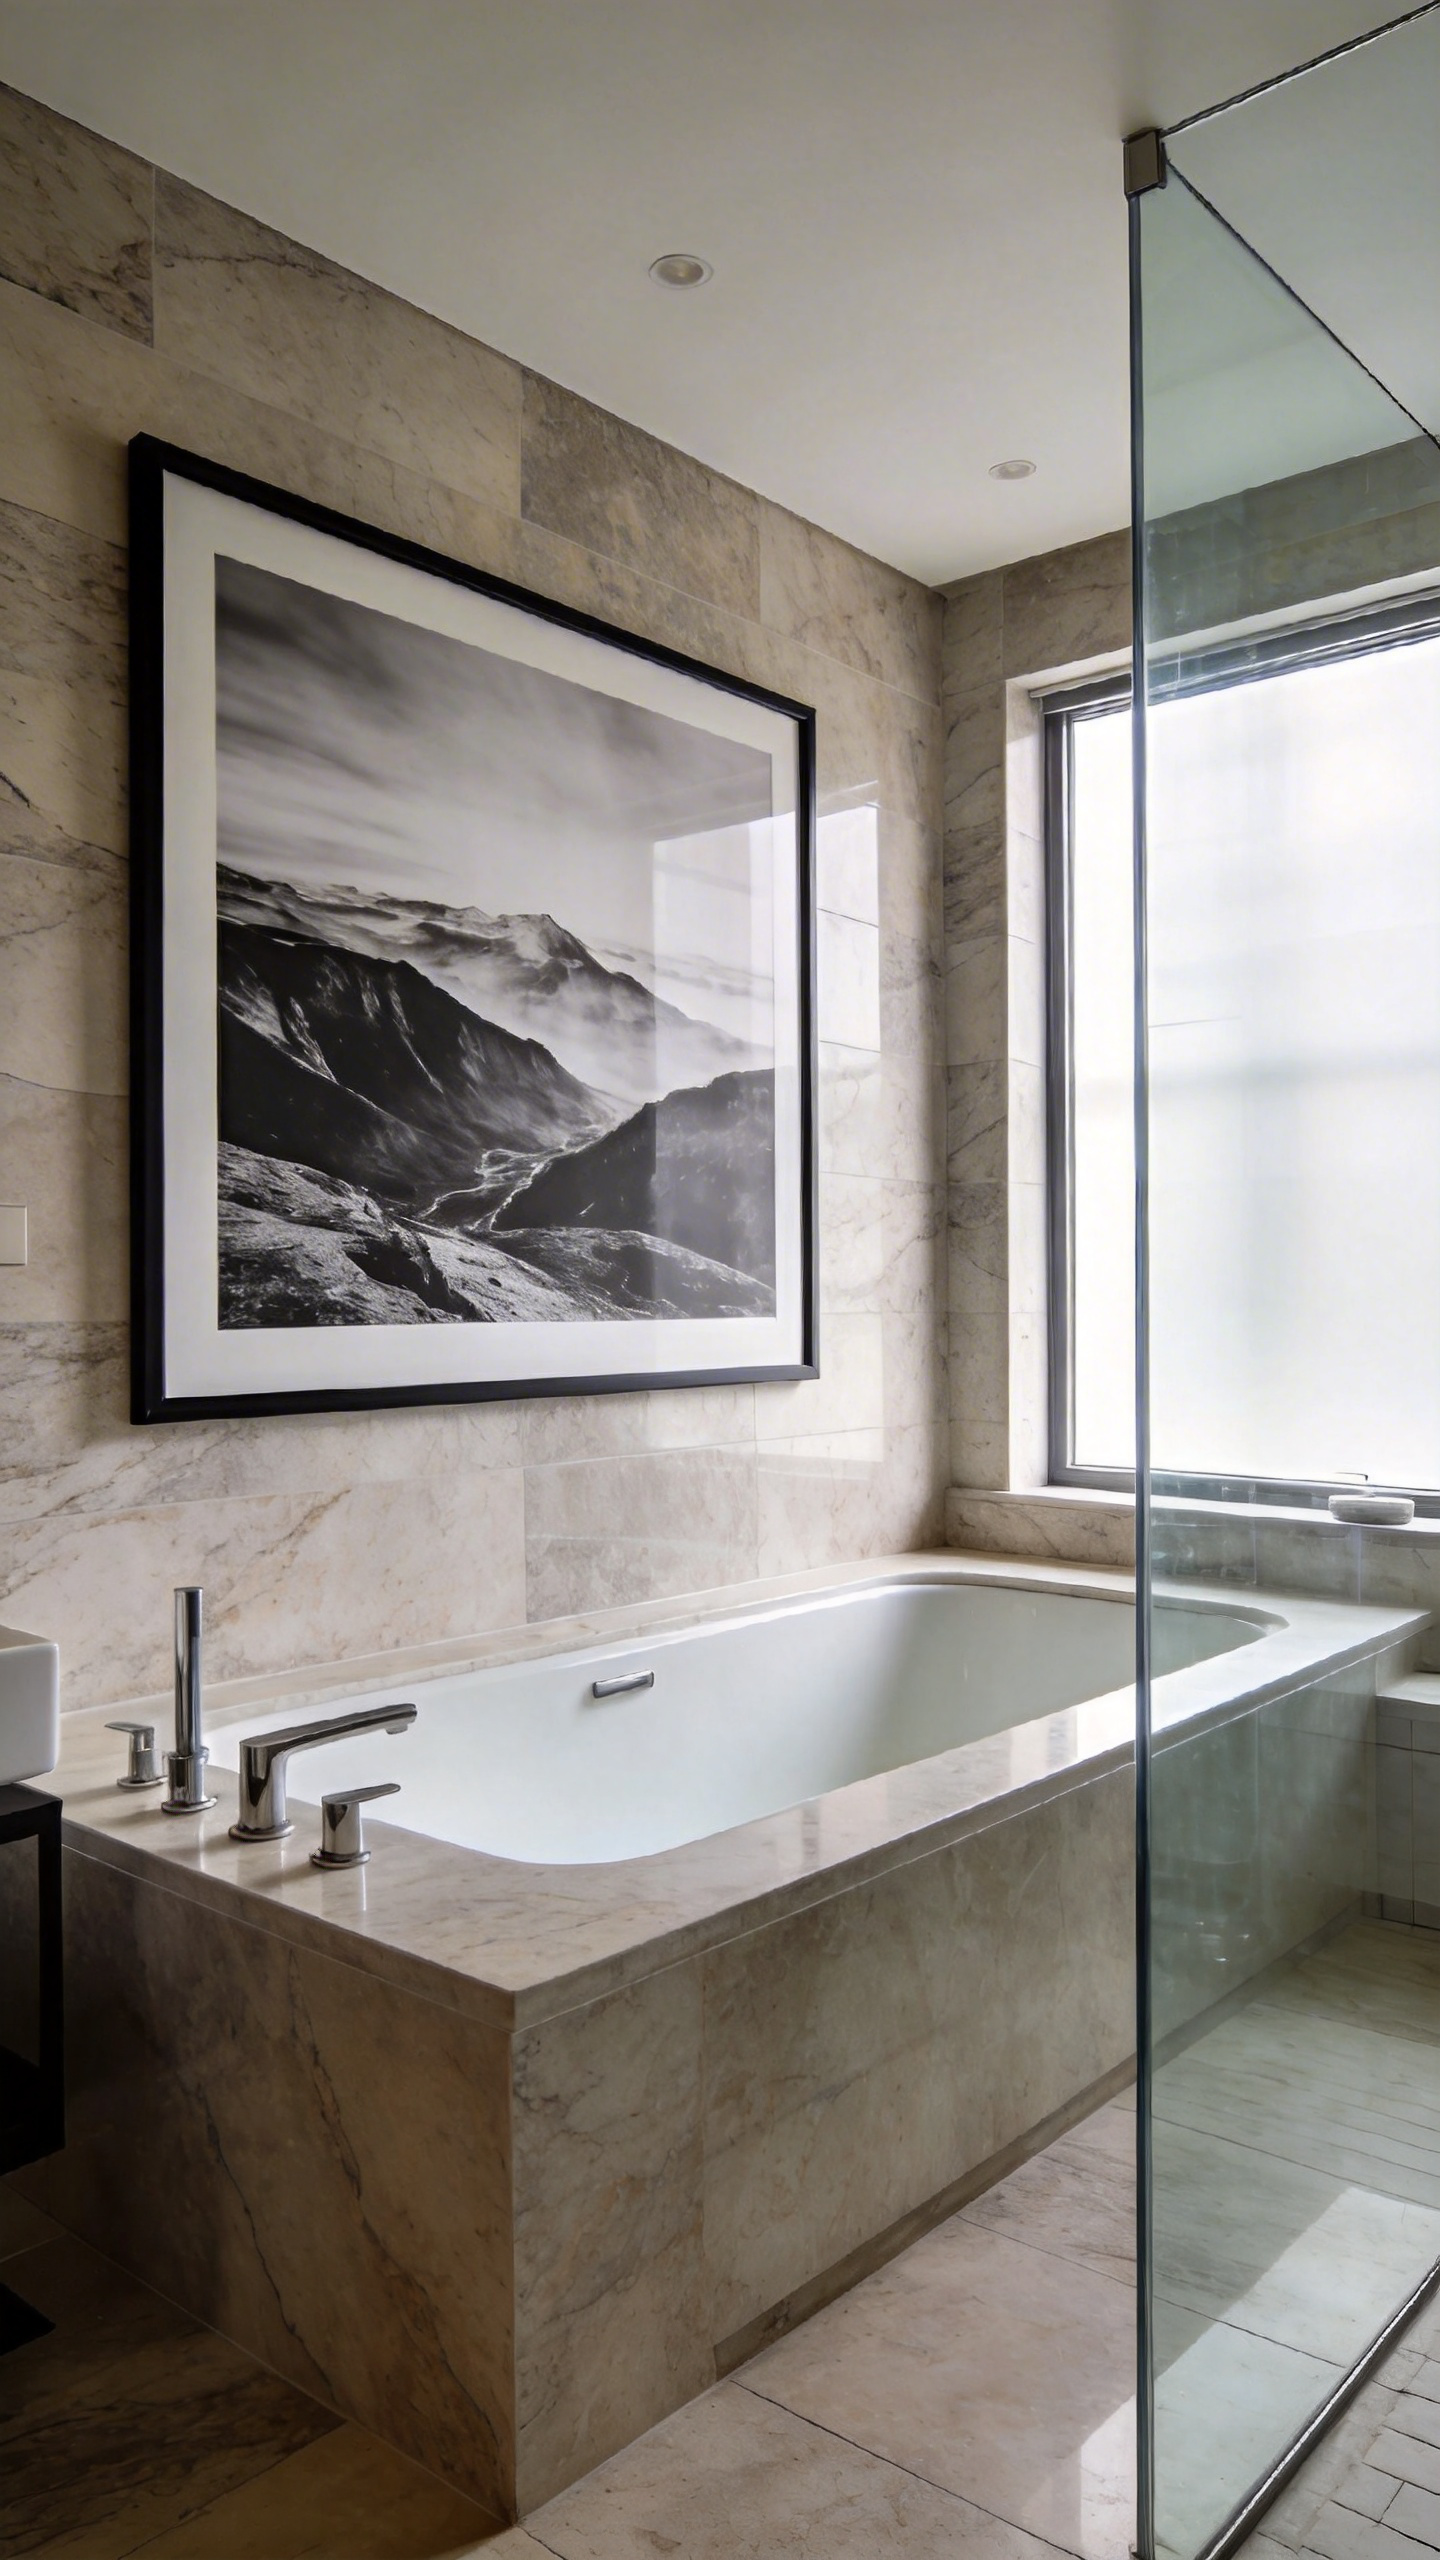
Next, you have to keep the print away from the glass. If the photo touches the glass, trapped condensation creates oily-looking puddles called Newton’s rings. Always use tiny plastic frame spacers to maintain a healthy airflow gap. Wood frames often warp and grow mildew in the bathroom. Sleek, powder-coated aluminum frames are completely steam-proof.
If you want to skip traditional framing entirely, order a dye sublimation print. The ink infuses directly into an aluminum panel. It floats off the wall, looks highly modern, and is completely waterproof. Finally, remember that steam gathers near the ceiling. Hang your photography comfortably at eye level to avoid the worst of the humidity.
15. High-Contrast Matting and Framing: Using Museum-Quality Borders to Protect and Elevate Budget Art
You do not have to spend a fortune to get a high-end look. High-contrast matting elevates budget art instantly. Try pairing a bright white print with a midnight-black museum mat. This bold border creates striking visual tension. It completely grounds the artwork against all the white porcelain in the room.
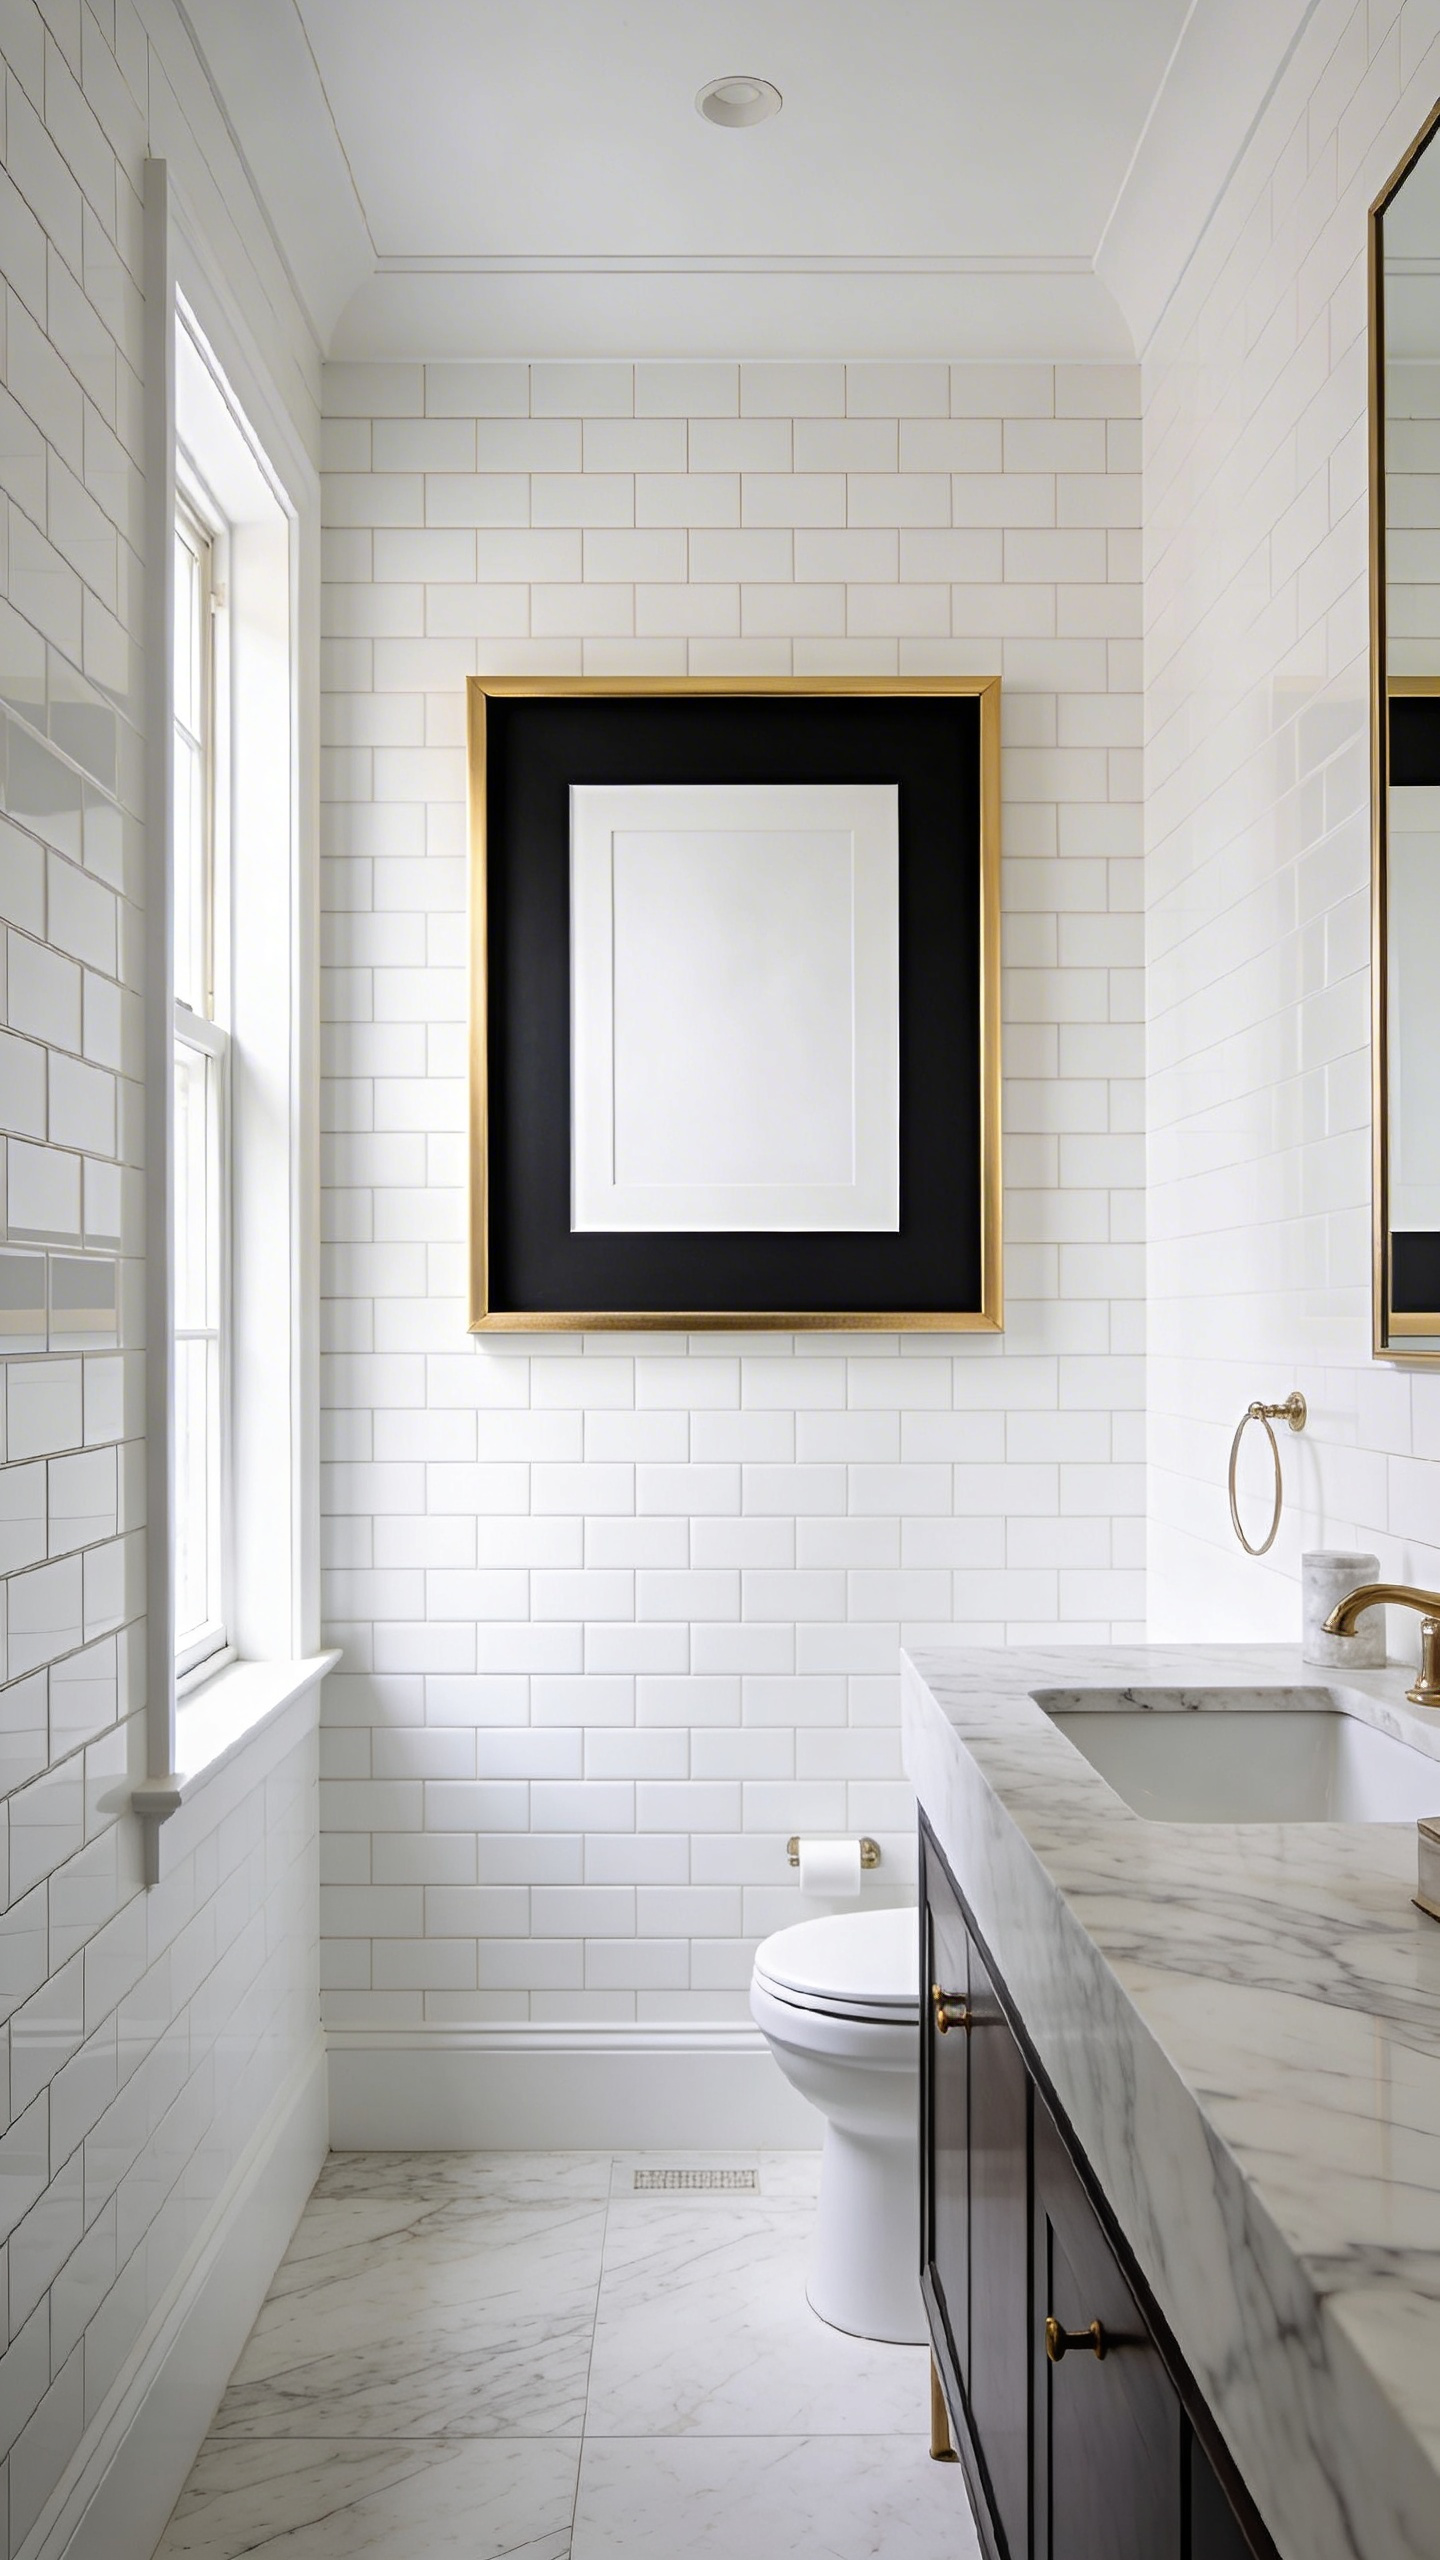
Curators also use oversized mats to make cheap prints look expensive. A dramatic four-to-one ratio of mat to print tricks the eye into seeing a valuable artifact. Use a “bottom-weighted” mat where the lower margin is slightly thicker. This keeps the artwork from looking like it is visually sinking.
However, high-moisture spaces speed up acid damage in cheap frames. Always use pure cotton rag mats to neutralize airborne acids. Professional framers seal the glass, mat, and backing together with archival tape. This tight micro-chamber fights off expanding hot air from your morning shower. Upgrade to museum-quality acrylic while you are at it. It kills the harsh glare from vanity lights and makes the ink colors look incredibly rich.
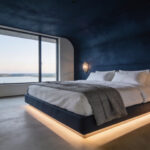
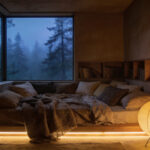
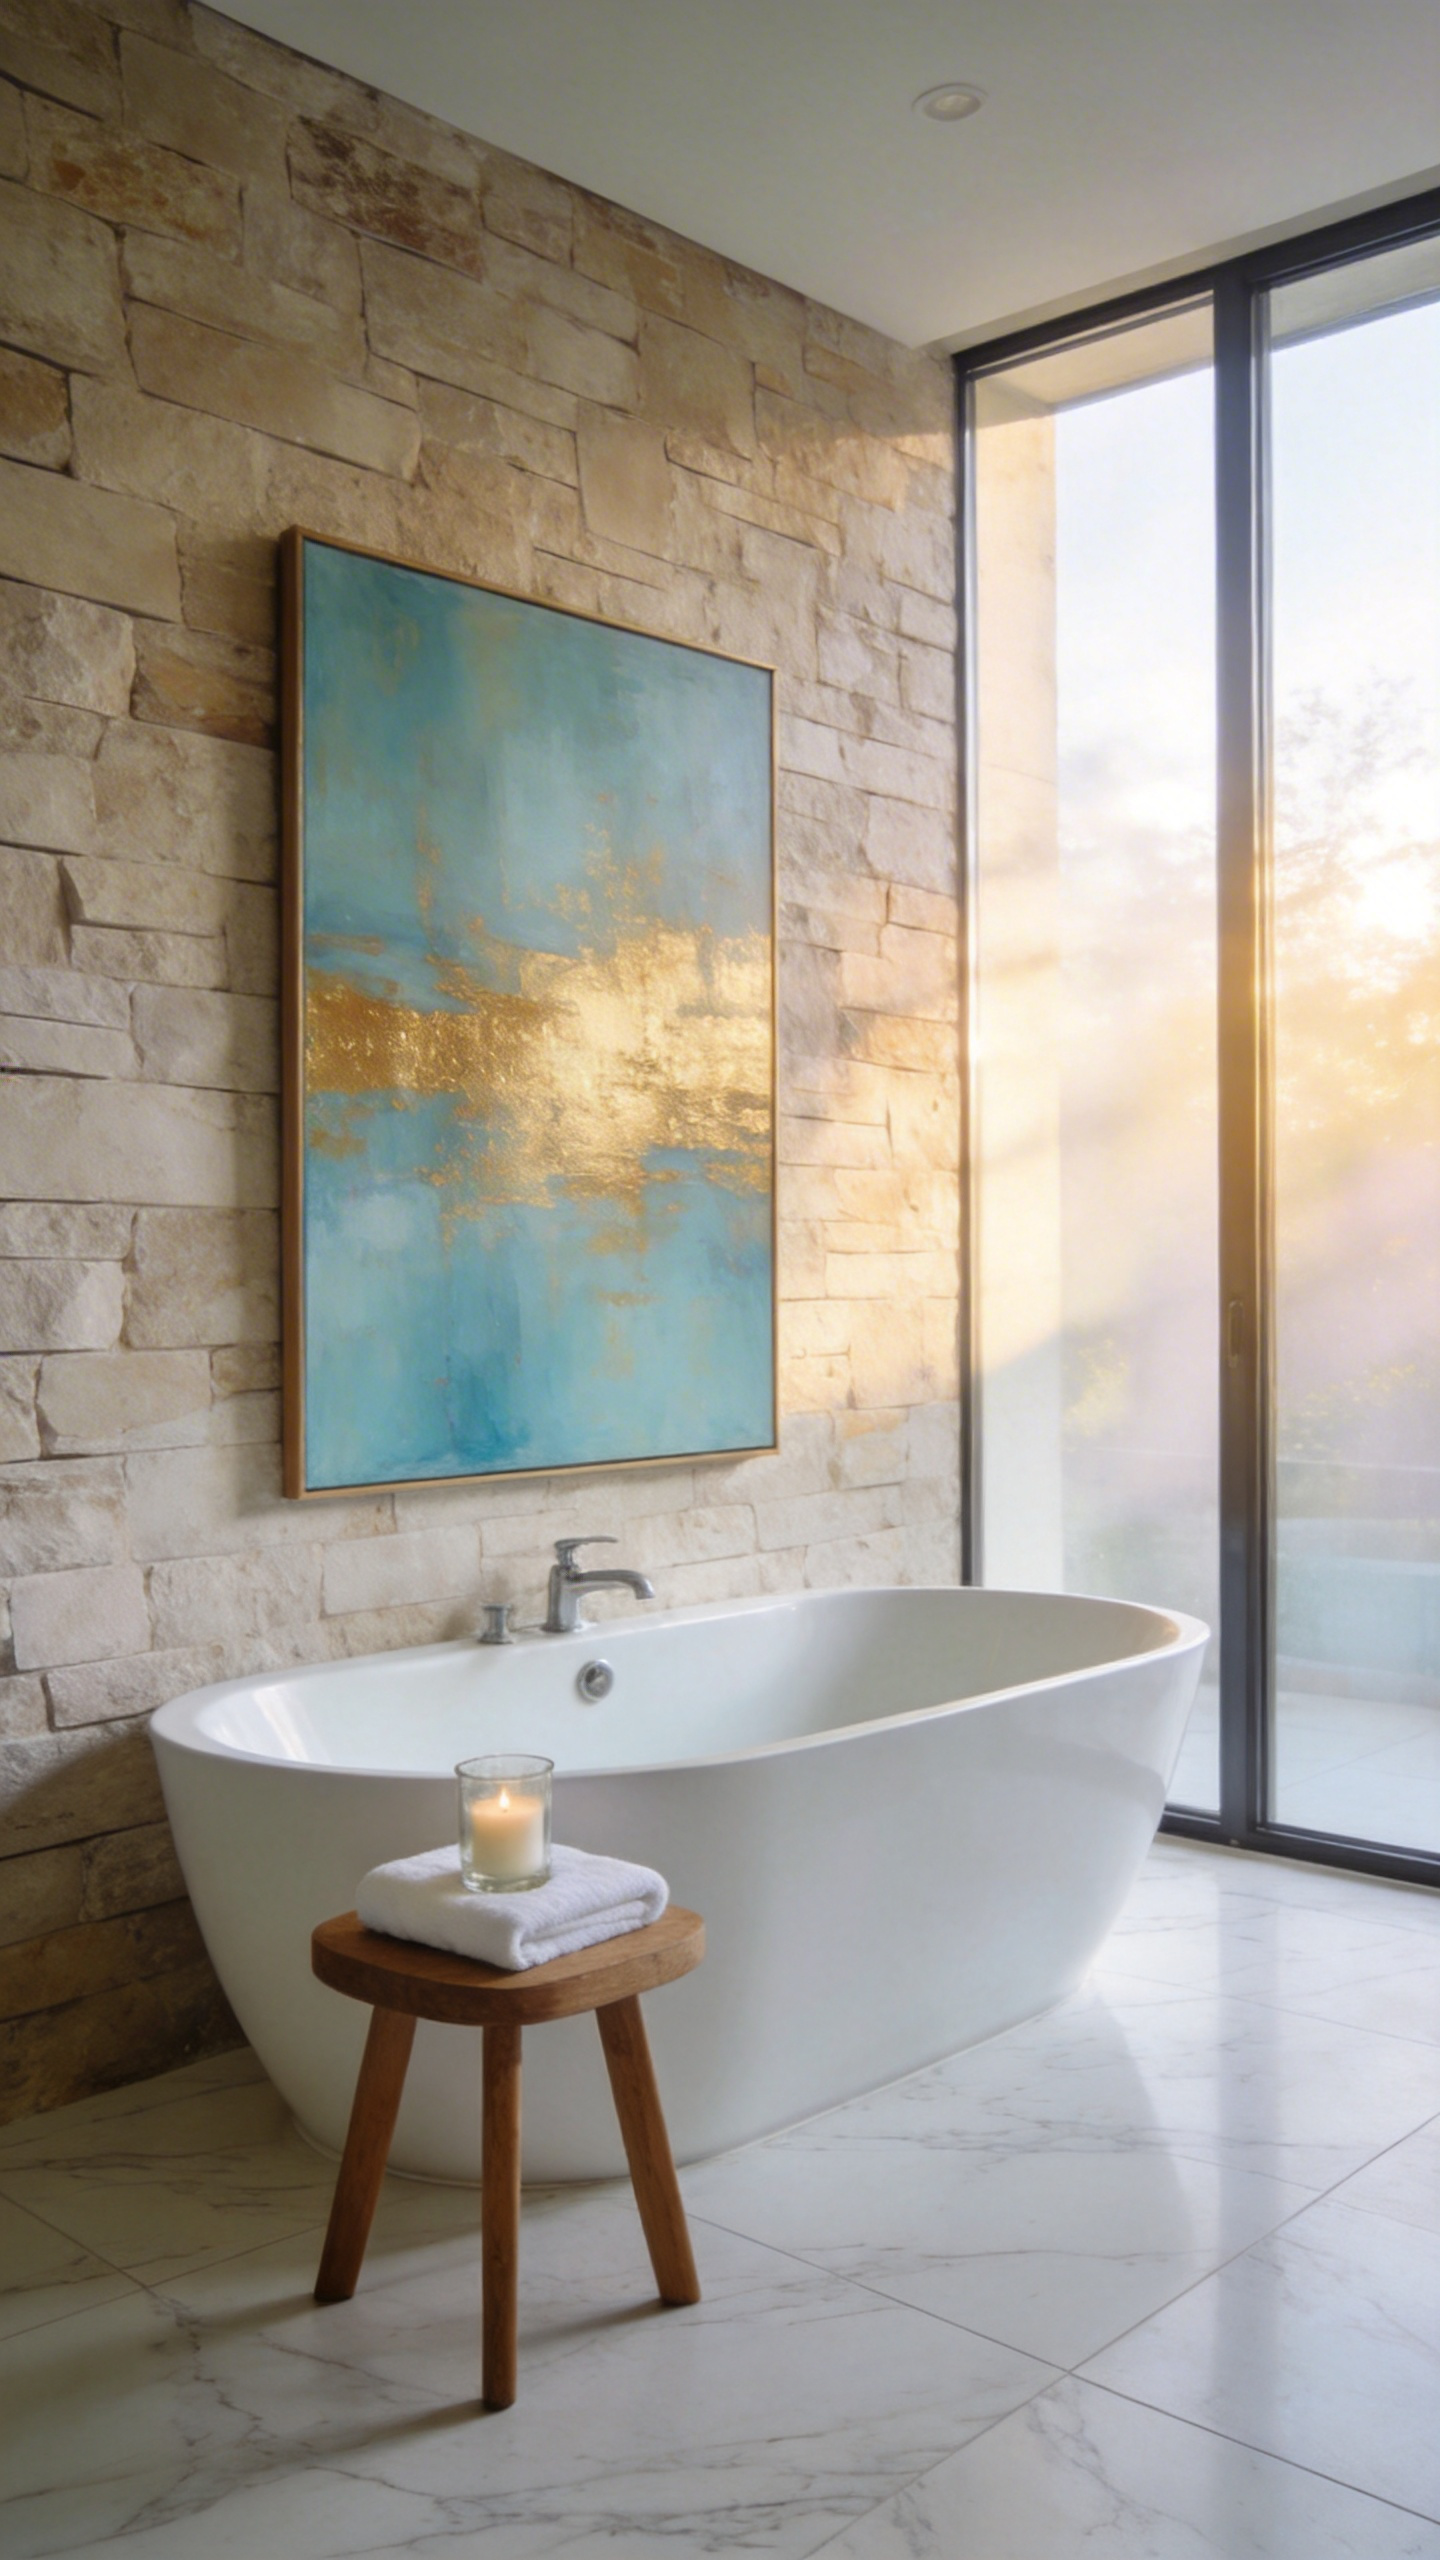
Phase IV: Mastery Integration—Immersive Curation
At the highest level of design, your bathroom becomes a true aesthetic sanctuary. This means embracing negative space. Do not clutter every wall. Surround your large power pieces with plenty of visual oxygen. This emptiness actually signals your parasympathetic nervous system to relax. Adding raw, tactile stone art also triggers a deep grounding response in a steamy room.
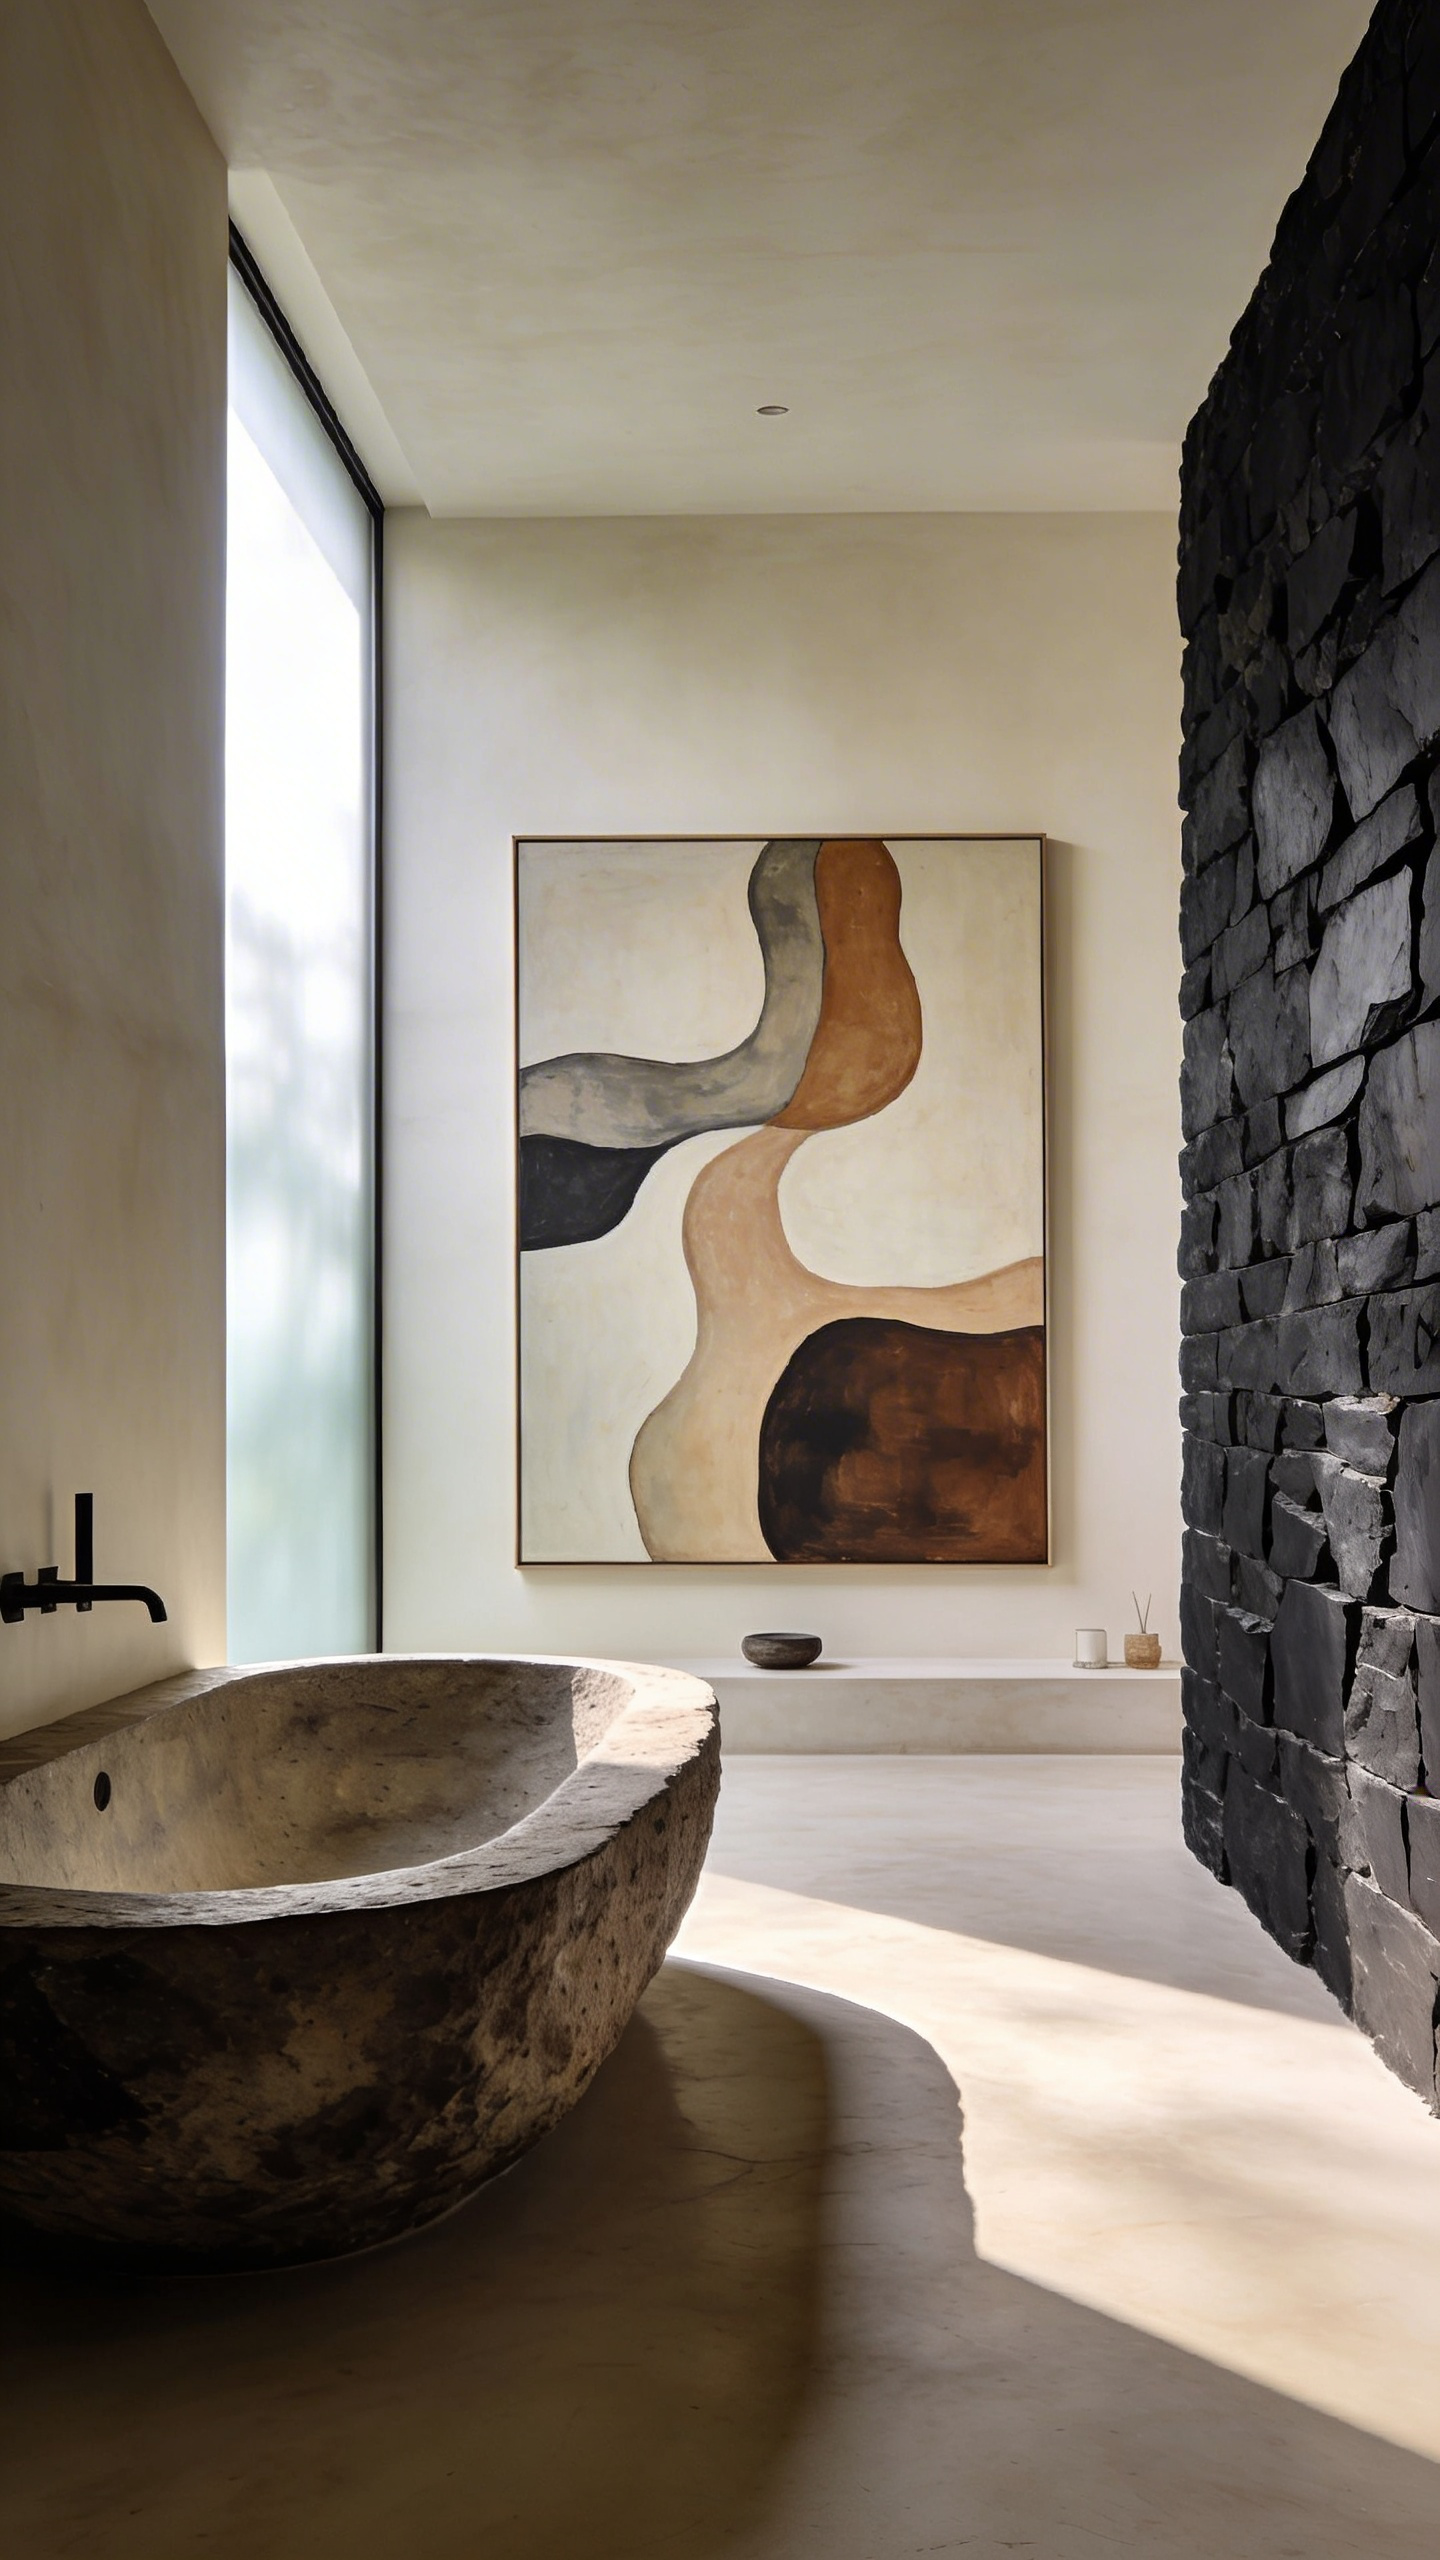
Immersive curation means ditching the generic “spa” prints. Follow the 80/20 rule: let clean architecture dominate 80 percent of the room, and save 20 percent for personal, soulful art. An antique oil painting in an ultra-modern bathroom creates fantastic visual friction. It feels like a private, 19th-century European salon.
Sometimes, the architecture itself acts as the art. A perfectly placed window can frame an outdoor landscape. Atmospheric lighting is just as important. Use narrow-beam spots to highlight specific canvases, mimicking an elite gallery. Finally, place your most uplifting abstract piece right in your morning sightline. It sets a positive emotional tone for the entire day.
16. The Floor-to-Ceiling Salon Hang: Creating an Immersive, European-Style Soaking Experience
The salon hang is a dramatic, floor-to-ceiling style that started at the Louvre in 1667. They put massive paintings way up high and smaller portraits at standing eye level. In a bathroom, you have to adapt this for a soaking tub. Since you will be seated, place your most intricate, detailed pieces 36 to 42 inches from the floor. Hang the grand, atmospheric landscapes near the ceiling. Leaning back in the tub creates an amazing, cathedral-like perspective.
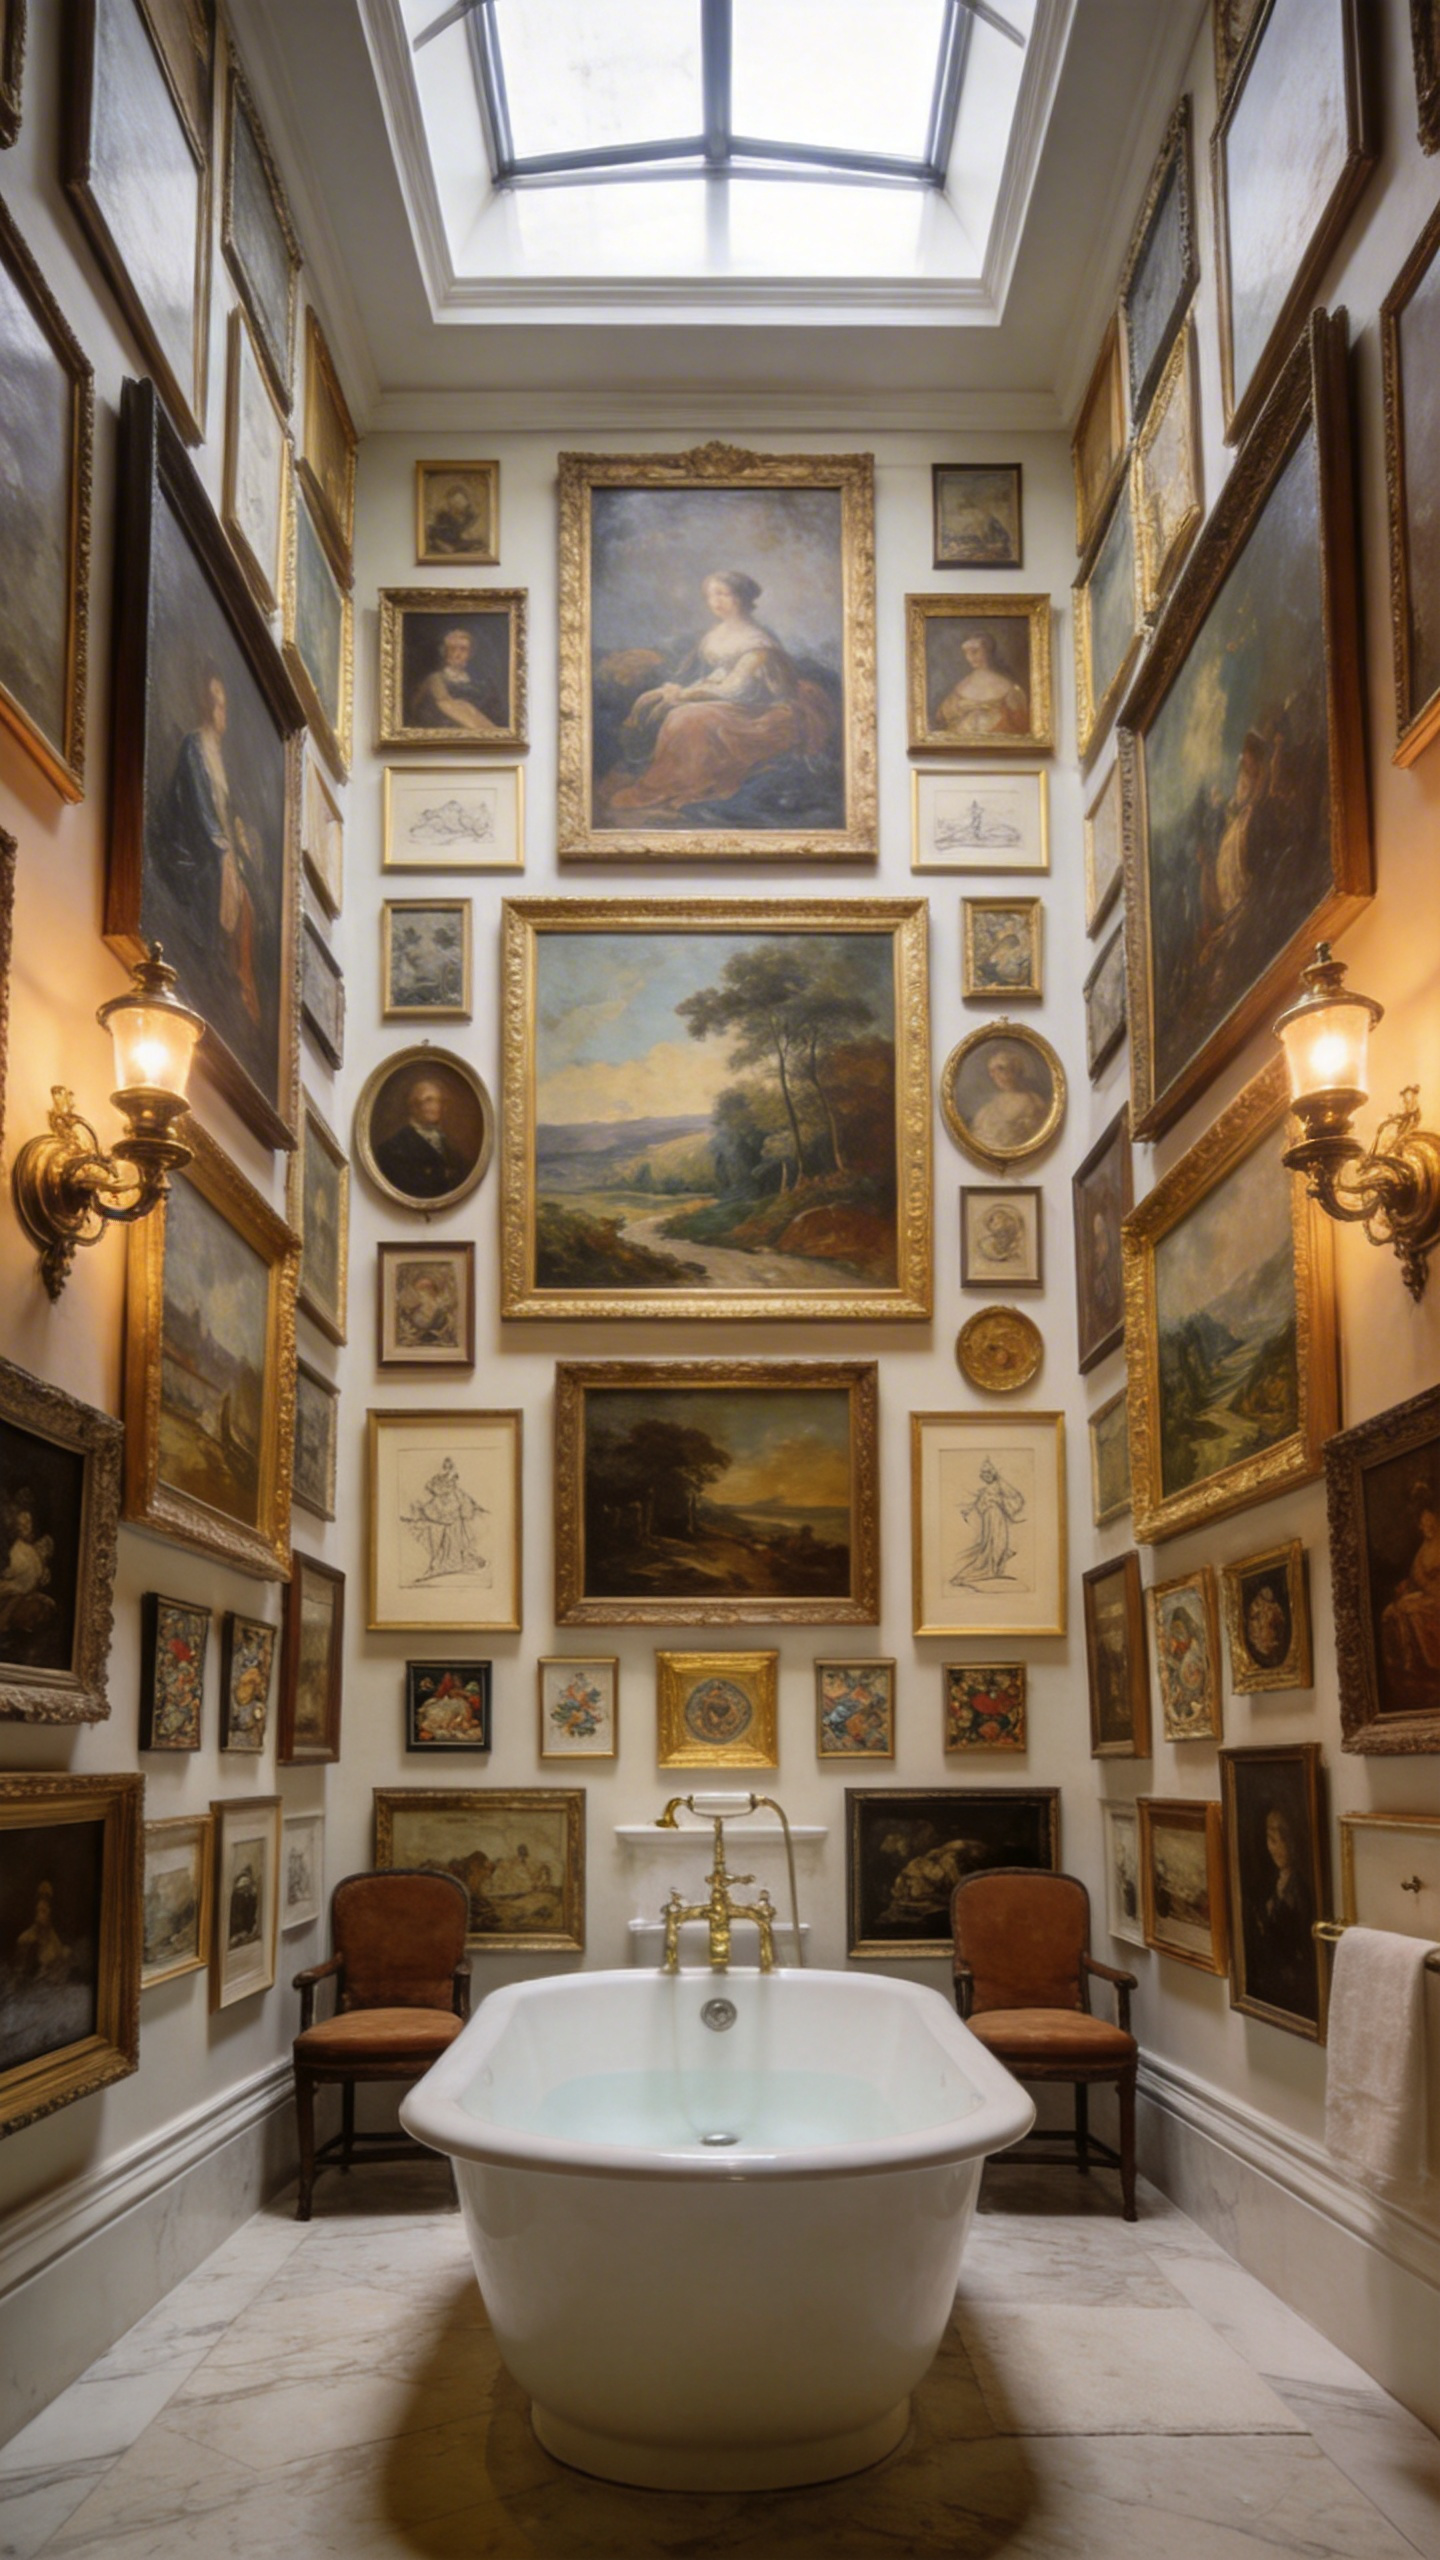
Naturally, this requires serious moisture protection. Mount everything using breathable Japanese paper hinges. Insist on Optium Museum Acrylic and sealed Mylar backings. Mix old-world mediums to build a compelling story. Anchor the wall with dark Dutch still lifes. Then, brighten it up with sepia architectural sketches.
Combine ornate gold frames with minimal modern ones. This intentional clutter feels organic and deeply personal. Being surrounded by so much art creates a profound sense of security. It makes the tub feel like an isolated, protective cocoon.
17. Seasonal Art Rotation Systems: Using Standardized Frames to Refresh Your Sanctuary’s Mood
Centuries ago, the bathroom was a highly decorated social space where aristocrats showed off fine art. We can easily bring that luxurious energy back today. I love setting up a seasonal art rotation system. It completely cures “art blindness”—that thing where your brain stops noticing decor because you see it every day. By swapping out one major piece every few months, the room always feels fresh. Hang delicate botanical sketches in the spring. Then, switch to a moody charcoal drawing to warm up the space in winter.
To make this effortless, standardize your frames. Buy three identical frames and mount a gallery rail near the ceiling. You can just slide new artwork inserts along the transparent cables without ever drilling new holes.
Of course, humidity is still a threat. Use waterproof dye-sublimation metal prints, or seal the backs of your frames tightly with acid-free tape. Finally, tie the visual art to your other senses. Pair a summer ocean print with a fresh eucalyptus diffuser. This multi-sensory approach makes the bathroom feel incredibly alive.
18. The Holistic Narrative: Effortlessly Connecting Your Bathroom Collection to Your Home’s Broader Artistic Identity
Bathrooms are essentially liminal spaces. They bridge the gap between our public homes and our private routines. Because of this, your bathroom art should not feel completely disconnected from the rest of your house. You want to avoid a jarring transition into a sterile utility zone. A bold piece in the hallway sightline anchors the shift perfectly.
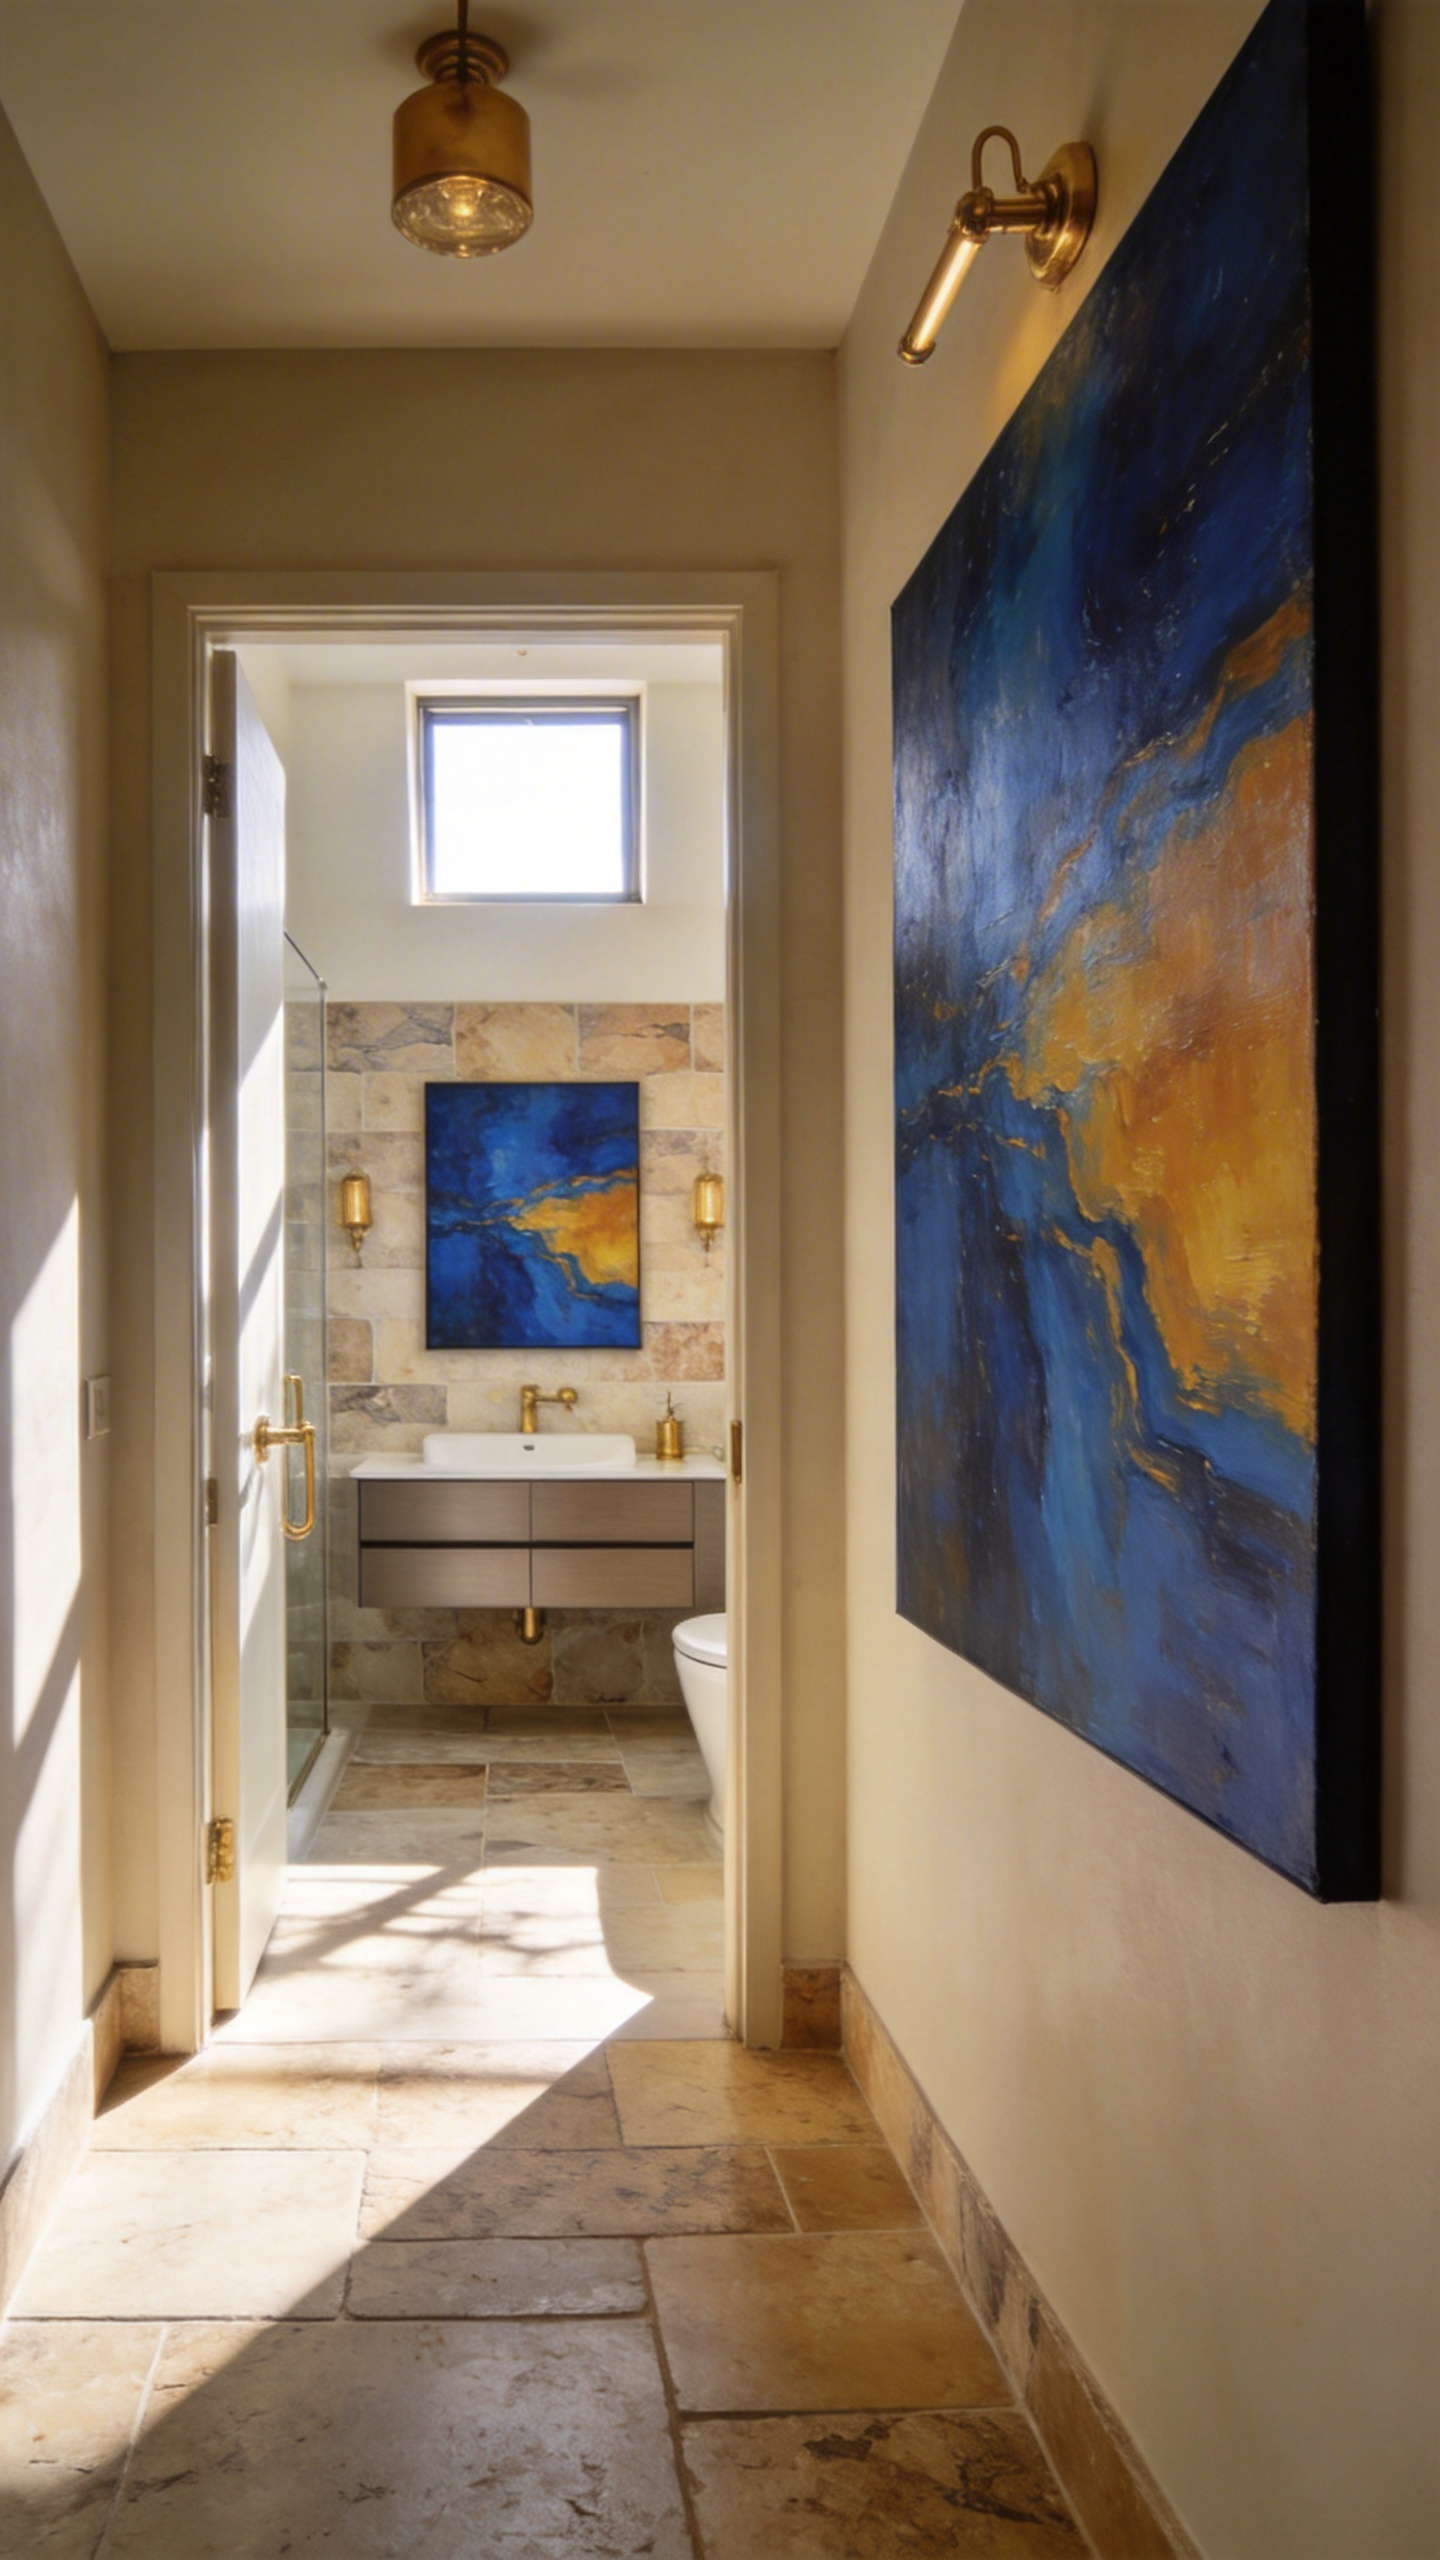
Building a holistic narrative is all about material resonance. If your living room has mid-century bronze sculptures, echo that warmth with unlacquered brass bathroom fixtures. A carved marble soap dish provides a great tactile link. However, high-value art near a shower needs serious protection. Unprotected paper will warp overnight. Textured encaustic wax paintings are a brilliant, moisture-proof alternative. Sealed metal prints also offer a pristine, steam-resistant finish.
Beyond the visuals, think about the broader sensory experience. High-end designs often include waterproof acoustic tiles to play subtle soundscapes. A signature woody room scent can perfectly match a dark landscape painting. Ultimately, your home’s artistic identity should not stop at the bathroom door. The right bathroom art ideas turn a functional space into a deeply personal sanctuary.
Frequently Asked Questions
Can I hang regular paper art in a bathroom?
You can hang paper art in a bathroom, but it requires serious protection from humidity. To prevent warping and mold, have the piece professionally sealed with a moisture barrier. Also, swap out standard glass for UV-protective acrylic to stop internal condensation.
What is the best height to hang art over a bathtub?
Aim for at least 18 inches above the bathtub rim. This protects the piece from splashes and rising steam. To get the best view while soaking, hang the center of the artwork at seated eye level, which is usually 36 to 42 inches from the floor.
Are metal prints better than canvas for bathrooms?
Absolutely. Dye-sublimation metal prints are perfect for wet environments. While traditional canvas absorbs steam and sags over time, metal prints are entirely non-porous. They are completely impervious to humidity, making them a stress-free, durable option.