If your kitchen works against you during dinner prep — spices toppling forward when you reach for the back row, spray bottles colonizing the cabinet floor, corner shelves holding duplicates you forgot you bought — you are not alone, and you don’t need a renovation to fix it. A well-chosen kitchen storage solution can transform a frustrating space into one that supports how you cook. I’ve spent over a decade reworking kitchen layouts for families and serious home cooks, and the most impactful upgrades I’ve seen rarely cost more than $50. They just require knowing what problem you’re solving and which system solves it cleanly.
This list covers 16 kitchen storage solutions across every zone of your kitchen — from the corner cabinet black hole to the refrigerator’s forgotten back shelf. Some take five minutes to install. Others require measuring twice and a trip to the hardware store. All of them make a tangible, daily difference.
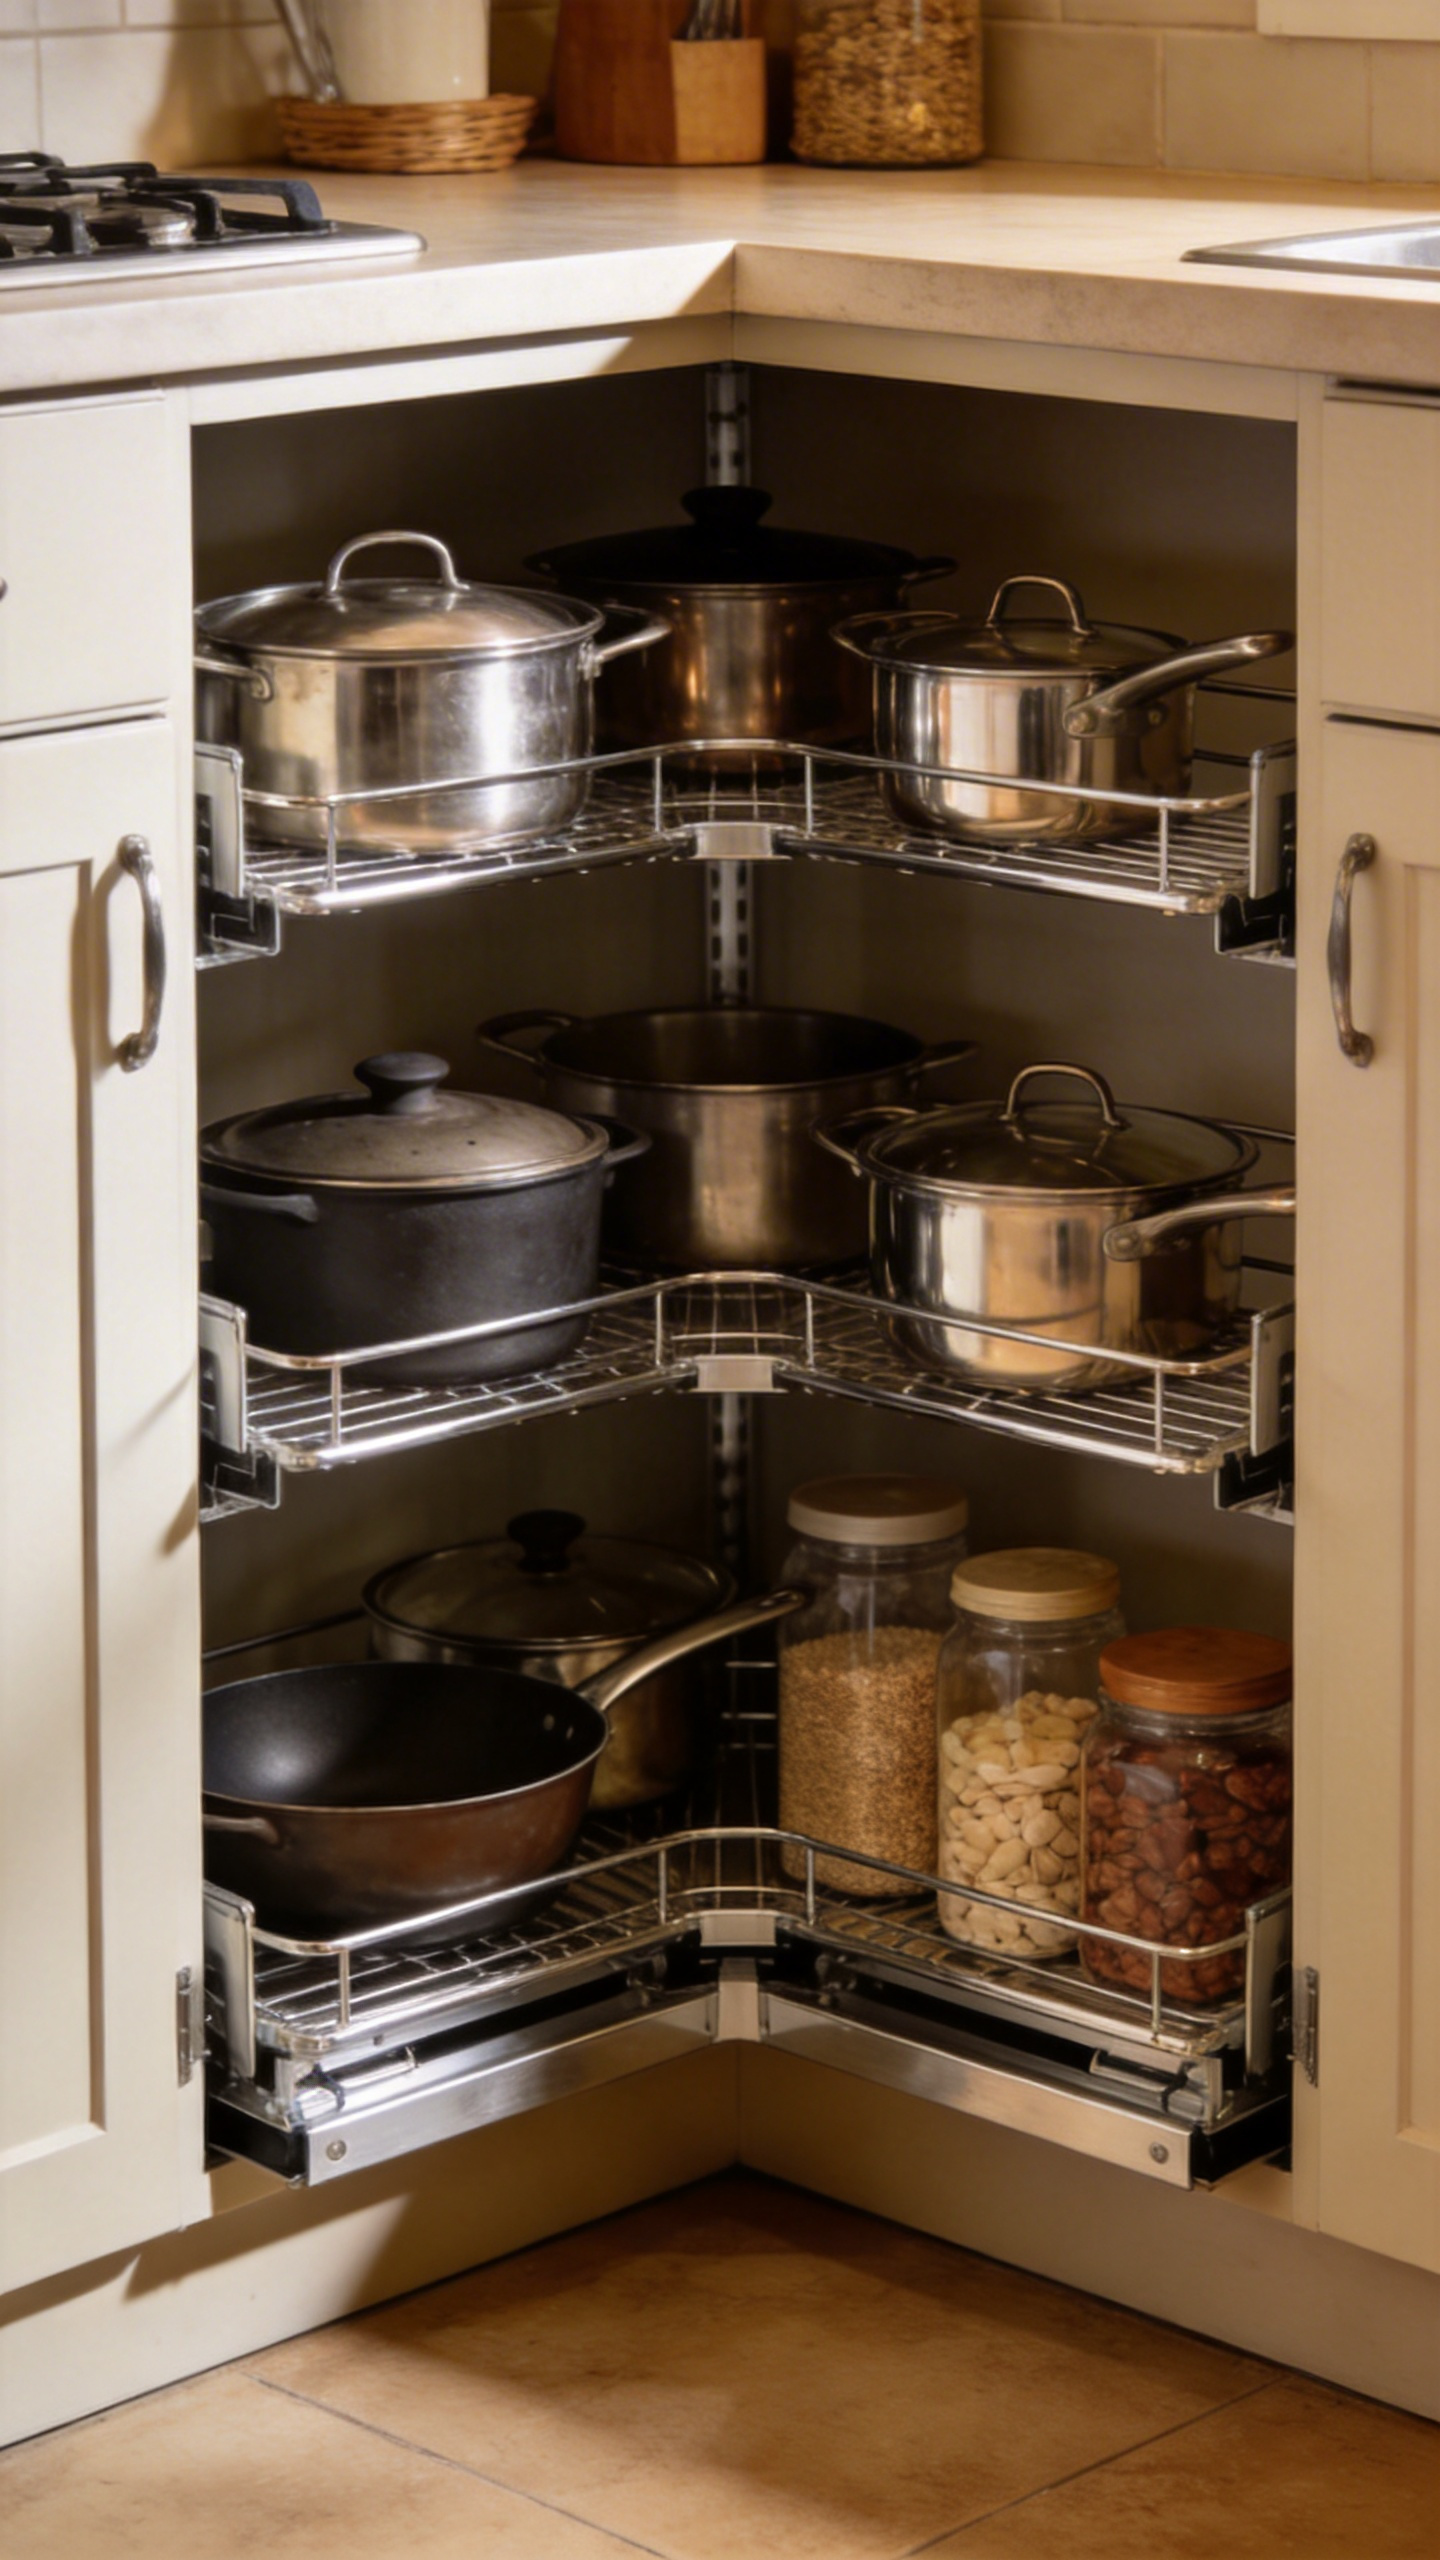
1. Pull-Out Cabinet Organizers — A Kitchen Storage Solution for Corner Spaces
Corner cabinets are where kitchen storage goes to die. In a standard L-shaped kitchen, the intersection creates a deep, awkward void that standard shelving can only partially reach. Items pushed toward the back are invisible, and retrieving them requires crouching and rummaging through whatever landed in front. It’s the cabinet that quietly accumulates duplicates — a second cast-iron pan, two identical jars of paprika — because the first one disappeared into the dark.
Choosing the Right Corner Kitchen Storage Solution
Three systems solve corner storage effectively. A lazy susan (rotating circular shelves) is the most affordable option at $30–$150 and the easiest to retrofit into an existing cabinet. It works well for lighter items and spice jars but struggles with tall bottles and heavy pots. Order the right shape: full-circle susans fit some configurations, but D-shaped or kidney-shaped models are required for many cabinet openings. A susan that jams because the shape is wrong is worse than no susan at all.
Blind corner pull-outs use full-extension slides to bring a two-shelf unit sliding out from the blind side of the cabinet. The entire depth of the cabinet becomes accessible, which means a stand mixer or large roasting pan can live back there and still come out easily. These run $80–$250 and need at least 9 inches of clearance at the door opening.
The magic corner — or LeMans system — is the premium option: hinged swing-out shelves that fold outward with the door and put every inch of storage in front of you. Cost is $250–$700 installed, but for a kitchen refresh it’s worth the consideration. The most common installation mistake across all three systems is skipping the interior depth measurement. Blind corner pull-outs need at least 21 inches of cabinet depth to track properly — measure before you order.
2. Over-the-Door Pantry Organizers for Instant Extra Shelf Space
The back of a pantry door is a storage surface most people never use. A standard full-height pantry door face offers 1.5 to 2 square feet of vertical space — enough for six to nine tiers of spice jars, canned goods, or snack packets. An over-door rack converts that space into functional storage without drilling a single hole, without modifying a shelf, and in the time it takes to hang a picture.
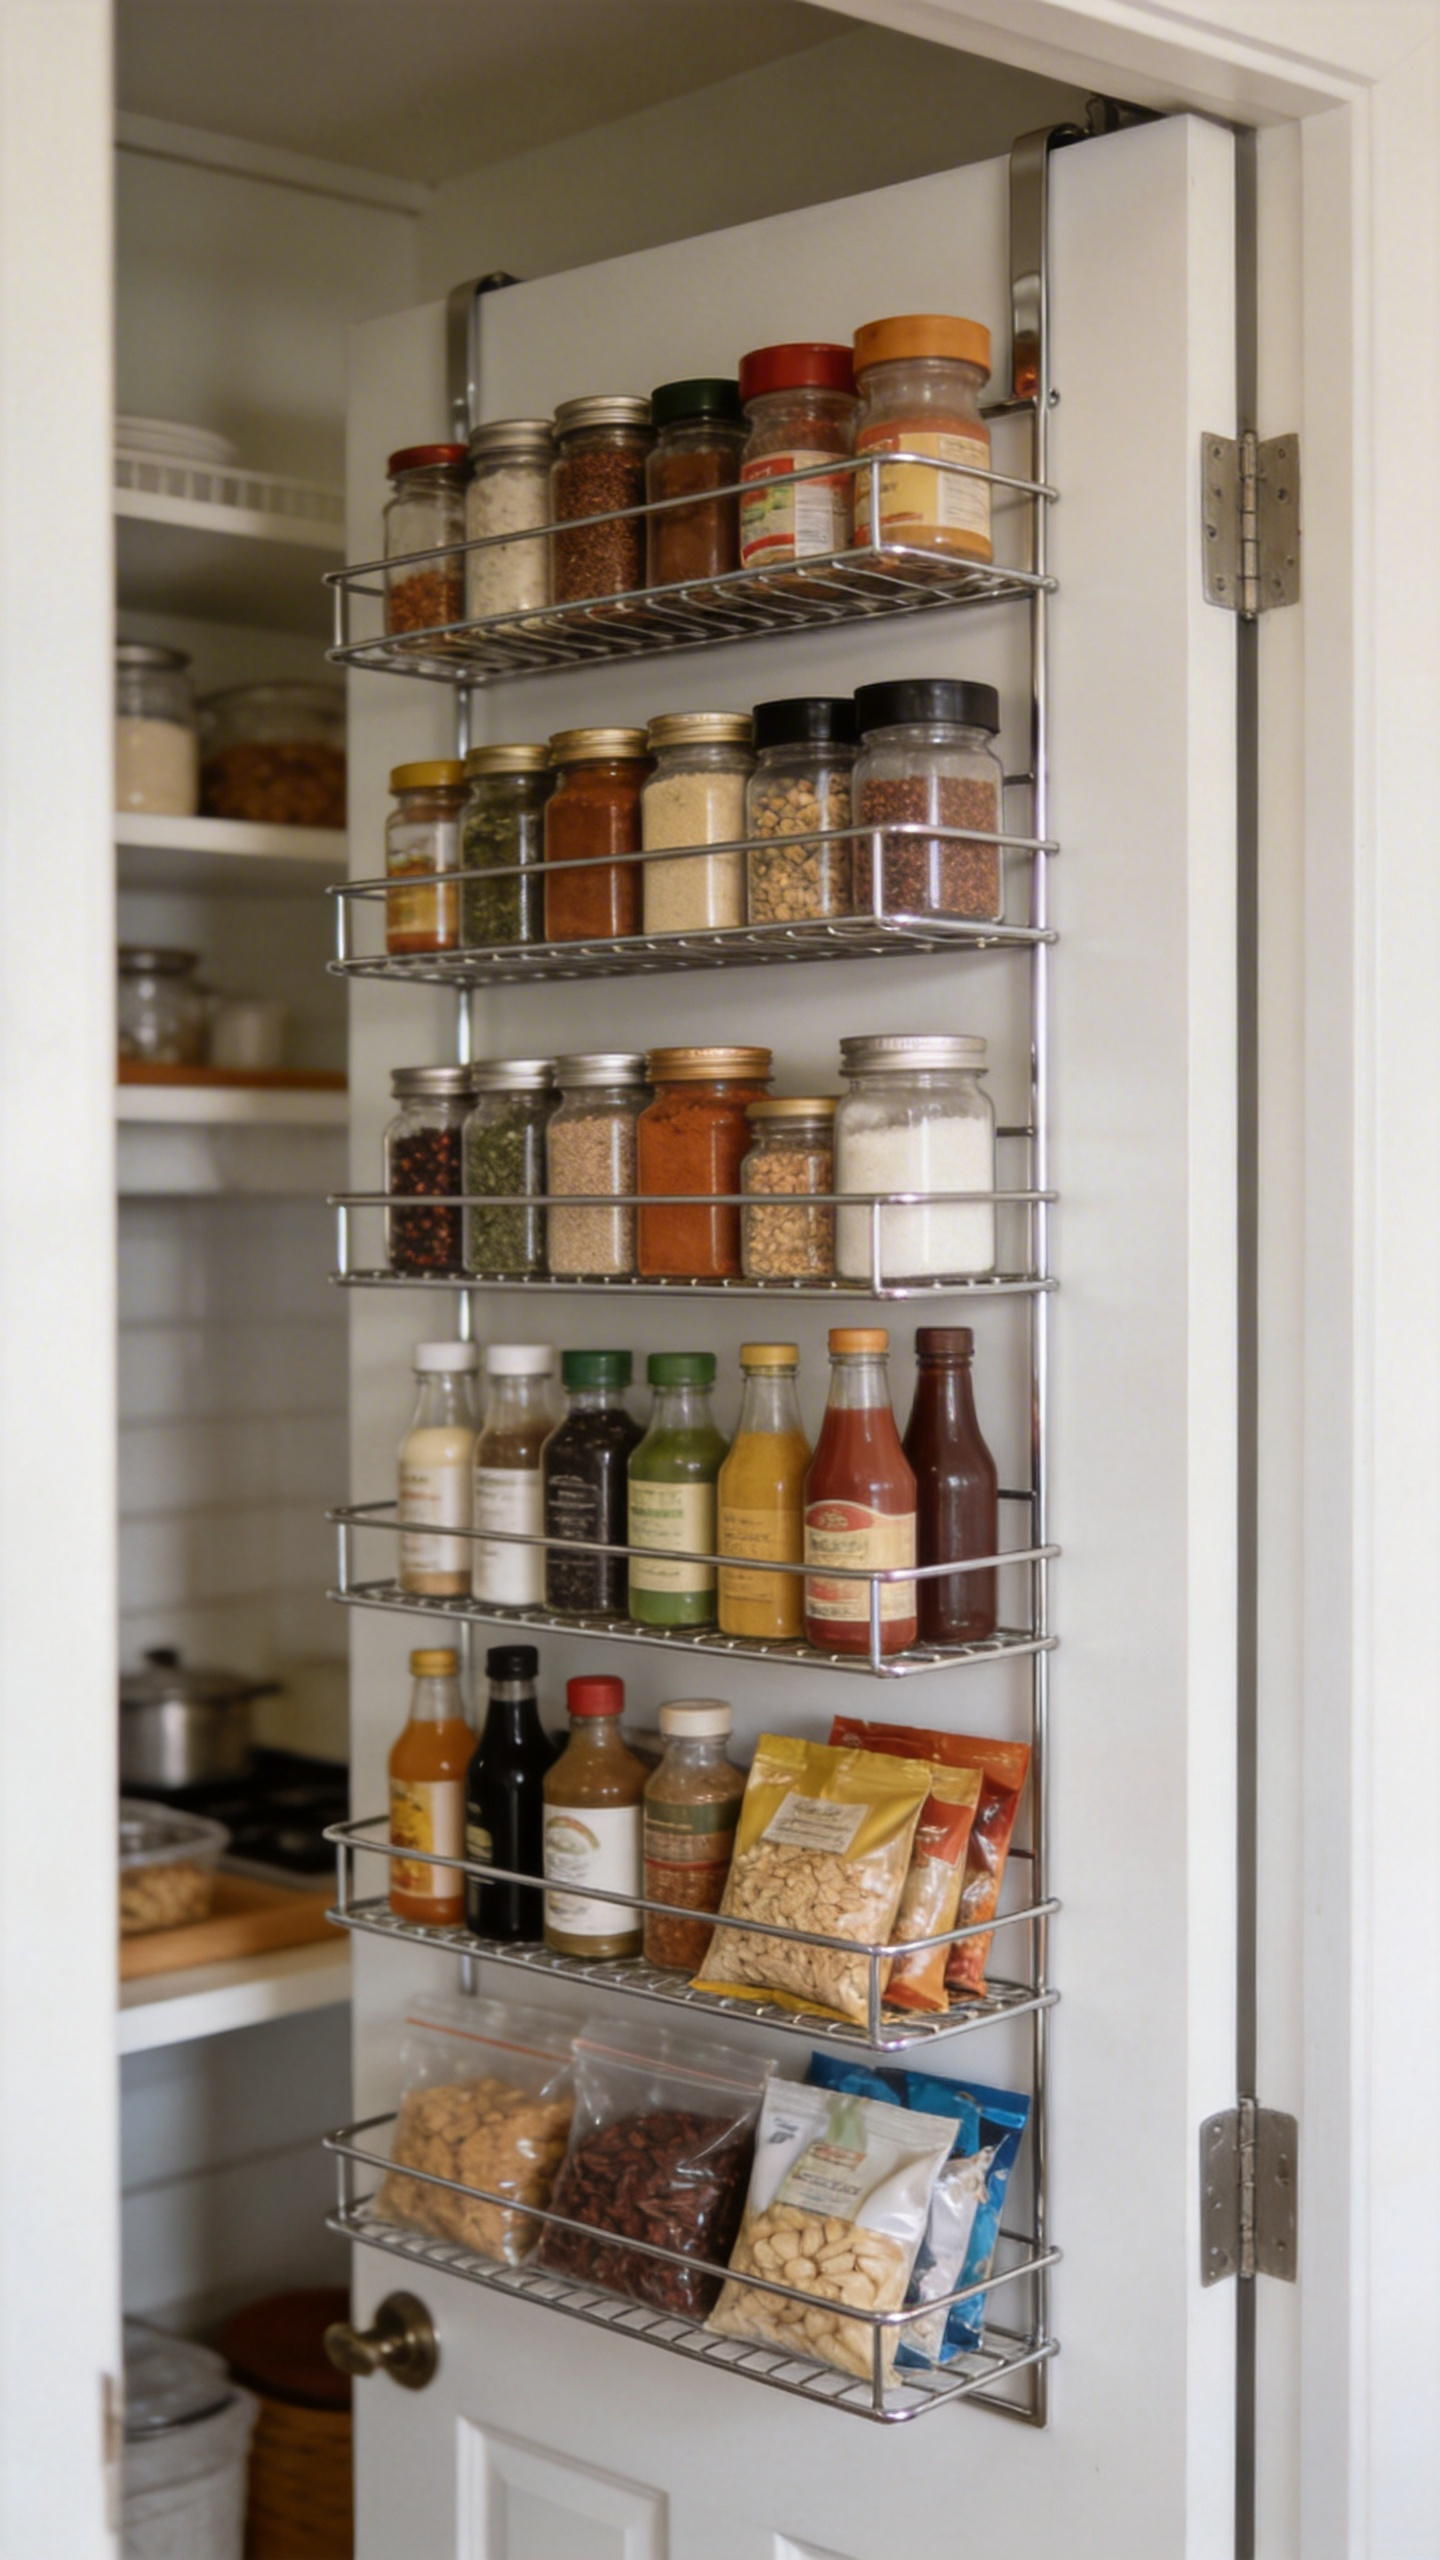
For broader kitchen pantry organization strategies, the pantry door is one of the first places worth assessing. Most over-door rack systems hook over the door top with a steel bracket that fits doors up to 1.75 inches thick; thicker doors need extension hooks sold separately. Installation takes under a minute. Delamu’s six-tier adjustable rack and Moforoco’s nine-tier model both rate well; total capacity runs from 44 to 90 lbs depending on the model, with individual shelves holding around 11 lbs each.
Style, Weight, and Rattle
Choose the rack style based on what you’re storing. Wire rack systems — coated steel or chrome — handle heavier items: condiment bottles, canned goods, cleaning sprays. Solid plastic shelf styles prevent small packets and seasoning envelopes from falling through the gaps, which wire racks don’t. Fabric pocket organizers with clear pockets work for lightweight items like plastic bags and twist ties but are not suitable for glass jars.
Two practical checks before buying: measure the gap between your door face and the nearest cabinet shelf edge. Most systems need 2 to 3 inches of clearance for the door to close. Also check the door clearance from the surrounding wall — a pantry door that swings right next to a wall won’t have room for the bracket to deploy. To prevent the metal-on-wood rattle that cheap over-door organizers are known for, add a strip of adhesive foam tape to the hook bracket where it contacts the door top.
3. Magnetic Knife Strips That Free Up Your Entire Knife Block Space
A standard six-slot knife block takes up roughly 6 by 9 inches of counter space and holds only the knives that fit its slots. That means your cleaver, bread knife, and Japanese gyuto are either stuffed awkwardly into the block or living in a drawer where their edges degrade against other metal. A wall-mounted magnetic strip costs $15–$40, mounts in 15 minutes, and holds every blade you own regardless of shape.
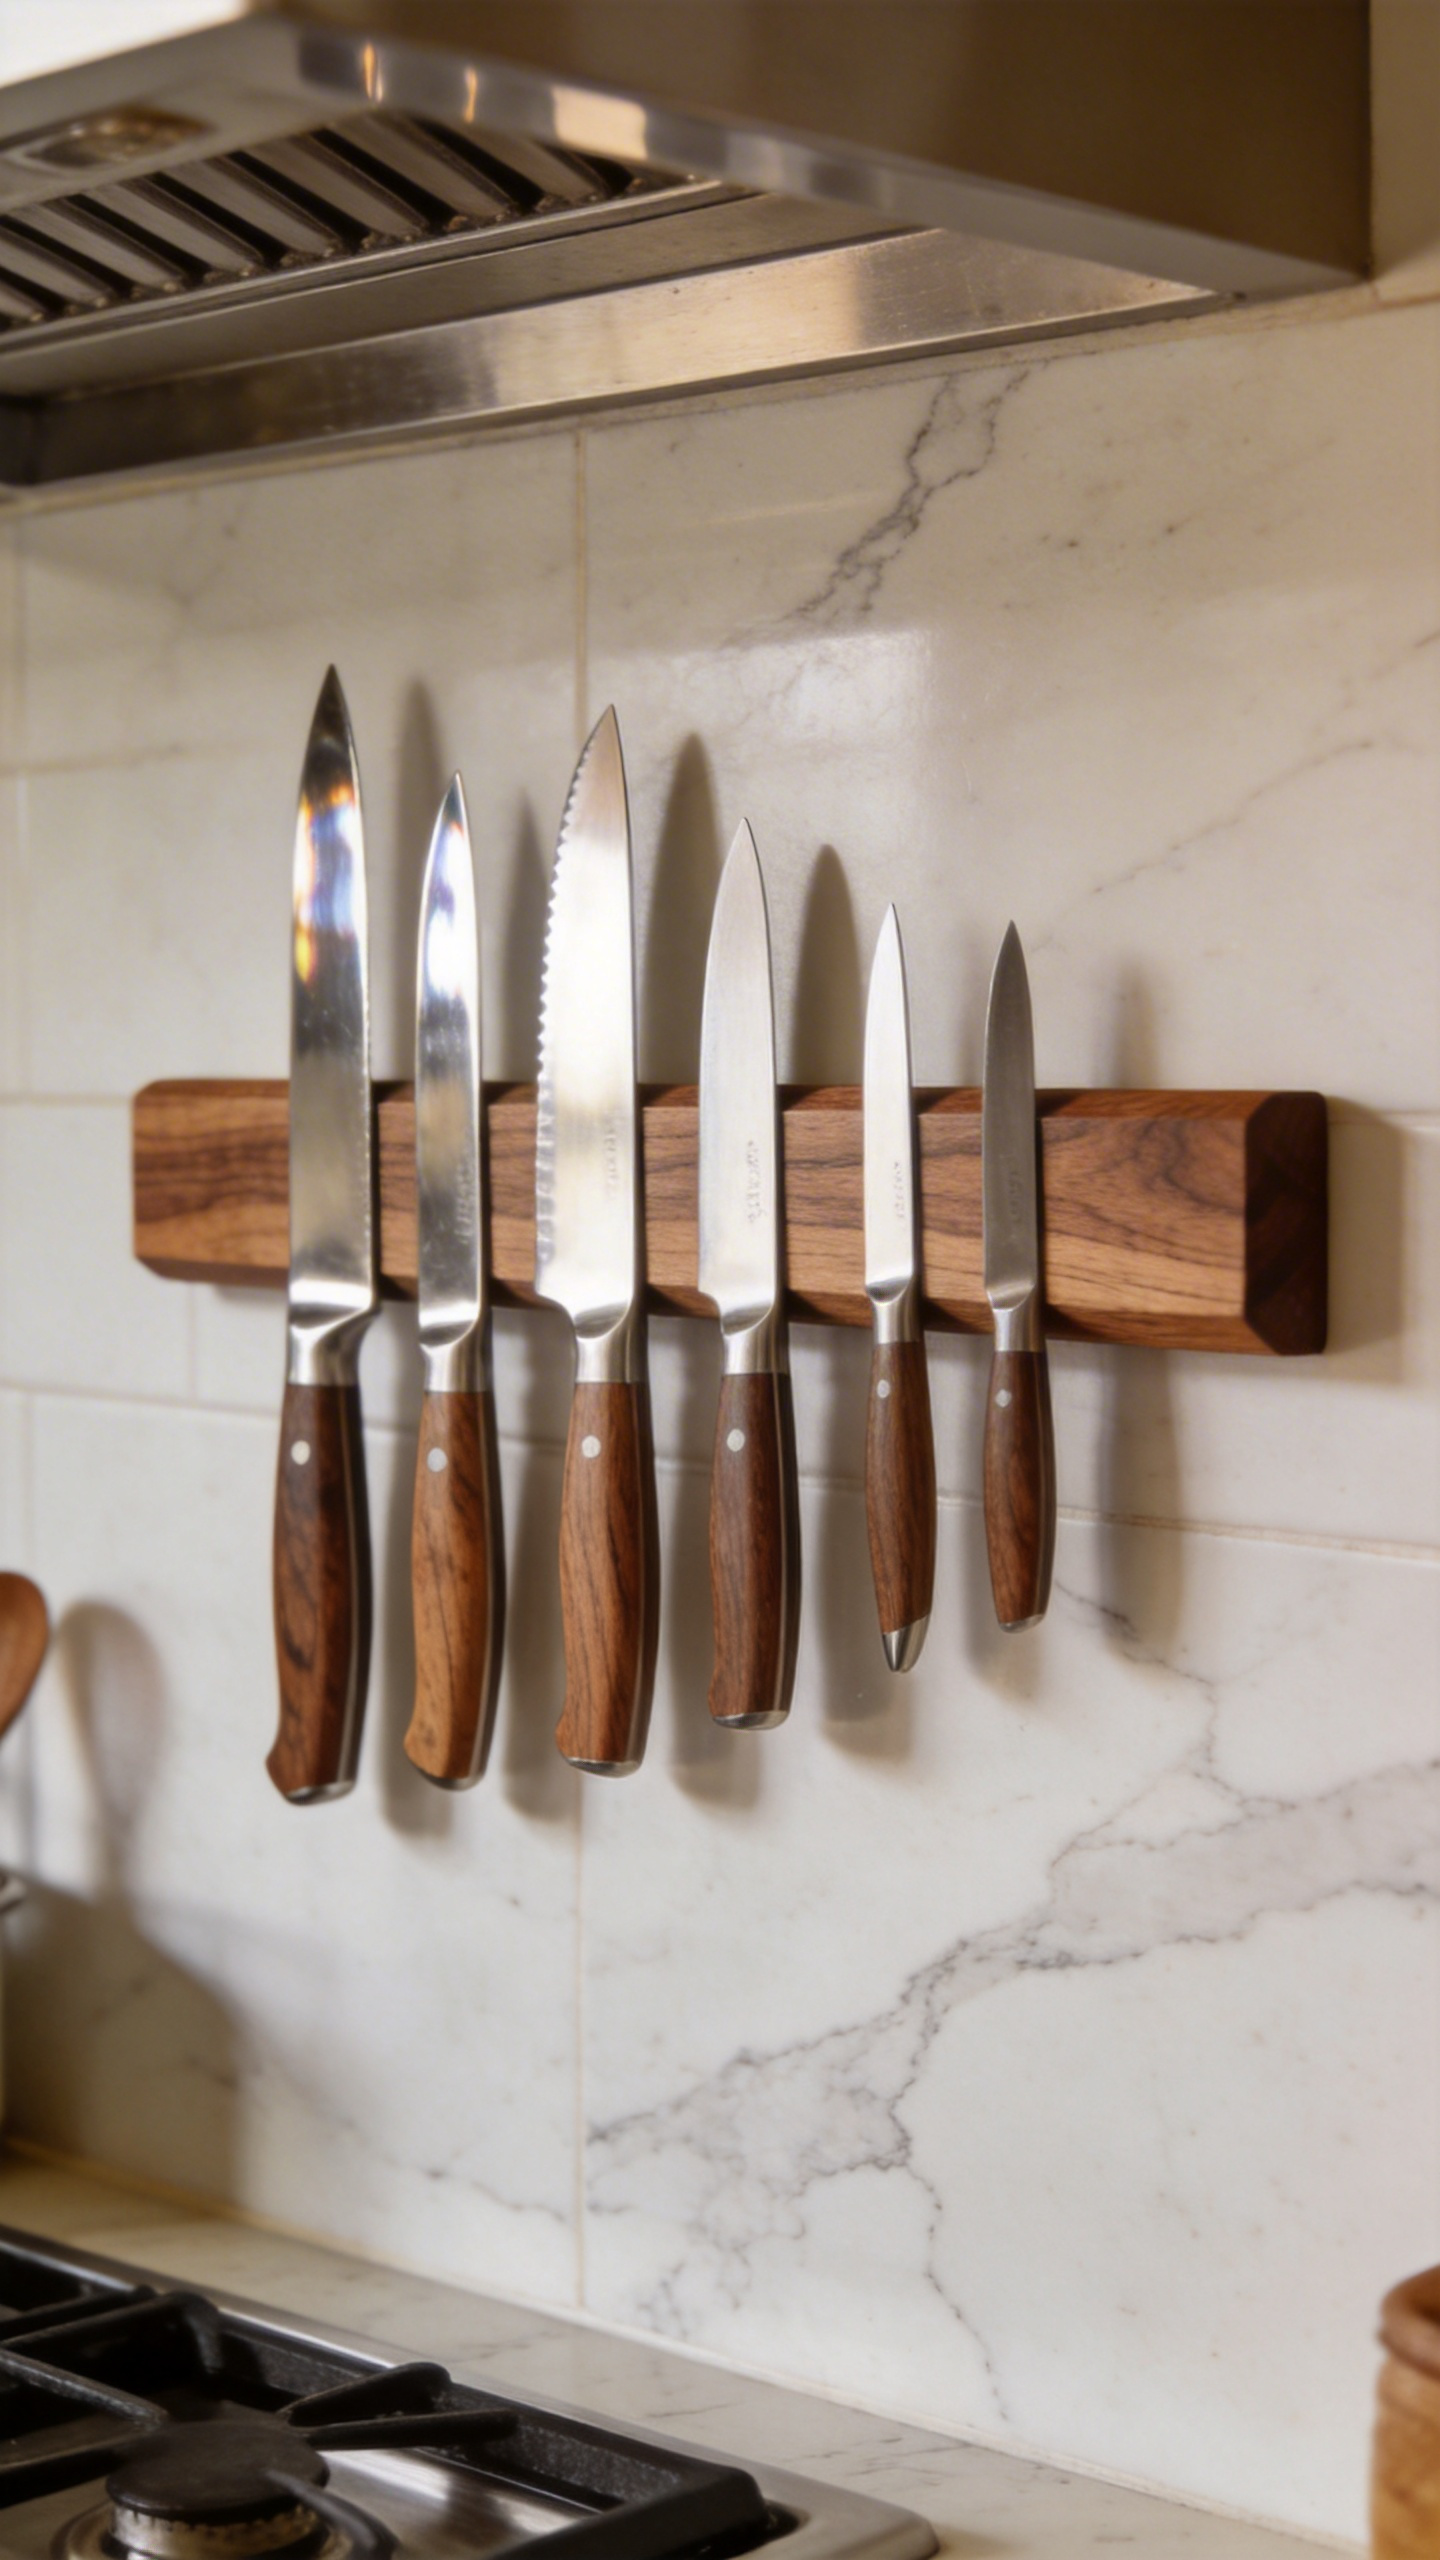
Professional kitchens have used magnetic strips for exactly this reason: knives stored edge-free stay sharper between honings. The blade contacts only air and the strip face, not wood slots or drawer walls. For a serious home cook who hones weekly and sharpens seasonally, this translates to a noticeably longer edge life.
Which Mount and Which Material
Screw mounting into a wall stud is the most secure option — lag screws into studs resist the repeated pull force of neodymium magnets. Adhesive mounting (3M VHB tape, not standard Command strips) works for lighter knife collections on smooth walls, tile, or the side of a refrigerator, but can fail over time with heavier German-style blades. Under-cabinet mounting is the cleanest visual solution and works on any cabinet base at least three-quarters of an inch thick.
For materials: 304-grade stainless steel is the most hygienic and kitchen-appropriate; magnets run edge to edge for even holding. Wood strips — acacia or walnut — are visually warmer and popular in open-shelf kitchens where the strip is on display. Acrylic strips create a minimalist floating effect but hold heavy knives less securely. For most kitchens, a 16-inch stainless strip from IKEA (KUNGSFORS, around $20) or a similar brand handles a complete knife set without issue.
4. Under-Sink Kitchen Storage Solutions With Tension Rods and Bins
The under-sink cabinet is the kitchen’s most chronically disorganized zone. Plumbing intrudes from the top, the base collects moisture, and there are no built-in shelves — so cleaning products, spare sponges, and dish soap spread across the base in a pattern that defies retrieval logic. This is also the fastest kitchen storage solution on this list to implement, starting at $6.
A tension rod mounted 6 to 8 inches below the cabinet ceiling creates an instant hanging zone. Adjustable rods in the 18- to 26-inch range fit most under-sink widths. Spray bottles are designed to hang: the trigger hook slides over the rod and the bottle hangs vertically, freeing the cabinet base. Two rods at different heights give you an upper zone for tall spray bottles and a lower zone for dish gloves or small cloths. Use rubber-ended tension rods — metal-ended ones slip and drop everything.
Completing Your Under-Sink Kitchen Storage Solution
Complete the setup with three additions: a waterproof vinyl shelf liner on the cabinet base (catches drips from the P-trap — a single leak soaks everything otherwise; $8–$15), a pull-out bin on a simple slide track for floor-level cleaning supplies ($20–$40 for 12- to 15-inch cabinet widths), and a small two-tier mini shelf toward the back for spare dishwasher pods and backup supplies. The entire system — rod, liner, bin, and mini shelf — runs under $60 and transforms the cabinet in an afternoon.
Add S-hooks to the tension rod for items that don’t have built-in hooks: a mesh bag of scrubbers, a bottle of glass cleaner with a looped handle. It’s one of the few kitchen upgrades where the before-and-after difference is immediate enough to make you want to address every other cabinet the same afternoon.
5. Floating Shelves for Open Kitchen Display Storage That Actually Works
Open shelving is one of the most debated kitchen decisions, and the debate usually comes down to this: people who styled their shelves like a magazine shoot and then tried to cook around them have strong opinions. But floating shelves work beautifully when they carry items you actually use, rather than items arranged to look like you might use them someday.

The golden rule: if it’s on the shelf, it gets used at least once a week. Everything else belongs in a closed cabinet. Daily dishes, your most-used glasses, a few cookbooks with cracked spines, a cluster of cooking jars you reach for every day — these earn shelf space. The pottery you got in Tuscany lives inside.
Mounting and Styling That Lasts
For mounting, the only safe approach for kitchen use is stud anchoring. Studs are typically 16 inches apart; each bracket mounted into a stud supports 50 lbs, so two-stud mounting gives 100 lbs per shelf — well above what any reasonable kitchen shelf will carry. Never rely on drywall anchors alone for loaded kitchen shelves; the leveraged weight works them loose over time. Bracket depth should be just under shelf depth, and for loads over 20 lbs, use solid steel brackets with multiple support rods rather than decorative L-brackets.
For styling: the creative ways to style open kitchen shelves that read as intentional rather than accidental follow the 60/40 rule — 60% functional items in use, 40% breathing space or a single decorative element. Uniform vessels (matching canisters, same-height glasses, consistent plate stacks) create visual cohesion. One plant or a small bunch of dried herbs breaks the hard lines of jars and dishes in a way that makes the shelf look designed rather than stored.
6. Drawer Dividers That Turn a Chaotic Utensil Drawer Into One You Can Navigate
Most kitchen utensil drawers fail for one reason: they treat every item with equal priority. A pasta fork you use twice a year sits in front of the spatula you use daily, and every cooking session begins with a small rummage. A divider system fixes this by forcing intentional placement — and once it’s set up, the right tool is always at your fingertips.
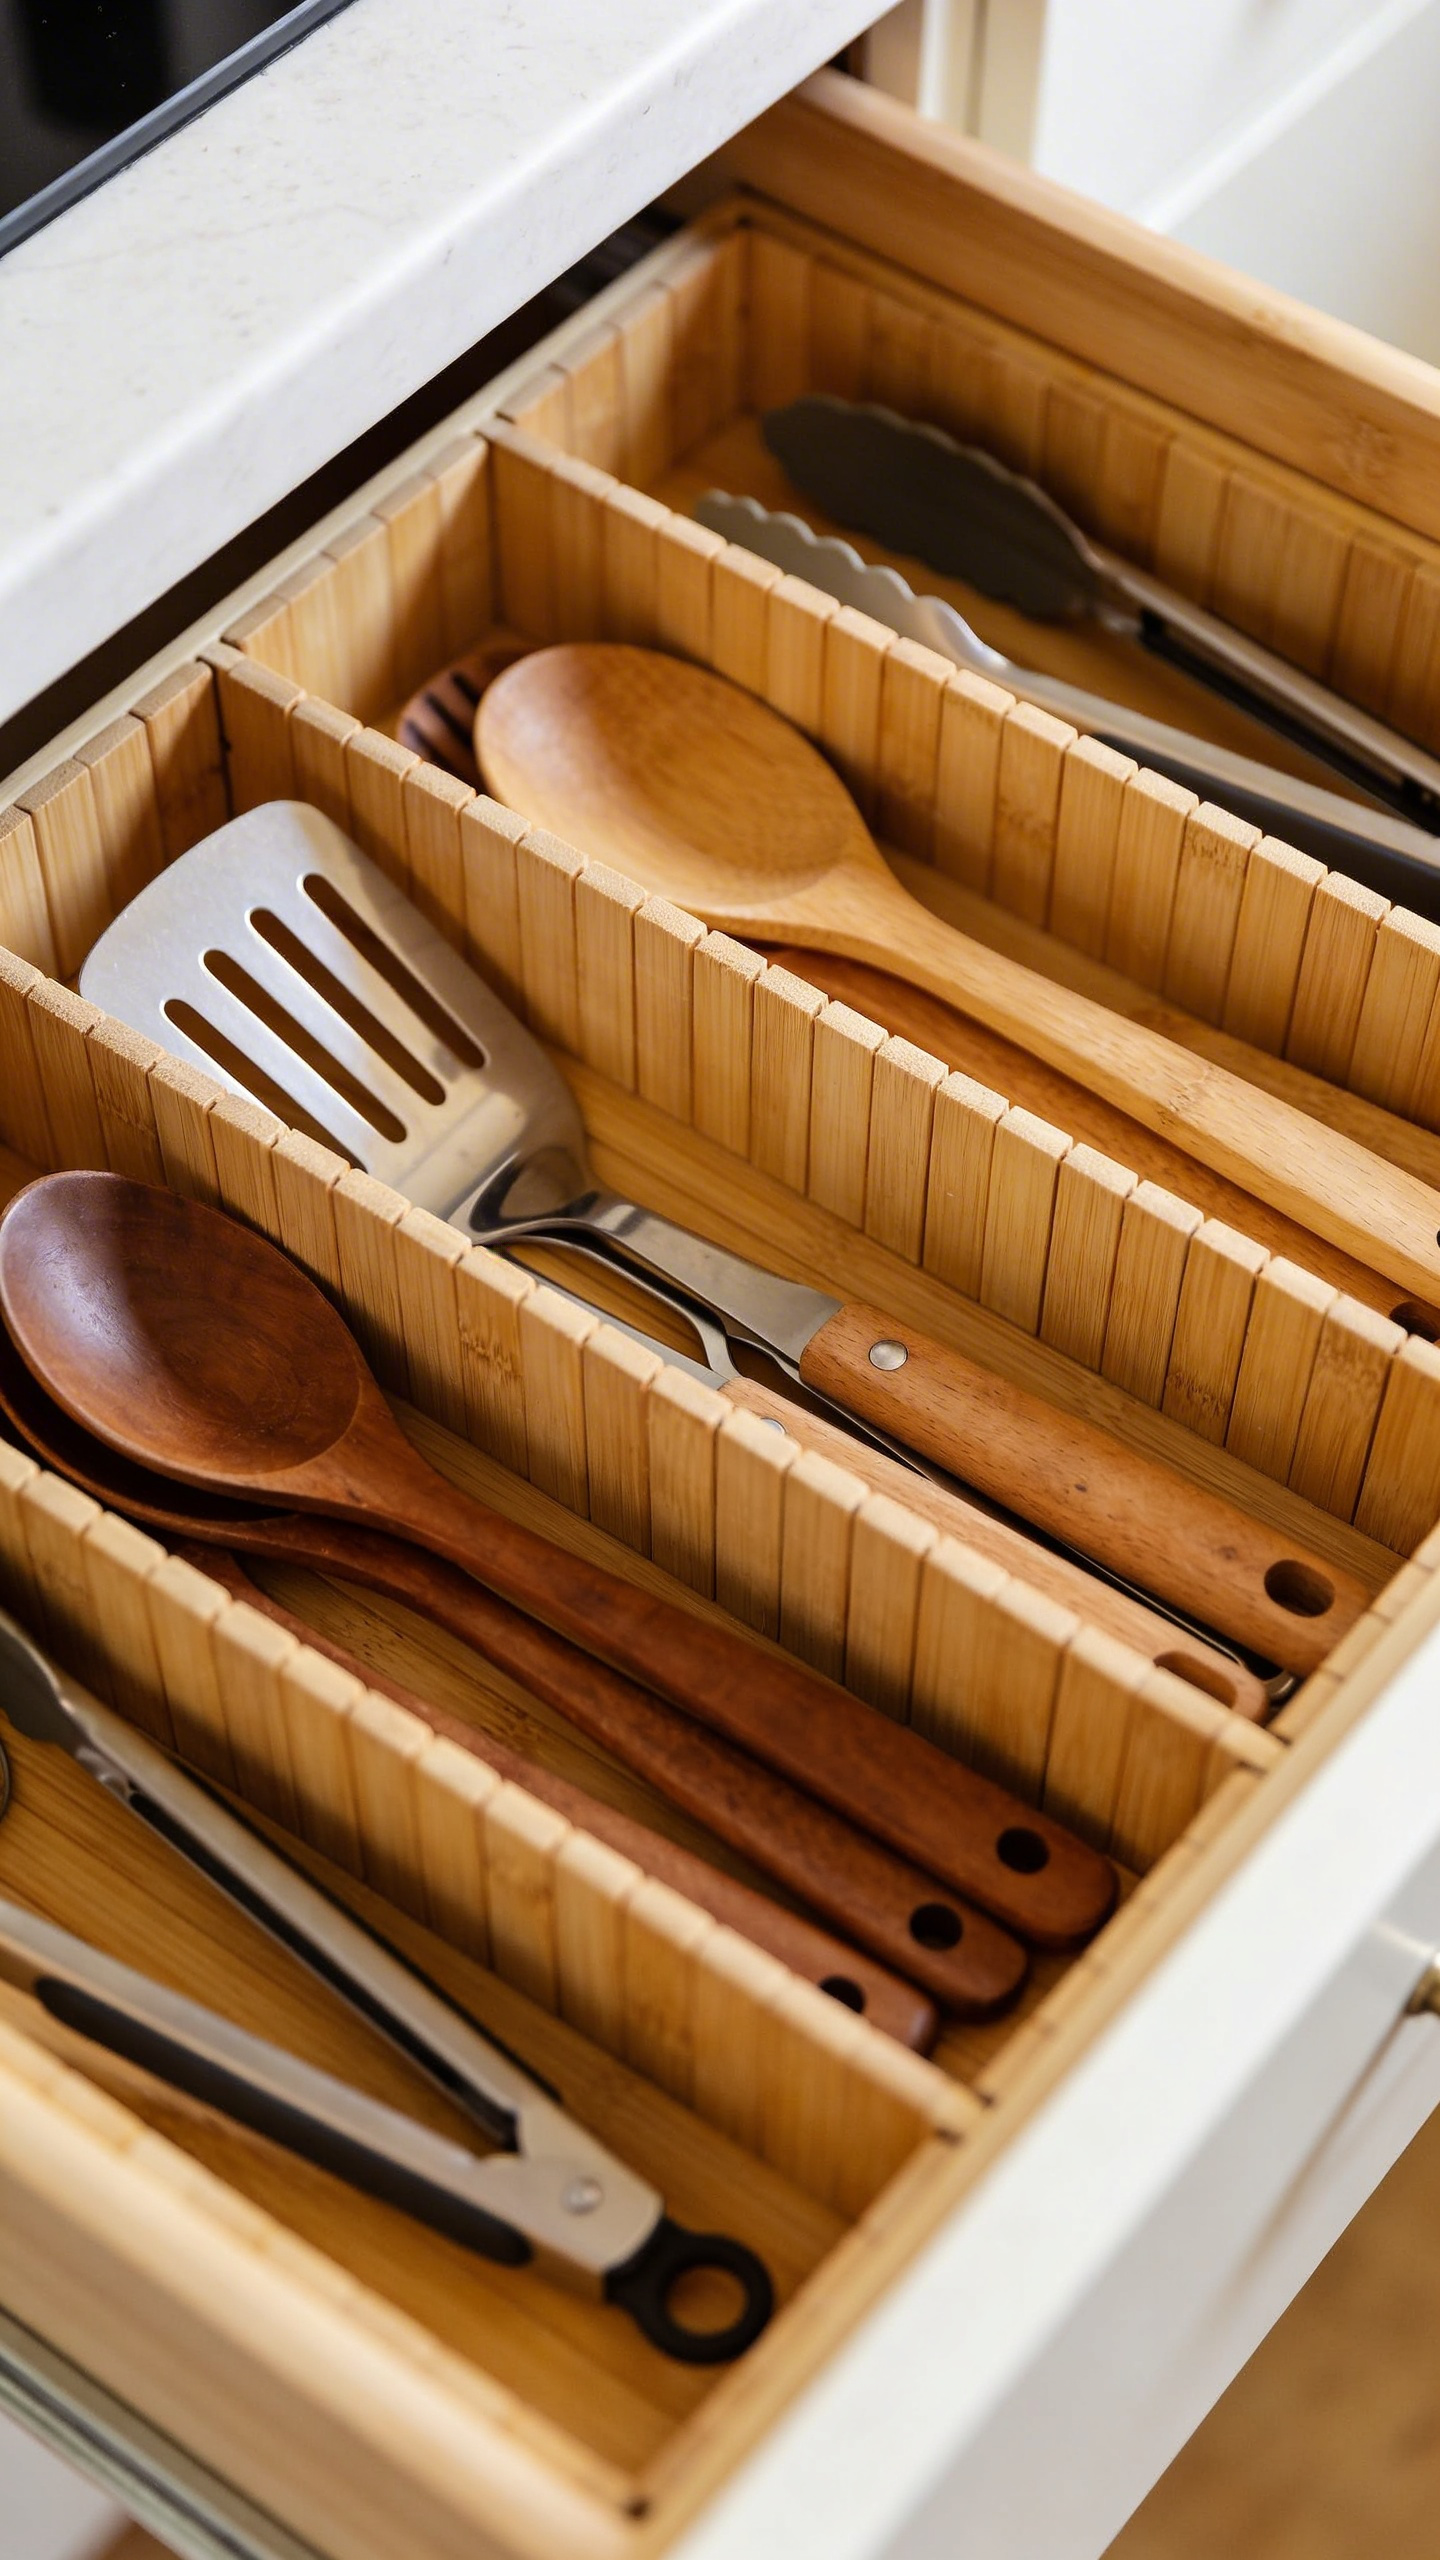
Bamboo expandable organizers are the most practical solution for most kitchens. Brands like SpaceAid, KitchenEdge, and Royal Craft Wood make versions that expand from 13 to 28 inches wide with 6 to 10 compartments, water-resistant bamboo construction, and a solid base that doesn’t shift. Standard kitchen drawers run 18 to 21 inches deep and 15 to 24 inches wide; most expandable bamboo organizers cover this range. Measure drawer depth before ordering — many organizers are 17.5 inches deep, which fits perfectly in a standard 18-inch drawer but leaves a gap in a 21-inch drawer.
Zoning by Use Frequency
The zone approach makes the biggest difference in daily use. Front zone, most accessible: the spatula, wooden spoon, ladle, tongs, and whisk you reach for at nearly every meal. Middle zone: the peeler, zester, garlic press, and can opener — used several times a week but not every session. Back zone: specialty tools that come out monthly (basting brush, turkey baster, corn holders). This way, daily prep never requires reaching past tools you rarely touch.
For kitchens doing a more thorough kitchen storage solution refresh, acrylic interlocking drawer inserts are a popular upgrade — they’re invisible (you see only the utensils), dishwasher-safe, and available in modular shapes. Custom wood inserts precision-cut to your drawer dimensions are the most seamless option but cost $80–$200 per drawer versus $20–$40 for a bamboo expandable.
7. Vertical Stacking: A Kitchen Storage Solution for Small Apartments
In a small kitchen, storage is a three-dimensional problem — but most people address only two dimensions. Countertops get organized. Cabinets get tidied. The vertical dimension — the wall height above counters, the space between shelves, the full height of empty walls — goes largely unused. This is where the biggest gains for small kitchens live.
The 18 inches between counter surface and the underside of upper cabinets is the most overlooked zone. That space can carry a wall-mounted rail system, a pegboard strip, a magnetic bar, or a single floating shelf — any of which moves storage off the counter and onto the wall. For small kitchen decor ideas for tight spaces, the vertical zone above the counter is the first place worth evaluating.
Risers and Towers for Cabinet-Light Kitchens
Inside existing cabinets, a shelf riser at $15–$30 creates a second storage layer. The riser sits on the existing shelf and raises a back row of items above the front row, making everything visible. A good riser height is 3 to 4 inches — tall enough to see over front items, short enough that a second row fits above. Yamazaki’s Tower Stackable Shelf and OXO’s cabinet insert are reliable picks; both expand from one unit to two or three as needed.
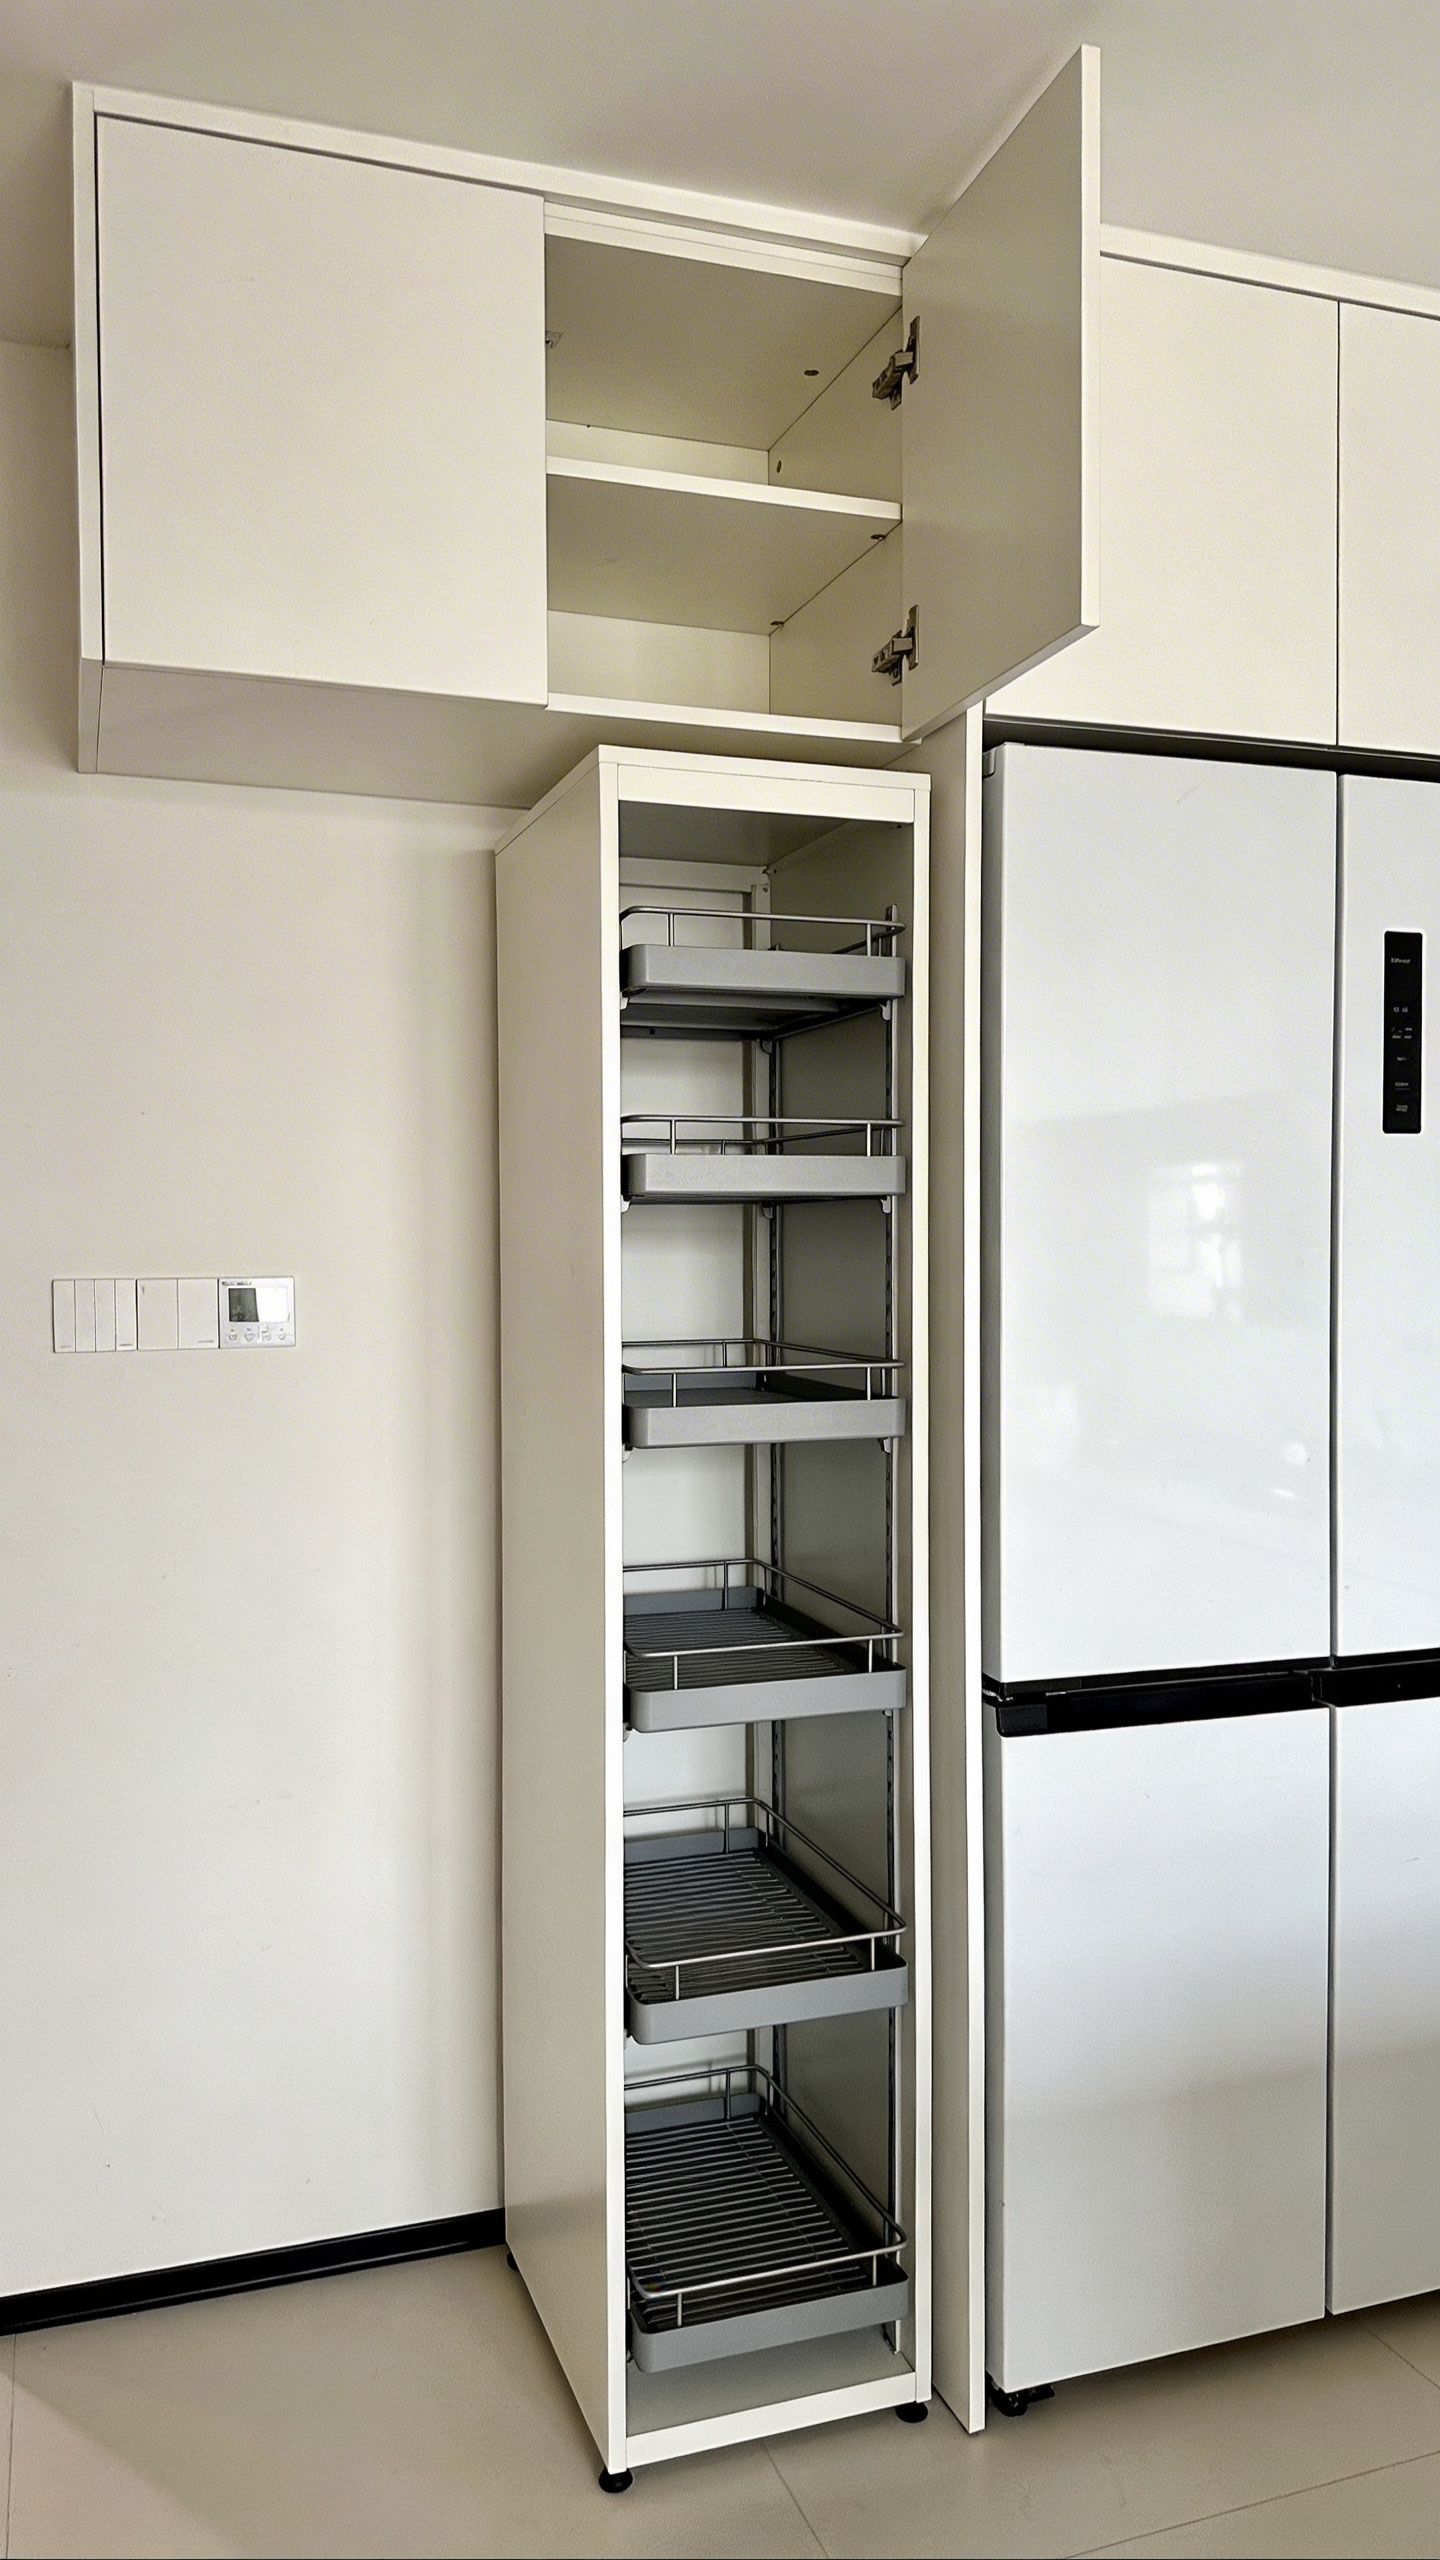
For kitchens with limited upper cabinet coverage — open-concept spaces, studio apartments, or older homes with minimal cabinetry — a freestanding pantry tower converts a blank wall into 15 to 25 cubic feet of food storage. Narrow 12-inch-deep towers fit against walls or beside refrigerators without impeding traffic flow. In tight kitchens, depth matters more than width: a 12-inch-deep 72-inch-tall tower has less floor impact than a wide shallow unit and holds considerably more.
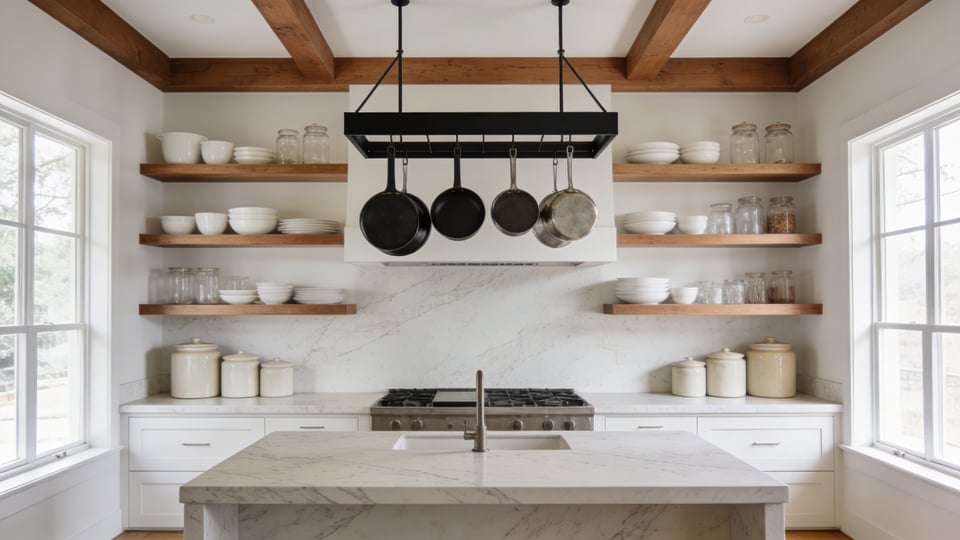
8. Hanging Pot Racks That Clear Your Cabinets and Display Your Cookware
Hanging pot racks solve two problems at once: they free two to three shelves of lower cabinet space and bring cookware within arm’s reach of the stove. There’s also something genuinely satisfying about a kitchen where the pots hang where a cook can reach them without opening anything.
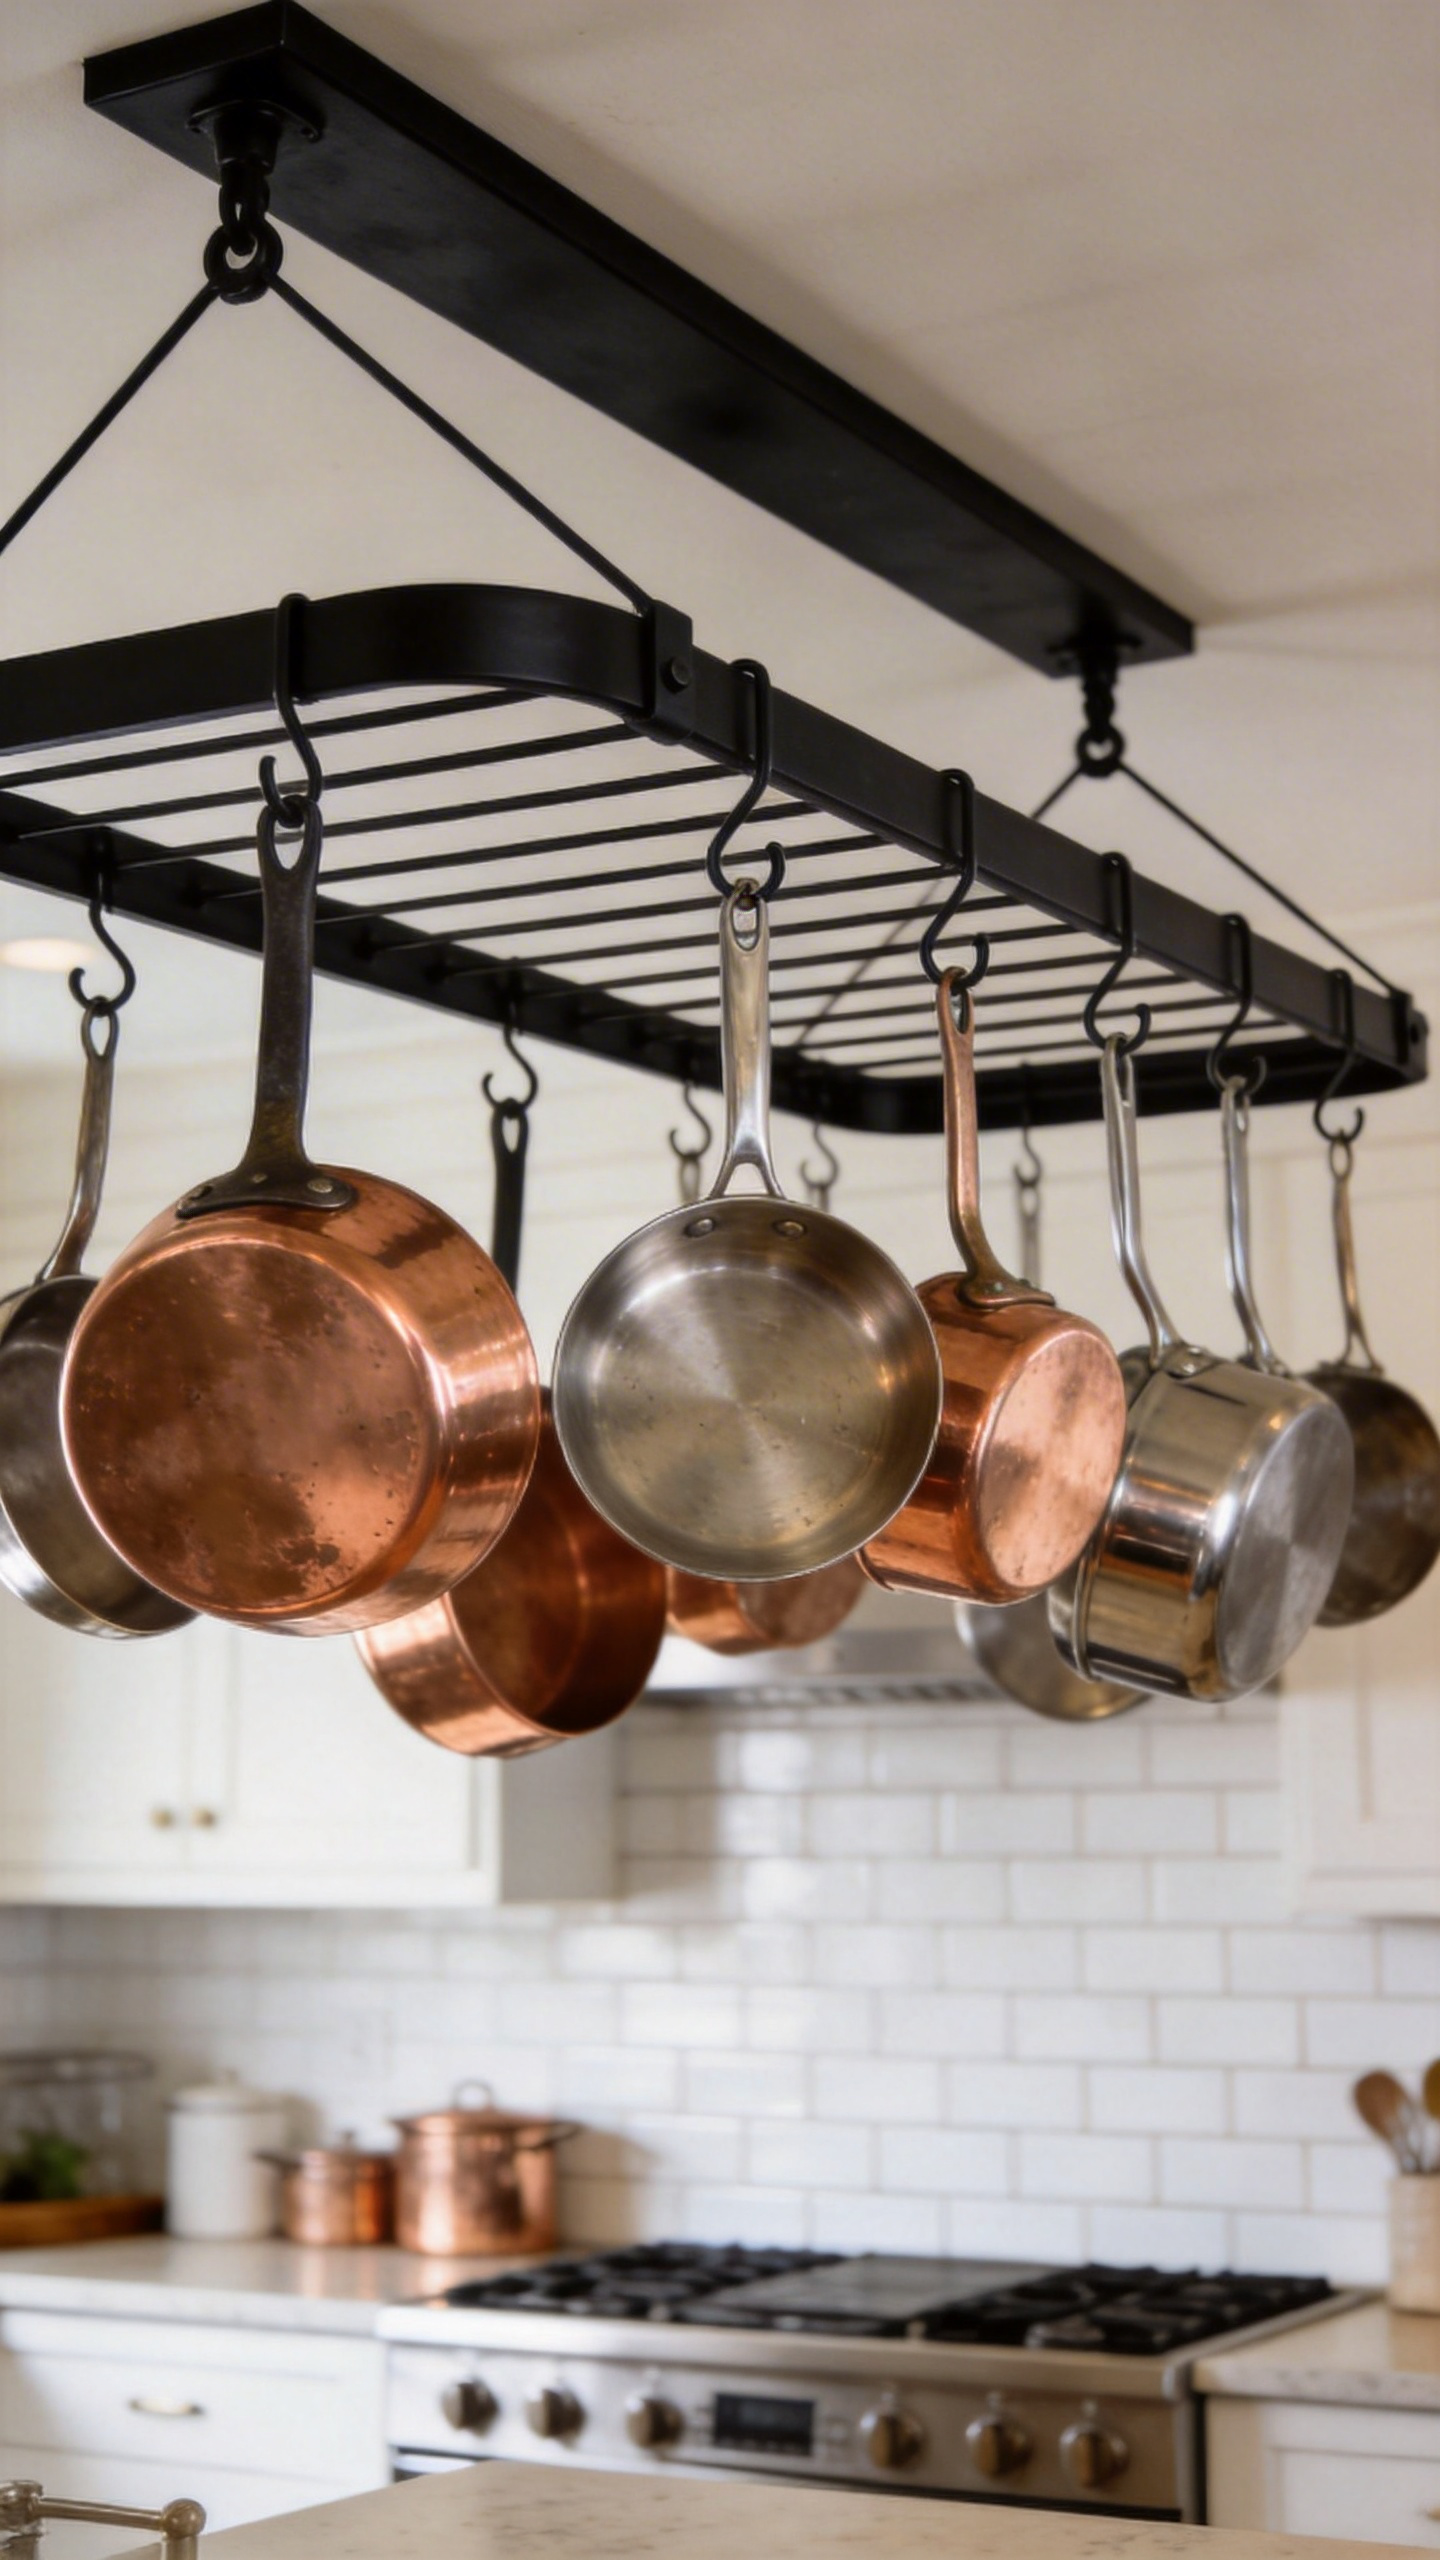
The ceiling vs wall decision comes down to kitchen size and layout. Ceiling racks work best in larger kitchens with an island or peninsula — the rack hangs centered above the prep zone, accessible from all sides, at roughly 42 inches above the counter. This keeps pans accessible without being an obstruction. The structural requirement is non-negotiable: ceiling screws must thread into a wood joist, not drywall. Most residential joists are 16 or 24 inches apart; check with a stud finder before ordering, because if joists don’t align with the mounting plate, you’ll need blocking installed between them.
Wall Racks and Finish Selection
Wall-mounted racks are the better choice for smaller kitchens or galley layouts — they mount flat against the wall above the stove or backsplash and don’t require ceiling access. Wall racks typically hold around 25 lbs when stud-mounted, which covers four to six standard pans but is not adequate for a full cast-iron collection.
For finish, match the rack to existing cabinet hardware rather than appliances. If your pulls are brushed nickel, a brushed steel rack reads as intentional. Matte black powder-coated steel is currently the most versatile finish — it works equally well against white shaker cabinets, warm wood tones, and dark kitchens. Chrome suits contemporary minimalist spaces; wrought iron and bronze suit farmhouse and traditional aesthetics.
9. Pegboards for Flexible, Wall-Mounted Kitchen Organization You Can Reconfigure
A kitchen pegboard is the closest thing to a future-proof storage upgrade. Every hook moves. Every shelf bracket repositions in 30 seconds. Add a new utensil, rearrange around a new appliance, or completely reconfigure when your cooking style changes — the pegboard adapts without new hardware or new holes.
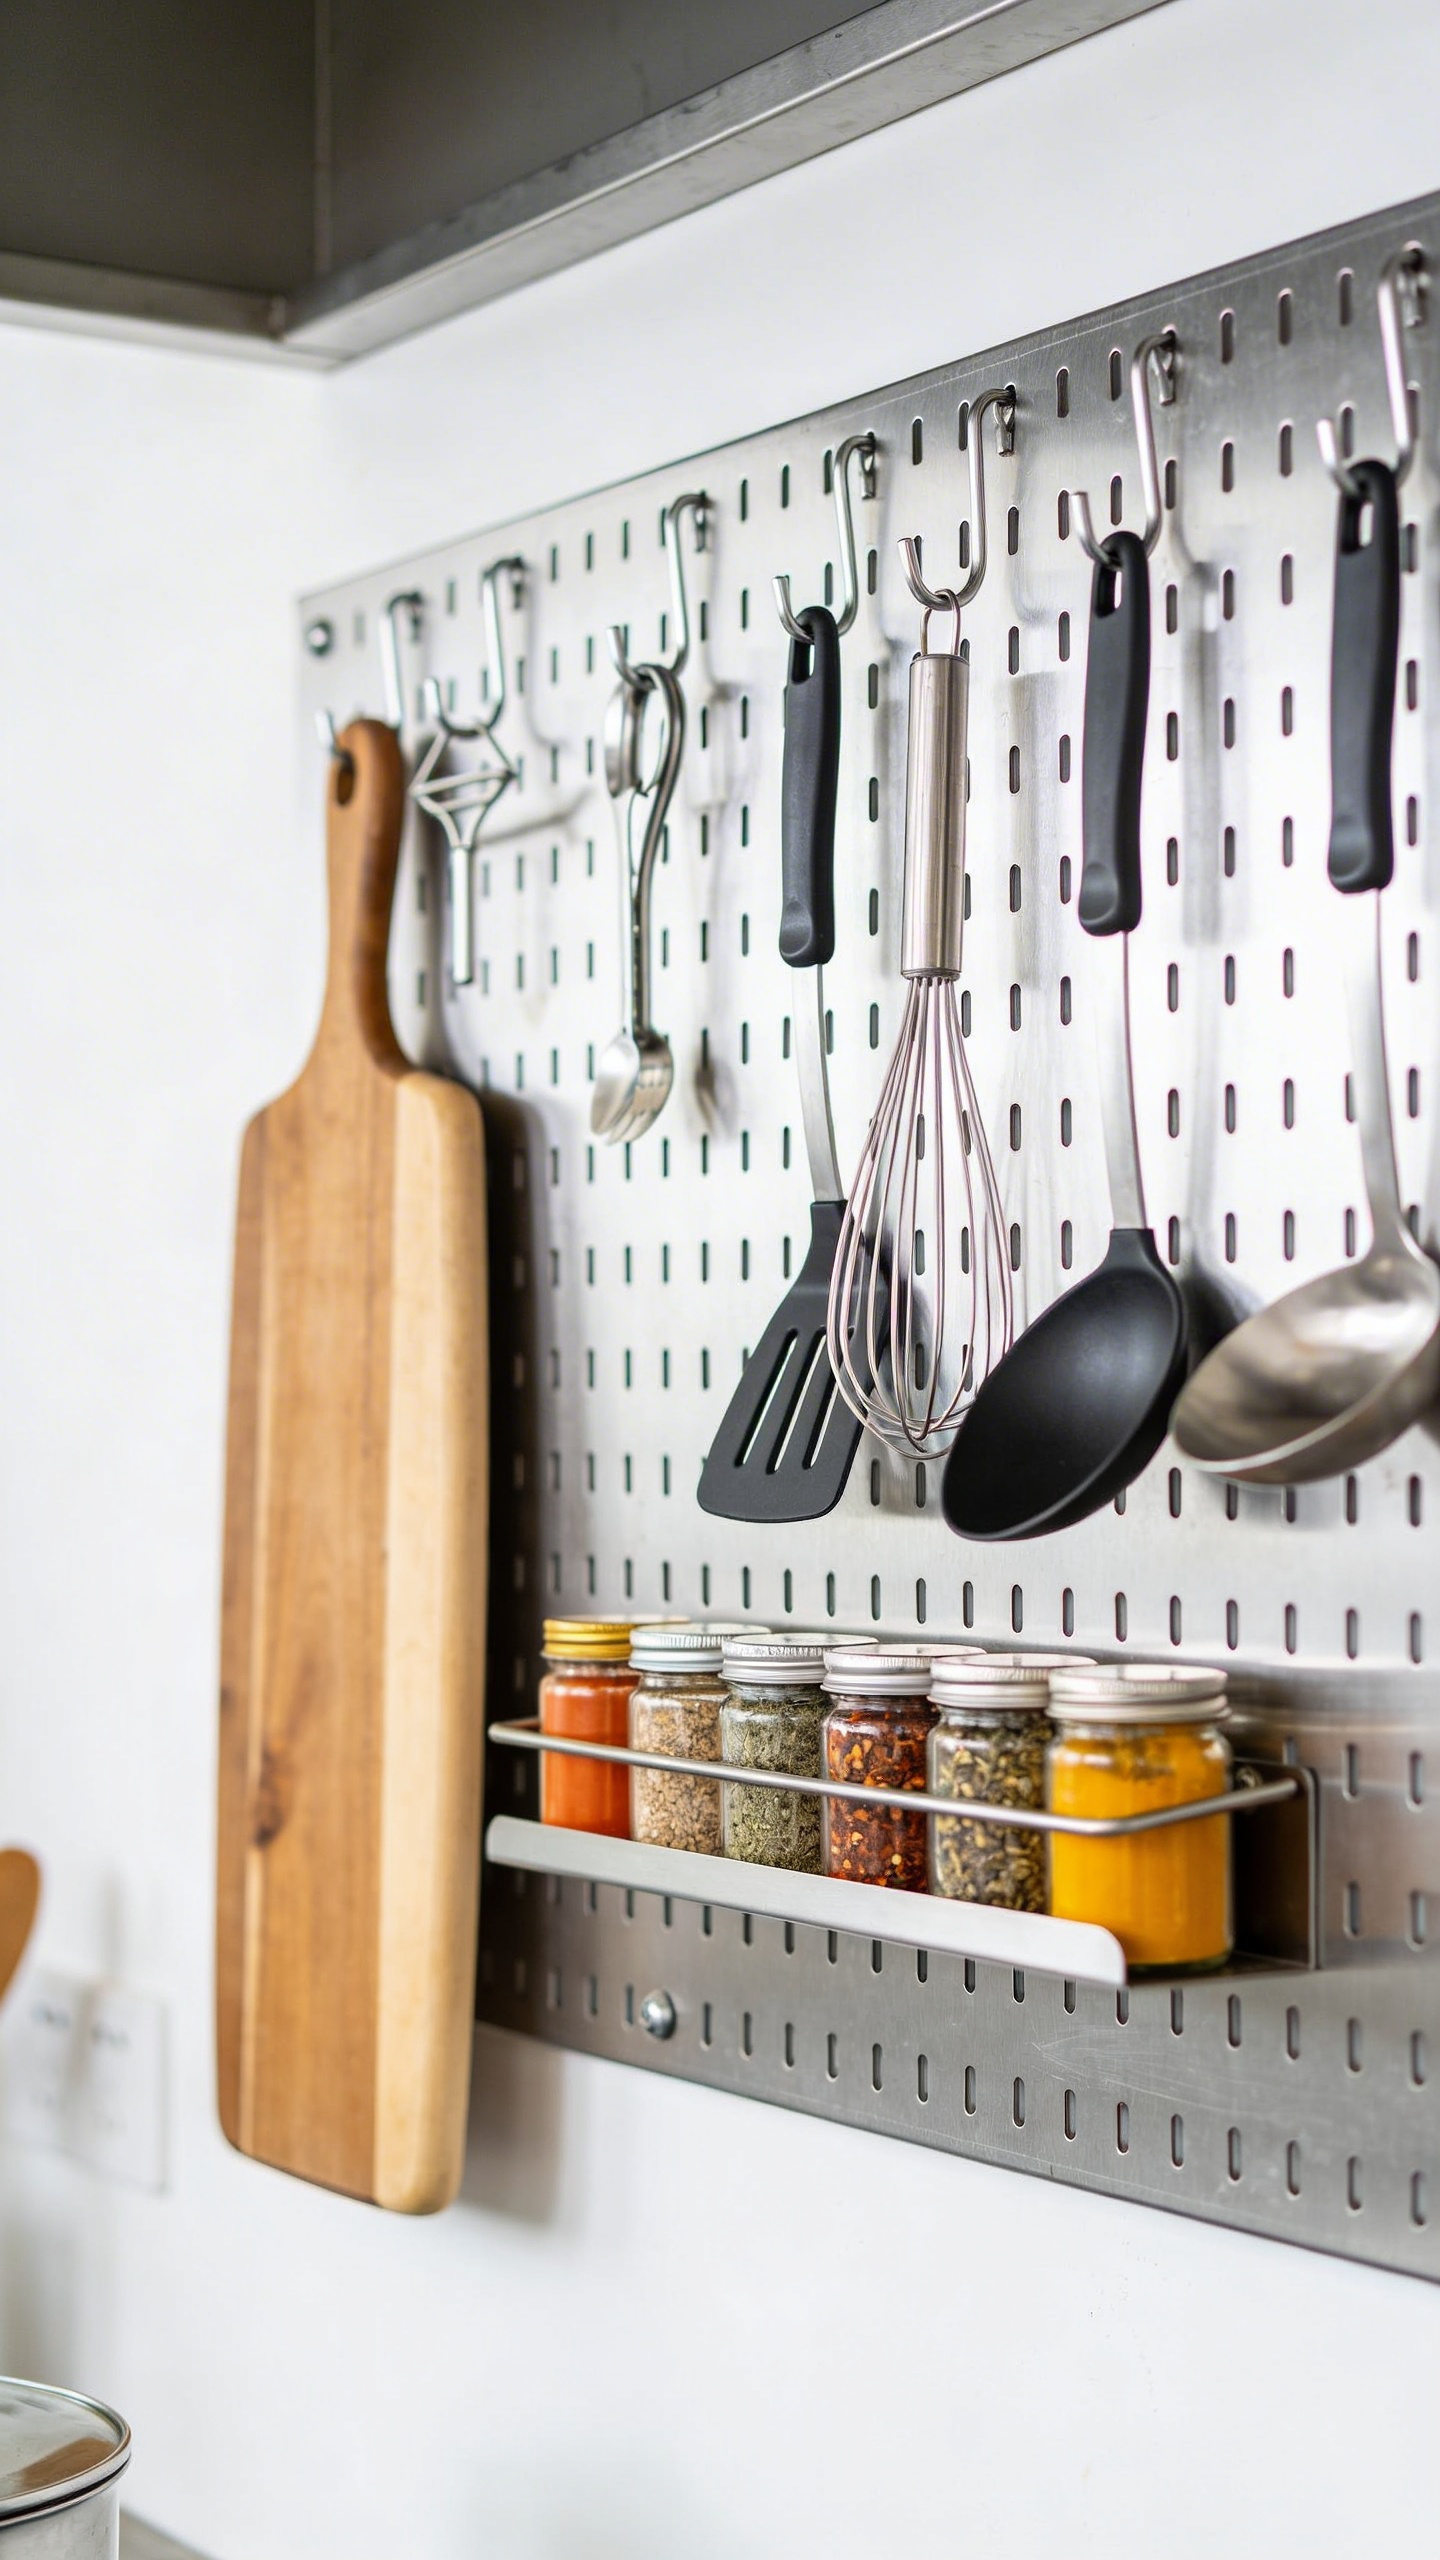
Wall Control’s 32×32-inch steel pegboard systems hold up to 200 lbs total — sufficient for cast-iron pans and a full set of stainless cookware alongside rows of utensils and a few spice jar shelves. A complete kit with hooks runs $80–$120. Installed above the stove or prep area, a kitchen pegboard brings the most-used tools within arm’s reach and off every counter and drawer in the zone.
Material Choice and Layout Planning
Material matters in kitchens. Standard hardboard (Masonite) pegboard is cheap at $15–$20 for a 4×4-foot panel, but it swells and warps near a stove or dishwasher. If you use hardboard, seal it with clear polyurethane before installation. Metal pegboard — powder-coated or galvanized steel — resists kitchen humidity and looks purposeful; Wall Control and similar brands offer pre-finished panels sized for kitchen backsplash areas at $40–$120 per panel.
Pegboard needs a one-inch gap between the board and the wall for hooks to insert. Metal systems build this in with integrated mounting frames. Hardboard requires furring strips installed first — skip this step and you have a wall decoration, not a storage system.
Leave 20 to 30% of holes empty. A pegboard with every hole occupied becomes hard to read quickly. Place heavier items (pans, heavy cast-iron pieces) at the bottom where weight is closest to the wall mount, and utensils at eye level where they’re most visible.
10. Smart Kitchen Storage Solutions on the Inside of Cabinet Doors
The inside face of a cabinet door is prime real estate that most kitchens leave empty. A single 30-inch cabinet door can hold a full door rack, a lid organizer, or a spice strip — all without reducing an inch of shelf space inside the cabinet.
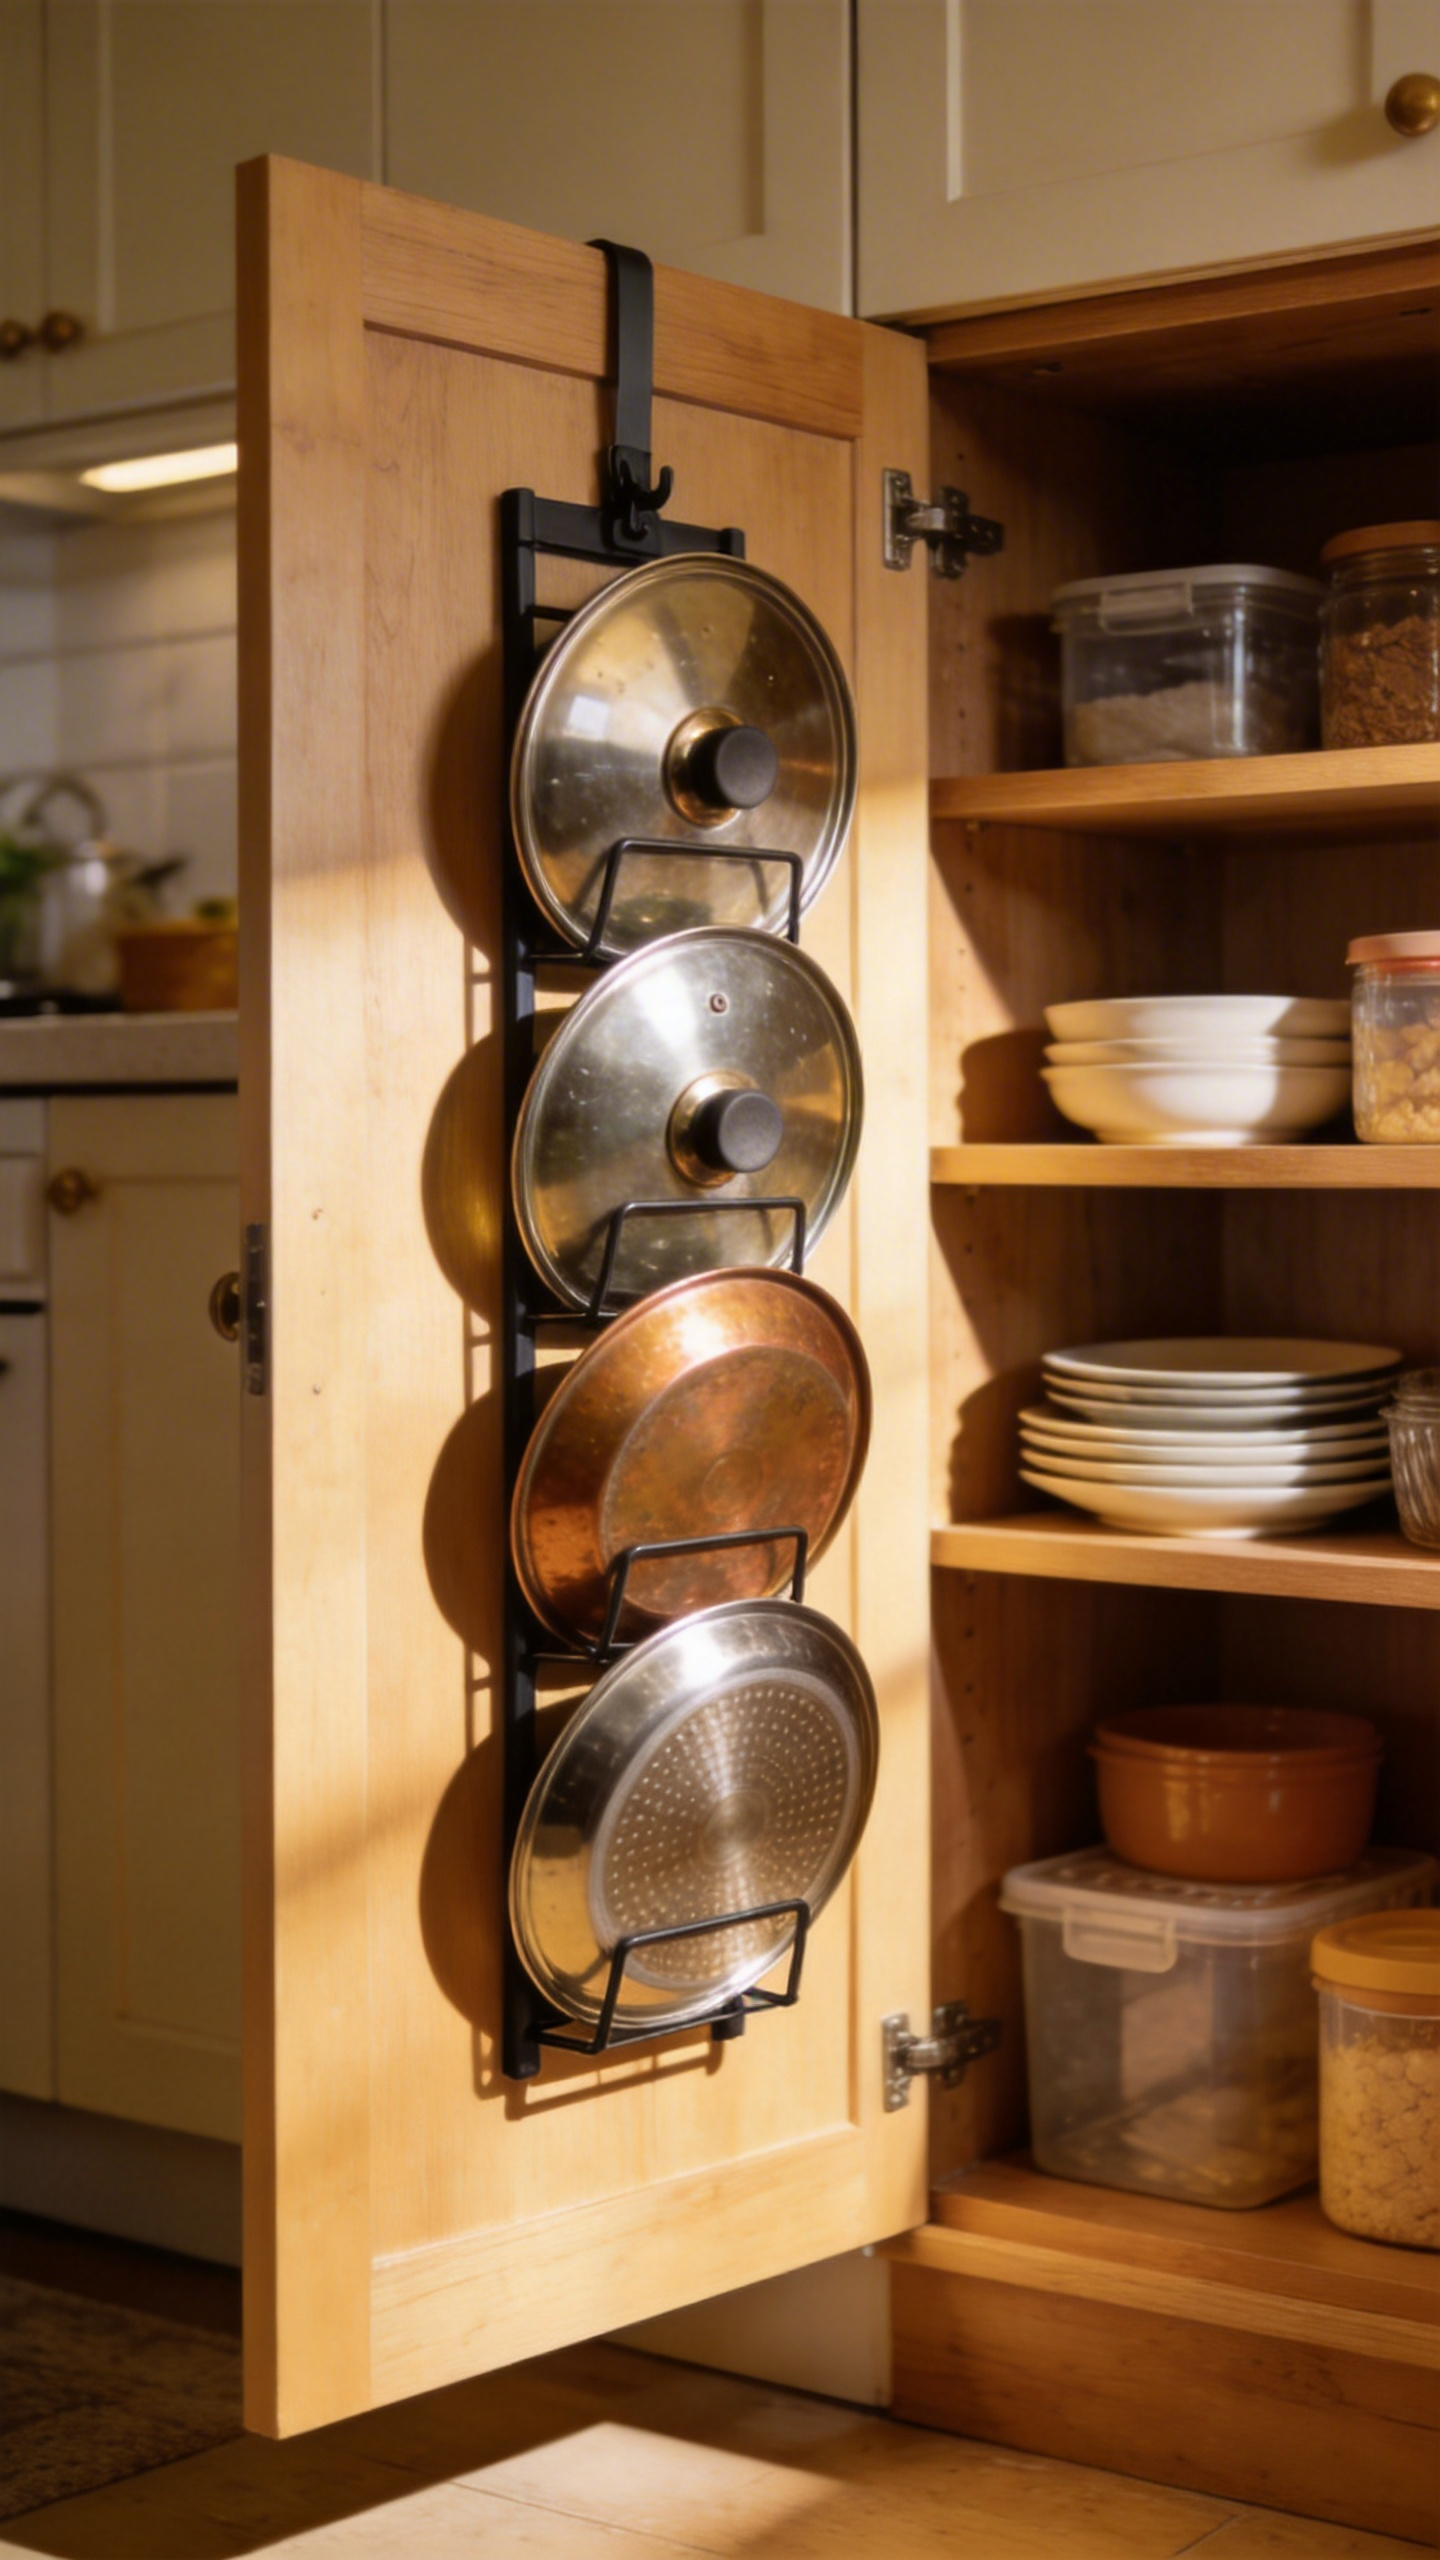
The best uses are specific and practical. Under the sink: a narrow mounted rack for dish soap refill, spare sponges, and a bottle of glass cleaner — keeps these items off the base and visible. Inside a pantry door: a six-pocket spice strip or a shallow three-tier rack for packets and seasoning envelopes at eye height. Inside a pot cabinet door: an adjustable lid holder (the Rev-A-Shelf door-mounted version is a popular retrofit) so lids are always findable without sorting through a drawer. These are smart kitchen storage organization wins that use space you already have, costing nothing in terms of existing cabinet capacity.
Mounting Options and Weight Limits
Two things don’t work well on cabinet doors: heavy items (anything over 5–6 lbs risks stressing hinges over time, especially on frameless cabinets) and anything requiring clearance you don’t have. Before buying any door-mounted organizer, close the cabinet and measure the gap between the door face and the nearest shelf edge. Most systems need 2 to 3 inches of clearance; in shallow-depth cabinets, that gap simply doesn’t exist.
For mounting: screw-in is the most secure for anything over 3 lbs. Adhesive-only mounts work reliably for lightweight items (foil boxes, bag clips, small utensil pockets) and are the right choice for renters. Over-door tension bar racks — applied to a door edge like a towel bar — are a no-drill middle ground for narrow lid collections or small spray bottles.
11. Pull-Out Trash and Recycling Bins That Disappear Into Your Cabinetry
A freestanding trash bin takes up floor real estate, creates a visual interruption in the kitchen, and sits wherever it happens to fit rather than where you actually want to dispose of things. A pull-out bin in a base cabinet solves all three issues — the bin is at the prep zone, it’s invisible when closed, and recycling lives right next to the trash.
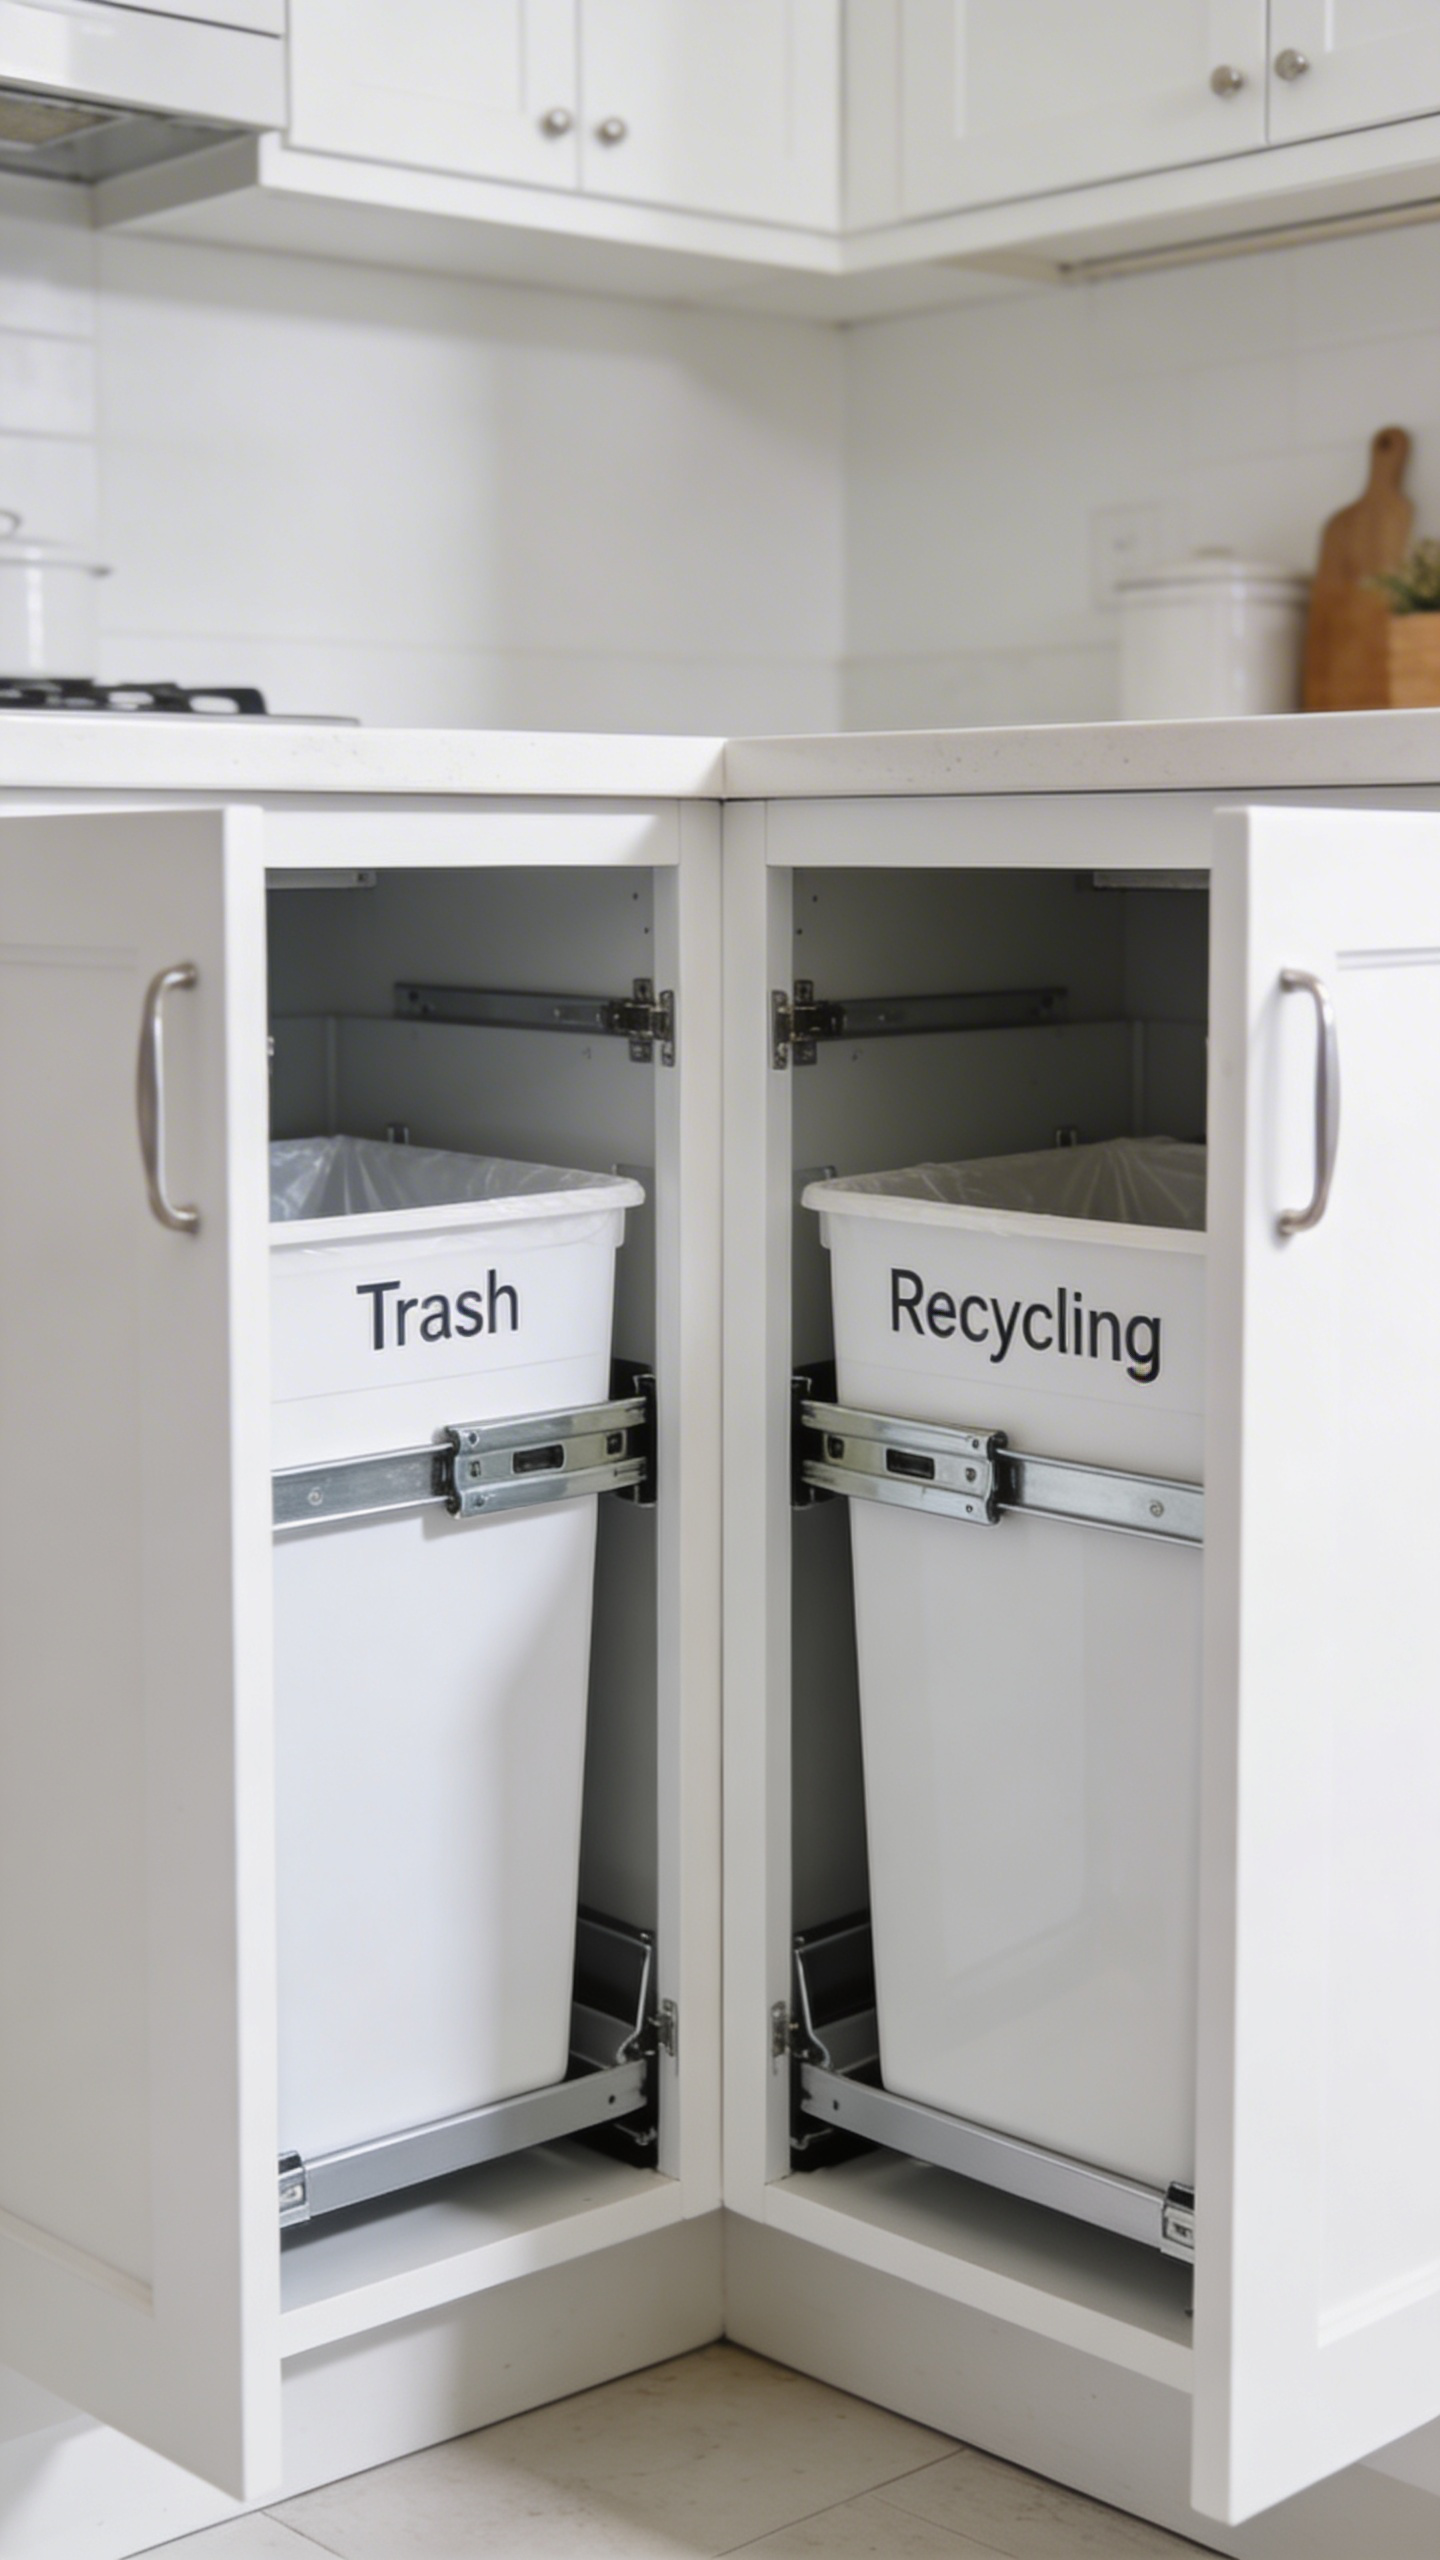
The workflow benefit is real. Keeping trash and recycling within arm’s reach of the main prep area means trimming, unwrapping, and disposing happen in one reach rather than a walk across the kitchen. For households that cook daily, this adds up. The separation is also built into the cabinet: trash in one bin, recycling in the adjacent one, with no decision-making at disposal time.
Cabinet Sizes and Bin Configurations
Cabinet size drives the system choice. A 12-inch base cabinet fits a single 4- to 8-gallon bin — useful for a composting station under a prep counter. A 15-inch base is the practical minimum for a trash-plus-recycling setup: a single 30- to 35-quart bin or a side-by-side dual 17-quart pair. A 21-inch cabinet is the best all-round configuration: two 35-quart bins on soft-close slides, large enough for daily family use.
One spec detail worth noting: full-size 50-quart bins require a full-height cabinet door — no drawer above. If your cabinet has a small drawer over the door, maximum bin size is 35 quarts. Measure interior cabinet height before ordering. Soft-close slide mechanisms add $30–$50 to the system cost but prevent the slam-jar that wears on cabinet floor fasteners over time.
12. Tiered Shelf Inserts That Effectively Double Your Cabinet Capacity
This is the most underrated kitchen storage upgrade on the list. A tiered shelf riser costs $15–$30, requires zero installation, and doubles the visible capacity of any cabinet it goes into. Instead of one row of items at a flat shelf height, you have a back row raised above a front row — every jar is visible, every label is readable, and nothing disappears behind anything else.
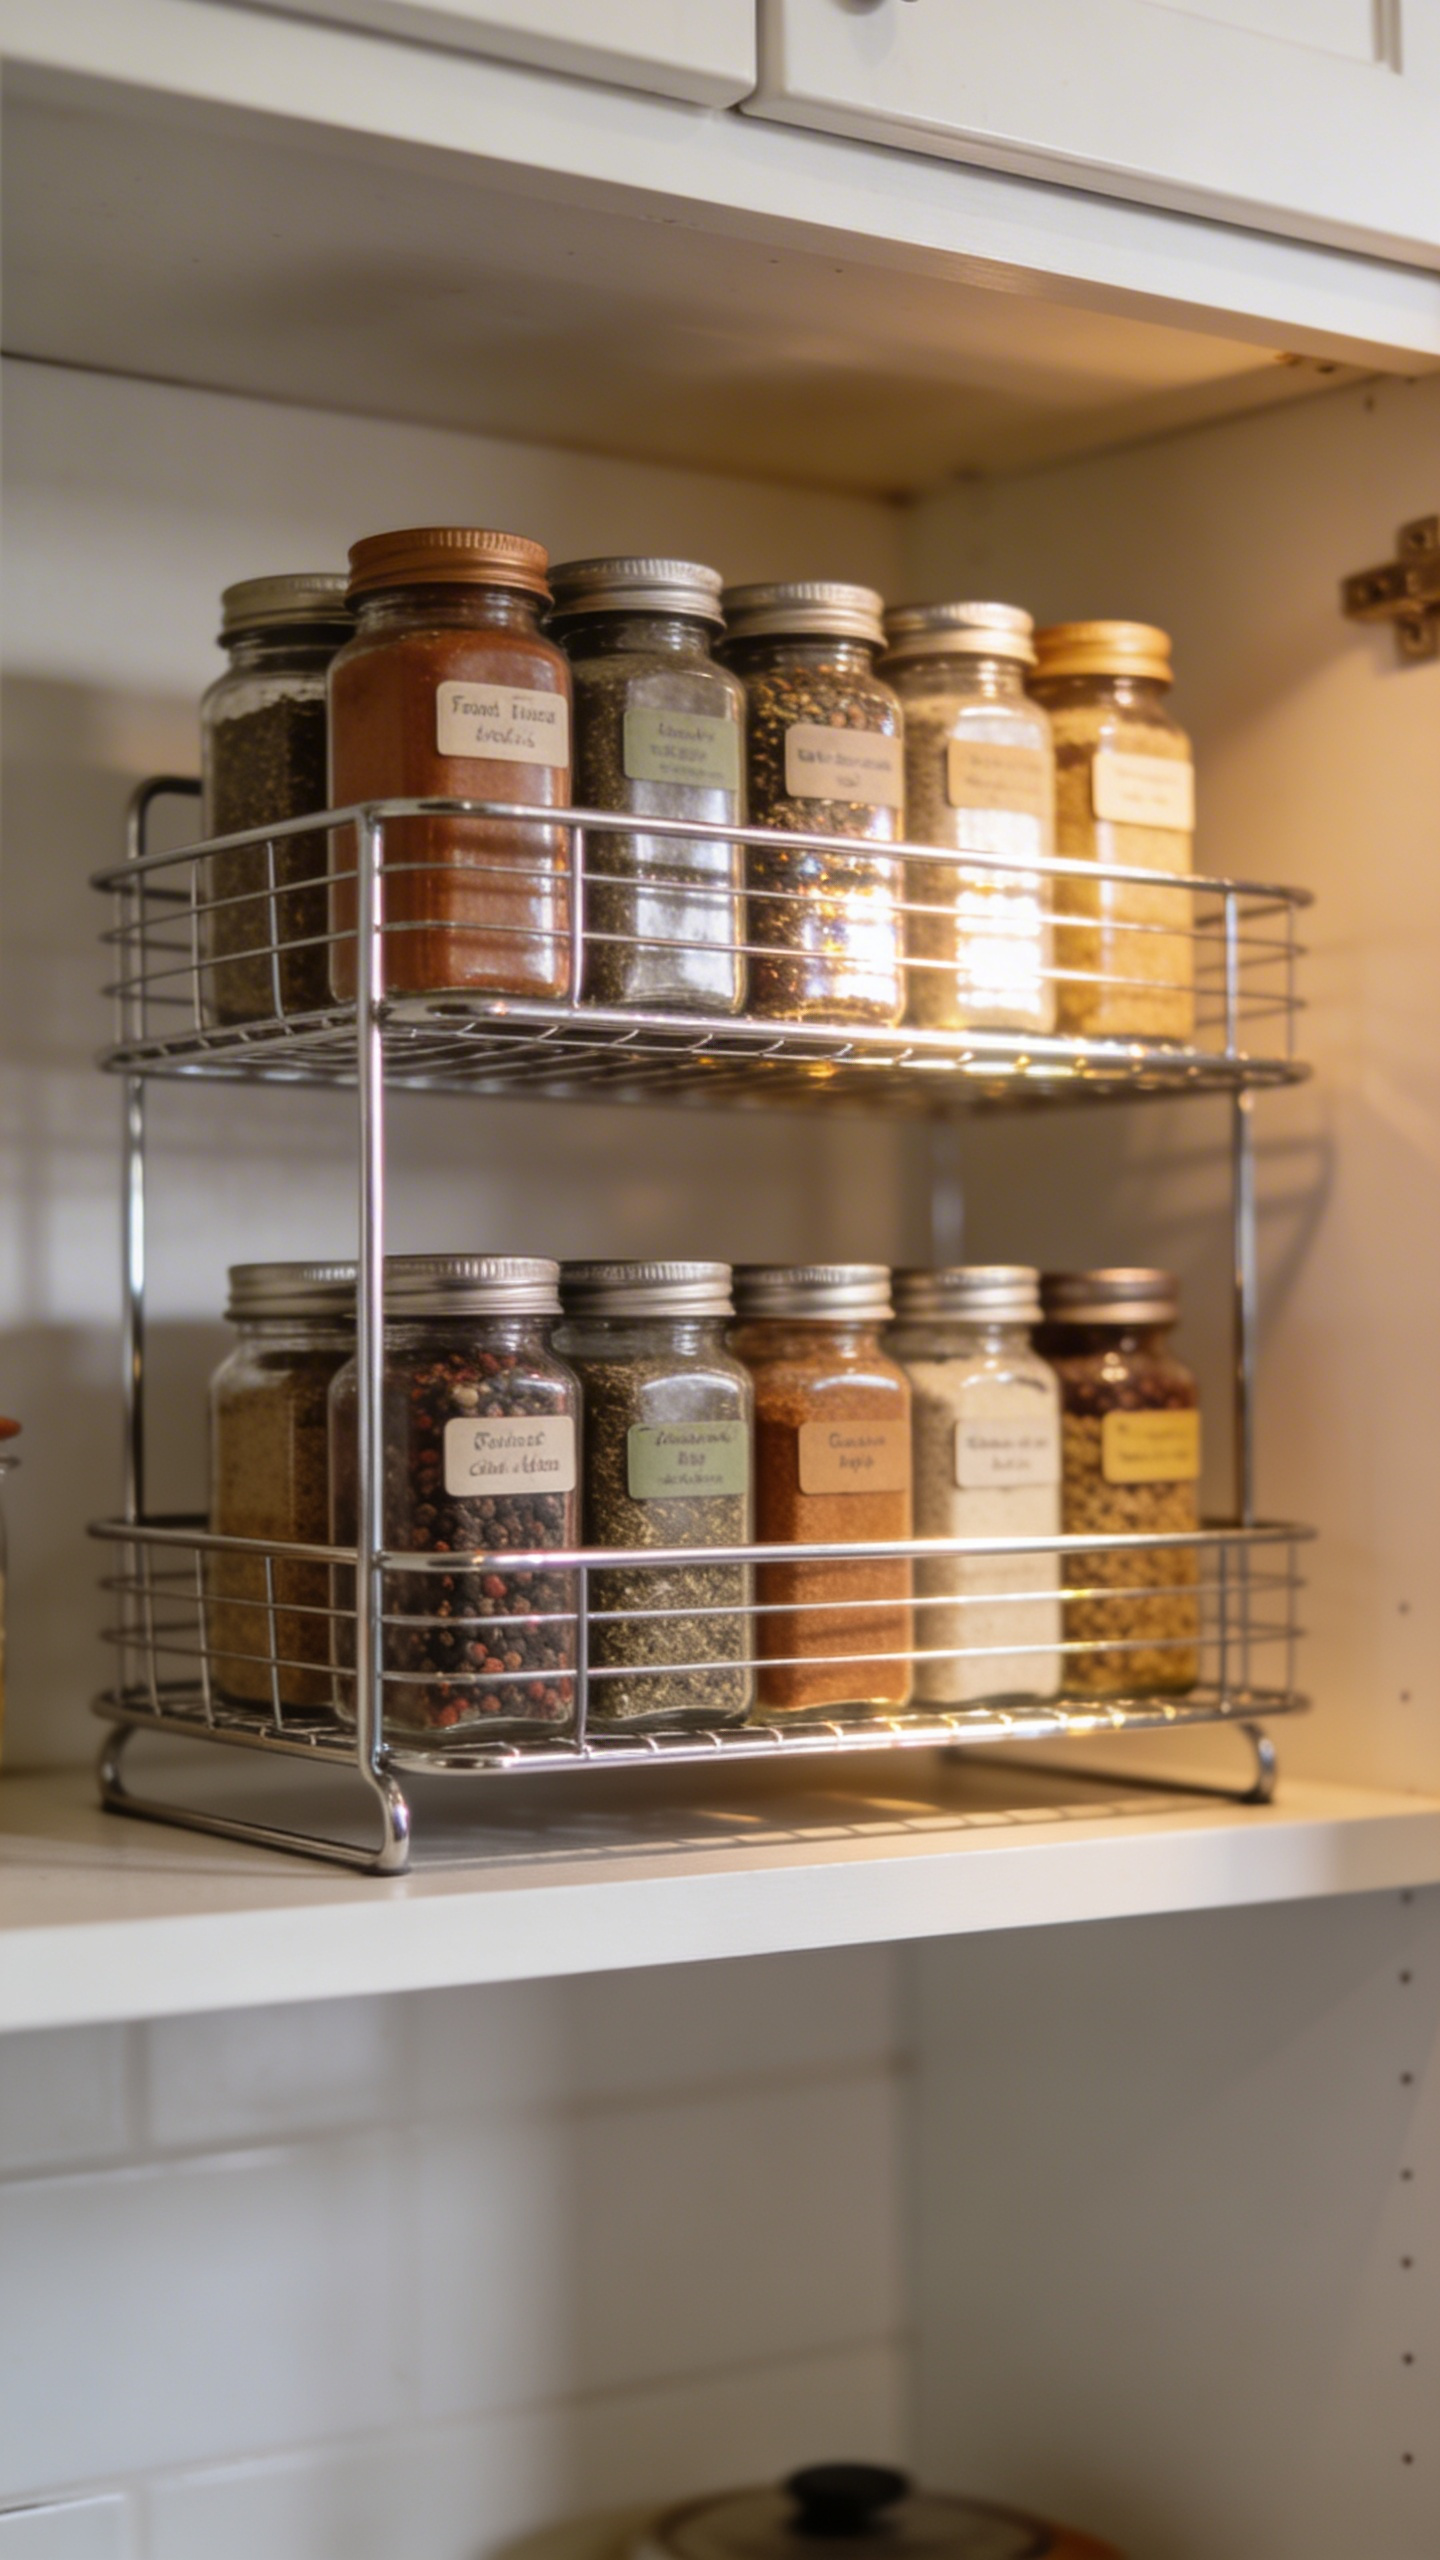
The effect in a spice cabinet is immediate. Twenty spice jars that previously occupied two rows — front row blocking back row — become twenty visible jars on two visible tiers. The most common riser size for spice cabinets is 3 to 4 inches high by 9 inches deep by 14 to 15 inches wide. Adjustable versions expand from 14 to 27 inches wide, which covers most upper cabinet widths.
What Works and What Doesn’t
For canned goods, look for a riser with a non-slip or textured step surface — smooth-faced risers let cans roll when you grab one from the front. Bamboo risers (Lipper International, SpaceAid) are the most attractive for open or visible cabinet use. Chrome wire risers wipe down completely and work best for cabinets near the sink where moisture accumulates. Heavy-duty polystyrene risers are the most affordable and don’t sag under canned goods weight.
What a riser doesn’t work for: bags and flexible containers. Flour in a bag, pasta in an open bag, sugar that isn’t in a rigid canister — these slump and fall over on a riser surface. Rigid containers only. Anything in a floppy bag belongs in a bin, a basket, or a canister on a flat shelf.
13. Kitchen Storage Solutions for Spices: Racks, Drawers, and Pull-Out Trays
Spice organization is a cooking efficiency problem disguised as an aesthetic one. The average home cook has 15 to 25 spices in active rotation, and without a clear system, every cooking session includes multiple moments of picking up jars to read the back of the label — paprika or smoked paprika, cumin or coriander, dried thyme or dried oregano. These moments compound. Over a year of daily cooking, a disorganized spice situation costs real time.
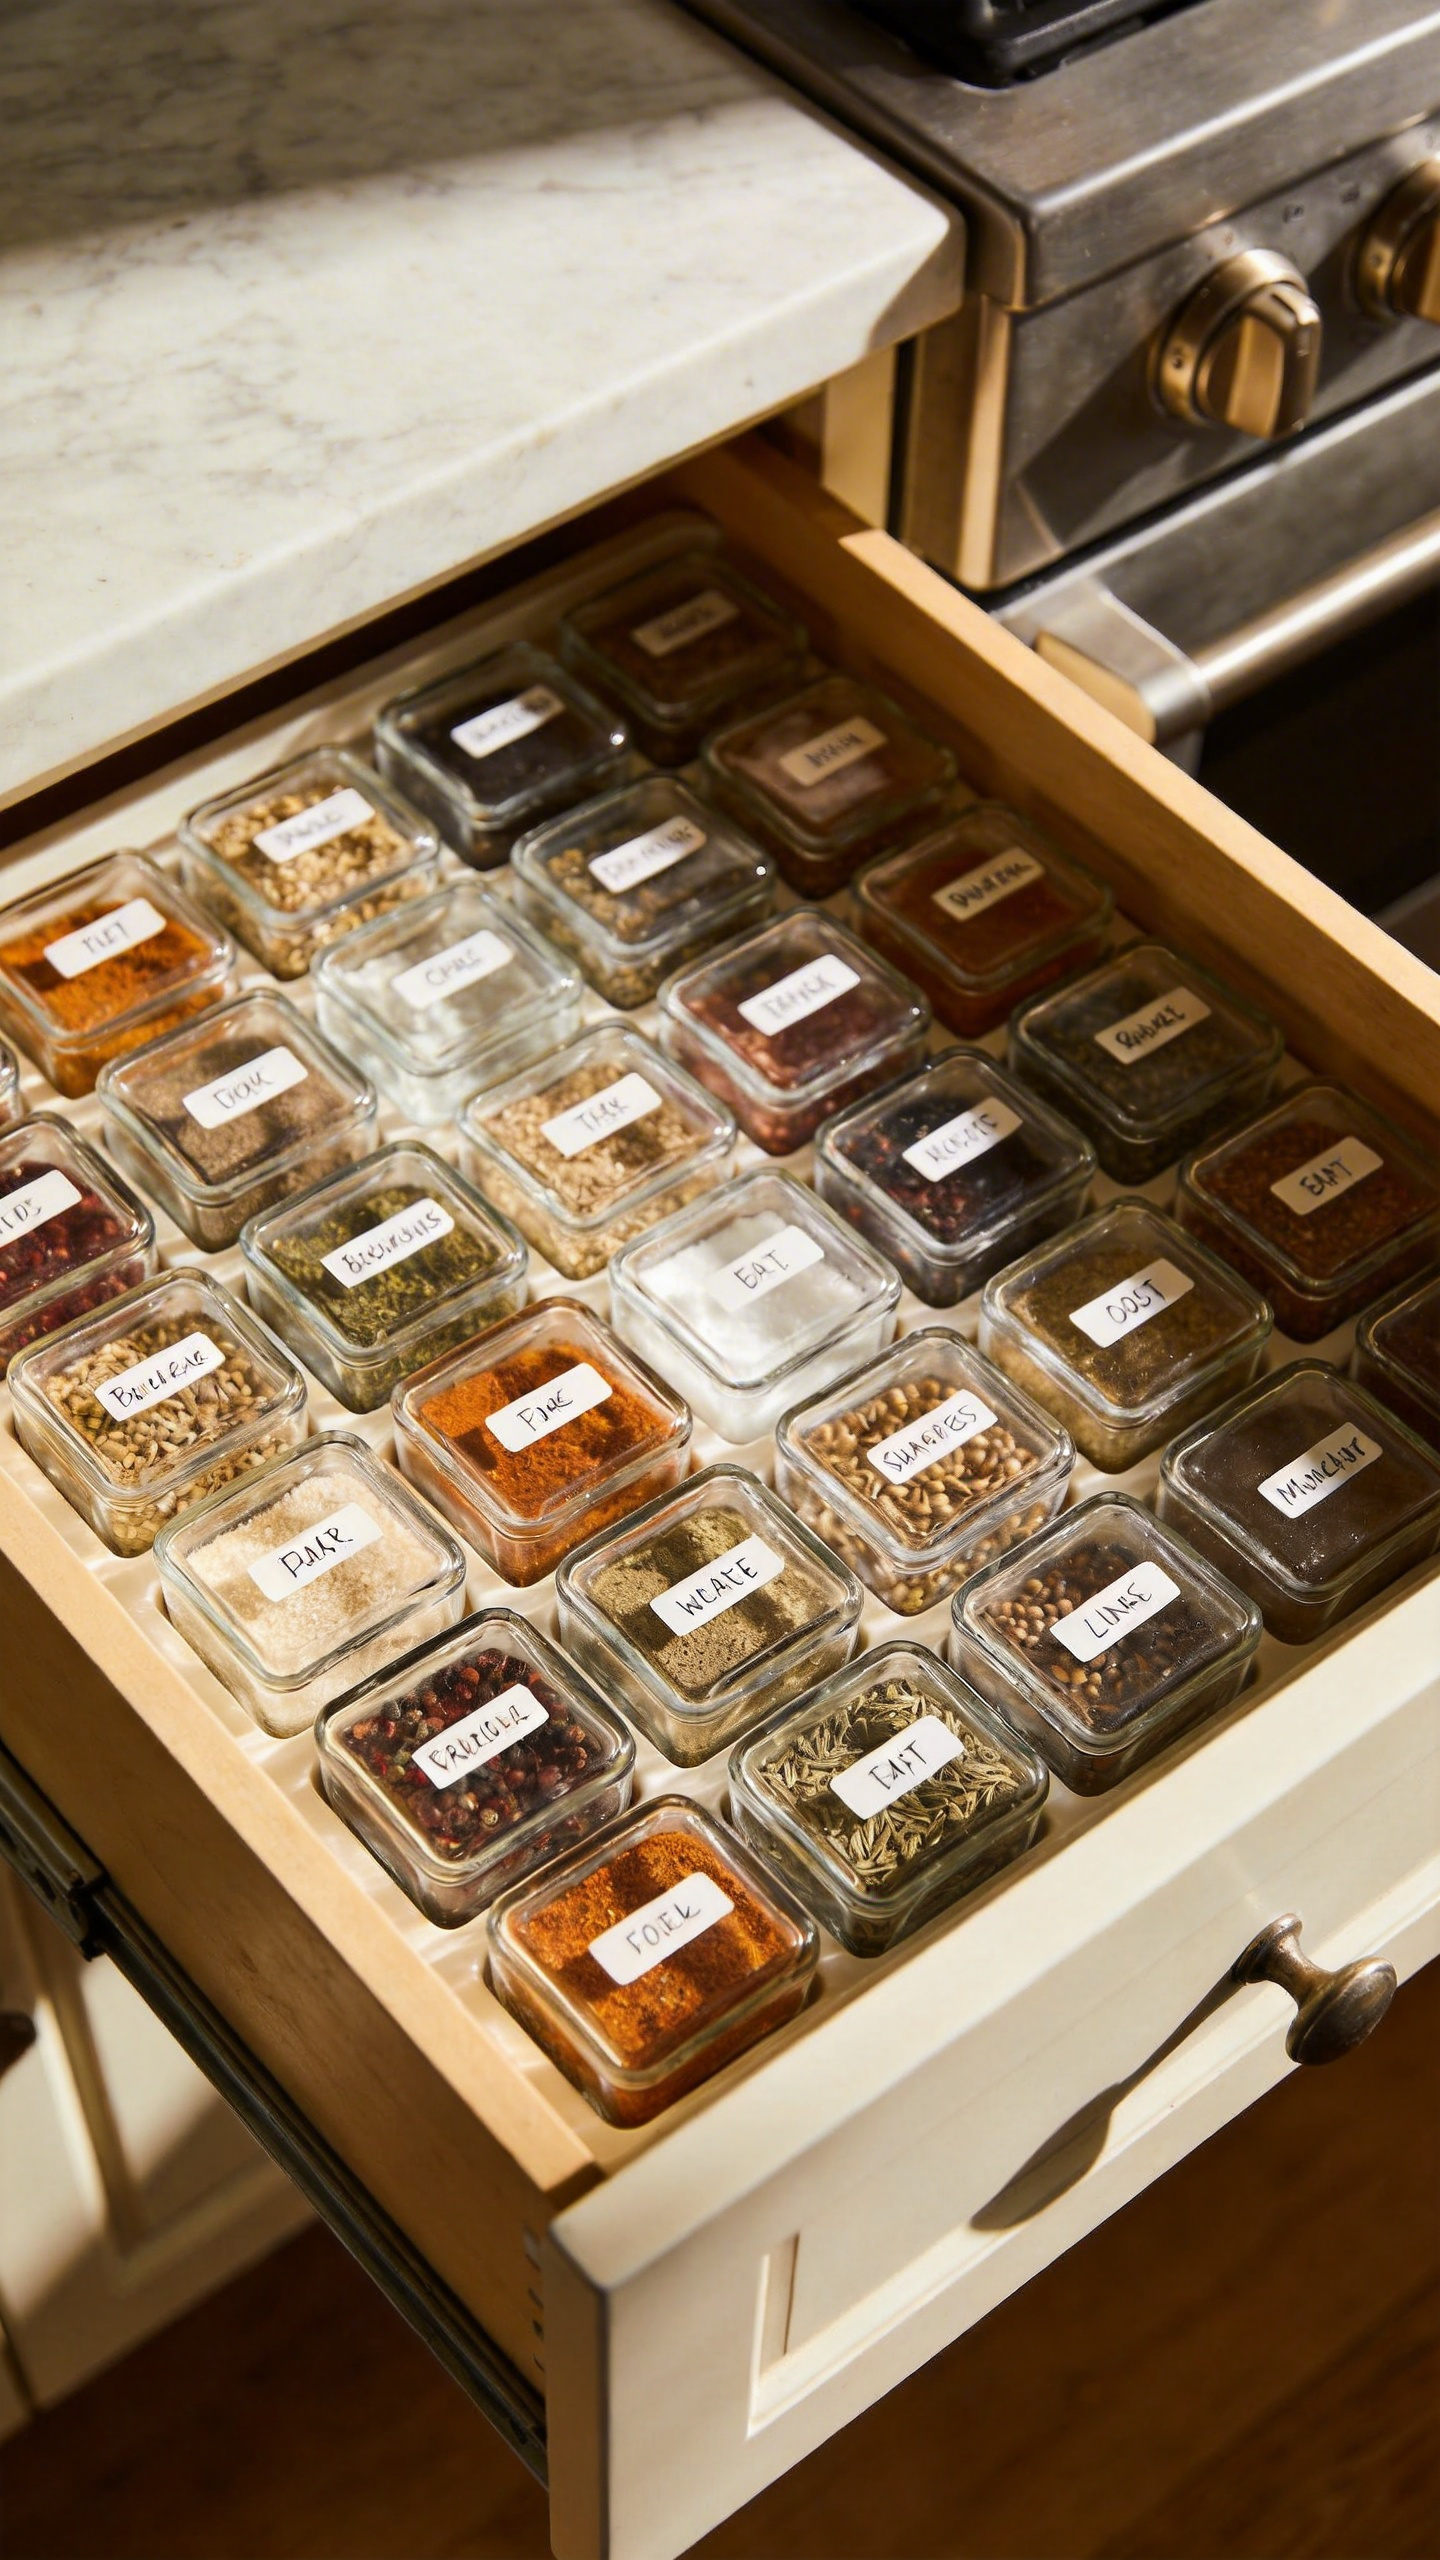
The visibility principle is what all good spice storage systems share: every jar is readable at a glance without moving another jar. Drawer inserts with horizontal labels, wall racks at eye height, and tiered door racks all achieve this. A crowded shelf behind a cabinet door does not.
Matching Your Spice Kitchen Storage Solution to Available Space
For a kitchen storage solution that fits your actual space, the system choice depends on what you have available. Drawer inserts (the IKEA Variera spice tray is the classic; a standard 24-inch drawer holds 20–24 jars) suit active cooks who want labels facing up in a pull-open system near the stove. Wall-mounted tiered racks work for smaller collections — 12 to 18 jars — in kitchens with blank wall space. Door-mounted systems are the renter-friendly option: they attach to the inside of a pantry or cabinet door, hold 20 to 30 jars, and need only 2 to 3 inches of door clearance.
The one upgrade that makes every spice system work better is decanting into uniform jars. Transfer spices from their original assorted-size containers into matching 4-oz square glass jars (24-packs for $25–$50). Uniform jars label at the same height, stack with the same logic, and turn any rack or drawer into a scannable system. When decanting, add a small piece of masking tape to each jar with the expiry year — otherwise that date is gone.
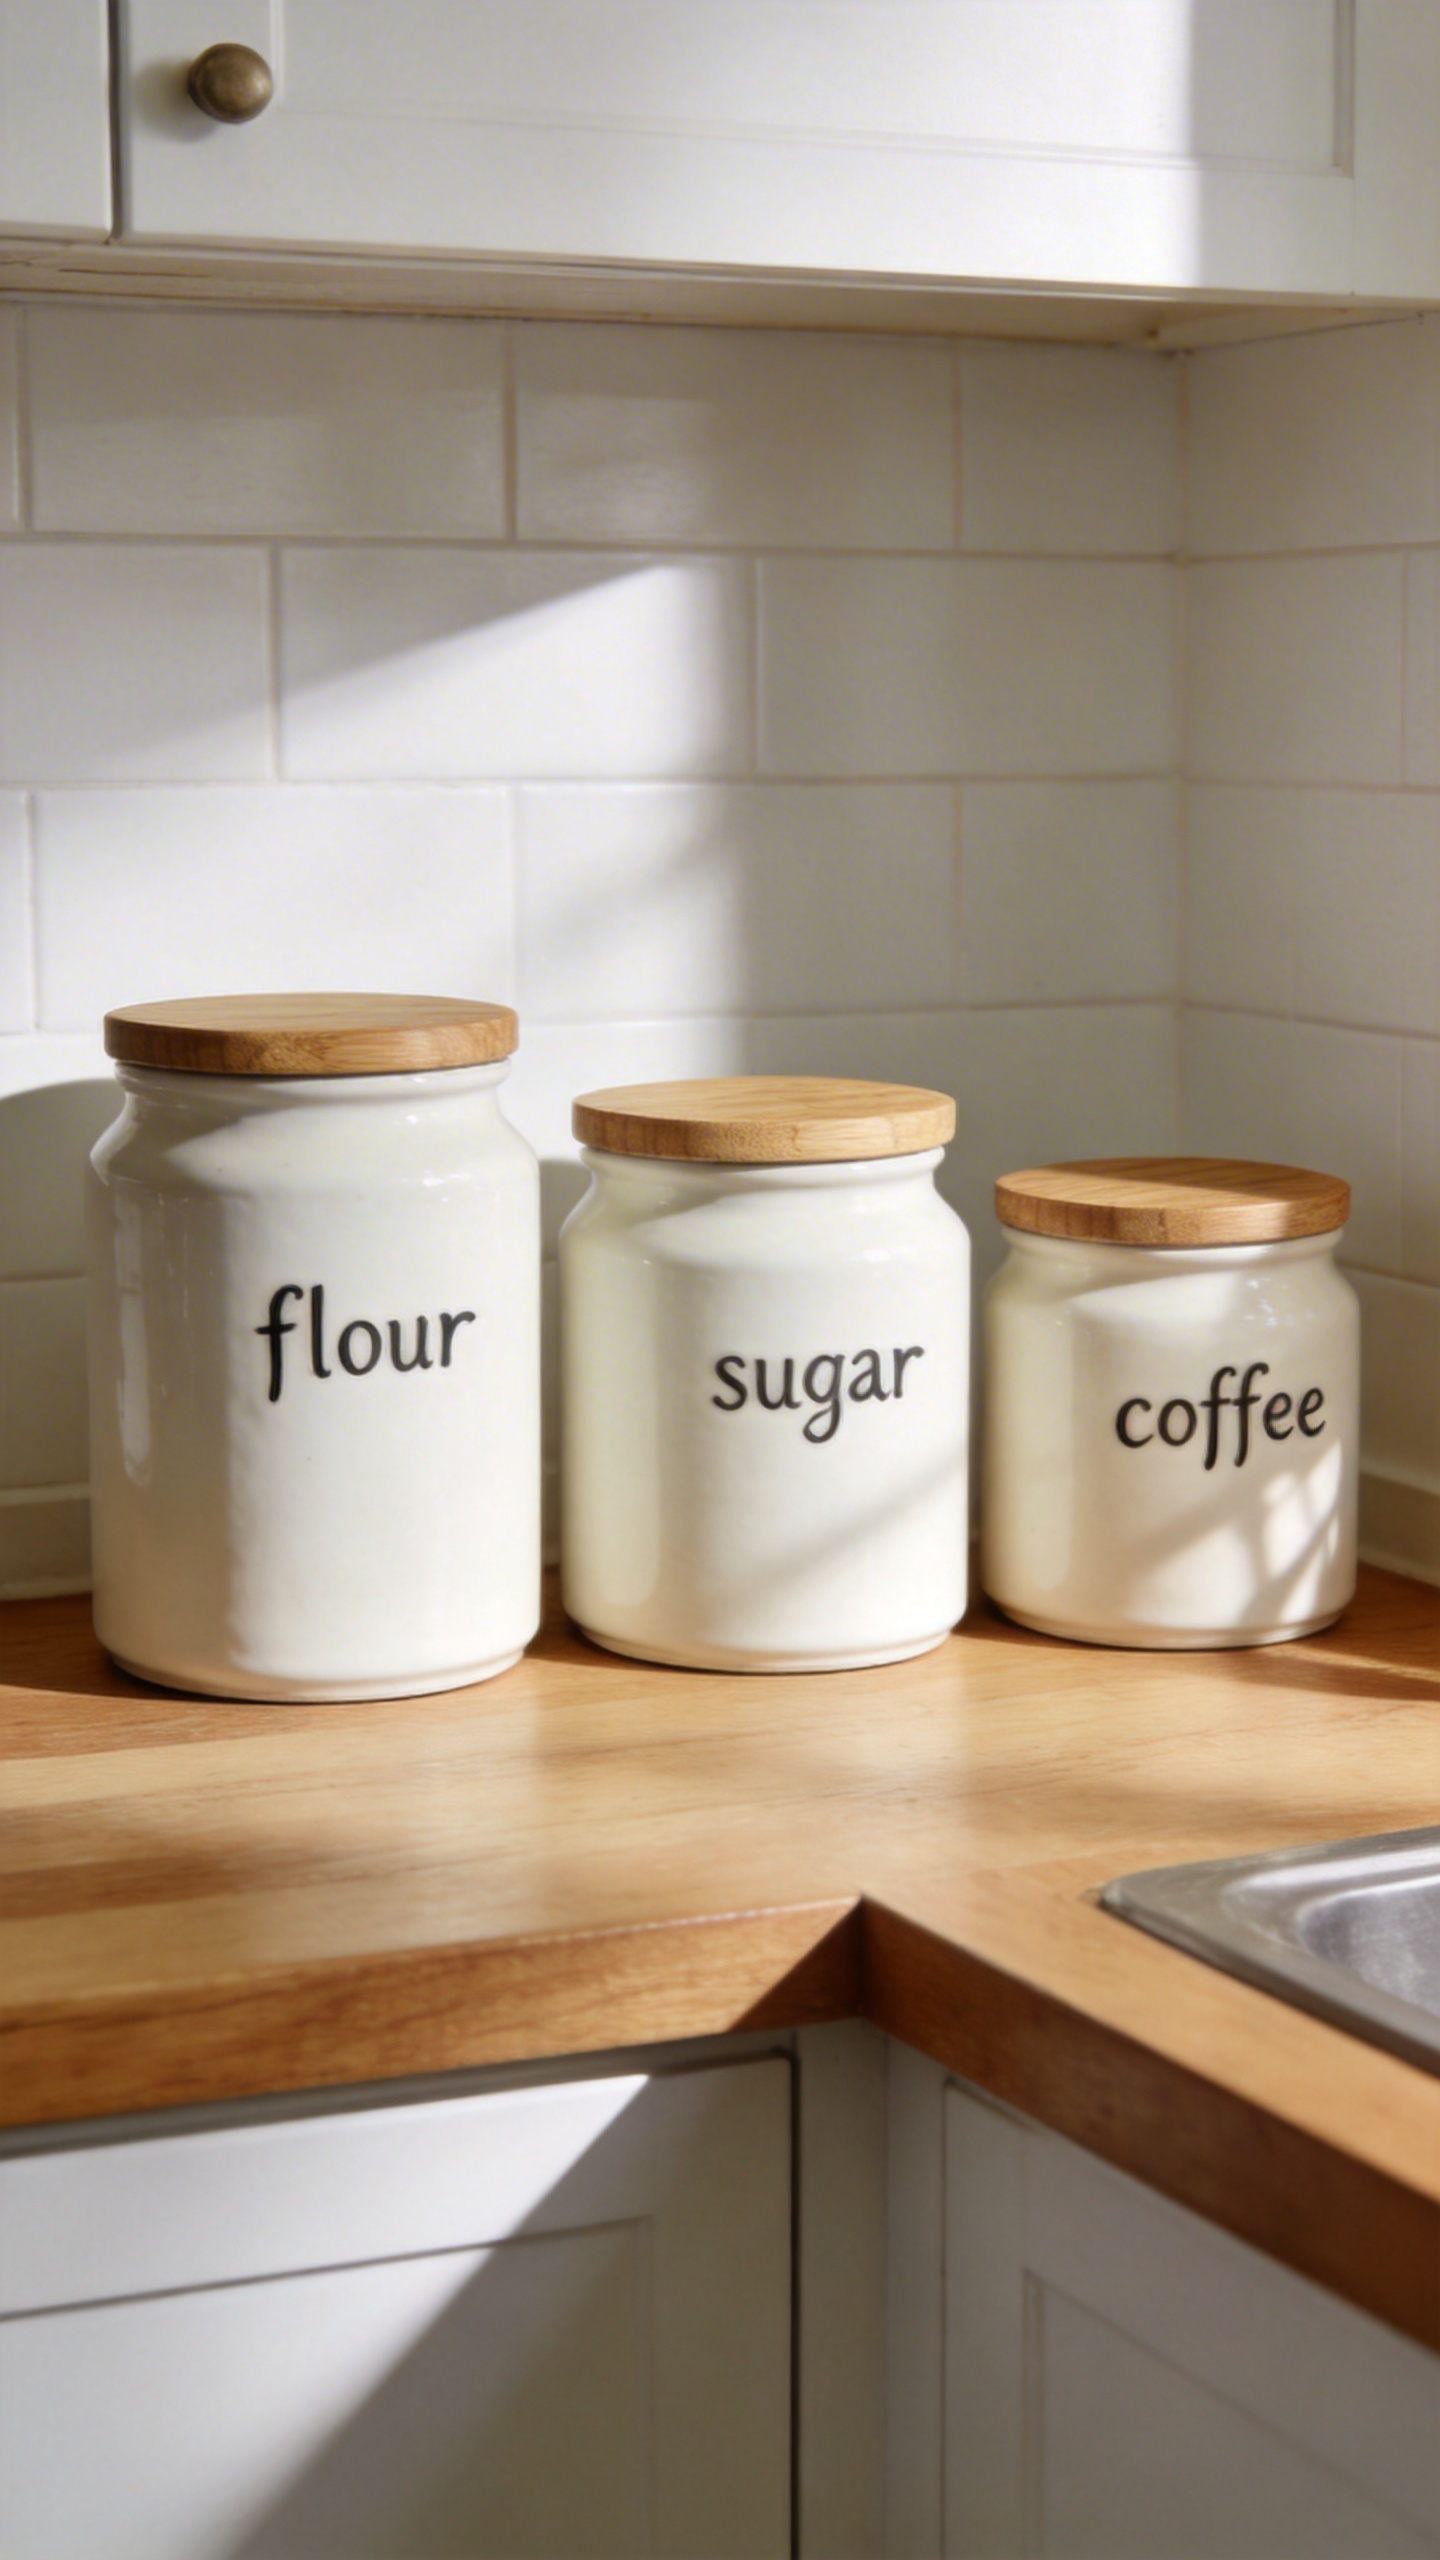
14. Countertop Canisters and Jar Systems for Baking Essentials Within Arm’s Reach
Countertop canisters have a specific job: keeping the four to six ingredients you reach for at almost every cooking session immediately accessible without opening a single cabinet. Flour, sugar, coffee, salt, the grain you cook most — these items earn counter space when they’re in daily use. The trap is filling canisters with ingredients you use twice a month, because then you’re maintaining a display around things you rarely need while prime counter real estate stays occupied.
The counter-vs-cabinet test is simple: if you haven’t opened a canister in two weeks, it goes inside. Counter space is the kitchen’s most valuable real estate, and unused canisters become surfaces to clean around.
Sizing, Materials, and the Mise en Place Zone
For sizing: a 1-quart canister holds roughly 4 cups — about half a standard 5-lb bag of flour. If you bake three or more times per week, a 2-quart canister holds a full bag and ends the constant refilling. Grains, oats, and granola typically need 3 to 4 quarts of capacity for a full purchase quantity.
Material comparison: glass is the most hygienic (no absorbed odors, easy fill-level visibility) and the best choice for bakers who assess remaining quantity at a glance. Ceramic looks the most cohesive on a styled counter. Stainless steel (18/0 grade) is the most durable. Matching sets in any material are worth the slight premium: a three-piece ceramic set ($30–$50) reads as intentional kitchen design in a way a collection of mismatched containers never does. A 10-inch lazy susan under the canister cluster turns it into a rotating station accessible from all sides — particularly useful in a corner or on a narrow counter strip.
15. Refrigerator Organization Bins That Make Your Fridge Actually Usable
A refrigerator without zones is a refrigerator where food goes to be forgotten. Without clear sections, items get pushed to the back during restocking, and the ‘I forgot I had that’ effect — a primary cause of household food waste — runs unchecked. Clear stackable bins fix this with a structure as simple as it is effective.
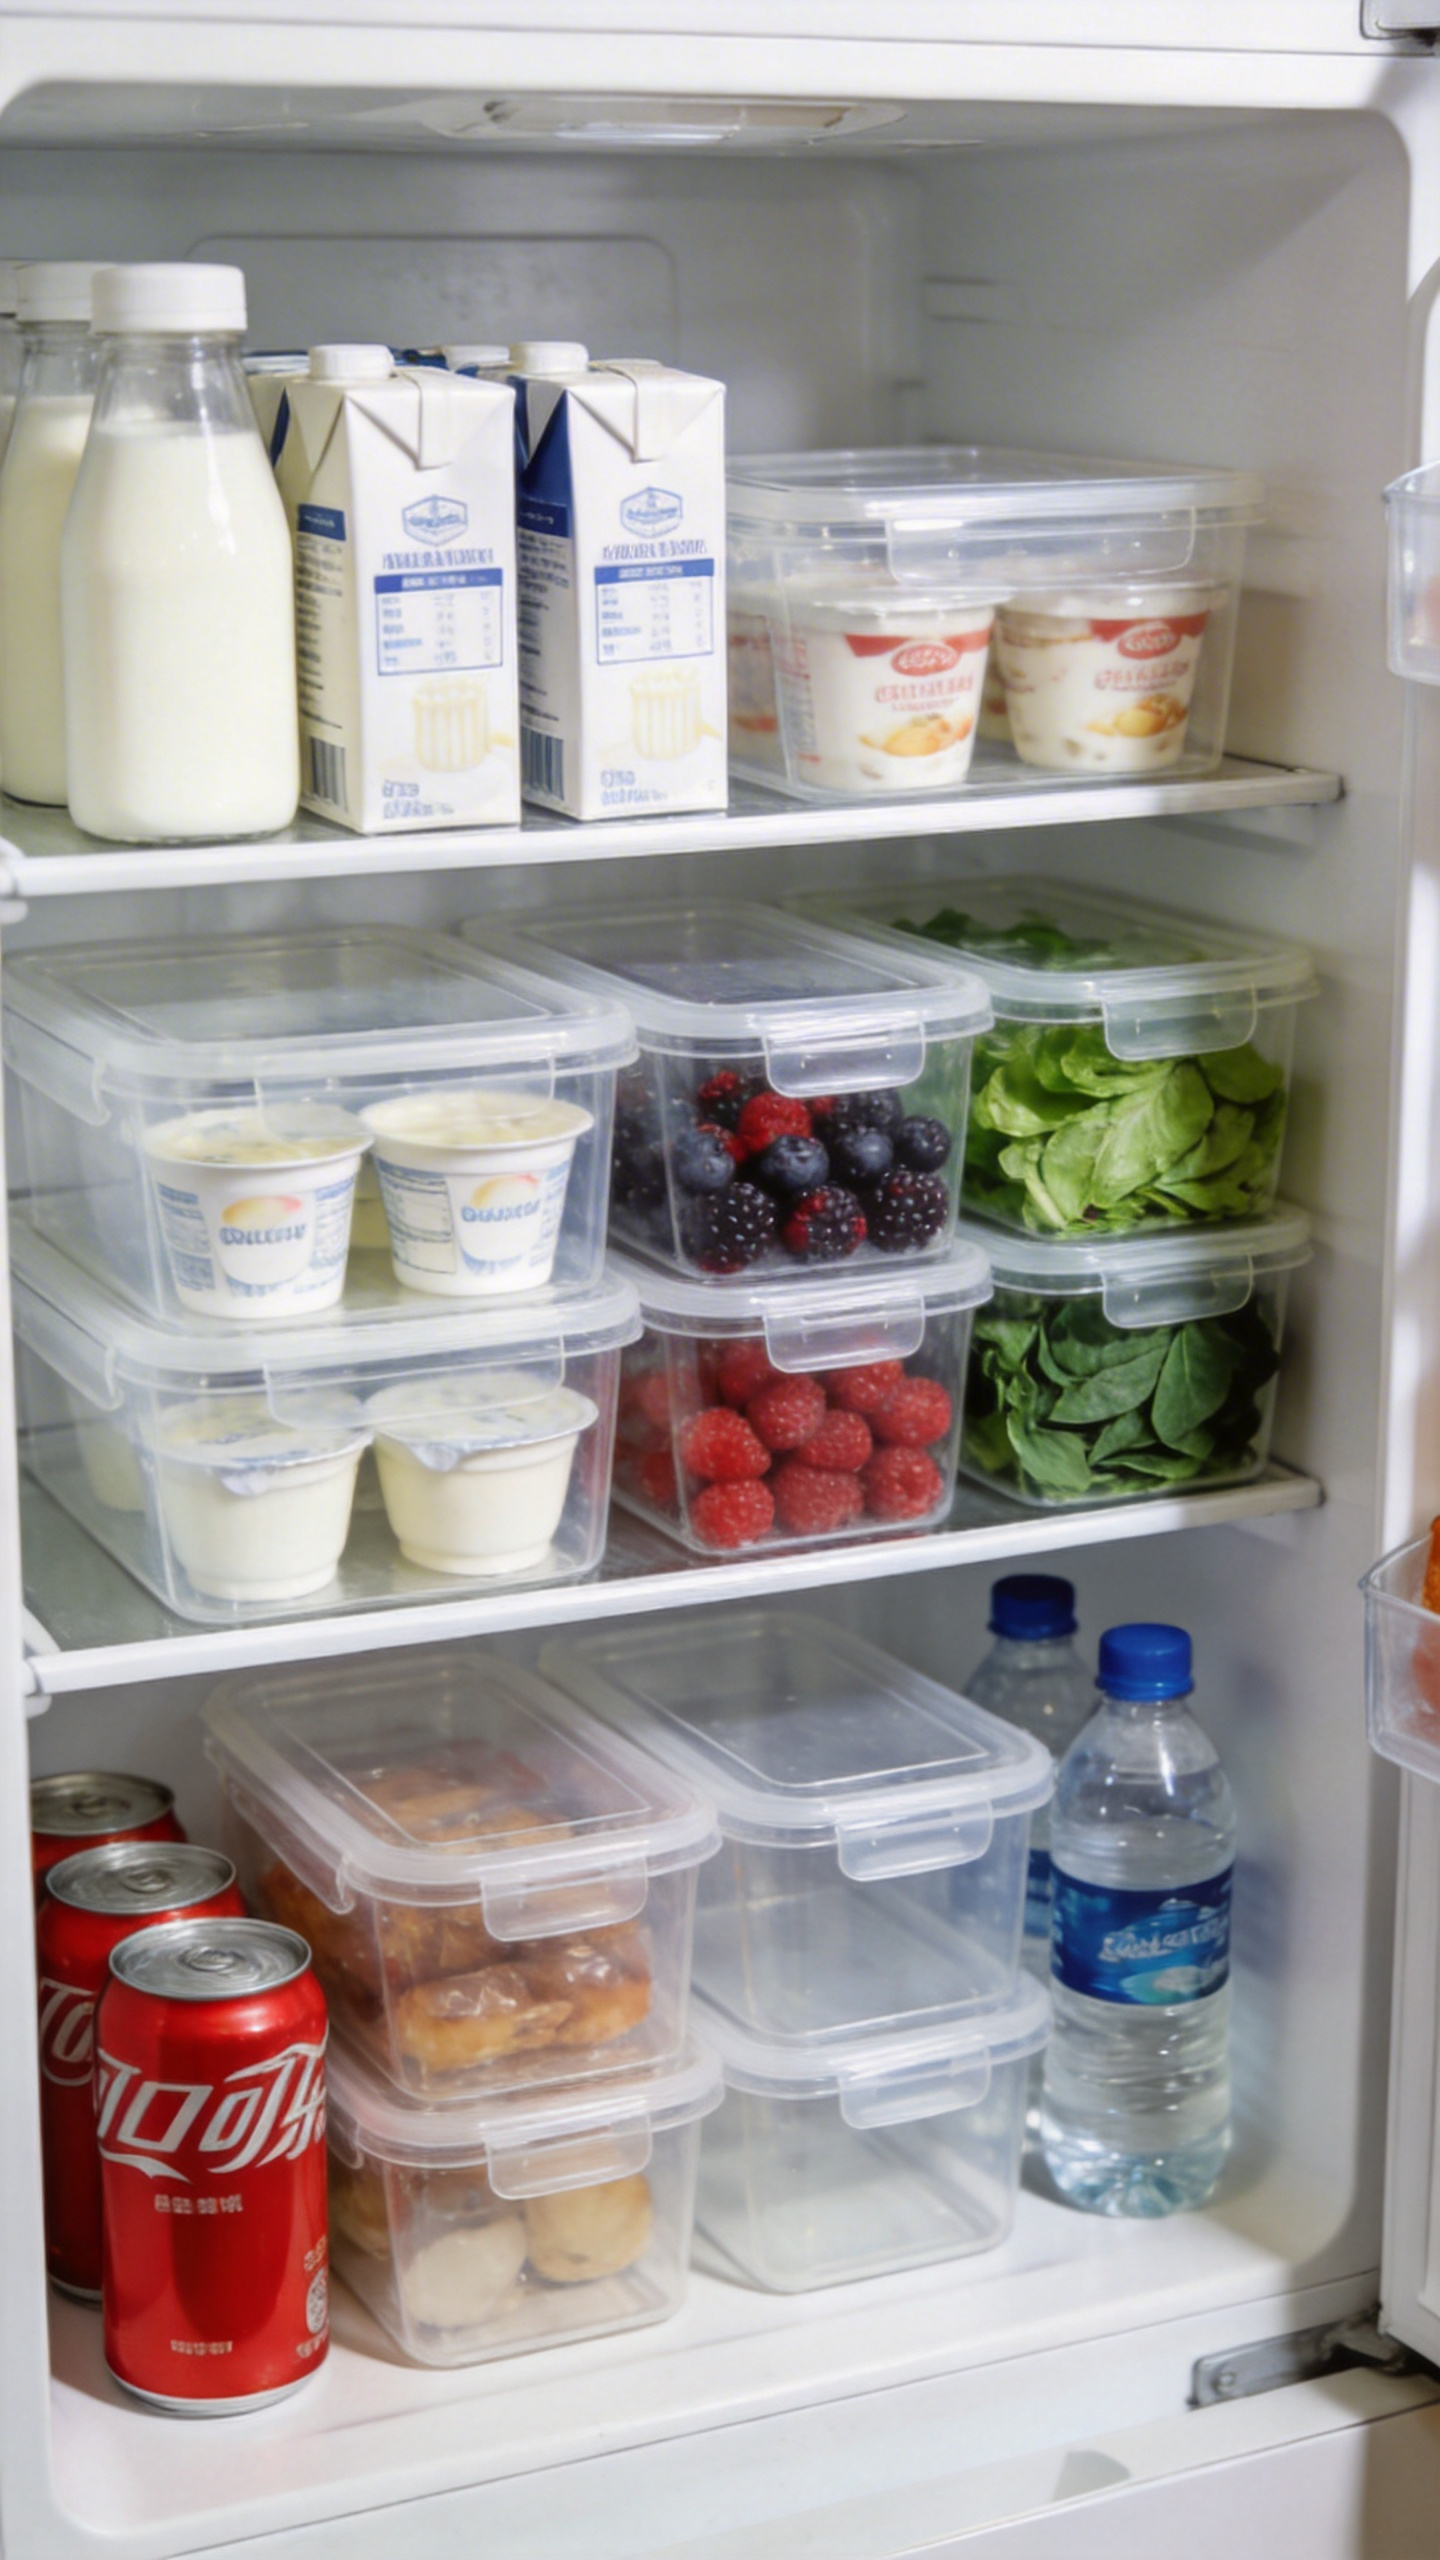
The principle is visibility: items stored in clear uniform bins are visible at a glance without moving other items. Standard clear fridge bins (10 x 7 x 4 inches) stack to 8 inches, fitting within the typical 10- to 12-inch fridge shelf height. A complete set of six to eight bins — two wide, two narrow, a can organizer, and an egg tray — runs $30–$60 and covers most standard US refrigerators.
Grouping Strategies and Sizing Notes
Grouping strategy matters and varies by household. Category grouping works for households that cook varied meals: one bin for dairy, one for produce, one for leftovers, one for drinks. The meal-kit approach works for households that meal-prep on Sundays — bins organized by planned meal create visual accountability for what needs to be eaten when. For families, a hybrid with category bins plus a dedicated ‘eat first’ bin on the top front shelf handles near-expiry items without any additional decision-making.
Two practical details: measure your fridge shelf width before buying. Most US refrigerators have shelves 21 to 26 inches wide; standard 10-inch bins fit two across in most configurations. Also choose bins with handle cutouts rather than smooth sides — they allow you to pull a full bin out without tipping its contents, which matters more than it sounds after a year of daily use.
16. Kitchen Storage Solutions for Deep Drawers: Pots, Pans, and Lids Sorted
Deep drawers — typically 6 to 8 inches deep — are among the most valuable features in a modern kitchen, and in older kitchens with only lower shelf cabinets, among the most missed. Retrieving a pot from a lower cabinet shelf requires crouching, reaching around whatever is in front, and often unstacking items to get to the one you want. A deep drawer slides open to reveal everything at once. It’s not a subtle difference.

For kitchens without deep drawers, the practical fix is a full-extension pull-out shelf insert. Rev-A-Shelf and Hafele make retrofit systems that convert an existing lower cabinet shelf into a pull-out at $60–$150 — less than a cabinet door replacement and functionally close to a built-in deep drawer. For kitchens that just need better division inside existing lower cabinets, a vertical pan rack (Yamazaki and SimpleHouseware both make versions for 15- to 21-inch wide base cabinets at $20–$40) divides the cabinet into vertical slots where each pan stands upright and separately accessible.
Peg Systems and Lid Solutions
For kitchens with deep drawers, a peg-style insert is the most flexible system available. Rev-A-Shelf’s 5DCD peg board ($45–$85, chrome) uses adjustable pegs that insert into a grid base — pots rest between pegs and can’t slide. The companion Rev-A-Shelf 5DLD lid organizer mounts in the same drawer alongside the peg base and holds up to six lids vertically. Every pot has a corresponding lid, always together.
Lid storage is worth treating as a separate sub-problem. In-drawer lid racks are the cleanest solution for deep drawer kitchens. Vertical freestanding racks inside lower cabinets ($15–$25) work without any installation. Door-mounted lid organizers screw or adhere to the inside of a cabinet door and hold three to five lids without consuming shelf space. As one of the more involved small kitchen remodelling solutions, a drawer-and-lid system that treats both pots and their lids as a deliberate storage category eliminates the single most common lower cabinet access frustration.
Choosing the Right Kitchen Storage Solutions for Your Home
The most effective kitchen storage upgrade is almost never the most expensive one. It’s the one that solves the problem you encounter most often — the spice that takes three attempts to locate, the pot lid that clatters out every time you open the cabinet, the counter space lost to a trash bin that has nowhere better to go.
Start with the zone that frustrates you most. If it’s the under-sink disaster, spend $50 on a tension rod setup, a waterproof liner, and a small pull-out bin. If it’s your spice situation, a set of uniform jars and a drawer insert will transform your cooking prep more noticeably than most $200 appliances. Prioritise reversible upgrades first if you rent: tension rods, over-door organizers, fridge bins, shelf risers, and magnetic strips require no drilling or permanent modification and move with you.
The one-zone-at-a-time approach works better than a full kitchen overhaul attempted in a single weekend. Choose the area you use most, complete it fully, and live with it for a week before moving to the next zone. The payoff motivates the next upgrade and prevents the common trap of starting six projects and finishing none. A well-organized kitchen is one you’ll maintain — and systems with clear, simple logic get maintained. Four to six thoughtfully chosen kitchen storage solutions, each with one home for one category of items, will serve you better than an elaborate modular system that requires daily mental overhead to keep organized.


