I’ve got a confession to make. For years, I thought putting wallpaper in a bathroom was insane. A one-way ticket to a peeling, moldy disaster. As a designer focused on productivity, the last thing I want is to create a space that becomes a nagging, high-maintenance headache for my clients. Your home environment should reduce your cognitive load, not add to it. Then I walked into the powder room of a new remote-work client, a freelance graphic designer who worked out of her home.
It was this tiny space, but it was wrapped in a stunning, deep blue Chinoiserie wallpaper. It felt like a jewel box—a little pocket of escapism from the chaos of her open-plan living/work area. She told me it was where she went to think, to get away from her screen for five minutes and let a difficult design problem untangle itself in her head. It was then that it clicked: for remote workers, the bathroom isn’t just a bathroom. It’s often the only truly private room in the house. It’s your strategic retreat. And designing it to be a sanctuary isn’t an indulgence; it’s a productivity tool.
But you have to do it right. So let’s cut through the noise. Here’s the real story on making this work, based on what I’ve seen succeed and what I’ve seen turn into an expensive, stressful failure.
Laying the Foundation: smart planning for Vintage Wallpaper (Part 1)
Alright, this is the boring-but-critical part. I know you want to get to the fun patterns, but skipping this is like building a house on a swamp. These steps aren’t just about making it look good; they’re about making it last, so you can install it and then forget about it for a decade. Peace of mind is the goal.
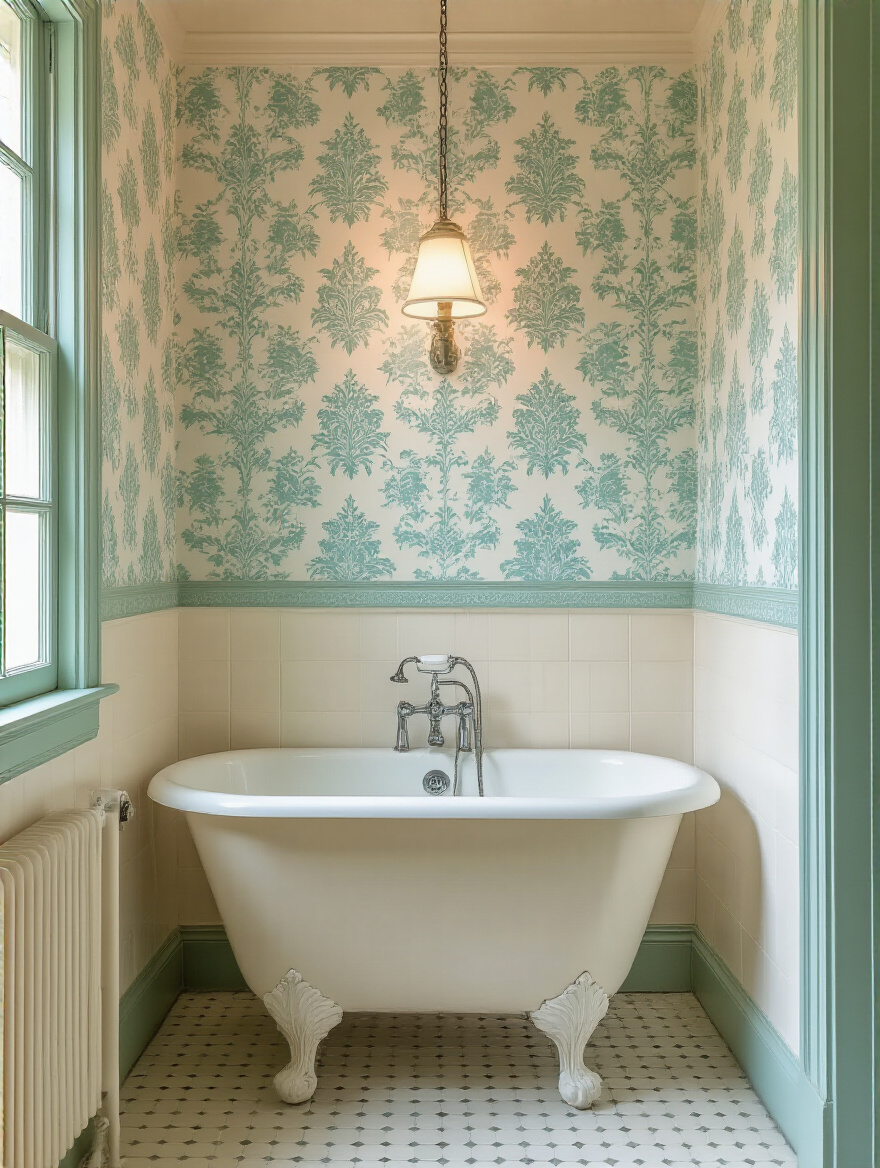
1. Assess Bathroom Moisture Levels and Ventilation Needs
You know what people always ask me? “Do I really need a better fan?” Yes. You do. This is non-negotiable. If your mirror is still foggy 20 minutes after a shower, your ventilation is garbage and it will destroy your wallpaper. Before you spend a dime on beautiful paper, you have to get this right.
This isn’t just about avoiding peeling; it’s about avoiding the hidden, behind-the-wall mold that creates a bigger, more expensive problem you don’t have time to deal with. The shortcut here is simple: get a hygrometer (they’re cheap) to measure humidity. If it’s consistently high, upgrade your exhaust fan to one that’s rated for your bathroom’s size and, ideally, has a humidity sensor so it runs automatically. This is a “set it and forget it” solution that protects your investment.
2. Select Appropriate Wallpaper Material for High Humidity
The BS everyone else says is that you can just put a sealant over any old paper. Don’t listen to them. Starting with the right material is half the battle. Think of it like buying a raincoat—you don’t buy a cotton jacket and hope for the best. You need something designed for the elements.
For a bathroom, that means solid vinyl or vinyl-coated wallpaper. It’s basically waterproof. Real vintage paper is often just… paper. Beautiful, but delicate. If you fall in love with a true vintage pattern, find a high-quality reproduction on a vinyl substrate. You get the look without the liability. Your brain will thank you when you’re not staring at a bubbling seam during a conference call.
3. Research Vintage Eras to Match Your Home’s Architectural Style
This might sound fluffy, but it matters for creating a space that feels grounded and calming. When the design of a room clashes with the bones of the house, it creates a subtle, low-grade visual tension. You don’t want that in your strategic retreat. You want harmony.
Take a second to identify your home’s style. Is it a Craftsman? Victorian? Mid-Century? A quick Google search will give you the corresponding wallpaper eras. Sticking to an Arts & Crafts pattern in a Craftsman home or an Art Deco geometric in a 1930s Tudor just feels right. It creates a sense of belonging and peace, which is exactly the vibe you need to recharge between tasks.
4. Create a Cohesive Color Palette That Enhances Vintage Patterns
Can we talk about why so many people get this wrong? They pick a beautiful, busy wallpaper and then throw a bunch of other competing colors and patterns in the room. The result is visual chaos. A chaotic space creates a chaotic mind, and that’s the enemy of focus and productivity.
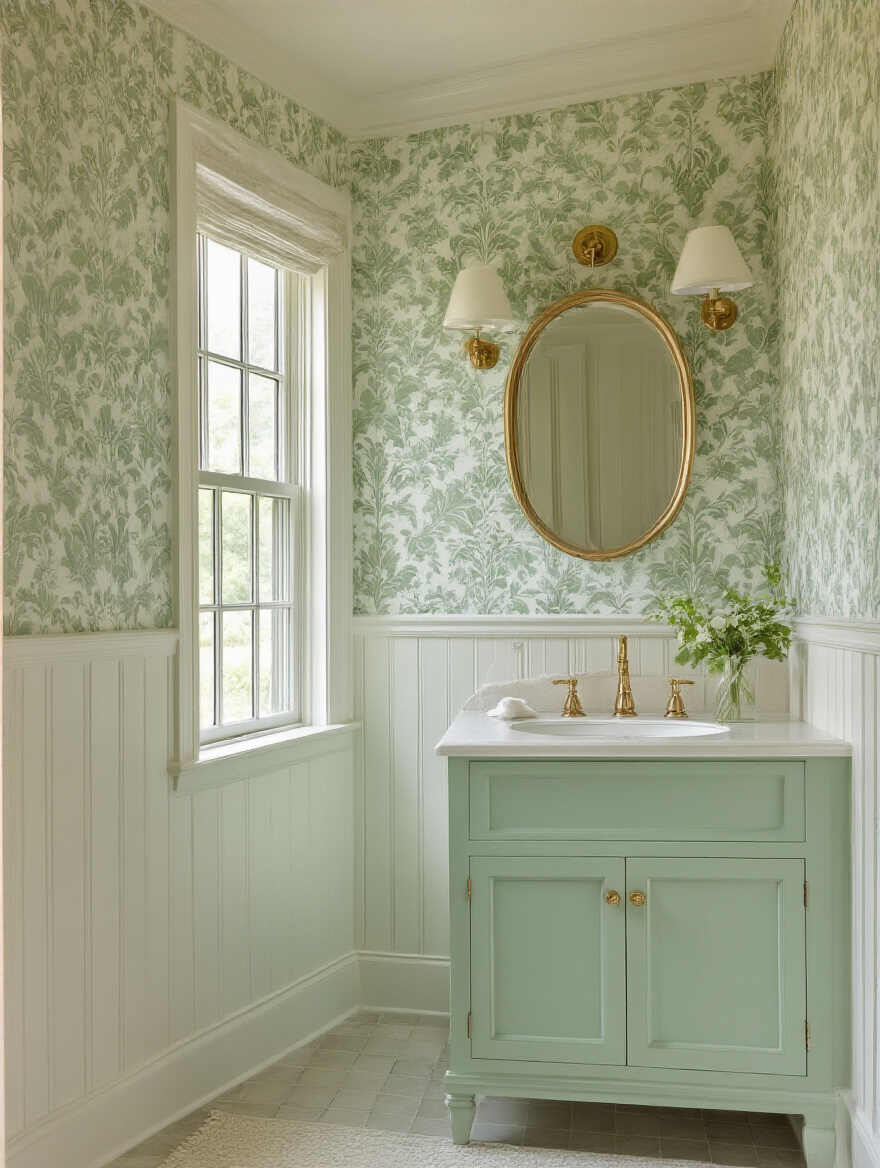
The shortcut I wish I’d known earlier: pull one of the least prominent accent colors from your wallpaper pattern and make that your main color for towels and accessories. If you have a floral paper with greens, pinks, and a tiny bit of deep blue, get deep blue towels. It looks incredibly intentional, sophisticated, and, most importantly, it calms the whole look down, allowing the wallpaper to be the star without overwhelming you.
Laying the Foundation: Smart Planning for Vintage Wallpaper (Part 2)
Okay, just one more planning step, but it’s a big one. Mess this up and you’ll either run out of paper mid-project (a nightmare for discontinued vintage finds) or spend a fortune on material you don’t need. We’re aiming for efficiency here—in time, money, and mental energy.
5. Accurately Measure Your Space and Account for Pattern Repeats
I once watched a client try to DIY this. They measured the walls but completely forgot about the “pattern repeat”—the vertical distance before the pattern starts over. They ended up short one roll of an irreplaceable 1950s deadstock wallpaper and had to scrap the entire project. It was a painful, expensive lesson.
Here’s what actually matters: measure the height and width of your walls, of course. But then, find the pattern repeat length on the wallpaper label. You need to add one full repeat length to each strip you cut to ensure you have enough wiggle room to line everything up perfectly. And then, after all that math, add 15% to your total order. Always. It’s your insurance policy against mistakes and for any future repairs. Do this right once, and you can move on.
Discovering Your Dream: Choosing Authentic Vintage Designs (Part 1)
Now for the fun part. Choosing the pattern is about defining the feeling you want your little sanctuary to have. Do you need it to be calming and serene? Or bold and energizing for a quick mental boost? The pattern sets the stage.
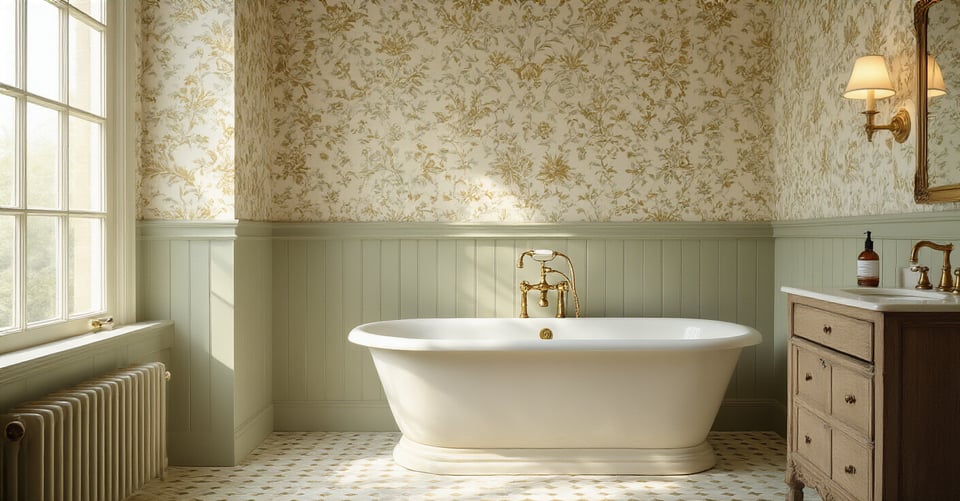
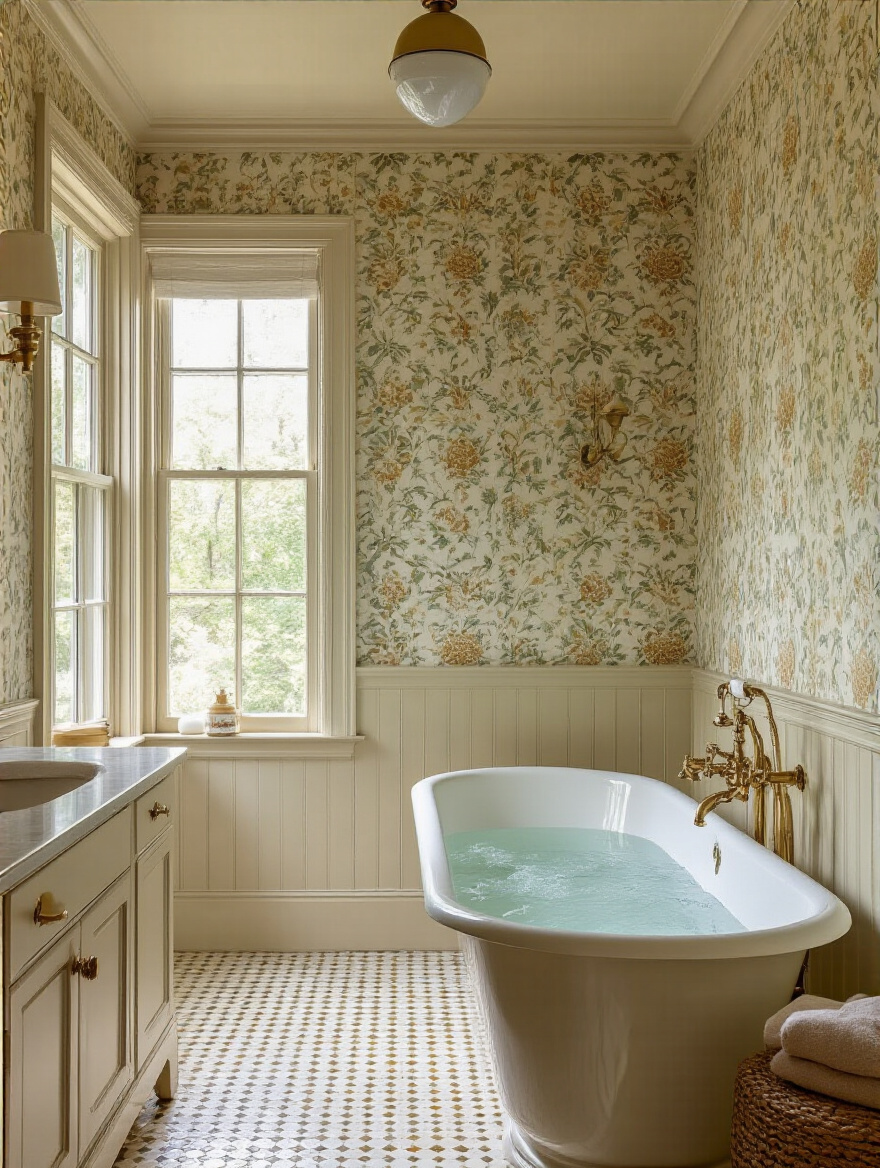
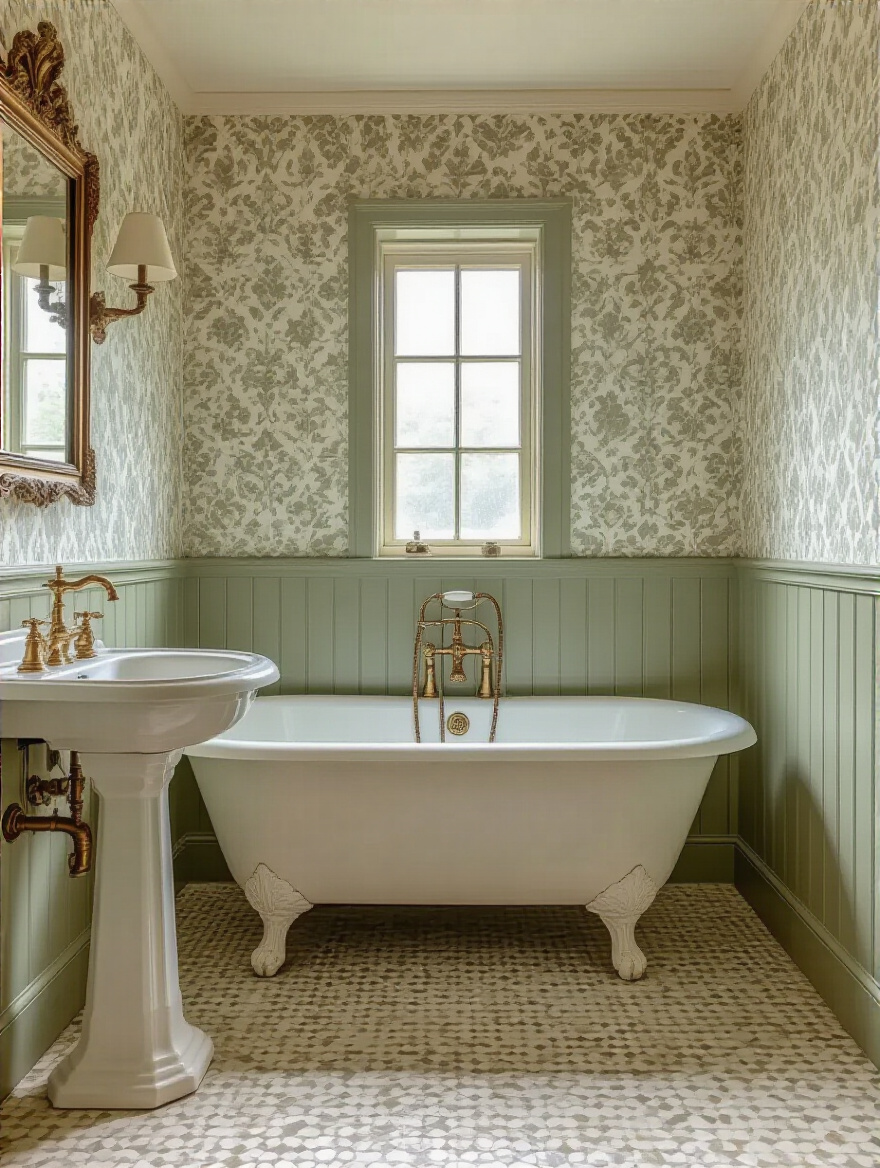
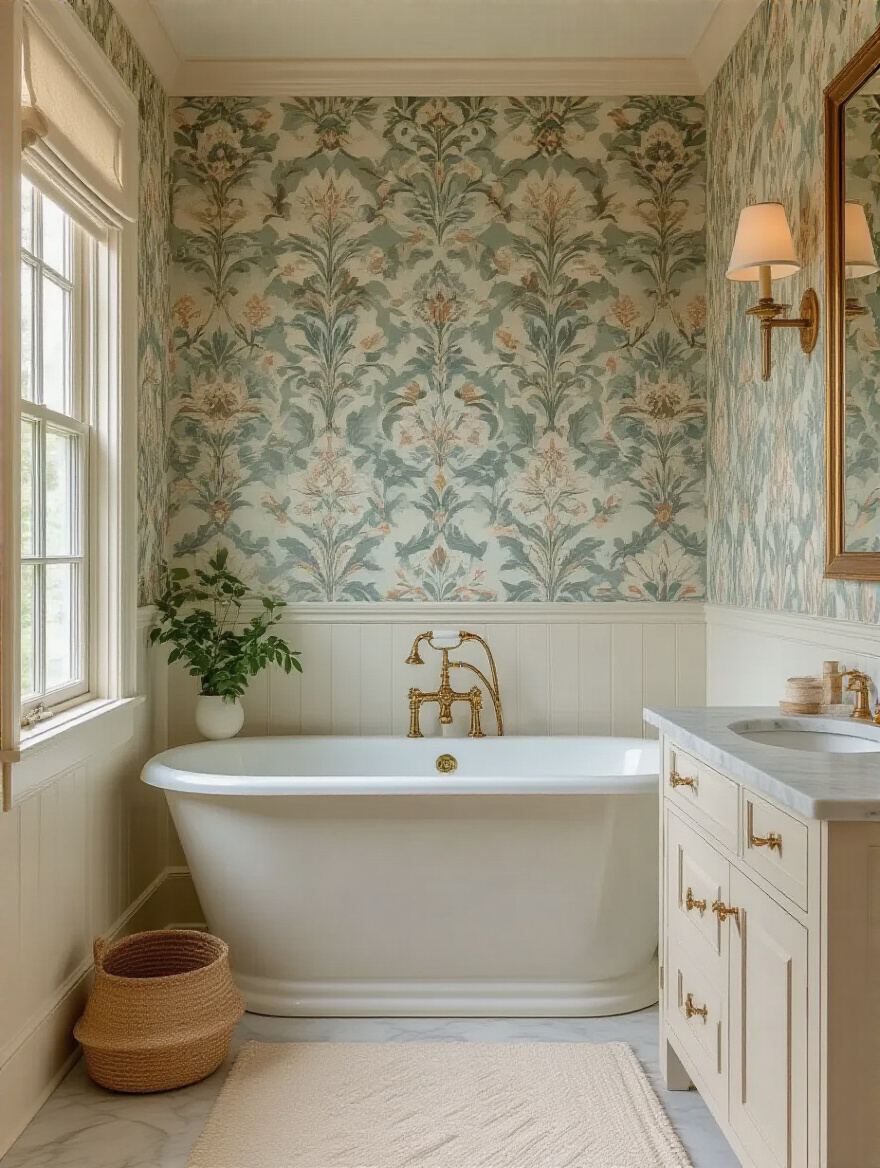
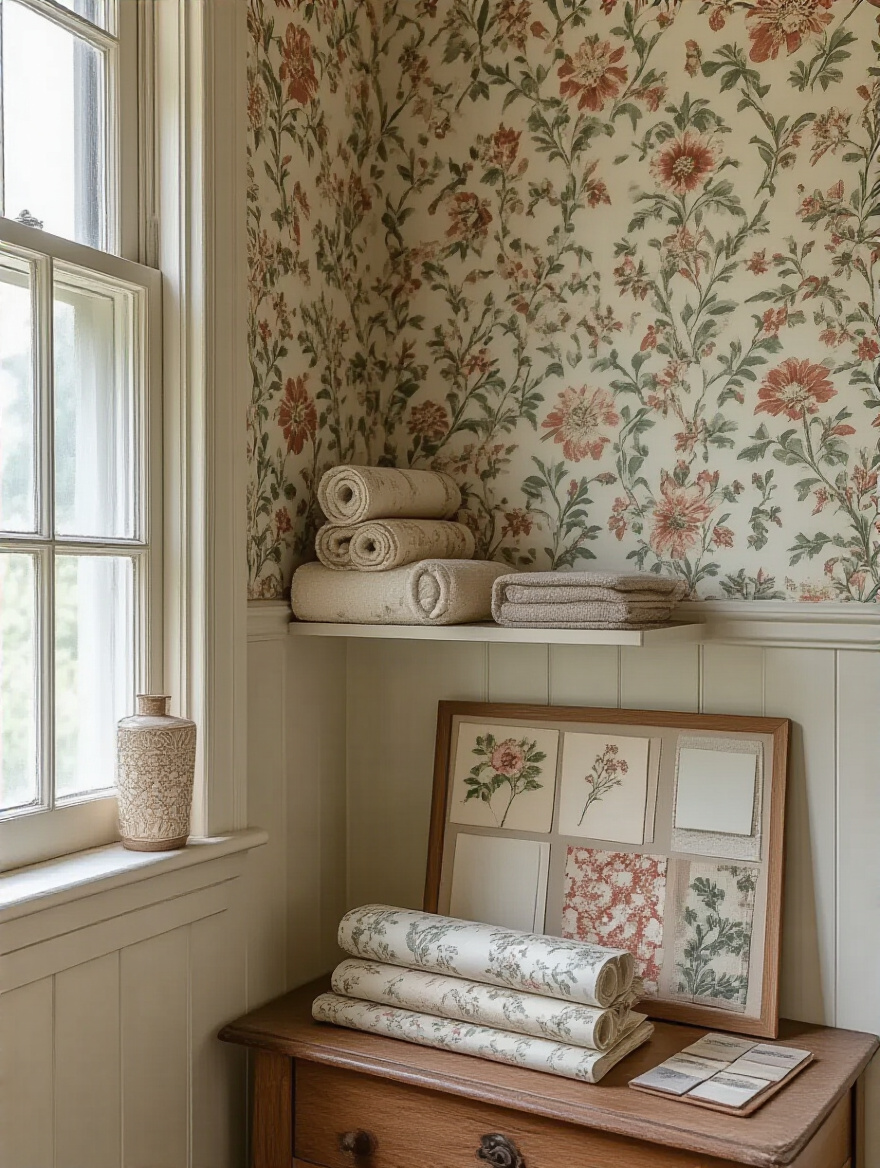
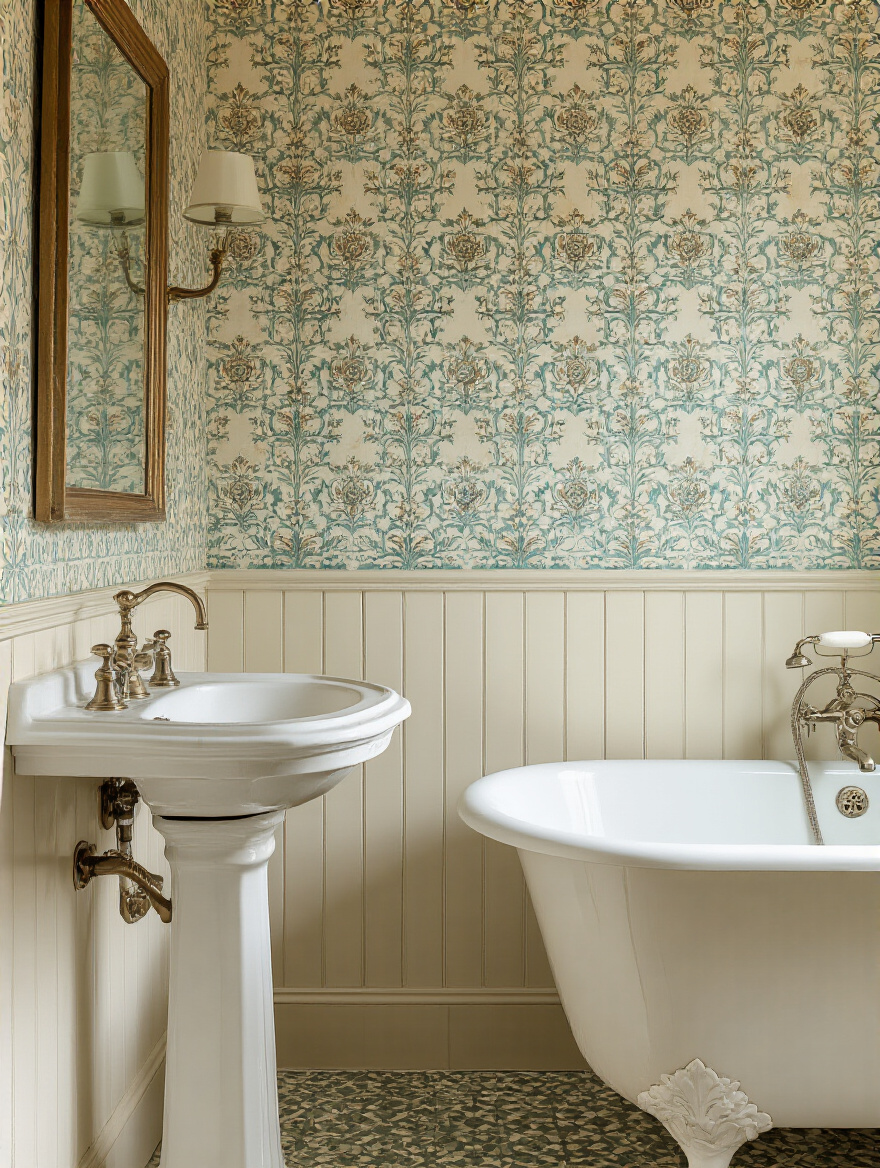
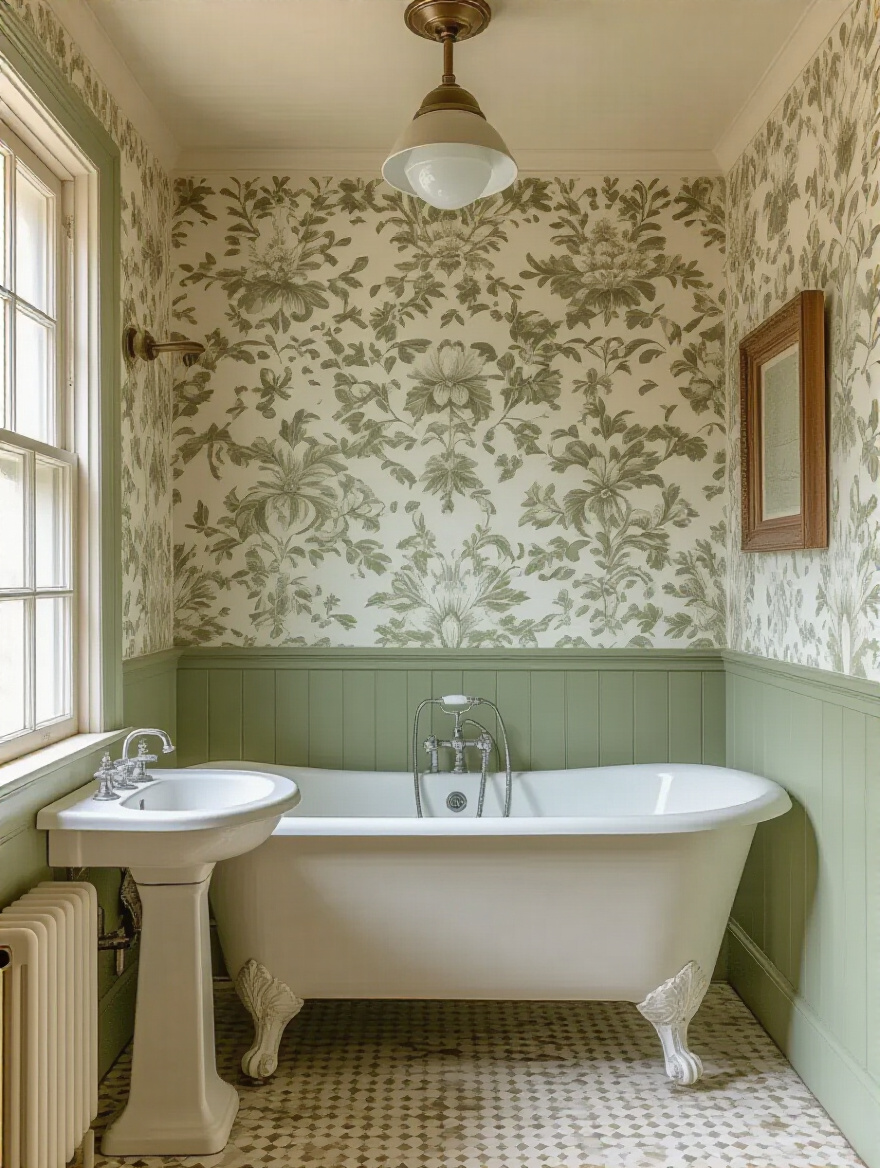
6. Embrace Classic Floral and Botanical Prints for Timeless Appeal
If your workday is a stressful mess of deadlines and demanding emails, this is your pattern. Biophilic design—the concept of connecting with nature—is proven to reduce stress. A beautiful floral or botanical print is a direct shortcut to that feeling. It’s a visual deep breath.
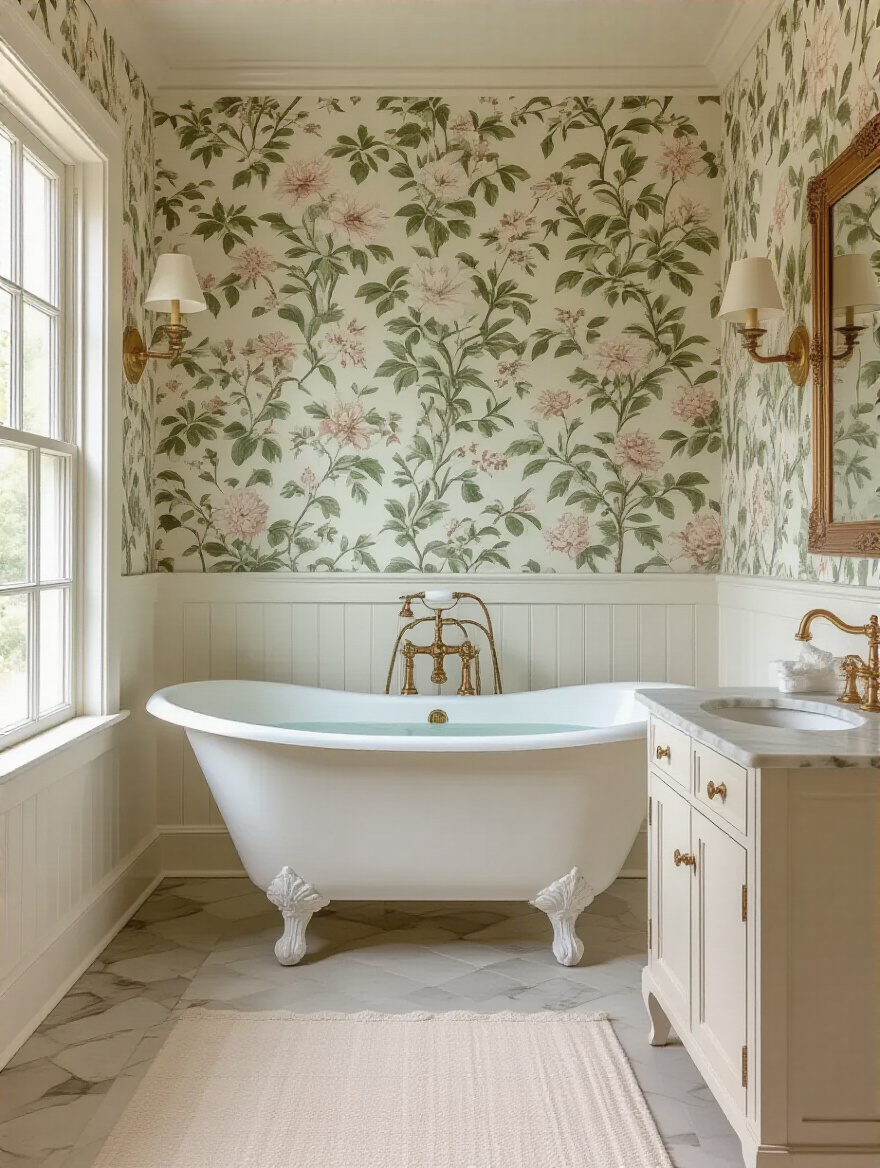
These patterns feel timeless for a reason. They’re grounding, elegant, and bring a sense of life into a small, often windowless space. A William Morris-style print, with its flowing leaves and organic forms, can make your five-minute break feel like a walk in a garden, helping you return to your desk feeling calmer and more centered.
7. Explore Geometric Art Deco or Mid-Century Modern Patterns
On the other hand, maybe you don’t need to calm down—maybe you need to rev up. If you’re hitting an afternoon slump or need a jolt of creative energy, the bold, structured lines of an Art Deco or Mid-Century Modern pattern are perfect. They’re confident and dynamic.
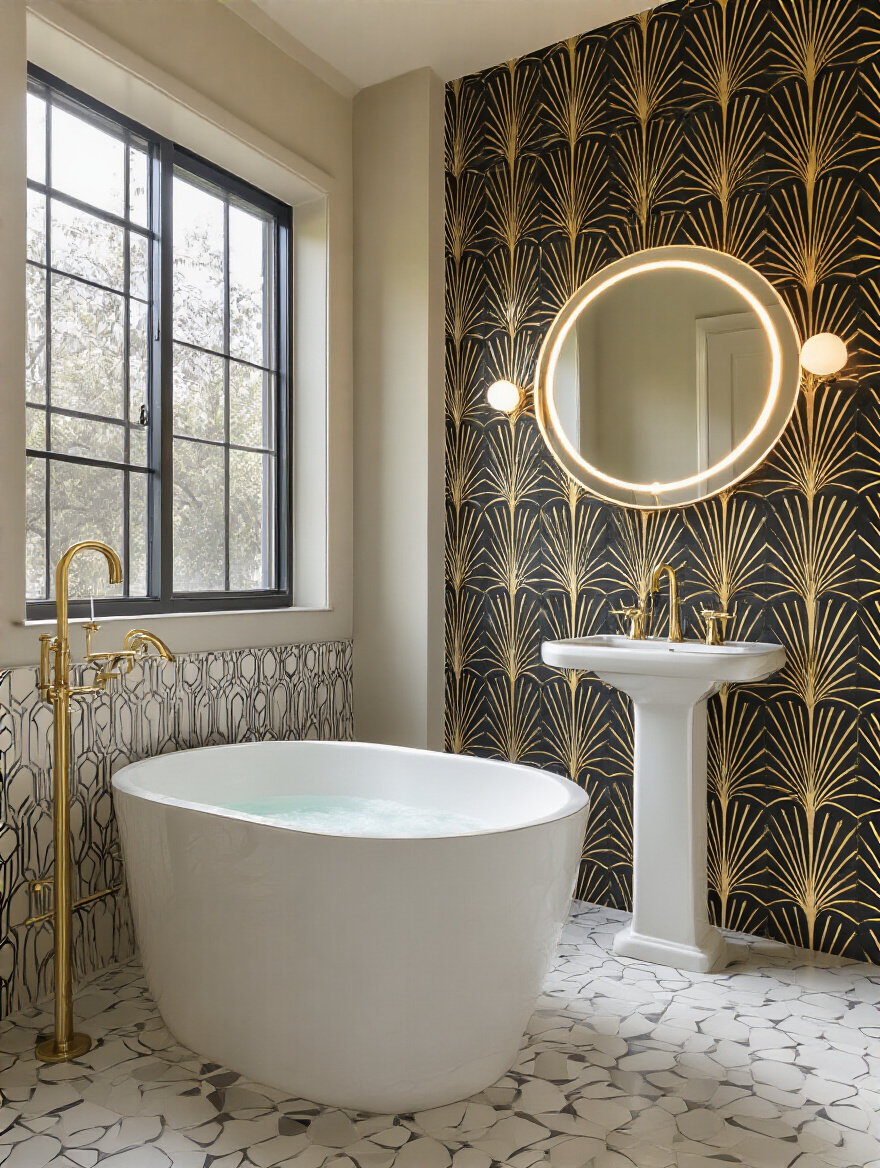
Think of these patterns as a visual shot of espresso. The sharp angles, repeating sunbursts, or atomic shapes have an inherent energy. A bathroom with a bold geometric pattern feels decisive and powerful. It’s the perfect backdrop for looking in the mirror and giving yourself a quick pep talk before a big presentation.
8. Consider Toile de Jouy or Chinoiserie for Elegant Period Charm
I think of these as the “storytelling” patterns. They are the ultimate for mental escapism. Toile de Jouy, with its pastoral scenes, and Chinoiserie, with its exotic landscapes and birds, transport you somewhere else entirely. This is powerful when your office is ten feet away in the living room.
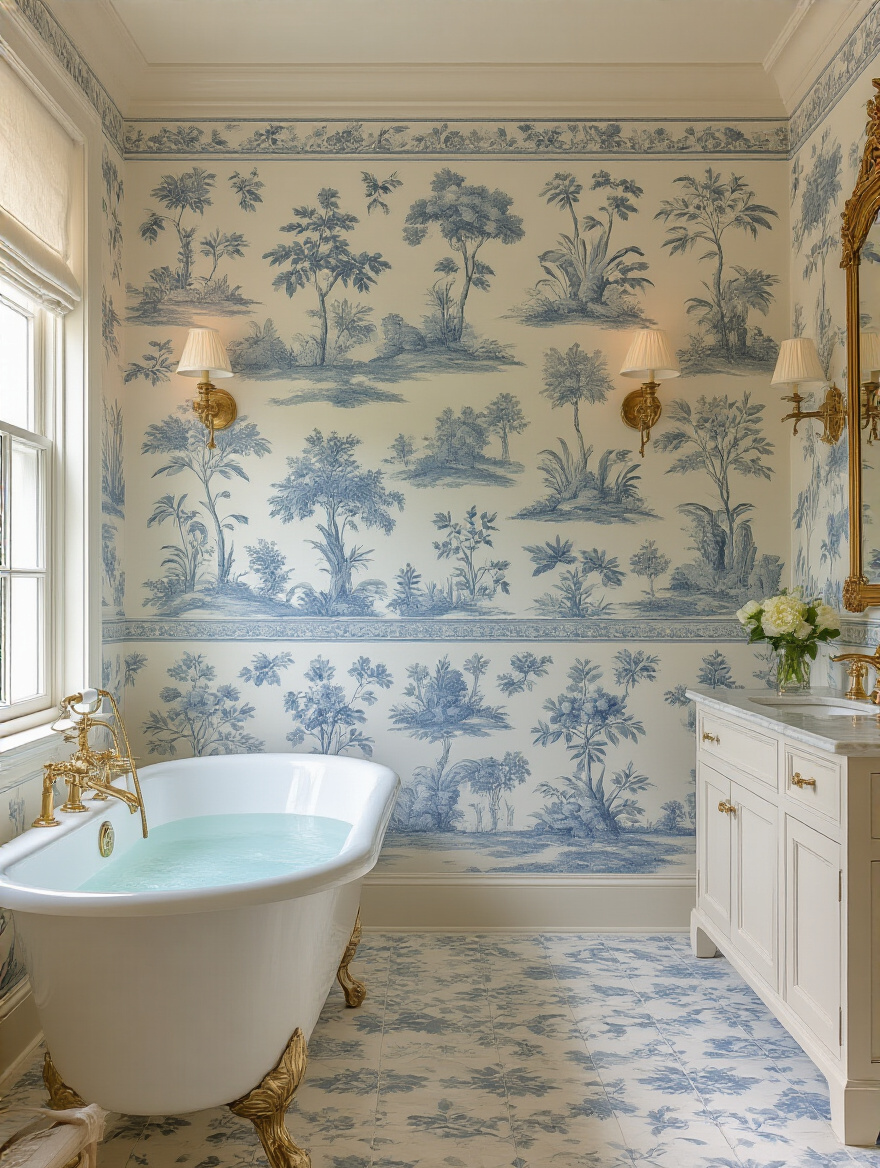
When your brain is stuck on a problem, sometimes the best thing you can do is think about something completely different. These intricate, narrative patterns give your mind a place to wander. Following the lines of a pagoda or tracing the story in a pastoral scene can be a form of micro-meditation, allowing your subconscious to work on the problem while you’re “away.”
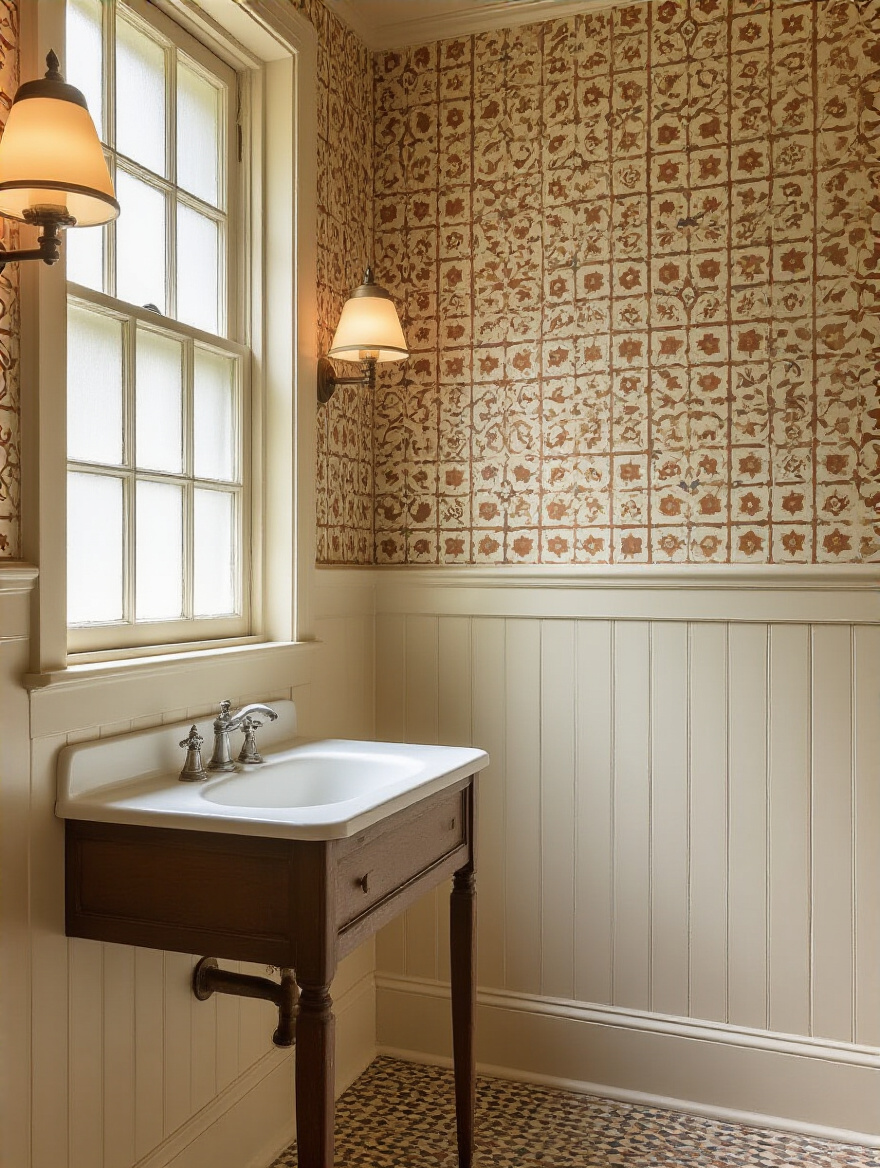
9. Source Reputable Reproductions or Authentic Deadstock Rolls
Here’s the deal: “deadstock” means original, authentic vintage rolls that were never used. It’s incredibly cool, but it comes with risks. It can be fragile, there’s a finite supply, and it wasn’t made for modern, humid bathrooms. High-quality reproductions are often the smarter, more practical choice for a functional space.
Think of it as an investment in your sanity. A good reproduction gives you the historic aesthetic you want on a durable, washable material that you won’t have to stress about. This is what matters: find a pattern that gives you the right feeling, and then source it in a format that won’t become another item on your to-do list.
Discovering Your Dream: Choosing Authentic Vintage Designs (Part 2)
We’re not just choosing a pattern; we’re designing a functional, psychological space. How that pattern is scaled and deployed has a massive impact on how the room feels, which in turn affects how you feel when you’re in it.
10. Avoid Overwhelming Small Bathrooms with Large, Busy Designs
My biggest pet peeve is seeing a giant, aggressive pattern crammed into a tiny powder room. It’s the design equivalent of someone shouting in a library. It visually shrinks the walls and creates a sense of claustrophobia and clutter. Your brain’s retreat should not feel like it’s closing in on you.
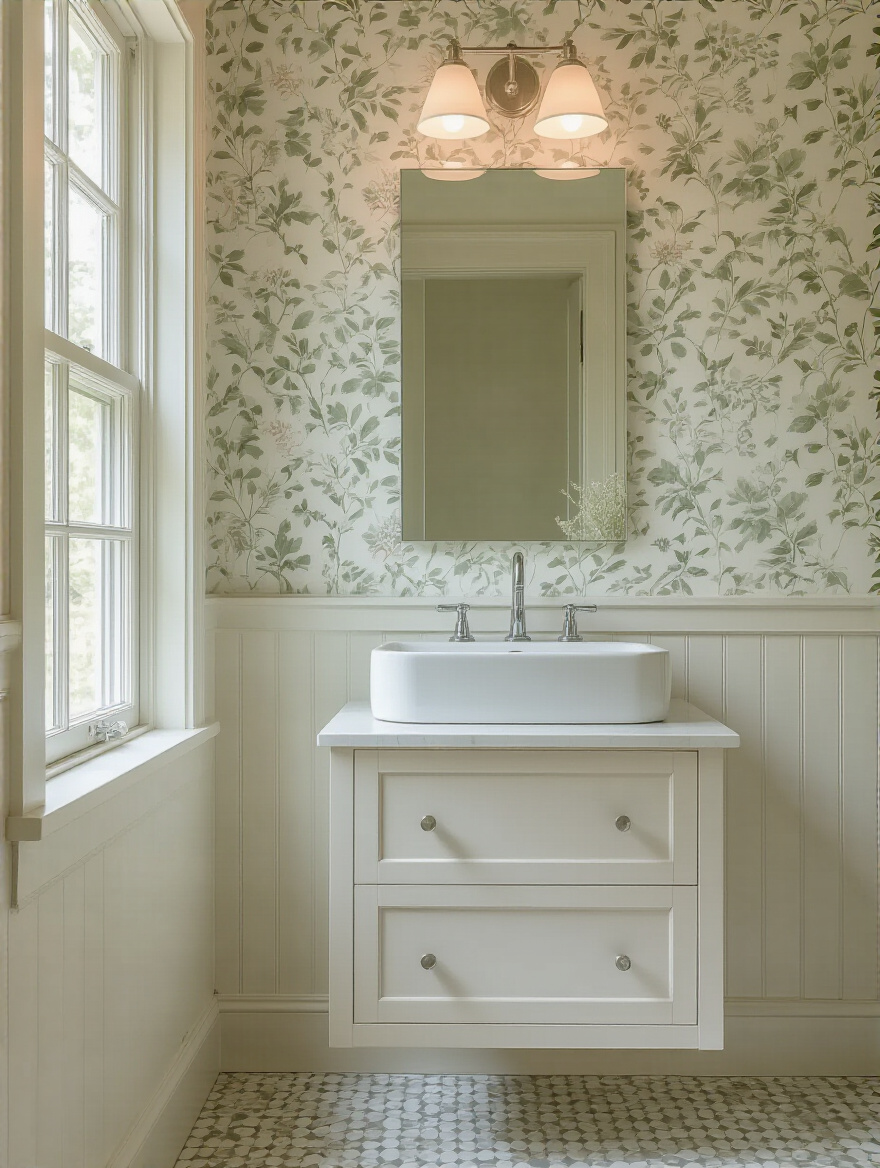
What you’re aiming for is “visual expansion.” Lighter backgrounds and smaller, more delicate patterns trick the eye into seeing more space. But here’s a shortcut if you’ve fallen for a bold design: use it on the wall behind the mirror. You get that powerful pop of pattern when you walk in, but when you’re standing at the sink, your view is mostly a reflection, which breaks it up and keeps it from feeling overwhelming.
Expert Installation: Achieving a Durable and Pristine Finish
This is where the magic becomes reality. A perfect installation is invisible; you only notice the beautiful pattern. A bad installation is all you see—peeling seams, bubbles, crooked lines. For a space meant to be a stress-free zone, getting the execution right is everything.
11. Prepare Walls Meticulously for Optimal Adhesion and Longevity
The single biggest mistake people make is slapping wallpaper onto an unprepared wall. It will fail. Period. Any grease, dust, or bumps will prevent the adhesive from bonding correctly, and the first thing to go will be the seams, especially in a steamy bathroom.
You have to clean the walls with something like TSP (a heavy-duty cleaner), patch and sand any imperfections until they are perfectly smooth, and then—this is critical—use a primer specifically made for wallpaper. It creates a sealed, uniform surface that the adhesive can really grip. Doing this prep work is tedious, but it’s the difference between your wallpaper lasting 2 years and 20 years.
12. Choose a High-Quality, Mildew-Resistant Wallpaper Adhesive
This seems obvious, but you would be shocked at how many people just grab any old wallpaper paste. In a bathroom, that’s asking for trouble. You need an adhesive that is specifically formulated for high-humidity environments and contains a biocide to actively prevent mold and mildew from growing behind the paper.
Think of the adhesive as the unsung hero of this entire project. A good one will create a stronger bond that resists the constant expansion and contraction from temperature changes in a bathroom. As one professional installer told me, “The paper gets the glory, but the paste does all the work.” Don’t cheap out on the paste.
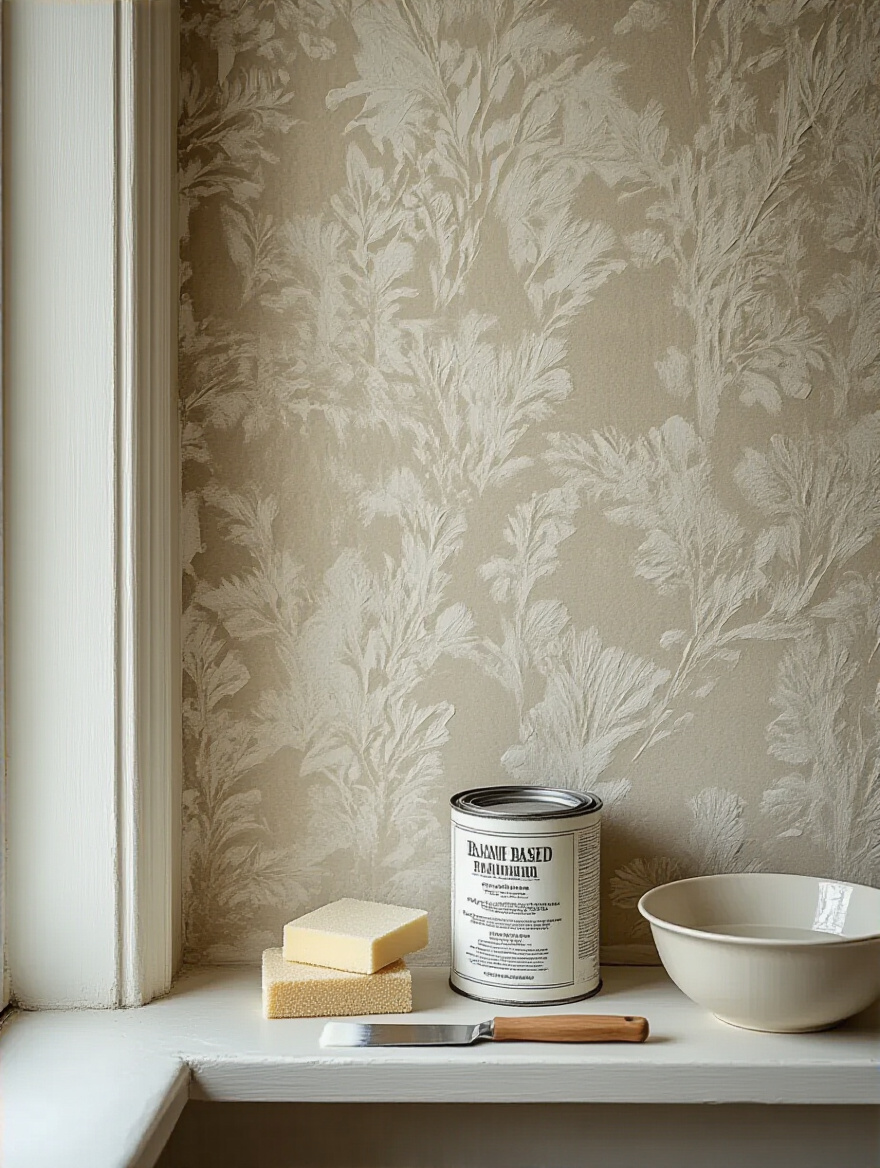
13. Apply a Clear, Breathable Sealant for Enhanced Moisture Resistance
So, remember when I said don’t just put sealant over any old paper? That’s still true. But putting a sealant over the right paper (like a good reproduction) as a final protective layer is a genius move, especially in a full bath with a shower.
The key is to use a “breathable” sealant, often sold as a “decorator’s varnish” in a matte or dead-flat finish. This creates a wipeable, waterproof surface without trapping moisture behind the paper, which is what causes bubbling and failure. Always test it on a scrap piece first to make sure it doesn’t change the color or sheen, but this final step can make your wallpaper practically bulletproof.
14. Master Precise Trimming for Seamless Corners and Fixture Edges
Nothing screams “amateur job” louder than jagged cuts around outlets or sloppy corners. This is where patience and a sharp blade are your best friends. The secret weapon of every pro installer is a snap-off utility knife. They snap off a segment to get a fresh, razor-sharp edge for practically every single cut.
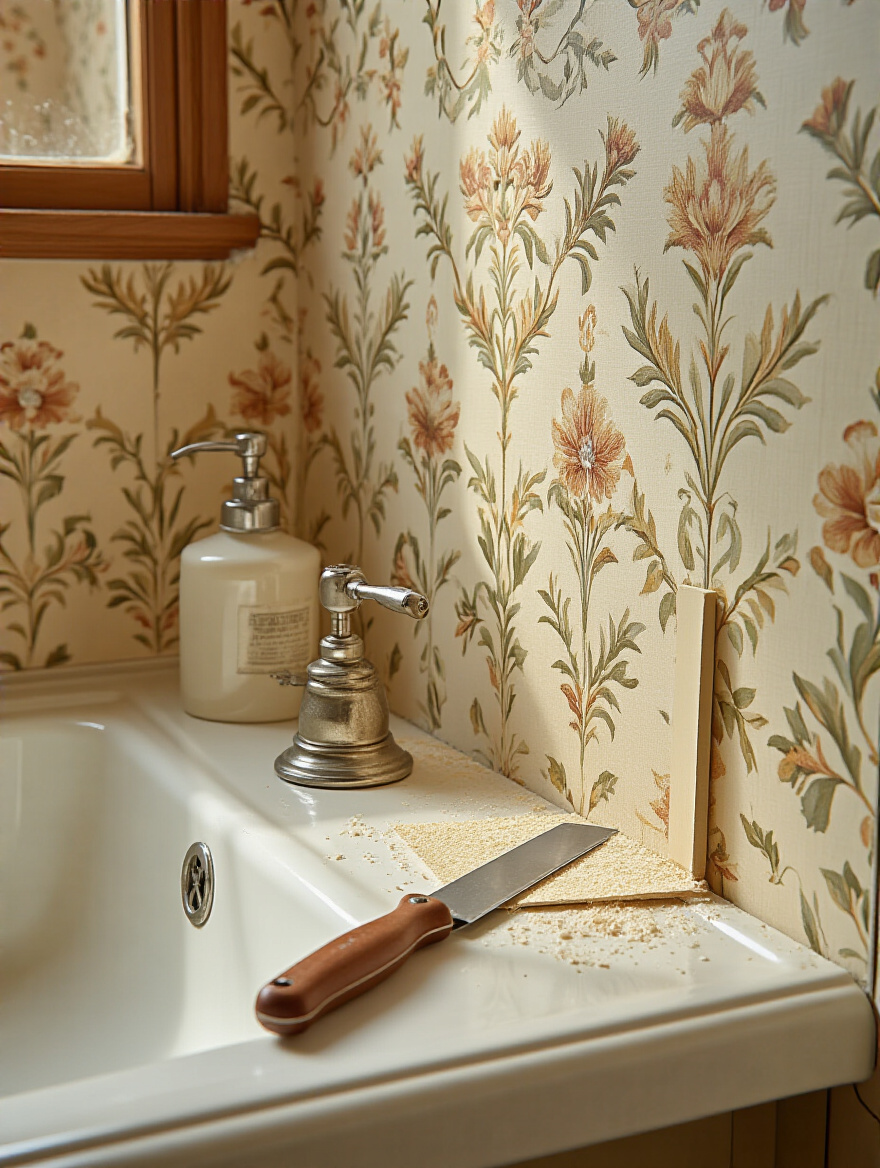
For tricky spots around pipes or sinks, make small relief cuts radiating out from the center, then trim away the excess bit by bit. The goal is a clean, tight fit that looks custom. This meticulous finishing is what elevates the final look from a DIY project to a professional installation, creating a polished space that helps your mind feel polished, too.
Styling and Longevity: Maximizing Your Vintage Wallpaper’s Impact
You’ve done the hard work. The paper is up, and it looks amazing. Now it’s about making sure the rest of the room supports your beautiful investment and that you have a low-effort plan to keep it looking perfect for years.
15. Integrate Vintage-Inspired Fixtures and Accessories for Authenticity
Your incredible Art Deco wallpaper is going to look a little weird next to a generic, big-box-store chrome faucet. You’ve created a specific mood and story with the walls; the fixtures need to be supporting characters in that story, not confused bystanders.
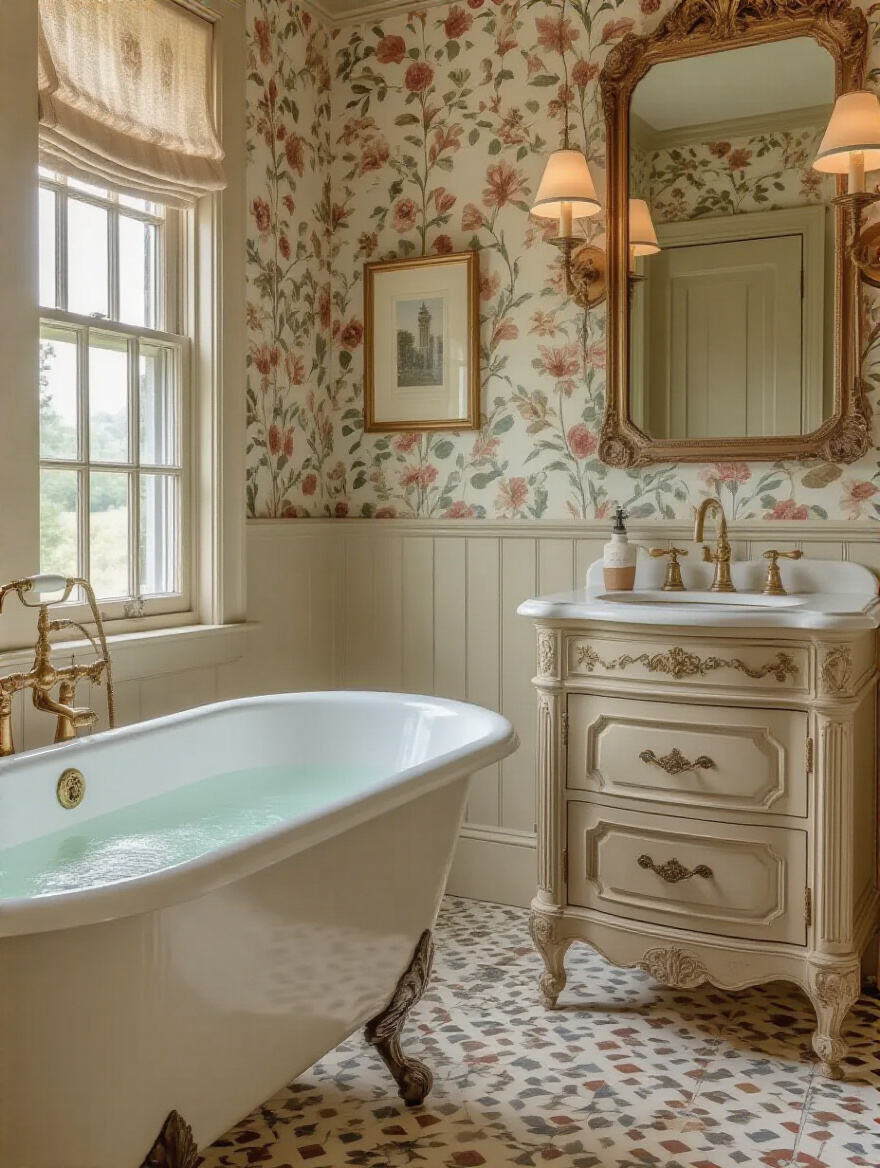
This doesn’t mean you have to hunt down original antiques (though you can!). High-quality reproductions of faucets, light fixtures, and mirrors from the same era will complete the picture. It creates a cohesive, immersive environment. When every detail works together, the space feels whole and intentional, which allows your brain to fully relax instead of subconsciously noticing things that feel “off.”
16. Balance Bold Wallpaper Patterns with Solid-Color Towels and Linens
This is the easiest design decision you’ll make, and it has a huge impact. Your wallpaper is the star of the show. Everything else is the supporting cast. Do not, under any circumstances, buy patterned towels. It just creates visual noise.
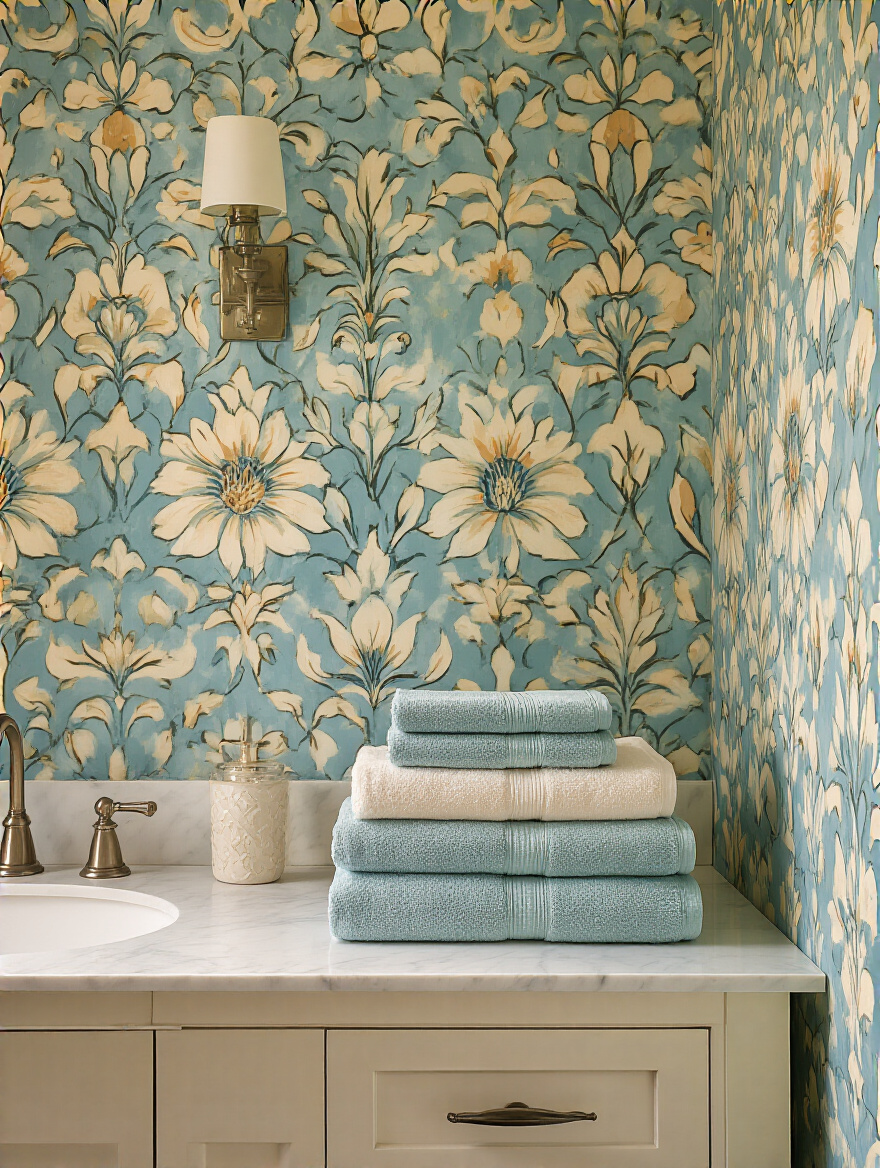
Pick a solid color for your towels and bathmat—either a neutral from the background of the paper or that one deep accent color we talked about earlier. This provides a “visual resting place” for your eyes, making the whole room feel more balanced and serene. It’s a simple trick that makes the space feel luxurious and thoughtfully designed.
17. Implement Regular Gentle Cleaning to Preserve Wallpaper Vibrancy
Preserving your wallpaper doesn’t require intense effort; it just requires consistency. The biggest enemy is the slow buildup of dust and grime, which can dull the colors over time. You want to avoid scrubbing at all costs.
About once a month, just run a soft microfiber duster or the soft brush attachment of your vacuum over the walls. That’s it. For any splashes, gently blot them immediately with a slightly damp sponge—don’t rub. This low-effort routine will keep the paper looking fresh and vibrant for years, ensuring your little sanctuary always feels clean and inviting.
18. Optimize Ventilation and Address Minor Issues to Prolong Life
This brings us full circle. That exhaust fan you upgraded? Use it. Every single time. Run it for a good 15-20 minutes after every shower to get all the moisture out of the air. This is the single most important thing you can do to prolong the life of your wallpaper.
And once every few months, take 60 seconds to scan the walls. See a tiny corner starting to lift? Get a tiny artist’s brush, dab a minuscule amount of seam adhesive behind it, and press it back down. Nipping these small issues in the bud prevents them from becoming big, ugly problems. It’s proactive maintenance that protects your investment in your own peace and quiet.
Conclusion
So, there you have it. Choosing to use vintage wallpaper in your bathroom is about more than just making it look pretty. It’s about intentionally designing a space that serves a vital function in your work-from-home life—a private sanctuary for decompression, focus, and creative thinking. By planning carefully, choosing the right materials, and executing with precision, you’re not just decorating; you’re investing in your own well-being and productivity.
Don’t be intimidated. Think of this as crafting your own personal escape pod. Now you have the roadmap to do it right, creating a timeless, beautiful retreat that supports you every single day. The result will be a space that not only looks incredible but feels like an essential part of your successful, balanced workday.


