As someone who spends most of my time designing kitchens, I can tell you a secret: the best kitchen designs don’t stop at the back door. They flow right outside. The deck or patio is really just the best room in the house, an open-air dining room, and the perfect spot for overflow when you’re hosting a big family get-together. But I know what you’re thinking. The cost. It feels like creating that beautiful outdoor living space is a giant, expensive project reserved for professional crews and big budgets.
Frankly, that’s just not true. You don’t need a second mortgage to build a space for morning coffee or family barbecues. I’ve seen clients create the most inviting, functional outdoor spaces with more creativity than cash. It’s about being clever. It’s about knowing where to spend and, more importantly, where to save.
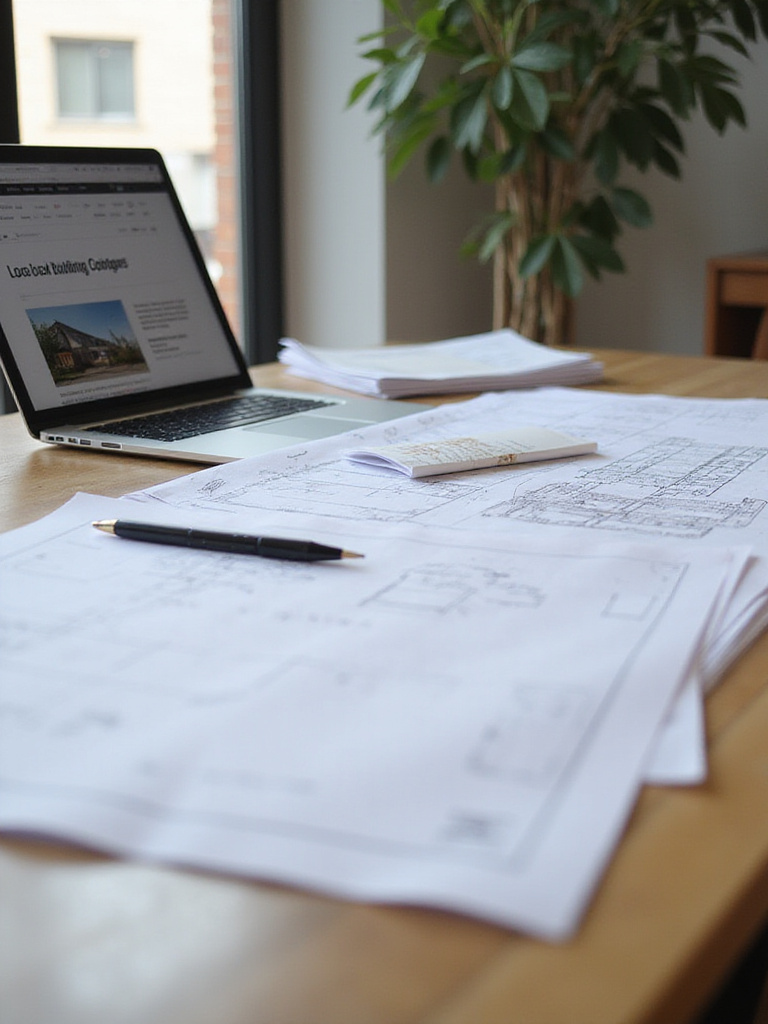
Whether you’ve got a few hundred dollars squirrelled away or a modest reno fund, I want to show you how to get that dream deck without the financial headache. Think of this as your recipe for an amazing outdoor space, starting with the most important ingredient: a smart plan.
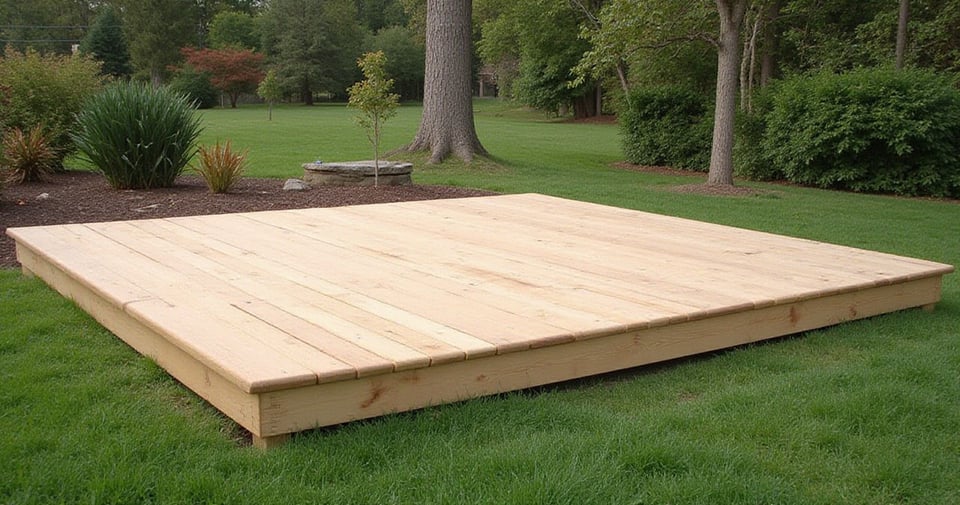
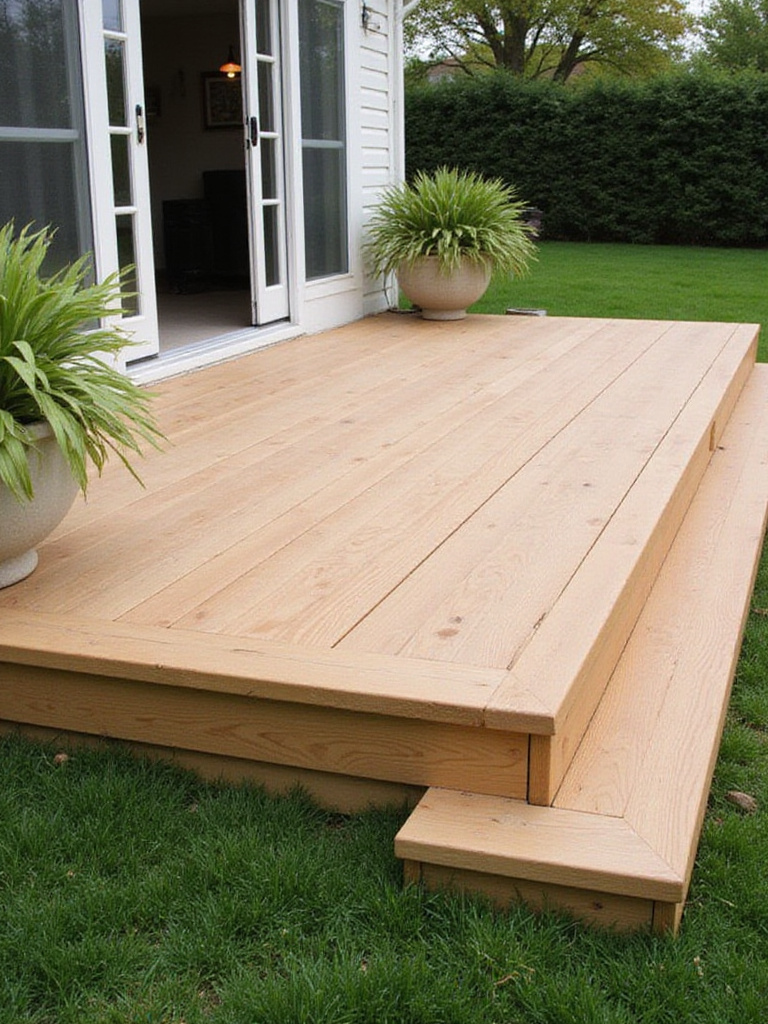
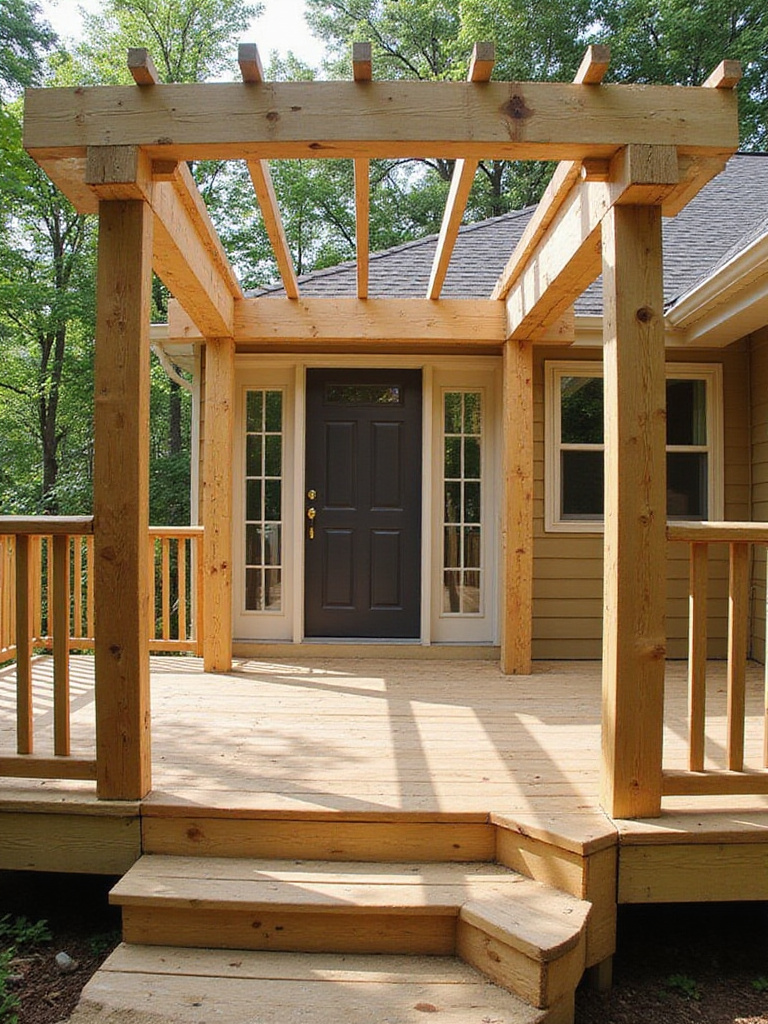
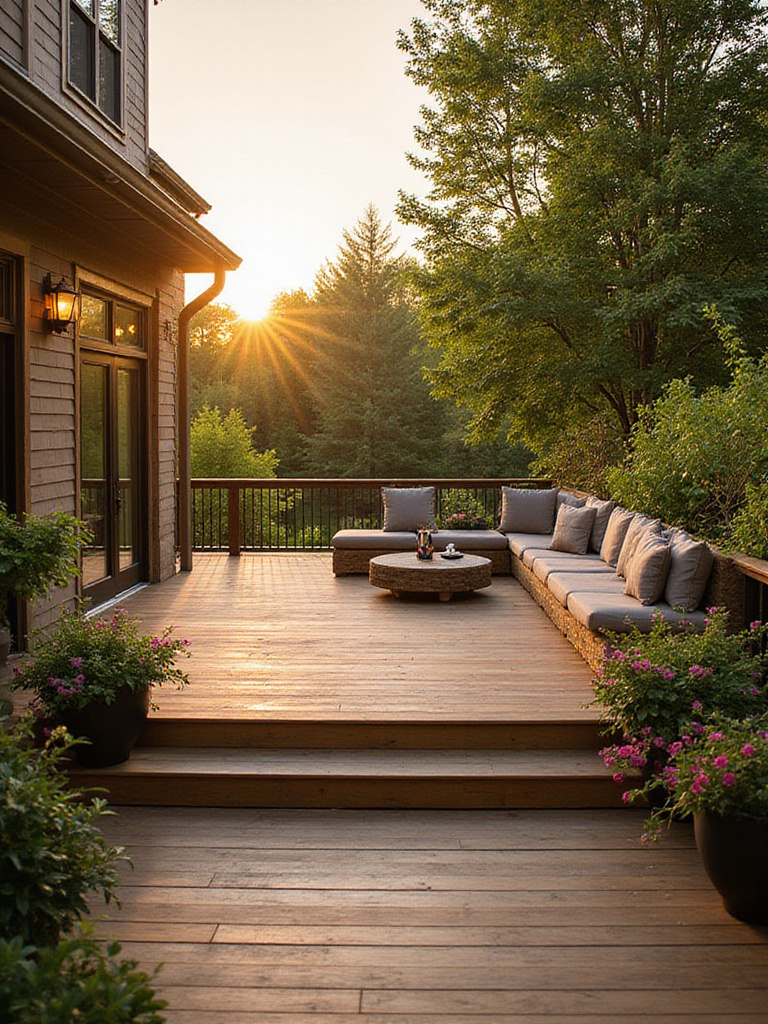
1. Build a Ground-Level Platform Deck for an Effortless Flow
When you imagine a “deck,” you probably picture something tall, with stairs and complex railings. Let’s set that idea aside for a moment. A ground-level platform deck is one of the single best ways to extend your home’s footprint without a massive bill from the lumber yard. These simple, elegant platforms sit just off the ground, often requiring so little structure that they feel more like an outdoor floor than a major construction project.
I once worked with a family whose small galley kitchen opened right onto a sad patch of grass. They dreamed of hosting, but everyone was always crammed inside. We designed a simple 12×14 platform deck right off their back door. Suddenly, their effective “entertaining space” was doubled. Because it was less than 30 inches high, we didn’t need pricey railings, which kept the view open and the budget in check. They built it themselves over two weekends, and by summer, they were hosting dinner parties where guests could drift easily from the kitchen island to the outdoor table. It completely changed how they lived in their home.
The magic of a ground-level deck is its simplicity. You’re often using 40% less lumber than a raised deck, and in many places, the permit process is far simpler. It’s an instant outdoor room.
2. Design Compact, Hard-Working Outdoor Spaces
Just like in a kitchen, a great layout is everything. You wouldn’t put your fridge on the opposite side of the room from your counters, right? The same “work triangle” logic applies to your deck. Instead of building one giant, undefined expanse of wood, think in terms of zones. A smaller, thoughtfully designed deck is always better than a huge, empty one. Even a little 8×10 foot space can serve as a grilling station, dining nook, and a spot to relax if you plan it right.

This is where your inner kitchen designer comes out to play. Think about traffic patterns. How will you get from the kitchen door to the grill without bumping into the dining table? Consider built-in benches that double as storage for cushions or kids’ toys (my personal favorite trick!). Or what about a narrow, fold-down table mounted to the wall of the house? When you start layering functions, you turn the limitation of a small space into a fun design challenge. It’s not about how much space you have; it’s about how you use it.
By getting intentional with every square foot, you’re not just saving money on materials—you’re creating a space that feels custom-built for how you and your family live.
3. Go on a Treasure Hunt for Materials
Let’s be honest, materials are where the budget usually goes off the rails. This is your biggest opportunity to be resourceful. I want you to think of this less as “sourcing cheap stuff” and more as a treasure hunt for materials with character. You would be absolutely shocked at what you can find for free or for pennies on the dollar if you know where to look. Construction sites are often desperate to get rid of surplus lumber that would otherwise end up in a landfill.
Start frequenting your local Habitat for Humanity ReStore or other architectural salvage yards. A client of mine found a gorgeous set of reclaimed redwood boards at a salvage yard—they had some old nail holes and a beautiful, weathered patina. We used them to create an accent wall on their deck for privacy, and it became the centerpiece of the entire project. It tells a story in a way that brand-new lumber from a big-box store never could. Check online marketplaces, too, especially when people are tearing down old sheds or decks. The key here is flexibility. You might have a plan for a pine deck, but if you find a great deal on cedar, be willing to adjust your design to fit your incredible find.
It’s a bit of an adventure, but the payoff—both for your wallet and for the planet—is enormous. And your deck will have a unique character that can’t be bought.
4. Build in Phases to Spread Out the Cost
Who says the whole project has to be done in one go? A huge, all-at-once project can feel overwhelming, both financially and physically. So, don’t do it all at once. Break it down. Think of it like cooking a big holiday meal. You don’t make everything on the day of; you prep for days in advance. Applying that same logic to your deck project can be a game-changer.
Here’s how it could work:
- Year One: Focus on the foundation and the main platform. Get the core structure built and usable. You’ll have a functional, flat surface for a couple of chairs and a grill. Enjoy it!
- Year Two: Use your tax refund or a little bonus to add the railings and maybe a simple set of built-in benches.
- Year Three: Finish it off with the “jewelry”—a pergola, beautiful solar lighting, and fantastic container gardens.
By phasing the construction, you build what you can afford, when you can afford it. It allows you to pay as you go, avoiding debt. Plus, it gives you time to live with the space and see what you really need next. Maybe after a year, you realize you don’t need a huge built-in bench, but you’d love a small pergola for some shade. A phased approach lets your design evolve with you.
Patience is your best friend here. A thoughtfully built, multi-year project will always turn out better than something rushed together in a panic.
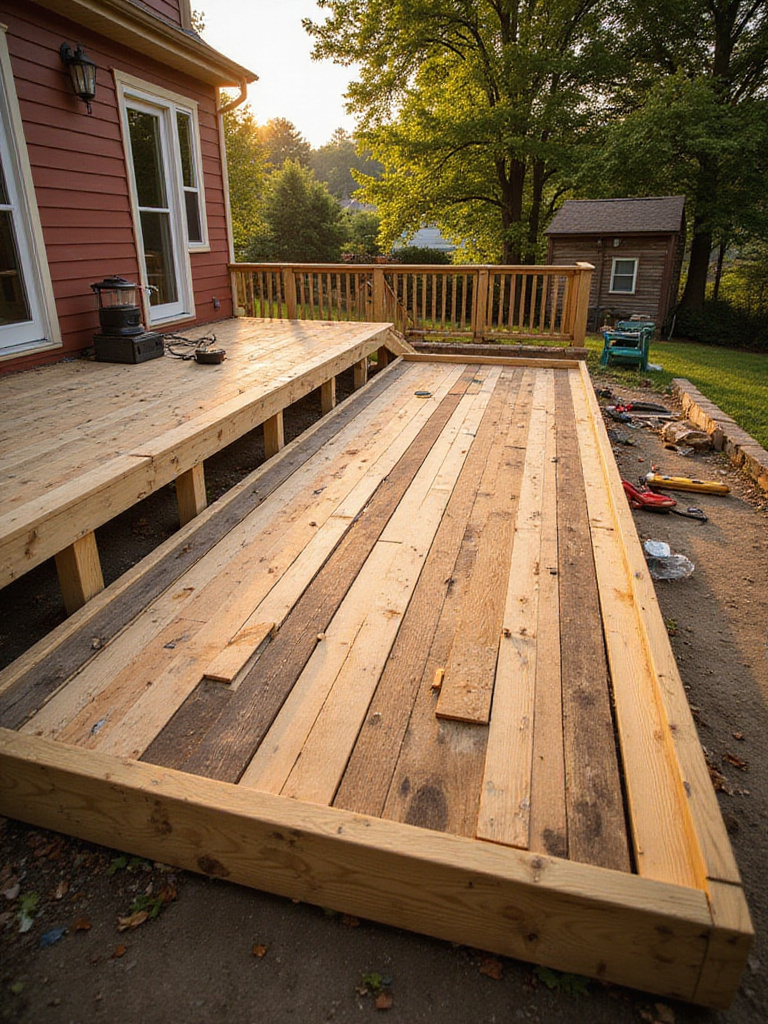
5. Use Pressure-Treated Lumber for the Bones
When it comes to the structure of your deck—the part you don’t see, the frame that does all the heavy lifting—there’s no need to get fancy. While cedar and redwood are beautiful, they come with a hefty price tag. For your joists and posts, pressure-treated (PT) pine is the smartest money you’ll spend. It’s the workhorse of the decking world.
I know, I know. Some people hear “pressure-treated” and picture that greenish, splintery wood from old park picnic tables. But modern PT lumber is much better looking and easier to work with than it used to be. The treatment process protects it from rot and insects, giving your deck a strong, stable skeleton that can last for decades. Honestly, the frame will likely outlast the first set of deck boards you put on top.
Think of it like cooking: you use good, sturdy, affordable chicken stock as a base for your gourmet soup. PT lumber is your base. By saving money on the framing, you free up more of your budget for the things people actually see and touch, like prettier deck boards, comfortable furniture, or a really great grill.
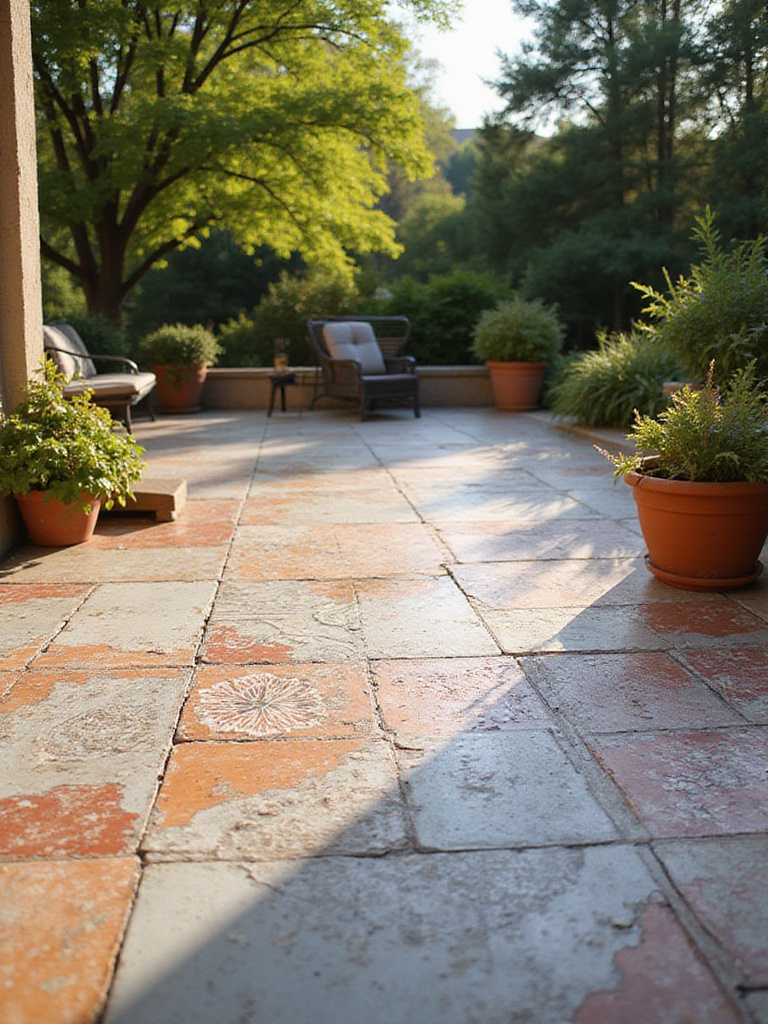
6. Choose Concrete Pavers for a Forgiving Surface
For a ground-level space, don’t get stuck on the idea that it has to be wood. A paver patio is a fantastic and often more affordable alternative. Pavers are tough as nails. You can spill a glass of red wine or drop a greasy burger, and you’re just a quick hose-down away from a clean slate. Try that on a porous wood deck! For a family with kids or for anyone who loves to entertain, that durability is priceless.

The installation is absolutely a DIY-friendly job. It’s like putting together a puzzle. You dig out the area, lay down a base of gravel and sand for drainage, and then start placing your pavers. And the design possibilities are endless—you can create checkerboard patterns, herringbone, or gentle curves. Because pavers are individual units, if one ever cracks or gets badly stained, you just pop it out and replace it. You can’t do that with a 16-foot deck board.
For high-traffic areas leading from the kitchen, a paver patio is a smart, low-maintenance choice that will look great for years to come.
7. Get a “European Courtyard” Vibe with Gravel and Stepping Stones
If a full paver patio still feels like too much work or money, I have a beautifully simple and budget-friendly alternative for you: gravel patios. Stay with me here! I’m not talking about a dreary-looking parking area. I’m talking about a chic, European-style courtyard with warm-toned pea gravel and a few large, elegant flagstones to create a path and a solid spot for your table and chairs.
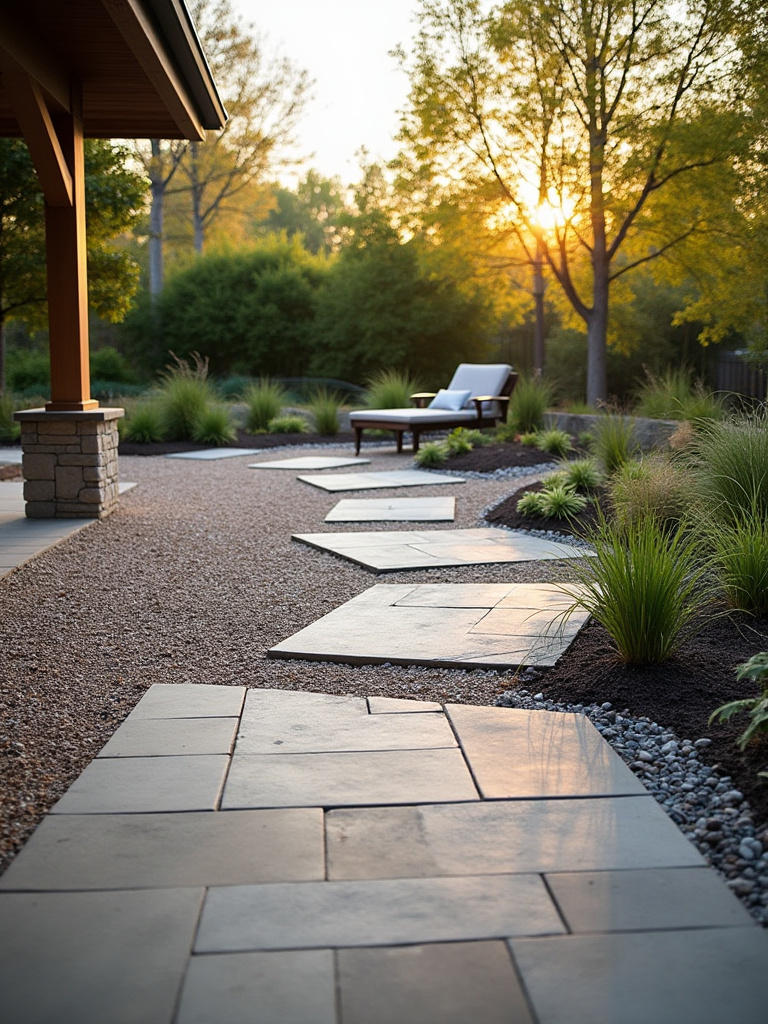
The look is incredibly organic and relaxed. The crunch of the gravel underfoot is such a satisfying sound, and it’s one of the best surfaces for drainage, so you have fewer issues with standing water. You’ll need to put down a good landscape fabric first to keep weeds at bay and use some sort of edging (metal, stone, or wood) to keep the gravel contained, but the installation is very forgiving.
This is the perfect solution for an awkward or shady corner of the yard where grass struggles to grow. It’s inexpensive, stylish, and you can create a charming little spot for your bistro table in a single weekend.
8. Look at Entry-Level Composite Decking (But Be Smart About It)
The siren song of composite decking is strong: no staining, no sealing, no splinters. But the price tag can be a shock. However, not all composite decking is created equal, and you don’t always need the top-of-the-line version to get the benefits. To be fair, this is where a little research goes a long way.
Most of the big brands, like Trex or Fiberon, offer “good-better-best” tiers. The most expensive options have deep, variegated colors and a super-tough “cap” or shell on all four sides. The entry-level boards might have simpler, more solid colors and a cap on only the top and sides. For most people, that’s perfectly fine! They still give you the core benefit of low maintenance at a much more palatable price. You can often find great deals on these boards at the end of the season or in less popular colors.
My advice? Go to a showroom and look at them in person. Get samples. See what the difference in price actually gets you. Sometimes, you’re just paying for a trendier color. Opting for a basic, entry-level capped composite can be a fantastic middle ground between the maintenance of wood and the high cost of premium composites.
9. Add Soul with Architectural Salvage
New materials are clean and perfect. Old materials have a soul. If you want your deck to feel unique and full of personality, nothing beats architectural salvage. An old chippy-paint door can become a beautiful privacy screen. Ornate iron grates can be turned into a stunning railing detail. I once had a client who found a set of massive, carved corbels from an old warehouse; we used them to support a small roof over their deck, and it became an instant focal point.
Sourcing these pieces is the fun part. It’s a hunt. You’re looking for things with history and patina that will add a layer of story to your space. You don’t want to use questionable wood for anything structural, of course. But for decorative elements, accent pieces, or even creating a “garden wall” for pots and herbs, reclaimed materials are gold.
This is how you get a custom look that no one else has. Your deck won’t just be a structure; it will be a collection of stories.
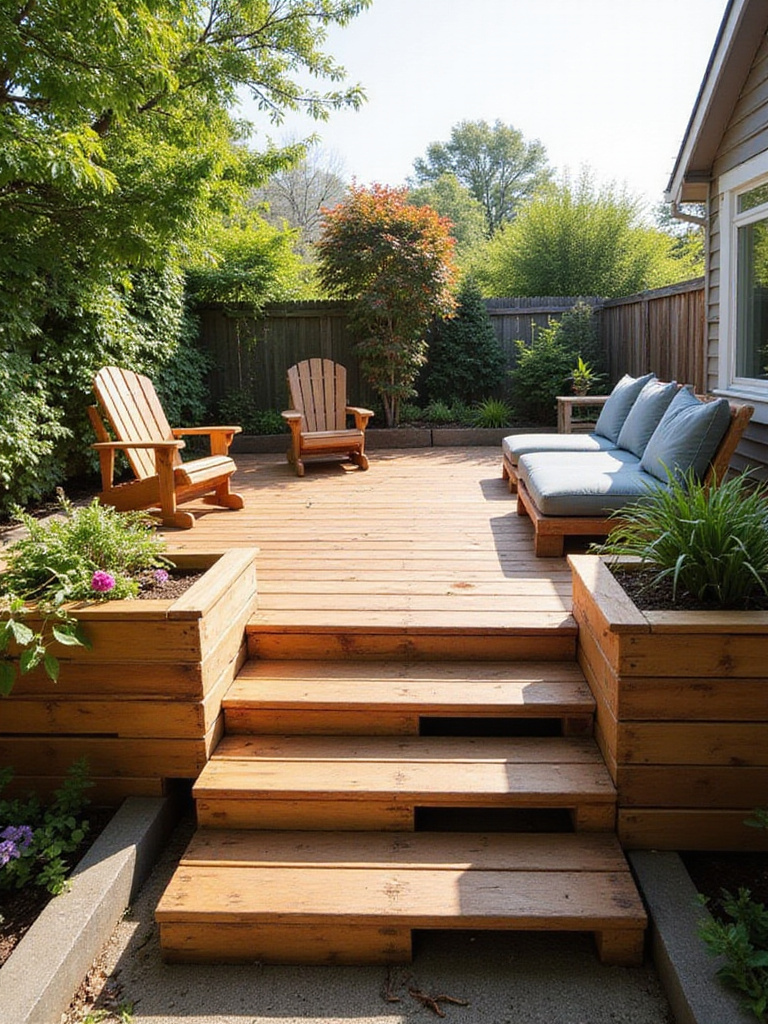
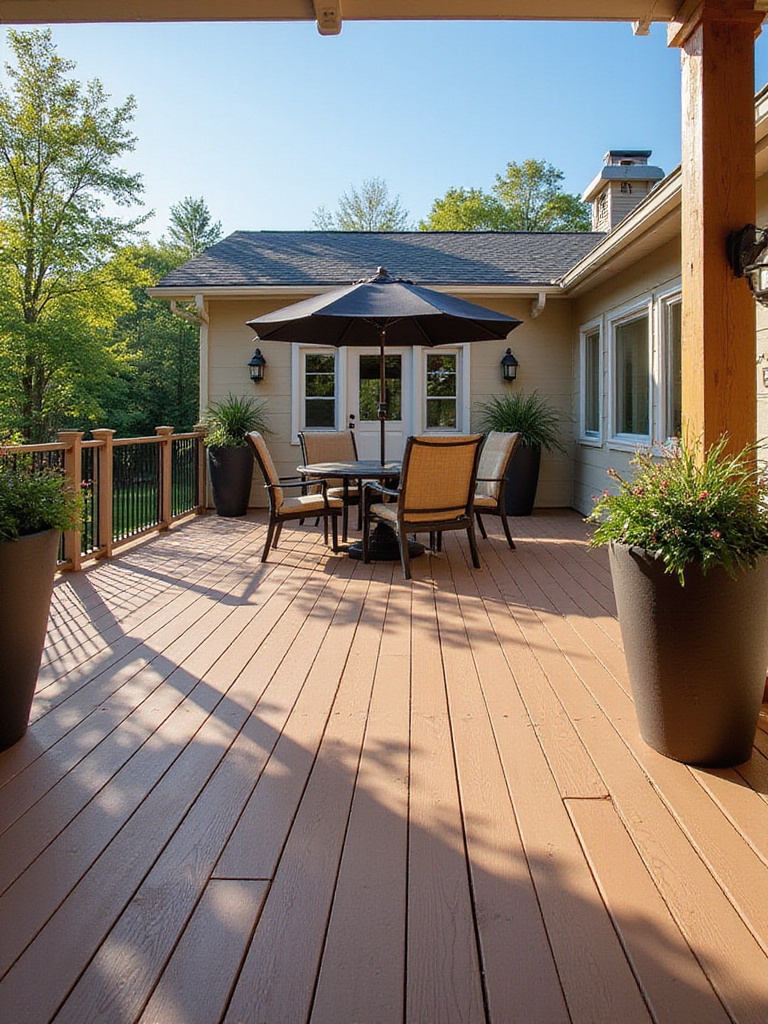
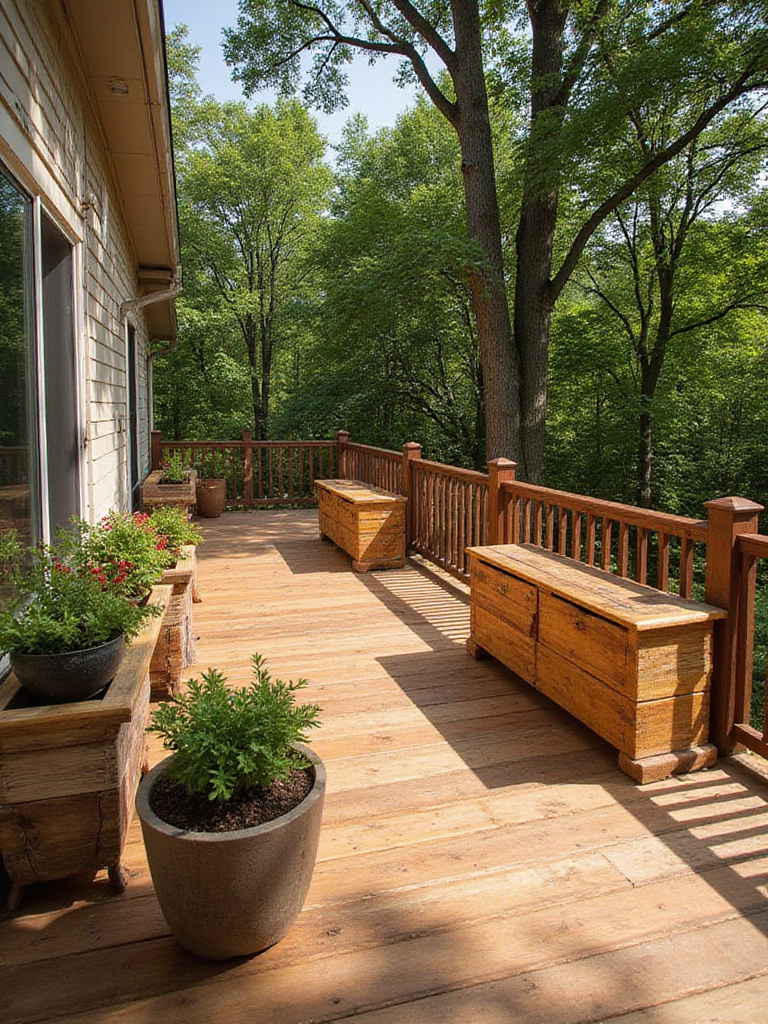
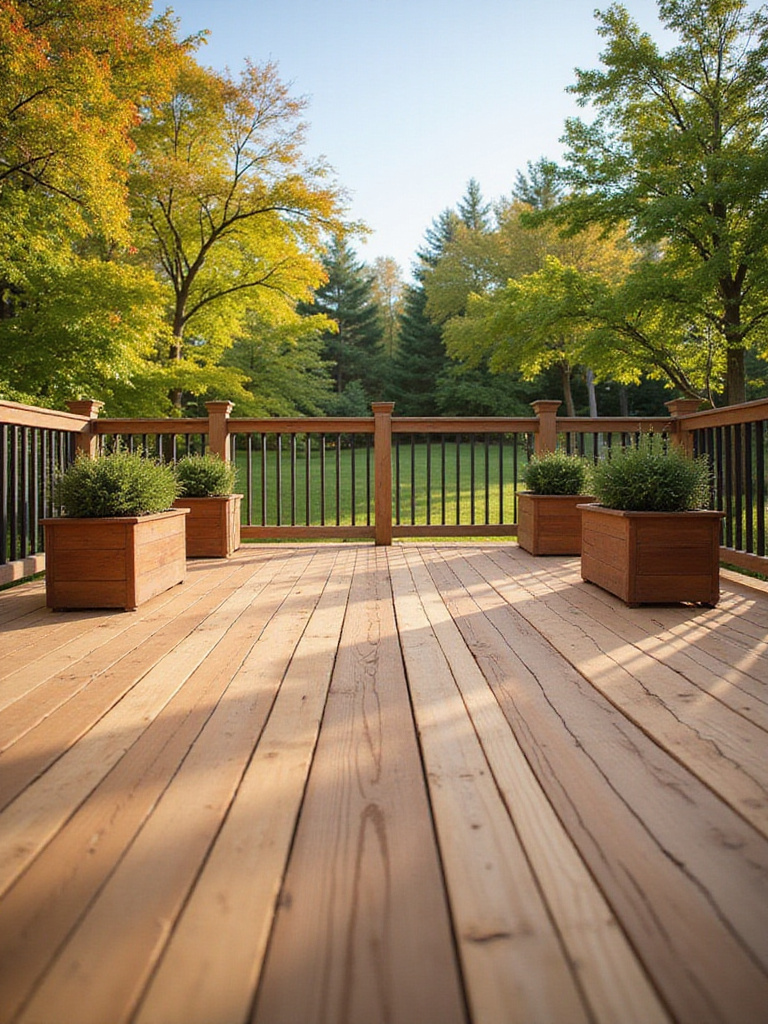
10. Design in Seating and Storage from the Start
Outdoor furniture is expensive! A good table and set of chairs can cost as much as the deck itself. The most brilliant way around this is to build your seating right in. A long bench along the edge of your deck not only provides tons of seating for parties but it also defines the space and often doubles as a safety railing.
And here’s the best part: add a hinged lid. Suddenly, that bench is a massive, weatherproof storage chest. It’s the perfect place to hide away grilling tools, citronella candles, and bulky cushions when they’re not in use. It keeps your deck feeling tidy and uncluttered—something every good kitchen designer appreciates! Building a bench uses the same basic framing skills you used for the deck, so it’s a very approachable addition.
By integrating seating and storage, you’re creating a custom, cohesive look, maximizing every inch of your space, and saving a bundle on furniture. What’s not to love?
11. Build Your Own Simple, Safe Railings
If your deck is high enough to require a railing, you’ve probably noticed that pre-fabricated railing systems are shockingly expensive. Here’s a secret: you can build your own safe, sturdy, and code-compliant railings for a fraction of the cost using standard lumber. A simple, clean design with vertical balusters is timeless and a completely doable DIY project.
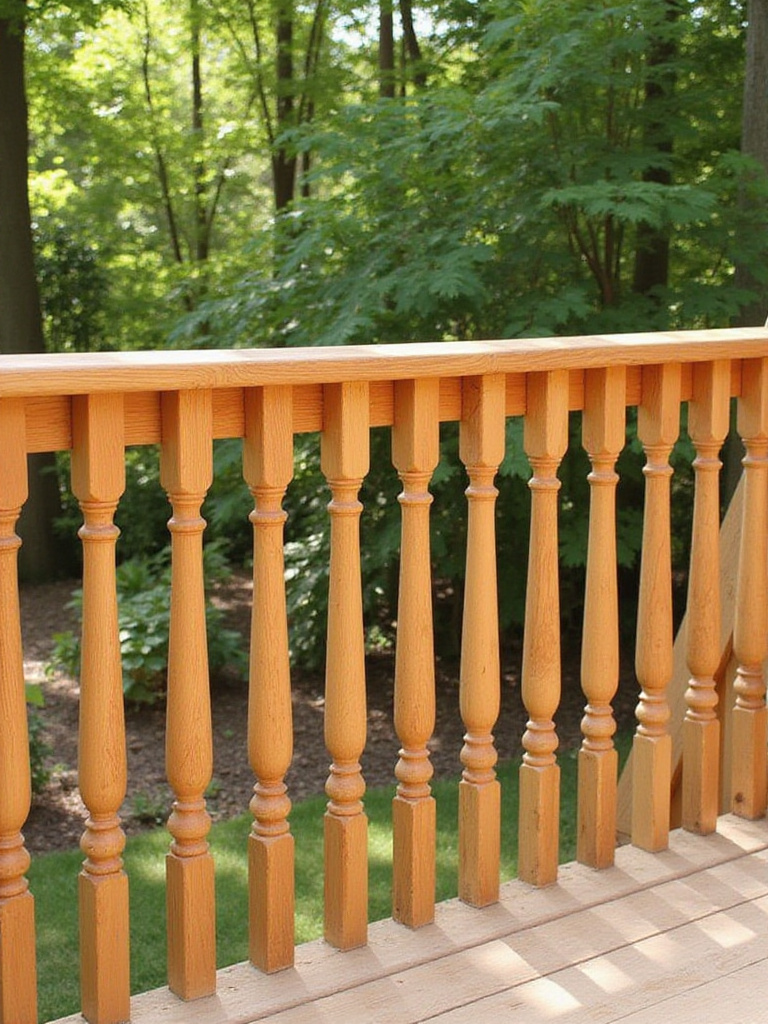
Now, this part’s important: you must know your local building code. No exceptions. The rules for railing height (usually 36 inches) and baluster spacing (so a 4-inch sphere can’t pass through) are there for safety, especially if you have children or pets. Take a trip to your local building department’s office or website. They aren’t trying to trick you; they’re trying to keep you safe.
Once you know the rules, the construction is straightforward. Think of the railing not just as a safety feature, but as the picture frame for your outdoor space. A simple, well-built wooden railing that you can stain or paint to match your house looks classic and saves you hundreds, if not thousands, of dollars.
12. Use Concrete Deck Blocks for a Forgiving Foundation
If digging deep holes and mixing concrete for traditional footings sounds terrifying, I have good news for you: concrete deck blocks. These are the unsung heroes for simple, ground-level decks. They’re pre-cast blocks with built-in notches designed to hold standard lumber for your deck’s frame. They’re often called “floating” foundations because they just sit on a level bed of gravel.
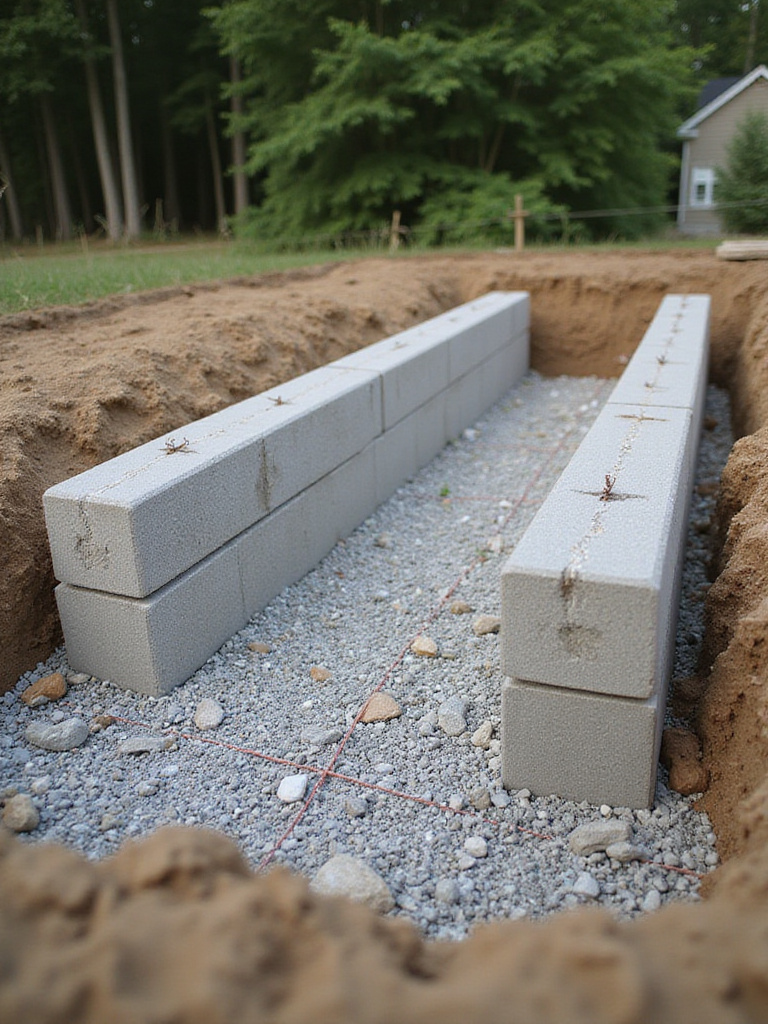
These are the Lego blocks of deck building. They are incredibly forgiving. If one spot isn’t perfectly level, you can just shift some gravel around underneath to adjust it. No pouring, no mixing, no waiting for concrete to cure. For a first-time deck builder, this is a huge confidence booster. They’re also perfect if you’re a renter (with permission, of course!) or if you think you might want to move or expand the deck later, as the whole system can be disassembled.
For low-to-the-ground decks, this is the quickest, easiest, and most affordable way to get your foundation in place so you can get to the fun part of building.
13. Let a Free Online Design Tool Be Your Sous Chef
Before you cut a single piece of wood, you need a plan. In the kitchen, we call this the mise en place—getting all your ingredients prepped and organized. For your deck, a free online design tool is your digital sous chef. It does all the tedious calculating for you so you can focus on the creative parts.
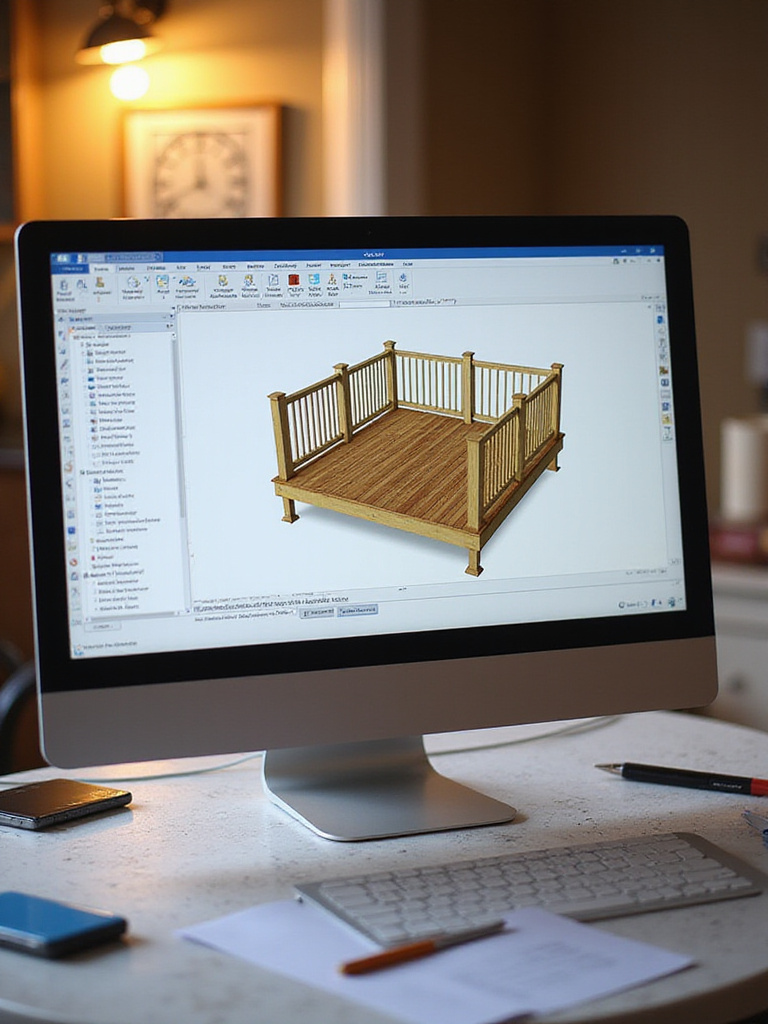
Most of the big home improvement stores and decking companies (like Trex) have free, browser-based design software. You can plug in your dimensions, drag and drop stairs and railings, and see a 3D model of your project before you start. The best part? It will generate a complete materials list and a cut list for you. This is HUGE. It prevents you from overbuying materials and drastically reduces waste and costly mistakes.
Spending a few hours playing with one of these tools is one of the smartest things you can do. It takes the guesswork out of the project and lets you walk into the lumber yard with a confident, precise shopping list.
14. Do Your Homework on Building Codes Before You Start
This is the least glamorous tip, but honestly, it might be the most important. I once had a friend who built a gorgeous deck, only to have a city inspector tell him the support posts were too far apart. He had to tear off the deck boards and add more posts—a heartbreaking and expensive mistake. Please, don’t be that guy.
Before you buy a single 2×4, find out what your local building codes are. Every town is different. A quick search on your municipality’s website or a call to the building department can save you so much pain later. They can tell you about footing depth requirements, railing rules, and whether you need a permit at all. Getting a permit isn’t a punishment; it’s a cheap insurance policy that ensures your deck is built safely.
Think of it as reading the recipe all the way through before you start cooking. A little bit of research on the front end will protect your investment of time, money, and hard work.
15. Add Magic with Solar-Powered Lighting
Once your deck is built, the quickest way to give it that magical, inviting feel for evening entertaining is with light. And you absolutely do not need to hire an electrician. The solar lighting available today is fantastic—it’s a world away from those dim, bluish lights of a decade ago. String lights, in particular, create an instant festive atmosphere.
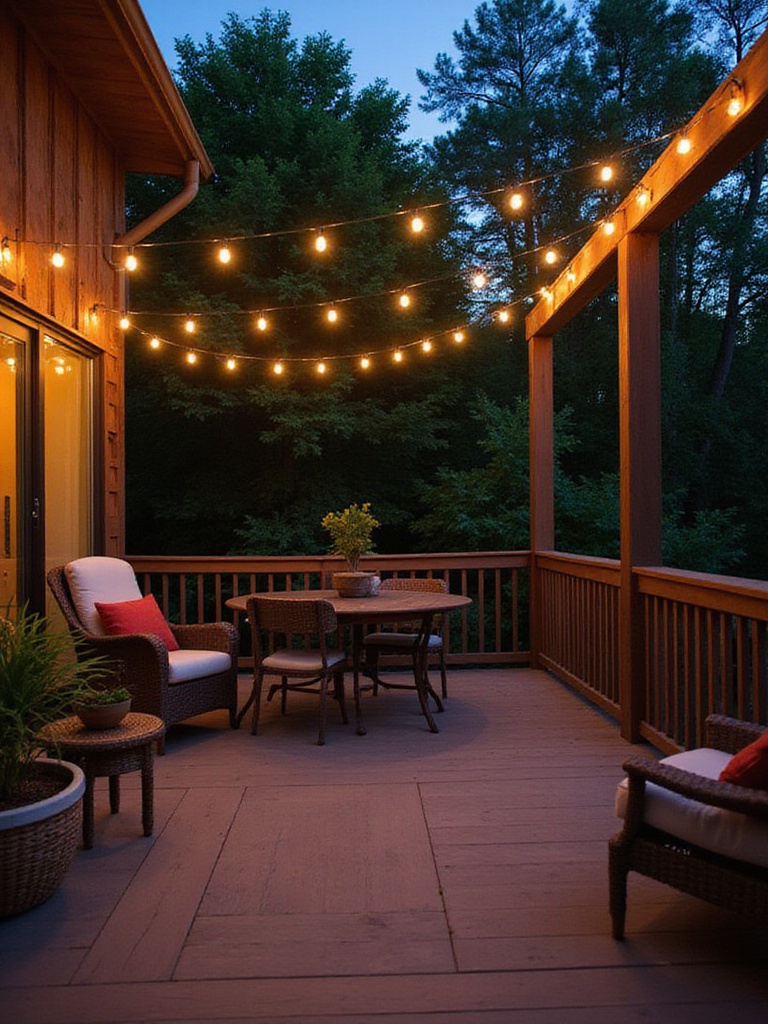
A few strings of solar-powered café-style Edison bulbs draped over your dining area creates the perfect ambiance for a dinner party. Solar pathway lights can make stairs safer, and little spotlights can highlight a beautiful planter or architectural detail. Because they’re solar, you can move them around and experiment with different placements without any commitment.
This is a tiny investment for a massive payoff in mood and usability. Twinkle lights aren’t just for the holidays—they’re for making every summer evening feel like a special occasion.
16. Use Container Gardens for Instant Color and Flavor
Landscaping is another place where costs can skyrocket. But you don’t need to hire a landscape designer to make your deck feel lush and alive. container gardening is your secret weapon. You get instant color and texture, and best of all, you have total flexibility. If you don’t like where a pot is, you just… move it.
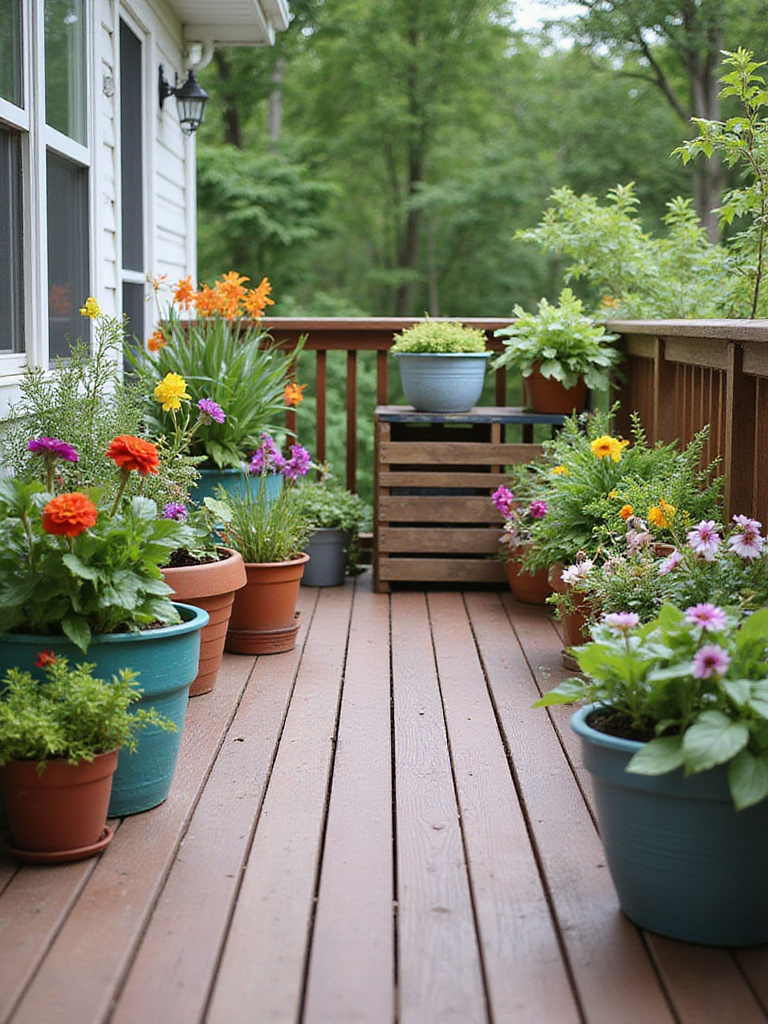
Here’s where it gets really fun for a foodie. Why not make your container garden edible? Imagine having a cluster of pots right outside your kitchen door filled with fresh herbs. Need some basil for your tomato sauce? Snip, snip. Want some rosemary for your roast chicken? It’s right there. A pot of cherry tomatoes, some lettuce, a pot of spicy peppers—your deck becomes a living extension of your pantry.
Grouping pots of different sizes and heights creates a much more interesting look than lining them all up in a row. It’s an easy, affordable way to soften the hard edges of the deck and make it feel like a true garden oasis.
17. Go Vertical for Privacy and Greenery
If your deck is a little too close to your neighbor for comfort, or if you’re short on floor space, think up! Vertical gardens are a brilliant solution. They create a living wall of green that can act as a beautiful, natural privacy screen while taking up almost no footprint on your deck.
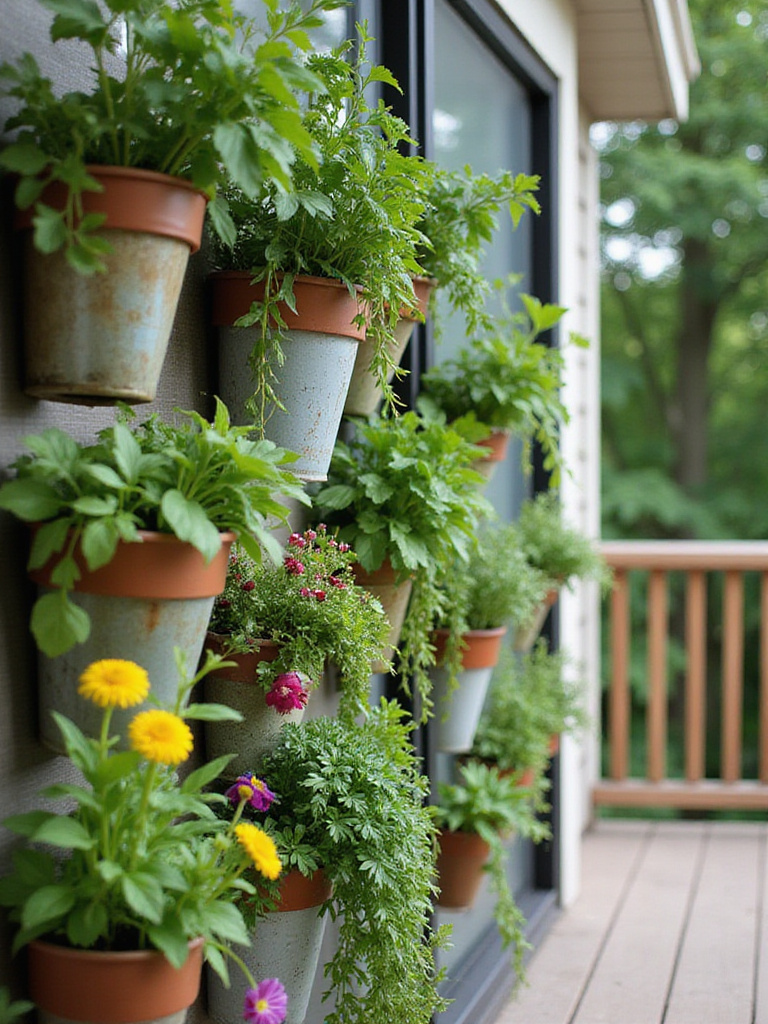
You can do this with something as simple as a few trellises with climbing vines like clematis or jasmine. Or you can build a planter wall out of repurposed wood pallets. These are perfect for tucking in smaller plants like succulents, strawberries, or a variety of herbs. It’s the same principle we use in small kitchens: when you can’t build out, you build up.
A vertical garden not only solves privacy issues but also becomes a stunning focal point. It brings life, color, and even fresh ingredients right onto your deck.
18. Give an Old Concrete Slab a Makeover
What if you’re not starting from scratch? What if you’re stuck with a boring, grey, cracked concrete slab off your back door? Don’t despair, and definitely don’t pay a fortune to have it jackhammered out. You can give that concrete a stunning makeover for very little money.
Think of it like refacing kitchen cabinets instead of replacing them. With concrete stains, paints, and stencils, you can completely transform a drab slab. You can use a stain to give it a rich, warm, terracotta color. You can use stencils to create a pattern that looks just like expensive tile. It’s all about the prep work—you have to get the concrete really clean before you start—but it’s a very achievable DIY project.
You’re working with what you’ve got and turning a negative into a positive. It’s one of the most satisfying budget transformations you can do.
19. Time Your Purchases for Seasonal Sales
Here’s an insider tip that all savvy home entertainers and cooks know: stock up when things are on sale. Just like you buy canning jars in August and turkeys in November, there’s a season for buying deck materials. The absolute best time to buy lumber, decking, and outdoor furniture is in the fall and winter.

As the weather turns cold, home improvement stores are desperate to clear out their seasonal inventory to make room for snowblowers and holiday decorations. This is your moment. You can often find lumber, stain, and even composite decking at a steep discount. Of course, this means you need a place to store it for a few months—a dry garage or shed is perfect.
Planning your project around the retail calendar can save you a significant amount of money. A little patience allows you to pounce on those end-of-season sales, stretching your budget further than you thought possible.
20. Rent the Big Tools You Only Need Once
Unless you plan on becoming a professional deck builder, you do not need to own a gas-powered post-hole auger or a giant concrete mixer. Renting specialized tools is one of the smartest, money-saving moves you can make. It gives you access to professional-grade equipment for the short time you actually need it, at a tiny fraction of the purchase price.
Plan your project so you can rent a tool—like an auger for your footings or a power nailer for installing the deck boards—and get all that work done in one focused day or weekend. Using the right tool not only makes the job go infinitely faster but also gives you a much better, more professional result. You’ll have tighter joints and straighter lines.
Don’t be intimidated. The folks at the rental shop are usually happy to show you how to use the equipment safely. It’s about working smarter, not harder.
21. Protect Your Investment with a Little Maintenance
You wouldn’t buy a beautiful cast-iron skillet and then leave it outside to rust, would you? Your deck is an investment of your time and money, and a little bit of regular care will make it last for years and years, saving you a fortune in future repairs.
This doesn’t have to be a huge, daunting chore. It’s about developing a simple routine. For a wood deck, this means giving it a good cleaning every year and re-applying a coat of sealant or stain every couple of years, depending on your climate. It’s an easy weekend project that keeps the wood protected from sun and moisture damage.
Think of it as part of your spring-cleaning ritual. By catching small issues early—a loose board, a bit of peeling stain—you prevent them from turning into big, expensive problems. A little care goes a long way.
22. Make a Simple Cleaning Routine Your Best Friend
The single easiest and cheapest thing you can do to prolong the life of your deck is to simply keep it clean. It costs nothing but a few minutes of your time. Wet leaves, pine needles, and dirt trap moisture against the surface of your deck, which is public enemy number one for wood, and can lead to mildew on composites.
Just give it a good sweep once a week, especially in the fall. Make sure you clear out any gunk that gets stuck between the deck boards so that water and air can circulate. If you have a spill during a barbecue, clean it up right away. This simple habit prevents so many problems from even starting. It’s the foundational step that makes all your other maintenance efforts more effective.
It’s like wiping down your kitchen counters after dinner. It’s a small, consistent act that keeps your space beautiful and ready for the next happy memory.
Conclusion
Creating your dream outdoor dining room and family hub isn’t about having a limitless bank account. It’s about being smart, creative, and willing to put in a little love. It’s about seeing the potential in a humble platform deck or a bag of gravel.
The most beautiful and cherished outdoor spaces I’ve seen were built with more heart than money. They combined a few of these ideas—phased construction, clever material sourcing, and lots of DIY spirit. They started with a clear idea of how they wanted to live in that space—more family dinners outside, a safe place for kids to play, a quiet spot for coffee—and worked backward from there.
Your perfect deck, the one that will be the backdrop for years of memories, is so much closer and more affordable than you think. Now, go get started.


