Of all the features we can add to our homes, few things draw people together quite like a fire. I’ve seen it time and time again in my design work: a well-placed firepit becomes the magnetic heart of a backyard. It’s where stories get told, where marshmallows are sacrificed to the flames by grandkids, and where you can simply sit with a cup of tea and watch the stars come out. It’s a connection point, plain and simple.
But creating that perfect gathering spot is about more than just buying a fire bowl and plopping it on the lawn. What separates a feature that gets used a couple of times from one that hosts decades of memories is thoughtful planning. It’s about anticipating needs—not just for today, but for all the tomorrows to come. Because good design, truly beautiful design, is about creating spaces that work for everyone, at every stage of life.
So whether you’re planning for aging parents, wrangling toddlers, navigating life with a disability, or simply want to create a home that will grow with you, you’re in the right place. We’re not just going to talk about firepits; we’re going to explore how to create a truly inclusive outdoor space that’s as safe and functional as it is stunning.
1. Choose the Perfect Location for Safety and Comfort
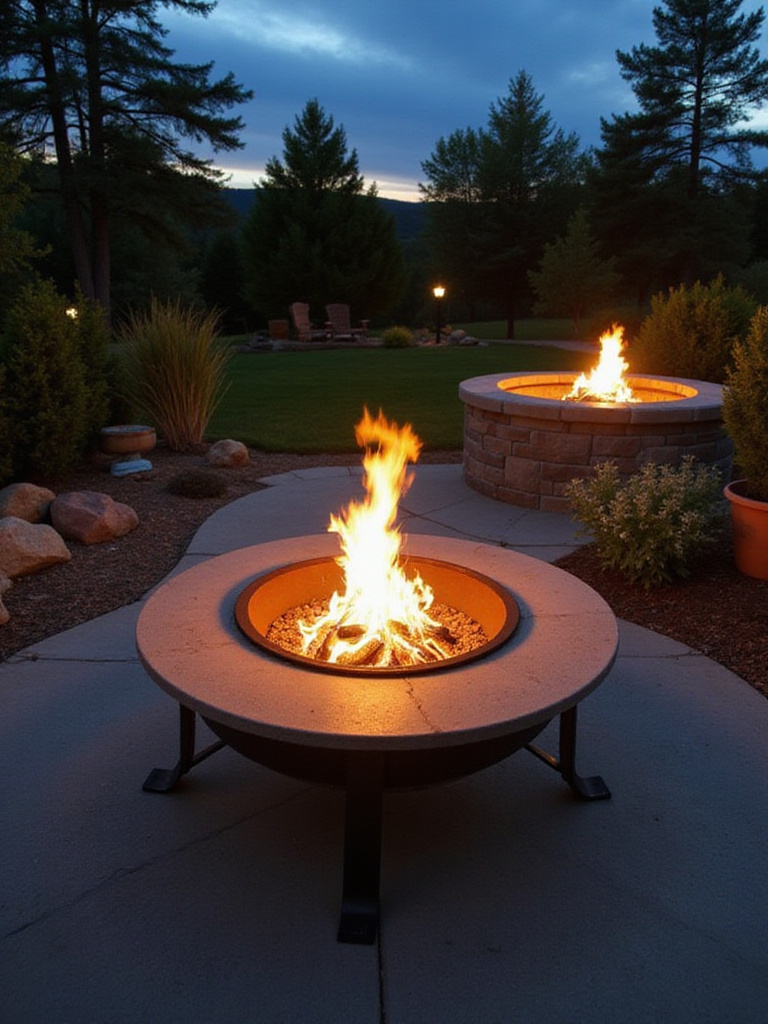
Before you even think about stone or steel, we have to talk about location. Honestly, this is the single most important decision you’ll make, and it’s about so much more than just picking a nice-looking spot. It’s about safety, comfort, and usability for years to come. The goal is to find that sweet spot where everyone feels comfortable and you’re not worried about stray sparks.
Most fire codes will tell you to stay at least 10 feet away from your house, fences, or overhanging branches. I tend to push my clients to aim for 15-25 feet if they have the space. It just gives you a more generous buffer. But here’s something people often forget: think about the path to the firepit. Is it a clear, direct route from the patio door? The surface needs to be firm and level—think pavers or stamped concrete, not loose pea gravel, which is a nightmare for anyone with a walker, a wheelchair, or even just unsteady feet. A few years ago, I worked with a family whose initial plan had their firepit across a squishy lawn. We rerouted a paver path directly to a newly leveled area, and suddenly, Grandma, who used a cane, could join them every single time. It changed everything.
Don’t forget to play meteorologist for a few evenings. Watch how the wind moves through your yard. Nothing ruins a good gathering faster than a face full of smoke. I’ve seen people build gorgeous setups only to realize the prevailing wind sends smoke directly into their outdoor dining area. Test your spot first. A small, controlled burn in a portable pit can tell you a lot before you commit to something permanent.
Now that you’ve got a potential spot in mind, the next step is just as critical and, I’ll admit, a lot less fun.
2. Navigate Local Codes and Permit Requirements
I know, digging into city codes and permits sounds about as fun as a root canal. It’s tempting to skip. Please don’t. A quick phone call to your local fire marshal and city planning department can save you a world of hurt later—from fines to being forced to tear out your hard work. Regulations vary wildly from one town to the next.
What you’re looking for are specifics: setback requirements from property lines, rules on fuel types (some areas restrict wood-burning), and whether you need a permit for a permanent installation, especially if it involves running a gas line. And don’t assume a portable firepit gets you off the hook; many ordinances apply to them, too. If you’re part of a Homeowners Association (HOA), they’re your first call. They often have their own set of rules on top of the city’s. It’s a bit of a bureaucratic puzzle, but it’s one you have to solve.
A client in Arizona almost learned this the hard way. They were ready to start a custom gas firepit project when we discovered they needed a permit. The inspection process, which cost them a few hundred dollars, revealed their planned location was right on top of an old, forgotten utility line. The permit didn’t just keep them legal; it prevented a mistake that would have cost thousands to fix.
Okay, once you have the green light from the powers that be, it’s time to talk money.
3. Establish a Realistic Budget for Your Project
Let’s be real: budgets are where dreams meet reality. It’s easy to get sticker shock if you only think about the cost of the firepit itself. The real budget needs to account for everything else: site prep, materials, professional labor if you need it, and those pesky little costs that pop up. A good rule of thumb is that these “extras” can add 30-50% to your initial estimate.

Start by deciding what scale of project you’re after. A simple DIY fire ring using landscape blocks might only set you back a few hundred dollars. A professionally installed, custom-built stone firepit with a gas insert? That can easily run into the thousands. Don’t forget to factor in the cost of running a gas line if you go that route; trenching and professional hookup is a significant, and non-negotiable, expense.
Here’s a rough breakdown to get you started:
- DIY Projects: A basic steel ring is under $100. A nice block kit could be $300-$800.
- Professional Installations: A good prefabricated unit, installed, might be $1,500-$4,000. Custom masonry often starts around $3,000 and goes up from there.
- Hidden Costs: Site prep ($200+), gas line ($500-$2,500), permits ($50-$300).
My best advice? Build a 15-20% contingency fund right into your budget. Always. That way, when the crew discovers a sprinkler line that needs to be moved, it’s a manageable issue, not a project-stopping catastrophe.
Your budget will be heavily influenced by one of the biggest choices you’ll make next: what kind of fuel will you burn?
4. Select the Ideal Fuel Type for Your Lifestyle
This decision fundamentally changes your firepit experience. It’s about ambiance, yes, but more importantly, it’s about convenience, safety, and who will be using it. There’s no single “best” choice—just the best choice for your family.
Wood is classic. You get the crackle, the smell, the whole primal campfire experience. But it’s also the most work. You have to source and store dry wood, manage the fire actively, and deal with ash cleanup. The smoke can be a real issue for people with respiratory sensitivities, and you have to be vigilant about burn bans.
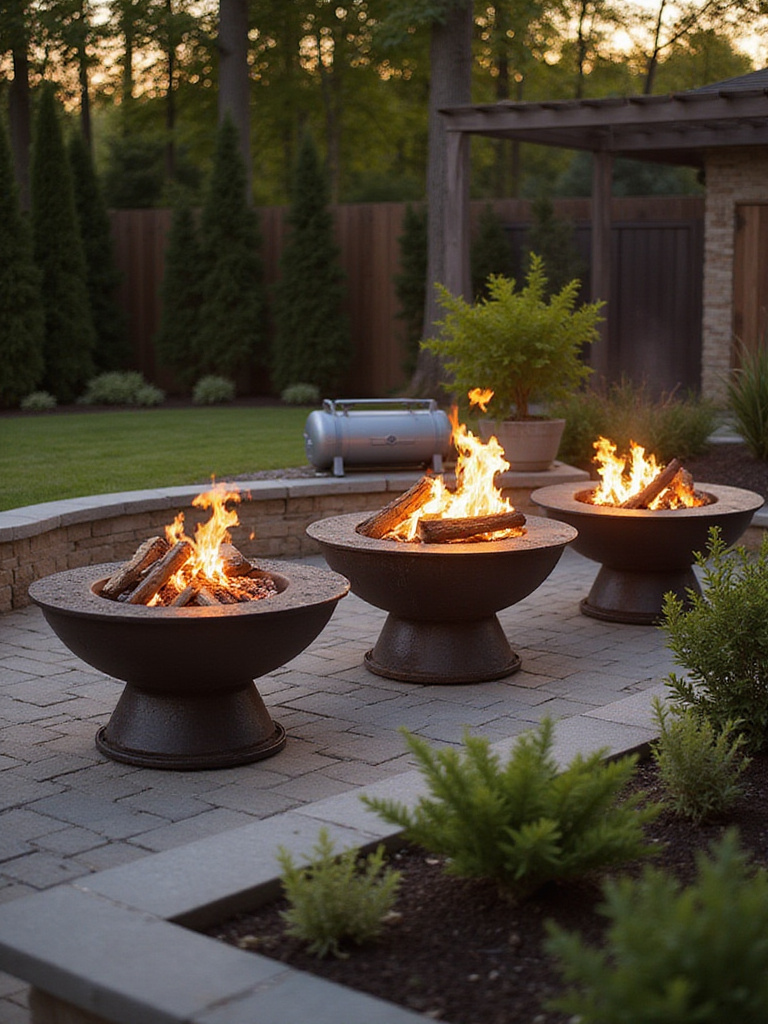
This is where gas comes in, and for many of the families I work with, it’s a game-changer. Propane offers a clean, smoke-free burn with the flick of a switch. The trade-off is schlepping and refilling those tanks. Natural gas is the ultimate in convenience. It’s hooked right into your home, providing endless fuel with no tanks to worry about. The flame is consistent and controllable. For an older couple I worked with, a natural gas firepit meant they could enjoy an evening fire without the physical strain of carrying logs or bending down to tend the flames. It future-proofed their backyard. The upfront cost for the gas line is higher, but the convenience and safety—no flying embers—is often worth every penny.
Your fuel choice is closely tied to the next big question.
5. Decide Between Portable and Permanent Installations
Are you setting down roots with this feature, or do you want the freedom to rearrange? Both have their place. Portable firepits are fantastic for their flexibility and affordability. They’re perfect for renters, people with smaller yards, or if you’re just not ready to commit. You can try out different spots in your yard and see what feels right.
A permanent, built-in firepit, on the other hand, is an architectural statement. It becomes an anchor for your outdoor living space. When done right, it looks like it was always meant to be there, adding real value to your home. This is where you can integrate features like built-in seating or custom stone that matches your home’s facade. It’s a commitment, for sure, involving more planning and a bigger budget. But it creates a dedicated outdoor “room” that feels incredibly intentional and inviting.
I often advise clients who are on the fence to try a portable model for a full season. Use it in the spot where you envision the permanent one. Does the smoke behave? Is the seating arrangement right? It’s a real-world test drive that can prevent a very expensive permanent mistake.
Once you’ve settled on the type of installation, the fun part begins: choosing the materials.
6. Choose Durable Materials That Withstand the Elements
The materials you choose define your firepit’s look, but more importantly, its lifespan and safety. You’re dealing with extreme temperature changes and the elements, so this isn’t the place to cut corners. A common and dangerous mistake I see is people using regular landscaping rocks or river stones. Never do this. Trapped moisture inside these stones can cause them to explode when heated. Seriously.
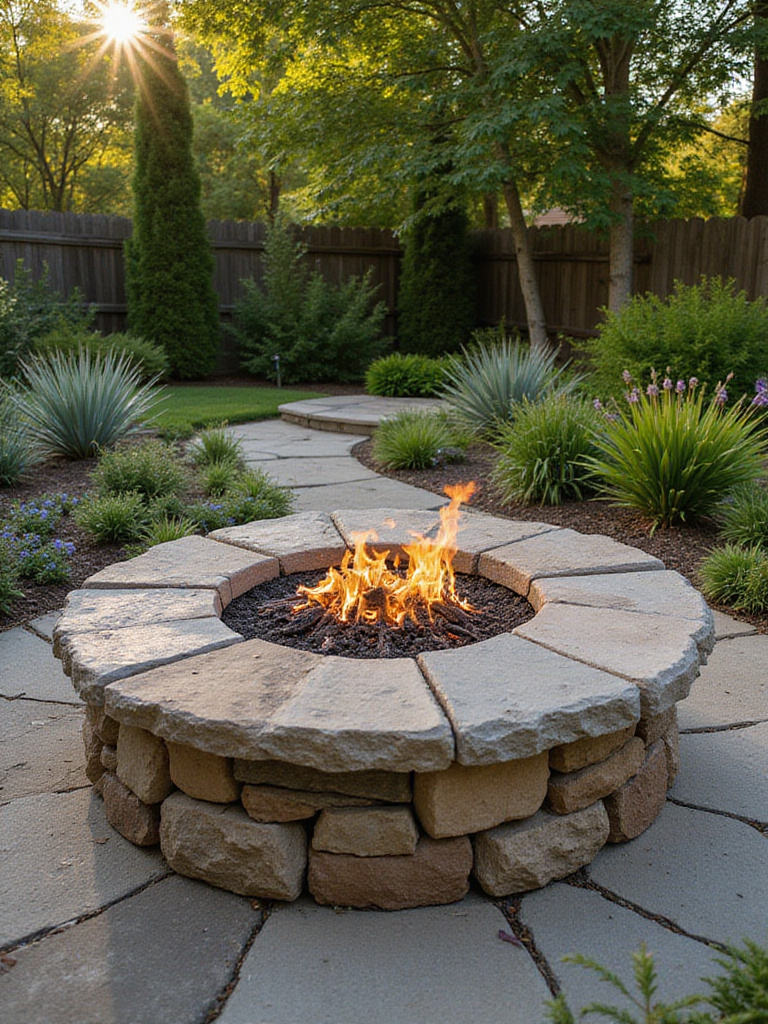
Stick to materials rated for fire. Natural stone like granite or fieldstone is beautiful and incredibly durable. Properly constructed, it can last for decades. Precast concrete blocks designed for firepits are another excellent, often more affordable, option. For a more modern look, heavy-gauge steel is fantastic. Corten steel, which develops a stable, rust-like finish, is one of my favorites for contemporary designs—it’s built to last in tough climates.
I worked on a project in Minnesota where the homeowners chose limestone quarried just a few towns over. Five brutal winters later, it still looks perfect, without a single crack. It not only weathers the elements but also ties the firepit beautifully to the local landscape. That’s the kind of harmony you’re aiming for.
A beautiful firepit is nothing without a comfortable place to sit and enjoy it, which brings us to one of my favorite topics.
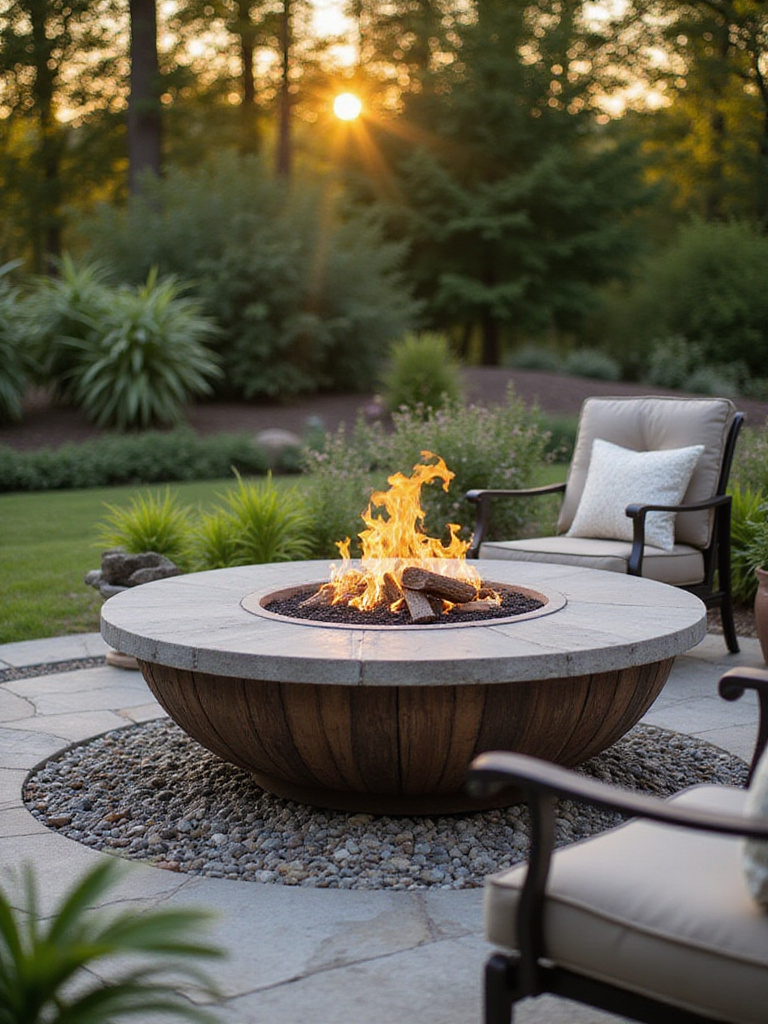
7. Design Comfortable Seating for Extended Gatherings
This is where universal design principles really shine. Seating isn’t just about placing a few chairs around a fire. It’s about creating a space that welcomes everyone and encourages them to stay a while. The key is variety and thoughtful placement.
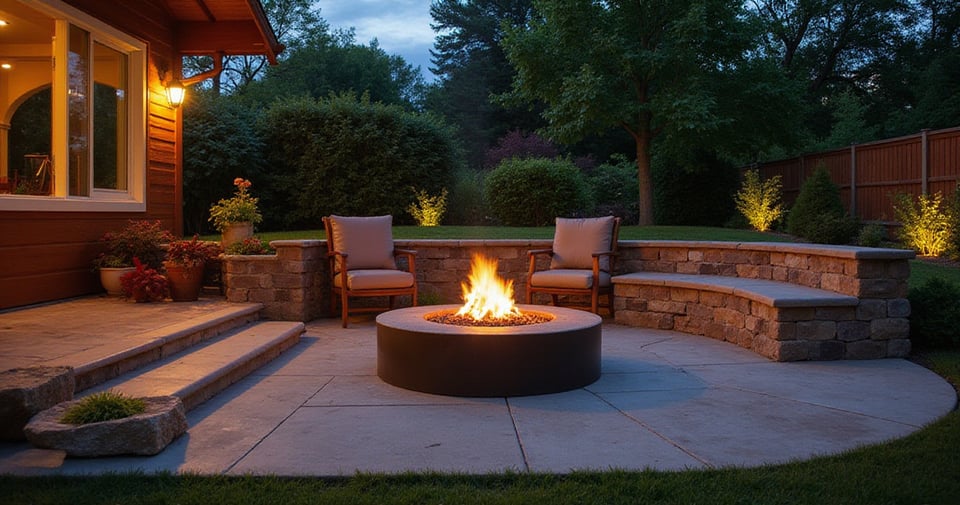
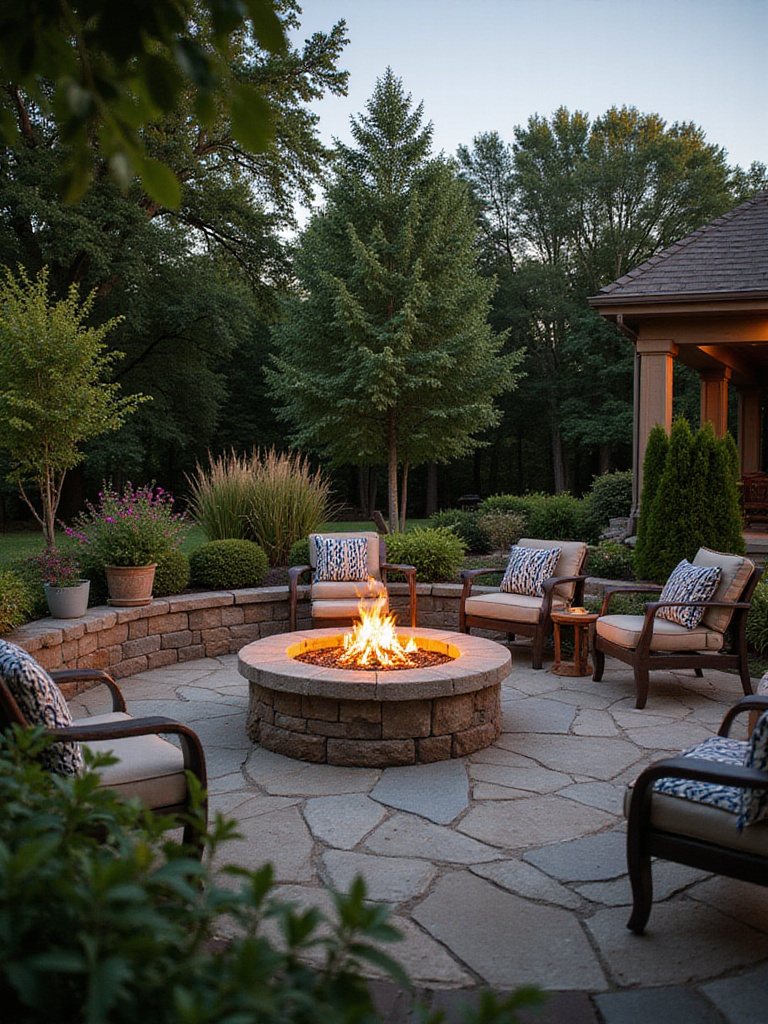
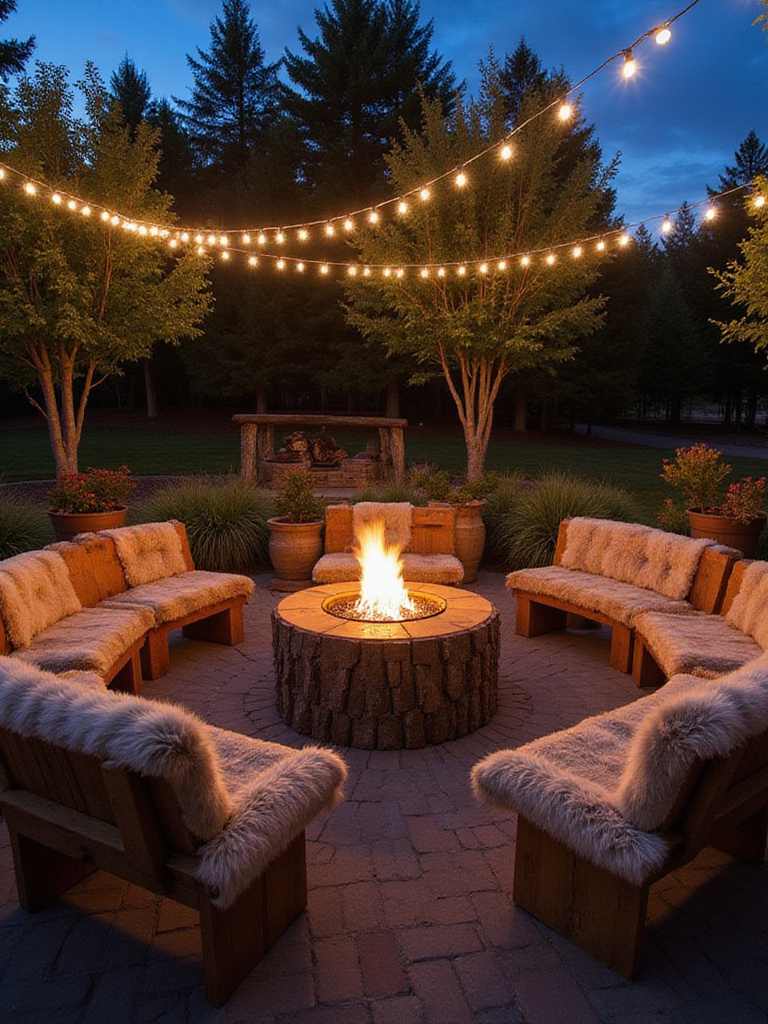
Position seating about 3-6 feet from the fire’s edge—close enough for warmth, but far enough for safety. Think about a circular or semi-circular layout, which is brilliant for conversation. Now, let’s talk specifics. Include seating at different heights. Maybe a classic Adirondack chair, a sturdy bench with a back, and an upright chair with solid armrests that someone can use to help themselves stand up. This variety ensures everyone from a flexible teenager to a grandparent with a tricky knee can find a comfortable spot. And here’s a crucial tip: leave at least one wide, open space in the circle. This allows someone using a wheelchair or a walker to pull right up and be part of the group, not relegated to the back.
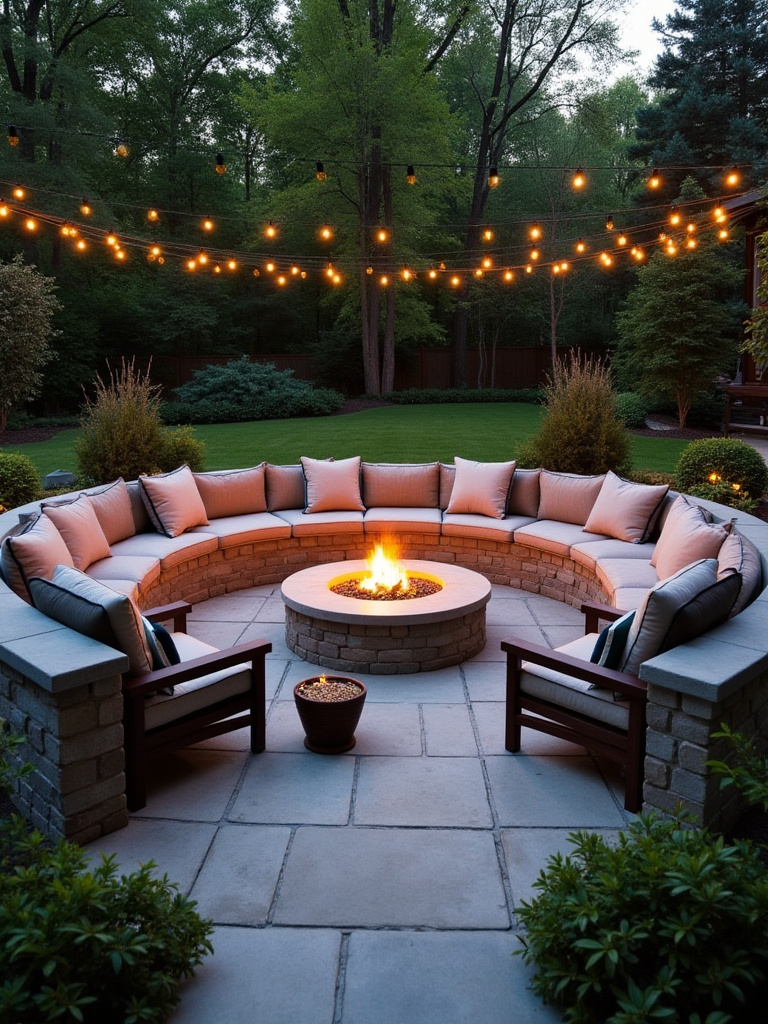
Built-in seating walls are gorgeous and permanent, but make sure they’re at a comfortable height (around 18 inches) and consider topping them with cushions for long-term comfort. We designed a sunken firepit for a multigenerational family, and the low retaining wall doubled as back support for the benches. It became everyone’s favorite spot.
The right seating can help blend your firepit into the larger landscape.
8. Integrate Your Firepit into Your Existing Landscape Design
A truly great firepit area doesn’t feel like an add-on; it feels like it has always been part of your garden. Achieving this sense of belonging is all about creating connections with what’s already there. Look at your home’s exterior and your existing patio or deck. What are the dominant materials and colors?
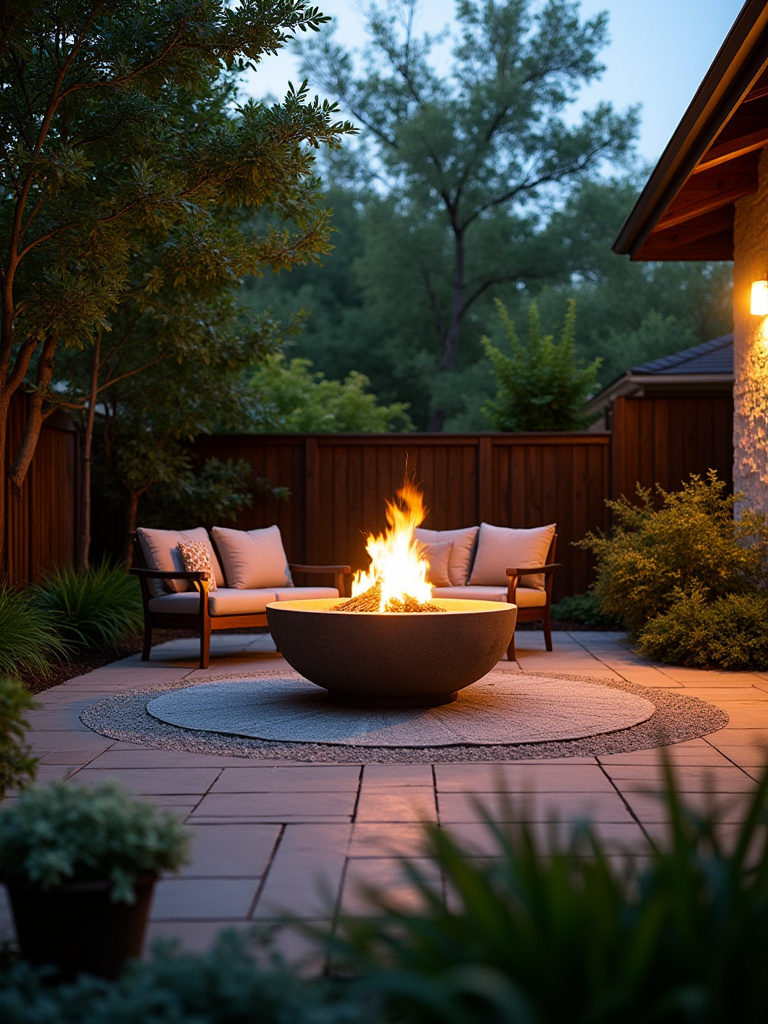
If you have a bluestone patio, weaving some bluestone into the firepit’s cap or surround creates an instant visual link. For a modern home with black window frames and steel accents, a sleek concrete or dark metal fire bowl feels right. It’s about creating a conversation between the different elements in your yard. One of my favorite projects involved a modern concrete home where we used the exact same concrete aggregate for the firepit. It made the entire patio feel like one cohesive, architectural space.
Don’t forget the plants! Use fire-resistant plantings like succulents or ornamental grasses to soften the hard edges of the stone or concrete. They add texture and color while maintaining that crucial safety clearance. A thoughtfully placed pathway of matching pavers that leads the eye—and foot traffic—from the house to the firepit is the finishing touch that ties it all together.
Now, as the sun goes down, let’s think about how to keep the magic going.
9. Enhance Ambiance with Strategic Lighting Design
When darkness falls, your firepit shouldn’t be the only thing glowing. Good lighting design is about two things: ambiance and safety. It extends the use of your entire backyard and makes it feel enchanting. The trick is to layer different kinds of light. You don’t want a single, harsh floodlight that kills the mood.
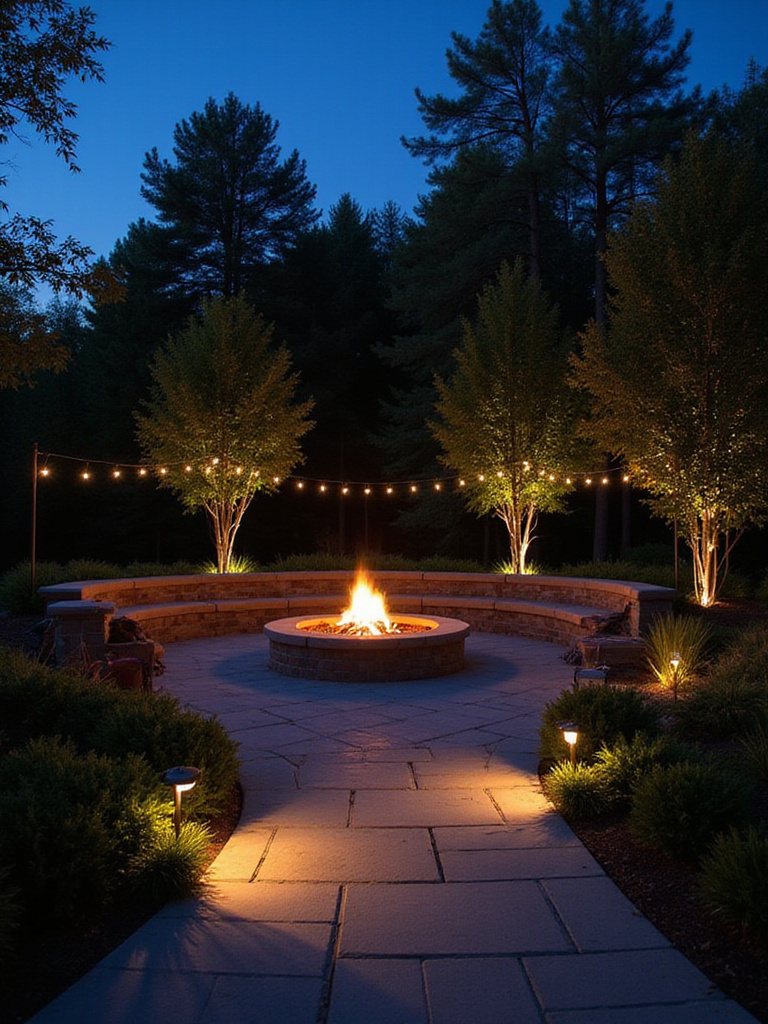
Start with safety. Low-voltage path lighting is essential for illuminating the walkway to and from the firepit area. These small lights can be subtly tucked into garden beds, ensuring no one trips in the dark. Next, think about ambient light. Soft, warm string lights draped overhead can create a magical ceiling, and they provide just enough gentle light for people to see each other’s faces. Finally, use accent lighting. A small spotlight aimed up at the branches of a beautiful tree or washing across a stone wall adds depth and drama.
The key is to keep the color temperature warm (look for 2200K-2700K bulbs) to complement the firelight, not compete with it. And put everything on dimmers! This gives you complete control—brighter for navigating, dimmer for intimate conversations. Smart controls are fantastic here, allowing you to create different “scenes” with the touch of a button.
With the scene set, why not make your firepit work a little harder for its keep?
10. Add Cooking Capabilities for Culinary Adventures
Why limit your firepit to just warmth when it can be an outdoor kitchen, too? Adding the ability to cook over the open flame transforms a gathering into a full-blown culinary event. It’s interactive, it’s fun, and the smoky flavor you get is something a regular grill just can’t replicate.
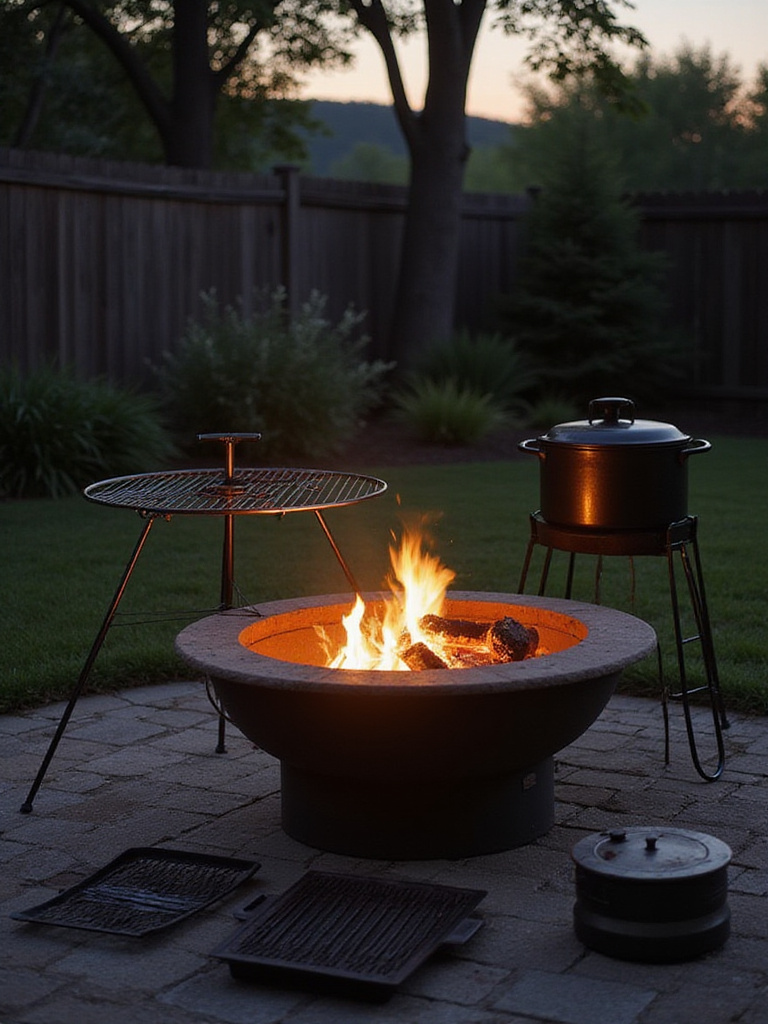
You don’t need a massive, elaborate setup. A simple, adjustable grill grate that fits over your wood-burning pit is all you need for burgers, veggies, and s’mores. Some of my clients have had great success with tripod systems that let you hang a Dutch oven over the fire for stews and chilis. One family in Texas installed a heavy-duty swivel grill over their stone pit. Their “taco nights,” where everyone grills their own fillings, have become legendary in their neighborhood.
If you’re going to cook, a little bit of planning goes a long way. Think about creating a small, dedicated prep area nearby with a weather-resistant countertop. It makes the whole process smoother and more enjoyable. You just need a spot to put down a tray or a cutting board without having to balance it on your knees.
This idea of a firepit doing double duty is a powerful one.
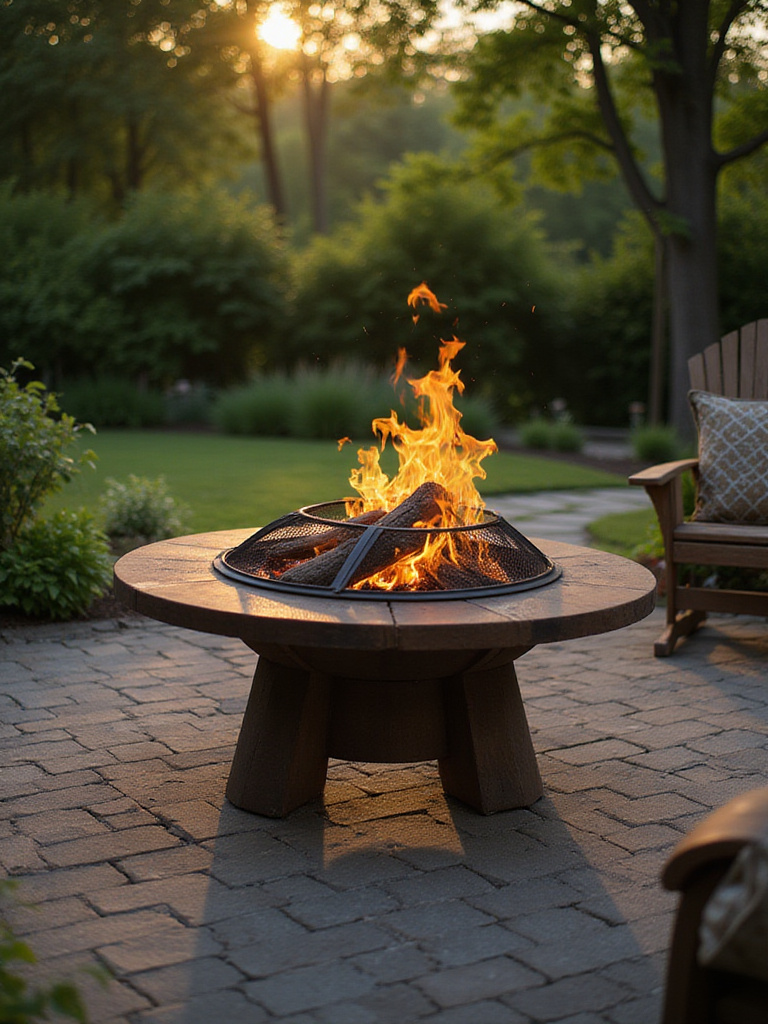
11. Design Multi-Purpose Features for Year-Round Use
Especially in smaller yards, every feature needs to earn its keep. A multi-purpose firepit is a smart investment that ensures the space is valuable even when there isn’t a fire burning. It’s about designing for all four seasons, not just for chilly evenings.
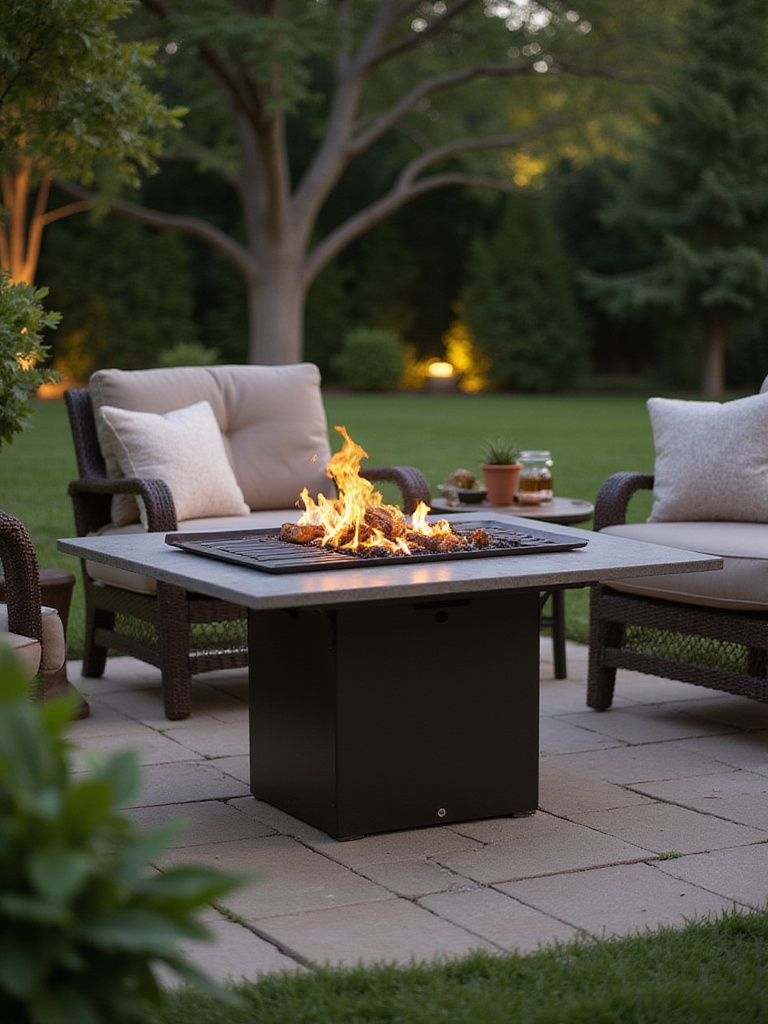
The easiest way to do this is with a well-fitting cover or lid. A custom wood or metal top can transform your firepit into a coffee table or a serving station for a summer party. One client with a square concrete firepit had a beautiful stone slab made to fit perfectly on top, giving them a gorgeous outdoor table during the day. For built-in designs, you can incorporate storage cubbies into the base or seating for cushions, blankets, or s’mores supplies.
Some of the more innovative designs even incorporate a water feature. Imagine a basin that bubbles with water during the hot summer months, then drains and becomes a fire bowl when the weather turns cool. It’s an incredible way to get year-round enjoyment from a single, beautiful centerpiece.
But you don’t need a custom, high-end design to have a great firepit. Let’s talk about rolling up your sleeves.
12. Explore Budget-Friendly DIY Construction Options
There is a special kind of satisfaction that comes from building something with your own hands, and a firepit is a totally achievable DIY project. It can save you thousands of dollars and give you complete control over the final product. With a bit of planning and some elbow grease, you can create a safe, beautiful firepit over a weekend.
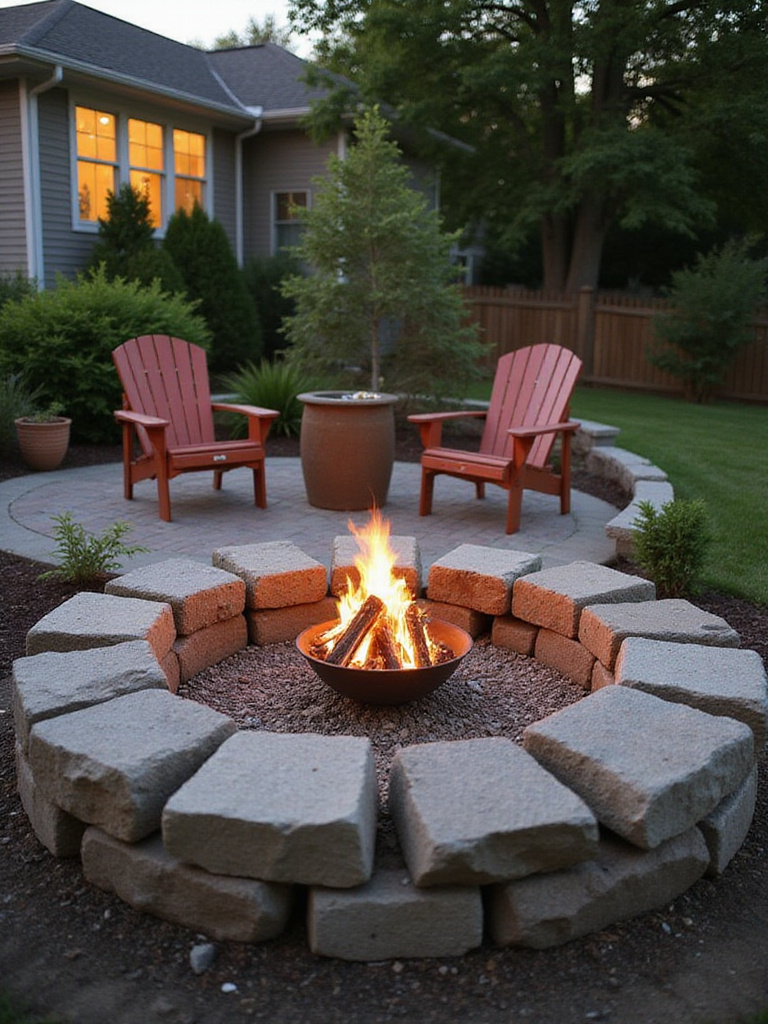
The most straightforward approach is using a kit of precast, curved concrete blocks from a home improvement store. They are designed to fit together easily and are rated for the heat. Another simple option is to build a wall of retaining blocks and place a steel fire ring insert inside. That insert is key—it protects the blocks from direct heat and makes the whole structure safer and longer-lasting. A family in Oregon built one this way for under $300, and it’s still going strong five years later.
If you go the DIY route, just be sure to do your homework. Ensure you have proper drainage at the bottom (a layer of gravel works well) so water doesn’t pool and crack your materials in a freeze. Safety is non-negotiable, so use fire-rated materials for anything touching the flames.
No matter who builds your firepit, you’ll have to deal with the aftermath.
13. Plan Efficient Ash and Debris Management
Let’s talk about the least glamorous part of owning a wood-burning firepit: cleaning it. Proper ash management isn’t just about keeping things tidy; it’s a critical safety measure and essential for the health of your firepit. Leftover ash can hold heat for a surprisingly long time and can corrode metal parts if left to sit.
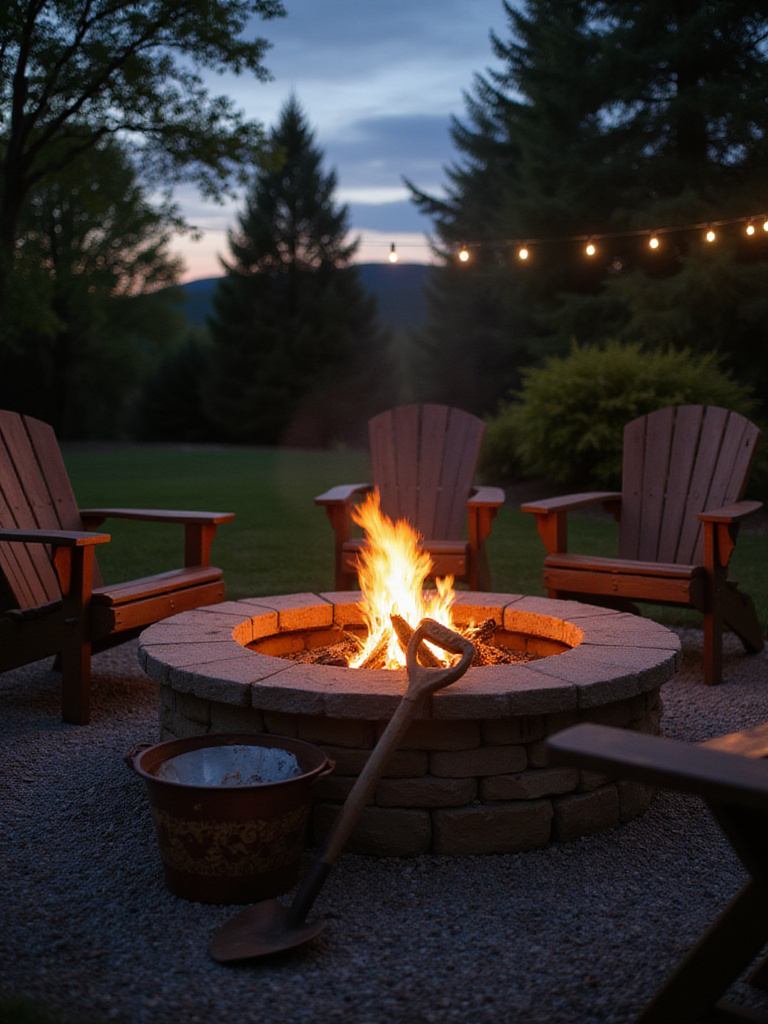
Here’s the golden rule: wait at least 24 hours, preferably 48, before you even think about cleaning out the ash. Embers can hide. Always use a metal shovel and a dedicated, fire-resistant metal can with a tight-fitting lid to store the ashes. Keep that can away from your house, your deck, or anything else flammable. One of my clients keeps their ash management “station” a good 20 feet away from their house, and it’s a practice I recommend to everyone. It only takes one hidden ember to start a tragedy.
Regular cleaning, maybe after every two or three burns, will also ensure your fires burn better by allowing for good airflow. And here’s a bonus for the gardeners: completely cooled ash from untreated wood can be a great soil amendment for plants that like alkaline conditions.
A clean firepit is a great start, but sometimes you want a little more… seclusion.
14. Incorporate Privacy Elements for Intimate Gatherings
A firepit is a gathering spot, but sometimes you want that gathering to feel like a private retreat. Creating a sense of enclosure can make the space feel cozier and more intimate, encouraging guests to relax and open up. It’s about creating a psychological hug around the space.
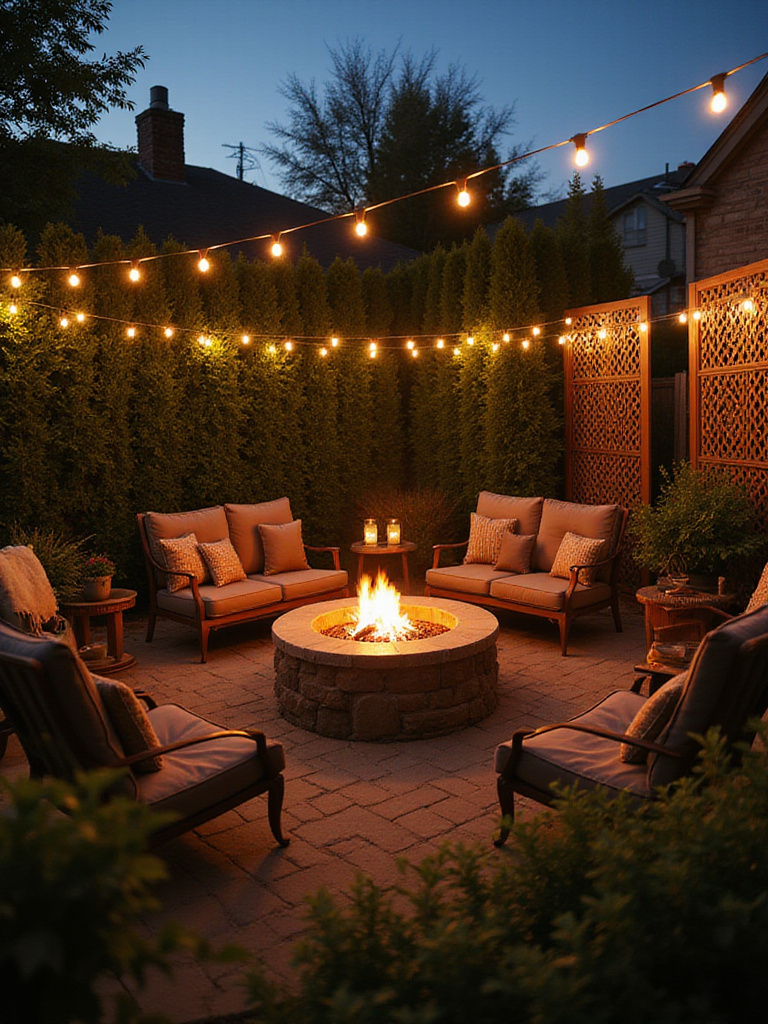
The best way to start is to identify the sightlines you want to block. Is it a neighbor’s kitchen window? The street? Once you know the source, you can choose your solution. Living screens are a beautiful option. A well-placed hedge, a row of tall ornamental grasses, or a trellis with a climbing vine can create a soft, natural wall that changes with the seasons.
For a more immediate solution, structural elements like decorative metal or wood screens can act as a piece of art while providing privacy. A pergola overhead can create a “ceiling,” making the space feel like a true outdoor room. Just make sure whatever you choose allows for plenty of air circulation so smoke can escape. And for a little extra tranquility, consider adding a small, bubbling fountain nearby. The gentle sound is wonderful for masking neighborhood noise.
Speaking of combining elements, let’s get a little more dramatic.
15. Combine Fire and Water for Dramatic Effects
There is something absolutely captivating about the elemental dance between fire and water. Integrating both into one design creates a high-end, resort-like feel that’s a true showstopper. The reflection of flickering flames on a water’s surface is pure magic.
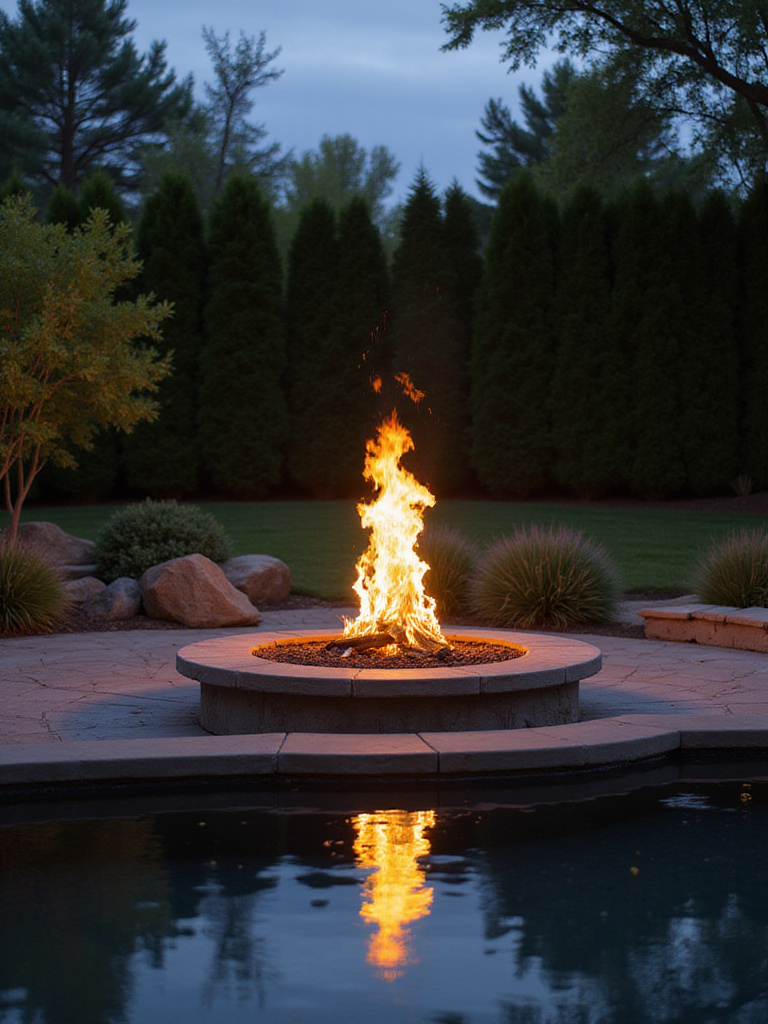
This doesn’t have to be as complicated as it sounds. It can be as simple as placing your firepit next to an existing pool or pond. But for a more integrated look, designers are creating incredible features like fire bowls that appear to float in a shallow reflecting pool, or linear burners set alongside a trickling water wall. It’s a feast for the senses.
This is one area where I highly recommend bringing in professionals. The technical details of combining water circulation, drainage, gas lines, and electricity are complex. They can help you figure out the logistics and ensure everything is installed safely and built to last. It’s a bigger investment, but the payoff in “wow” factor is enormous.
Whether you go for high drama or simple charm, it should always feel connected to your home.
16. Match Firepit Style to Your Home’s Architecture
A firepit should never feel like it just landed in your yard from outer space. It should feel like it belongs. The best way to achieve that is to take your style cues directly from your home’s architecture. This harmony between house and hardscape is what creates a truly sophisticated outdoor living space.
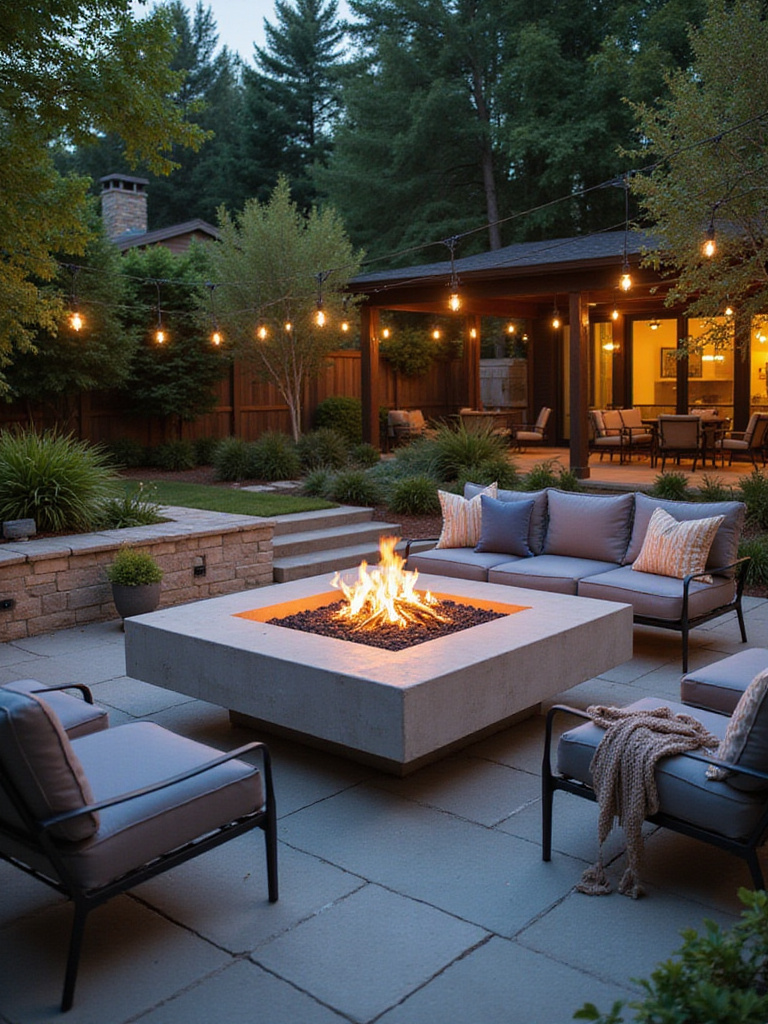
Take a good look at your house. Is it a traditional brick colonial? A rustic Craftsman with lots of natural wood and stone? A sleek, modern structure with clean lines? A brick firepit will look out of place next to a modern home, just as a minimalist concrete bowl might clash with a quaint cottage. For that Craftsman home, a fieldstone firepit would be a natural choice. For the modern house, a linear fire table made of powder-coated steel or concrete would be perfect.
Think about scale, too. A massive, imposing firepit can overwhelm a small yard and a small home. The goal is balance. A great trick is to create a quick mood board. Just snap a picture of your home’s exterior and drop in photos of firepit styles you like. Seeing them side-by-side makes it much easier to spot what works and what doesn’t.
Now, let’s talk about the gear you’ll need to run this thing safely.
17. Invest in Essential Safety Tools and Accessories
Operating a firepit confidently and safely comes down to having the right gear on hand. These tools aren’t just accessories; they are essential safety equipment. They let you manage the fire effectively and protect your home, your guests, and your investment.
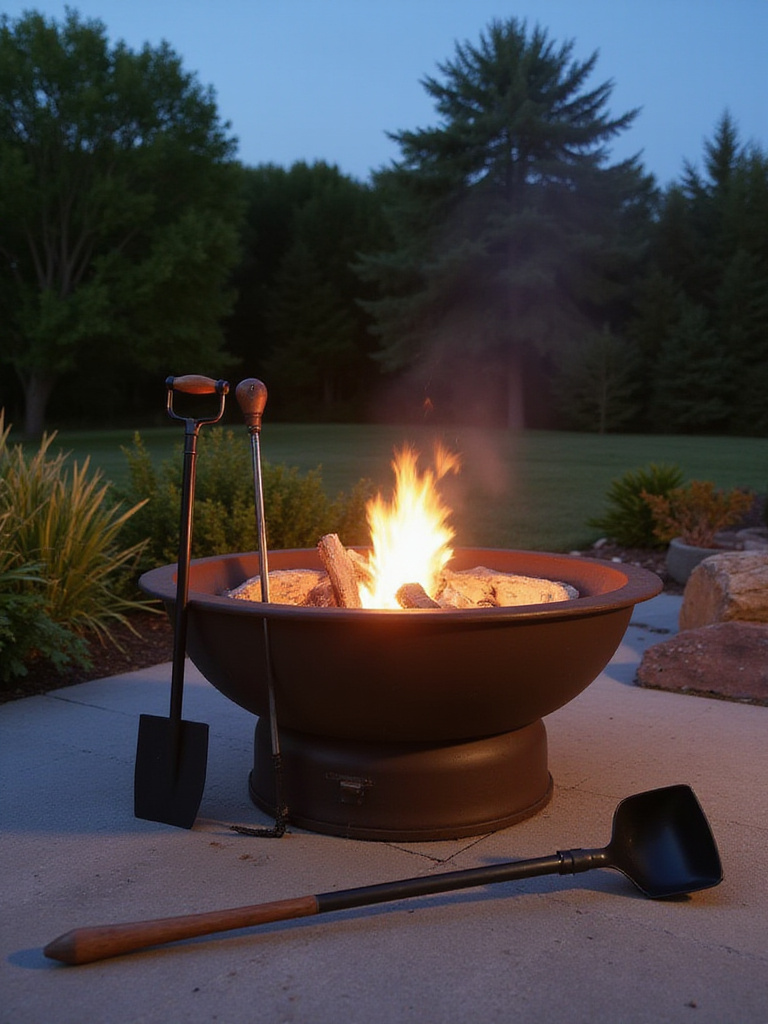
Your basic toolkit should include a long-handled poker and log grabbers to adjust wood from a safe distance, as well as the ash shovel we already discussed. A spark screen or mesh cover is non-negotiable, in my opinion. It’s your number one defense against flying embers that could catch on dry leaves, patio furniture, or worse. I know a family in a windy area whose spark screen absolutely prevented a small fire when an unexpected gust came through.
Most importantly, you need a way to put the fire out, fast. Before you light a single match, have a charged garden hose nearby or a couple of large buckets of water. A fire extinguisher rated for Class A fires (wood, paper, cloth) is also a smart investment. And make sure everyone who uses the firepit knows where the safety gear is and how to use it.
For wood burners, having good tools is half the battle. The other half is having good fuel.
18. Design Convenient Wood Storage Solutions
If you choose a wood-burning firepit, your wood storage is almost as important as the pit itself. Soggy, unseasoned wood is a recipe for a smoky, frustrating fire that produces very little heat. A proper storage solution keeps your fuel dry, seasoned, and easy to grab.
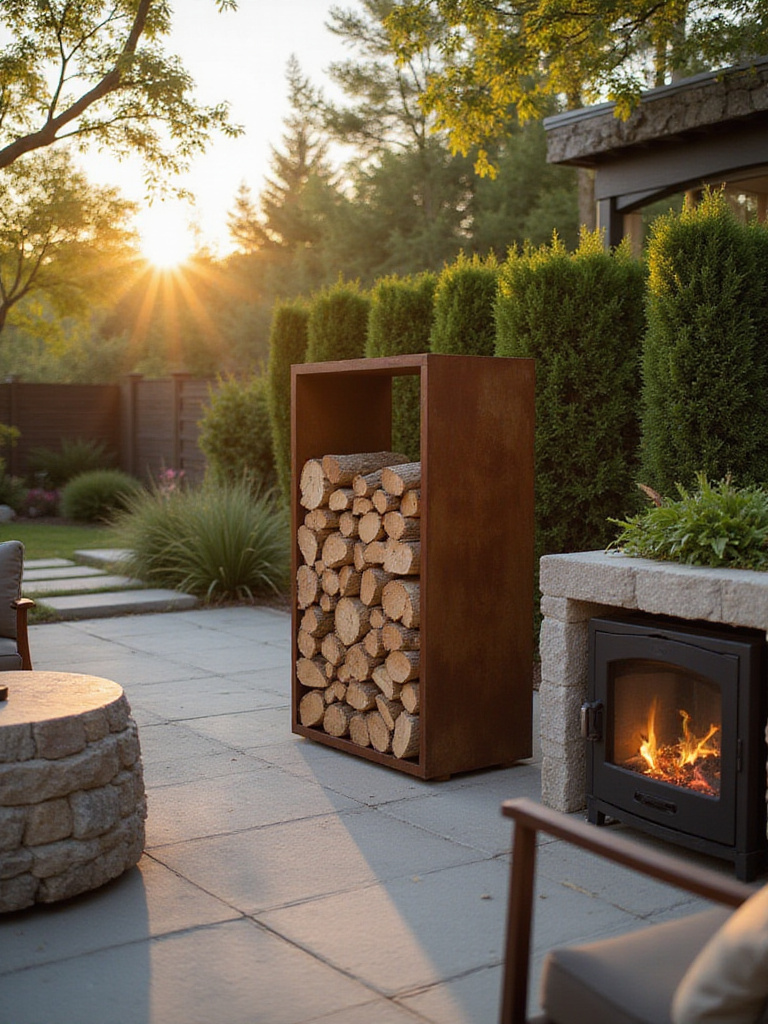
Ideally, you want your woodpile close enough to be convenient but far enough away to be safe from sparks—a 10-15 foot distance is a good target. The key to good storage is airflow. Wood needs to be elevated off the ground (at least 6 inches) to prevent rot and allow air to circulate underneath. It also needs a roof to keep off rain and snow, but the sides should be at least partially open to let the wood breathe and dry out. This “seasoning” process is what gets the moisture content down, which is what gives you a clean, efficient burn.
You can buy prefabricated wood racks, or you can build your own. It can be a simple structure, or you can get creative and integrate it into a fence or build it as a low wall to provide a bit of privacy. It’s a functional element that can also be a beautiful, rustic feature in your yard.
Just as you protect your wood, you need to protect your firepit itself.
19. Protect Your Investment with Quality Covers
A good, weatherproof cover is the simplest and most effective thing you can do to extend the life of your firepit. It’s shocking how quickly sun, rain, and snow can break down even durable materials. A quality cover prevents rust on metal parts, protects masonry from freeze-thaw cycles that cause cracking, and keeps the whole thing clean and ready to use. It can easily double the lifespan of your investment.
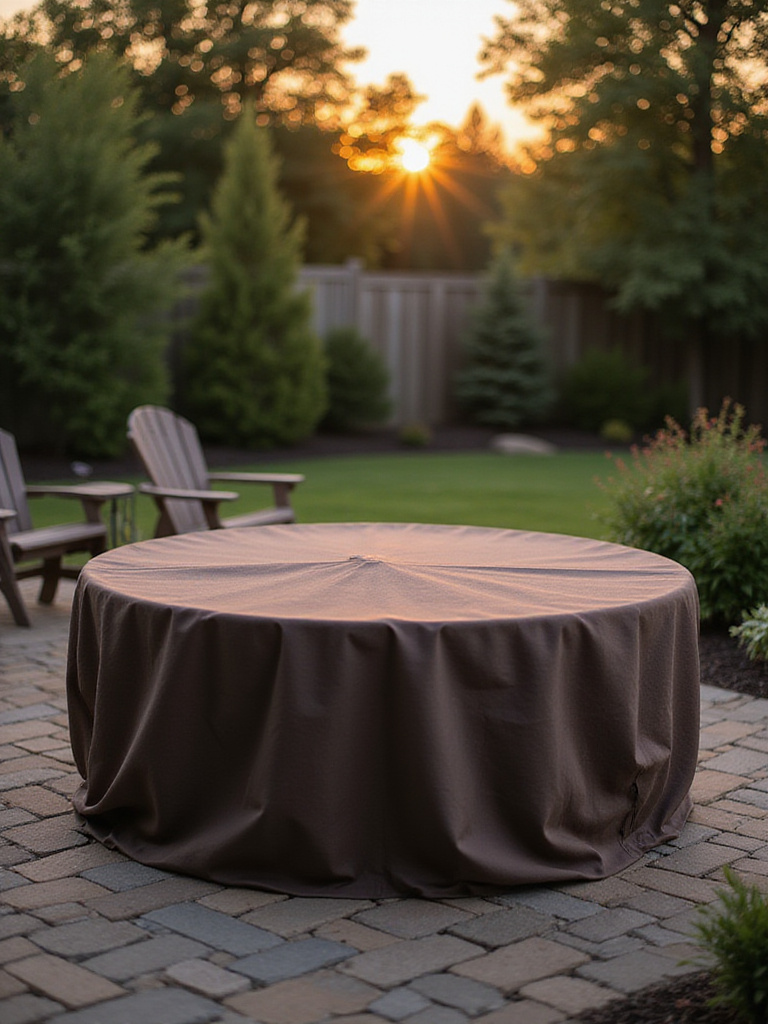
Look for a cover made from heavy-duty, waterproof material like 600D polyester, with secure straps or buckles so it won’t blow away in a storm. And here’s an important feature: make sure it has built-in vents. This allows moisture to escape, preventing condensation and mildew from building up underneath.
Here’s a little pro tip I share with all my clients: put a bucket or a large ball in the center of the firepit before you put the cover on. This creates a dome shape that allows water to run right off instead of pooling in the middle, which can stretch and damage the cover over time.
A cover is your first line of defense, but a little routine care is also essential.
20. Implement Regular Maintenance for Longevity
Like any part of your home, your firepit needs a little routine TLC to stay safe, efficient, and looking its best. Consistent, simple maintenance tasks are far more effective than one massive, once-a-year cleaning marathon. A little effort along the way prevents small issues from becoming big, expensive problems.
For wood pits, this means the regular ash cleanup we talked about. For gas pits, it means periodically checking the burner ports for any clogs from insects or debris and gently cleaning the lava rocks or fire glass. Once a season, do a thorough inspection. Check for cracks in the masonry, rust spots on metal that might need a touch-up with high-heat paint, and, for gas units, test all the connections for leaks using soapy water.
One of the best things you can do for a wood firepit is to use a small grate or andirons to elevate the logs off the bottom of the pit. This vastly improves airflow, giving you a cleaner, hotter fire, and it also reduces the direct heat stress on the base material of your firepit, helping it last longer.
With all the practicalities covered, let’s get to the best part.
21. Personalize Your Space with Unique Touches
This is where you turn your firepit area from a well-designed space into your space. Personalization is what gives a place its soul. It’s about layering in elements that reflect your family, your passions, and your idea of comfort. It’s what makes guests feel not just welcomed, but cared for.
This can be as simple as choosing outdoor pillows and cozy, weather-resistant blankets in your favorite colors. Maybe you have a set of unique, handcrafted marshmallow-roasting sticks that become a conversation starter. Or perhaps you’re a family of stargazers, so you choose reclining chairs and add some red-filtered, night-vision-saving accent lights.
Think about textures and materials that feel good to you. Consider functional art, like a beautifully designed log holder or a unique spark screen. The goal is to look around the space and see your own story reflected there. Dedicated, attractive storage—like a handsome deck box—for all these personal comfort items is a great finishing touch, keeping everything protected and ready for your next gathering.
Finally, and most importantly, let’s tie all of this together with the golden rule.
22. Master Comprehensive Safety Practices
Everything we’ve discussed comes back to this one, overarching principle: safety. A firepit is a joy, but it’s still a fire. Treating it with respect every single time you use it is what ensures a lifetime of happy, accident-free memories. A professional approach means having a safety mindset from start to finish.

Before you light the fire, do a quick safety sweep. Check the weather—never light a fire on a very windy day or during a burn ban. Make sure your safety clearance zone is free of dry leaves, kids’ toys, or anything else combustible. Double-check that your water source or fire extinguisher is ready to go. And for every single gathering, have a designated “fire supervisor”—a responsible adult who stays attentive and sober, and whose job is to manage the fire and ensure it’s properly extinguished at the end of the night.
Proper extinguishing is just as important as proper lighting. Douse a wood fire with plenty of water, stir the ashes to make sure all embers are out, and then douse it again. It should be cool to the touch before you walk away. A smoldering fire can reignite hours later. Creating a simple, laminated checklist of these safety steps and keeping it with your firepit tools is a great way to ensure everyone in the family follows the same safe procedure, every time.
Conclusion
Creating a firepit zone that will be loved for years is a journey of thoughtful choices. It begins with the practical foundation of placement and codes and blossoms with personal touches and style. But woven through it all is a commitment to creating a space that is safe, comfortable, and welcoming to every single person you want to share it with.
That investment of time and planning pays off a thousand times over with every story told, every laugh shared, and every quiet moment of connection around the flames. You’re not just building a firepit; you’re building a backdrop for a lifetime of memories.