Most apartment bathrooms get decorated the same way a hospital room does — whatever was there when you moved in, plus a few things you picked up because they were available. The towel bar is in the wrong place, the lighting is flat, and the floor tile is a shade of beige that hasn’t been fashionable since before you were born. You tolerate it because it feels like the kind of thing you can’t change.
But apartment bathroom ideas have a way of working on constraints rather than against them. Years spent in accessible and universal design have taught me one reliable truth: the limitations that feel most frustrating are usually prompts to think differently. Small square footage, rental restrictions, fixtures you didn’t choose — these aren’t obstacles to a good bathroom. They’re the parameters of a design problem with genuinely good solutions.
The ideas here cover the full range, from an afternoon upgrade that costs less than a dinner out to renovations that make sense if you own the space. Most require no permanent modifications and no permission from anyone.
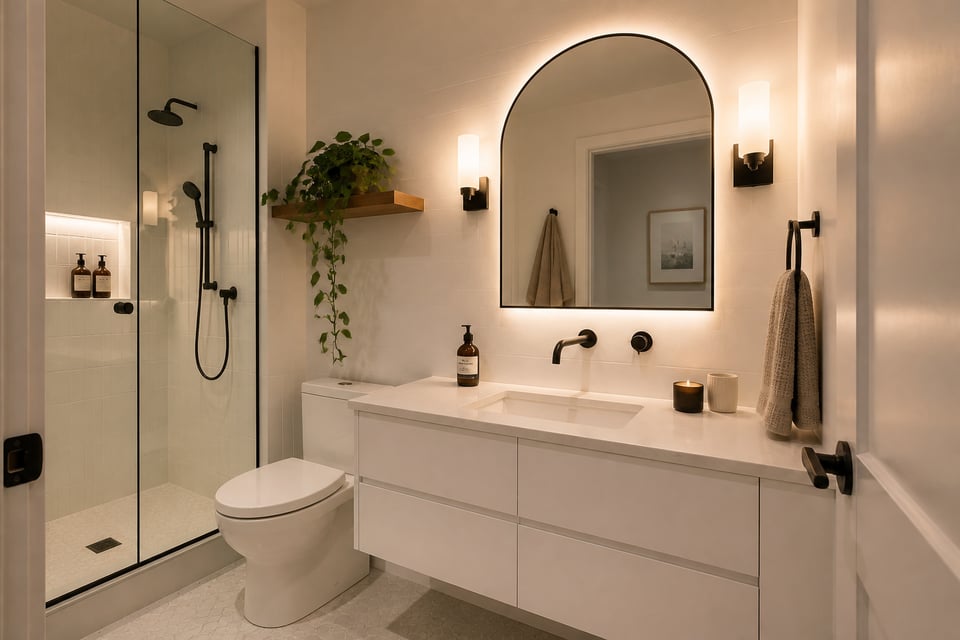
1. Floating Vanity to Free Up Floor Space in a Tight Bathroom
There is something almost architectural about a floating vanity in a small bathroom — the exposed floor plane beneath it signals that someone thought carefully about the room. The effect lands immediately. Your eye travels the full tile floor, reads the space as continuous and unbroken, and interprets that as square footage. The room hasn’t changed at all, but it reads differently.
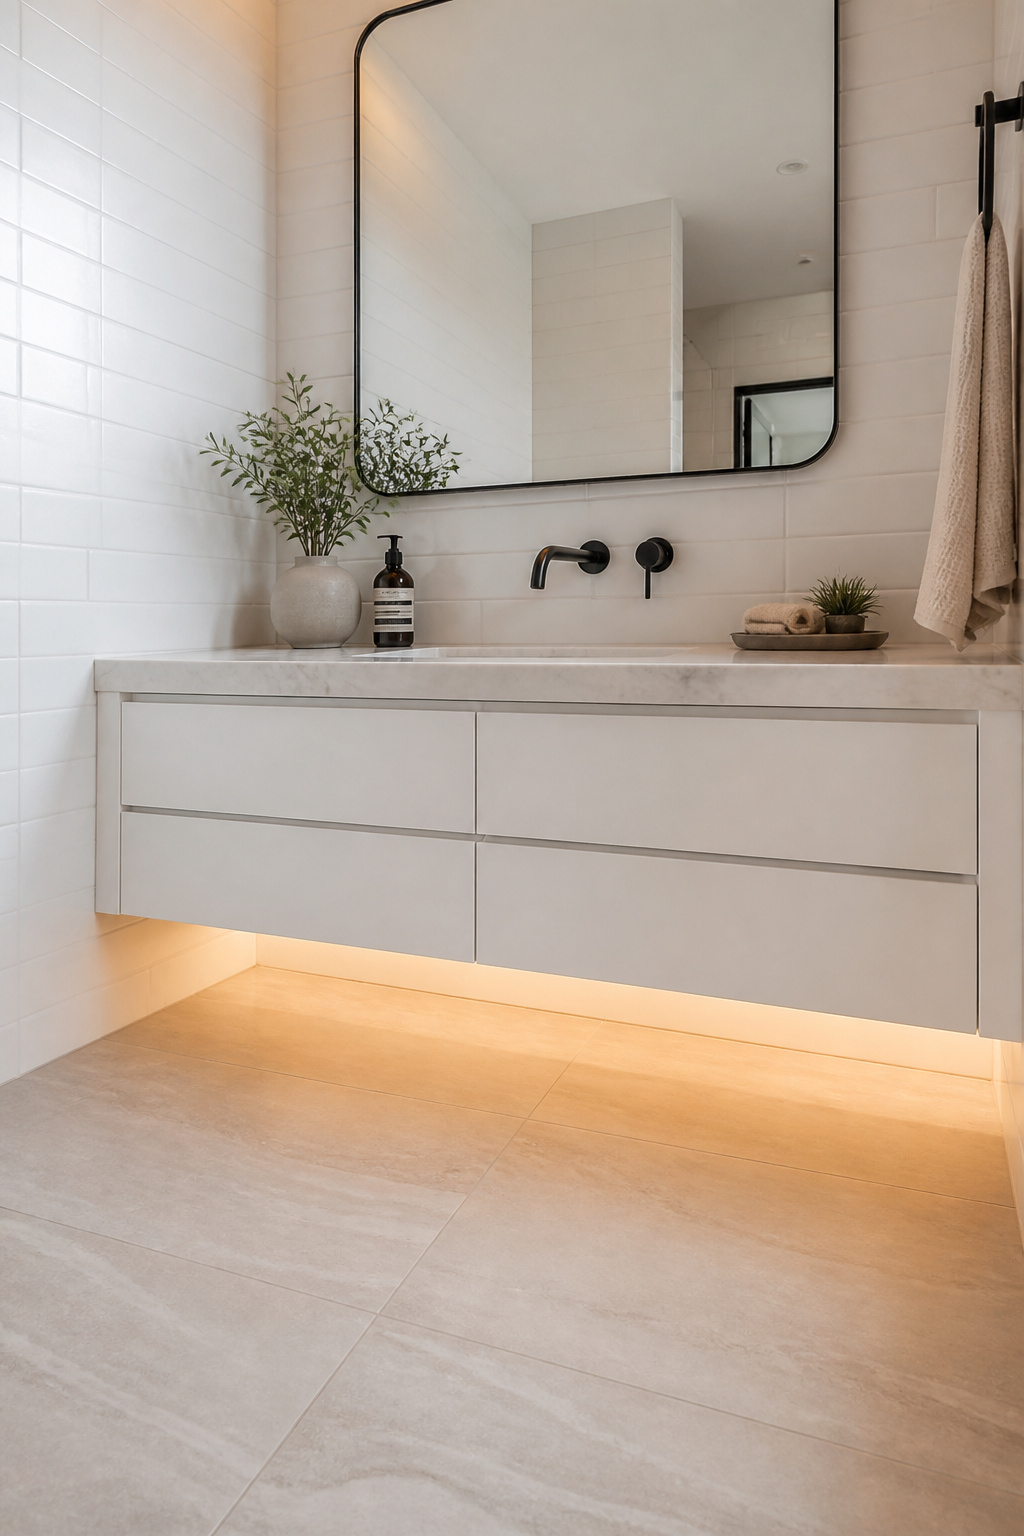
Wall-mounted vanities sit 2 to 6 inches above the floor, supported by heavy-duty brackets anchored into wall studs or a French cleat system. The 18- and 24-inch widths work best in compact bathrooms — deep enough to hold a proper sink basin, narrow enough not to crowd the room. Standard mounting height is 30 to 32 inches from floor to countertop. For renters, raise the wall-mounting question directly with your landlord before committing; some are fine with it given proper patching on exit, others aren’t. A freestanding vanity on hairpin legs achieves most of the same visual effect without permanent wall attachment — the floor line is still visible, the silhouette still lean.
Pair it with an adhesive LED strip light (IP44 or higher for damp locations) along the underside. A warm white strip at 2700K creates a soft glow at floor level that reinforces the floating effect and adds ambient light the room probably lacks. Plug-in versions require zero wiring.
2. Vertical Storage Tower That Takes Space Up, Not Out
The floor plan of a small apartment bathroom doesn’t expand, but the ceiling is usually several feet beyond where any storage currently exists. A freestanding tower changes that calculation: you get the capacity of a linen closet in roughly one square foot of floor space.
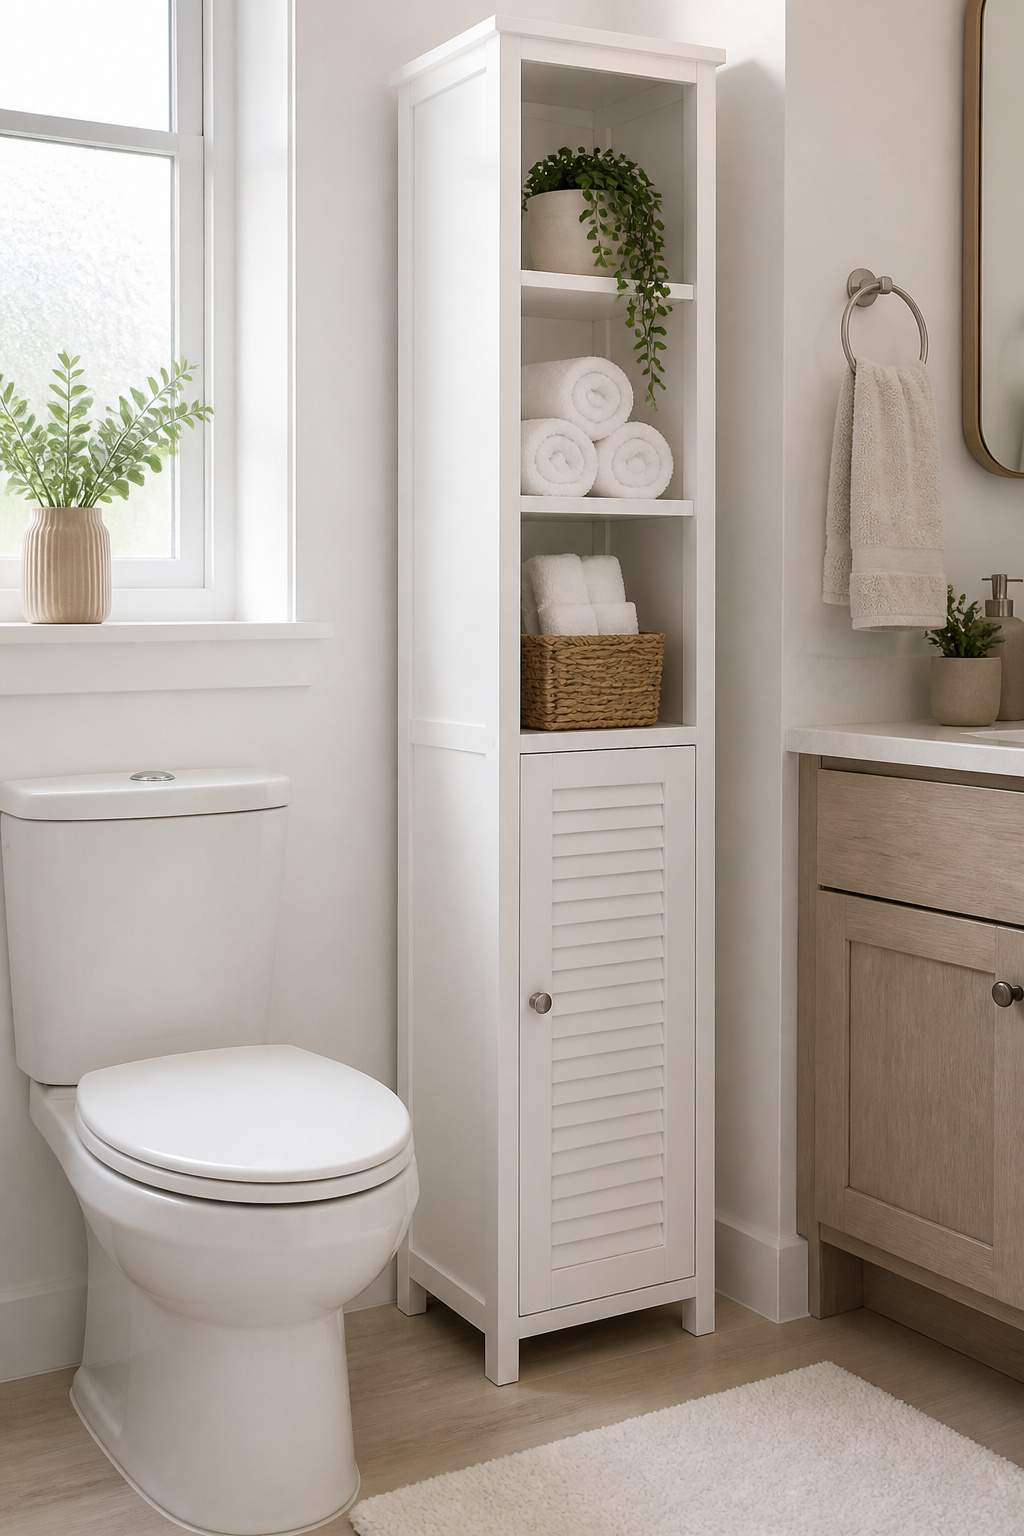
The rental advantage is complete — no screws, no anchors, no evidence you were there. Quality towers use moisture-resistant MDF with a melamine surface that handles bathroom humidity without swelling. Dimensions to look for: 63 to 72 inches tall, 11 to 16 inches wide, 11 to 15 inches deep. Going wider than 16 inches crowds a small bathroom; deeper than 15 inches can block toilet access or fight with the door swing. Combined shelf capacity of at least 80 lbs keeps the tower stable when loaded.
Organize by frequency: eye-level shelves (60 to 66 inches) hold daily items — hand lotion, facial products, extra toilet paper. Lower closed doors handle cleaning supplies and spare toiletries. The top shelf, beyond comfortable reach, is for decorative items only. Leave 20 to 30 percent of open shelf space empty — a half-full shelf reads as curated, not as a storage overflow.
3. Peel-and-Stick Tile for a Rental-Friendly Floor Refresh
The beige floor tile in most rental bathrooms isn’t just ugly — it’s a daily reminder that you’re living in someone else’s design choices. Peel-and-stick tile addresses that directly, and current quality makes it a genuine option rather than a craft project compromise.
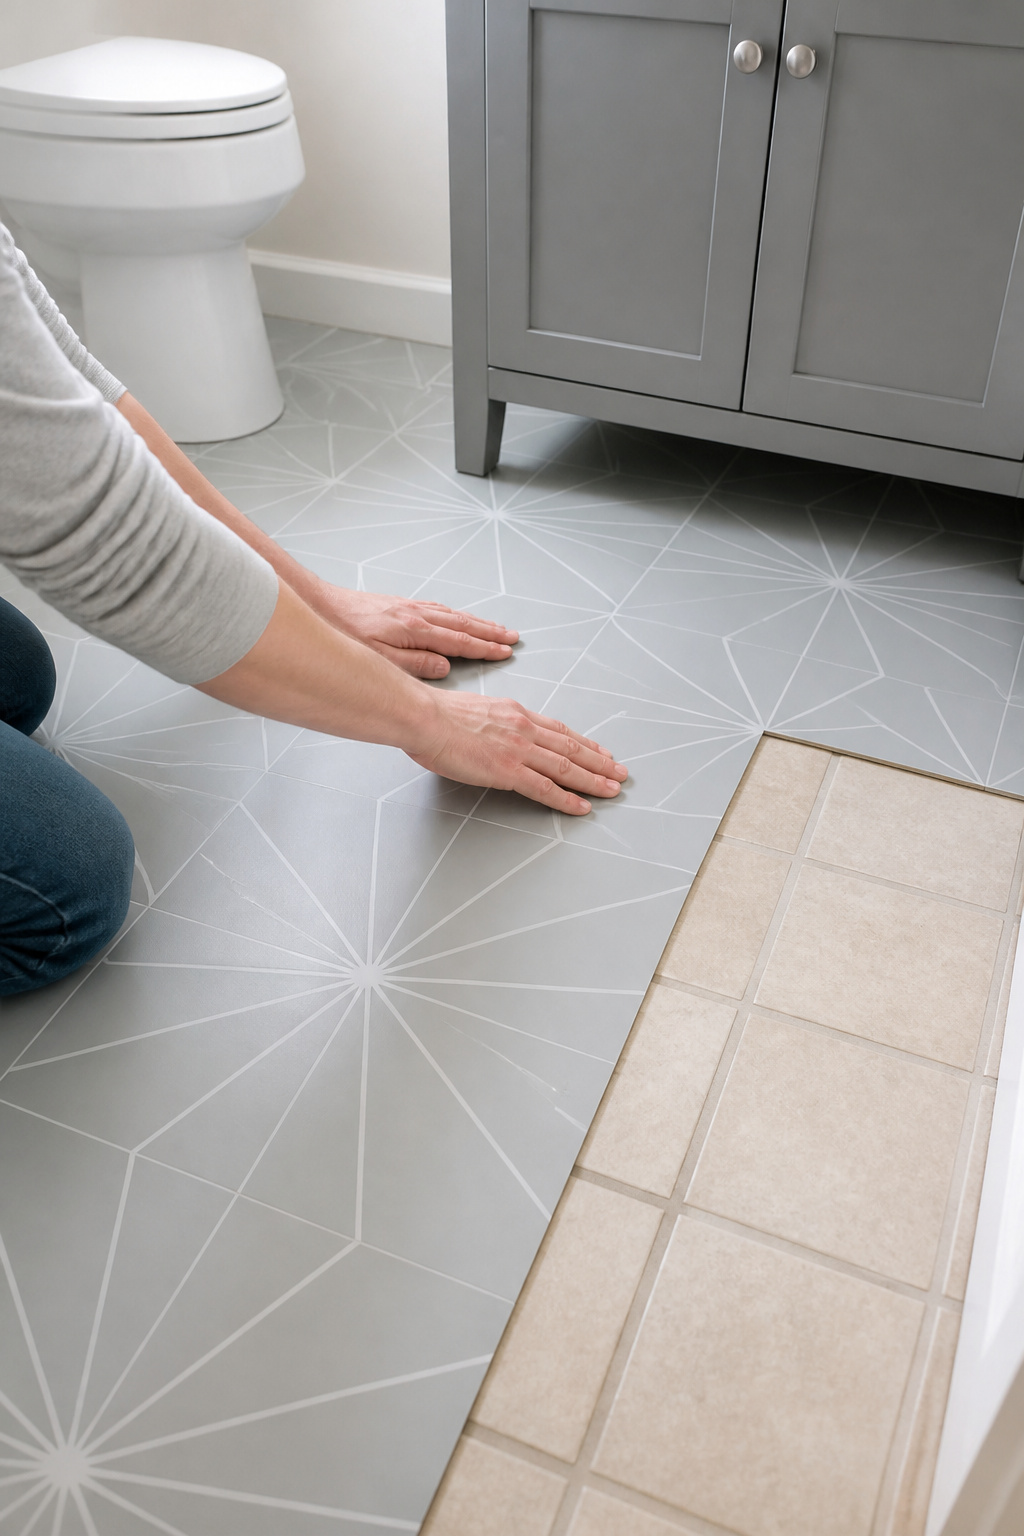
Modern versions use pressure-sensitive adhesives that bond firmly under daily use and release cleanly with heat during removal. Smart Tiles uses its Gel-O technology to give tiles real surface depth — they pass visual scrutiny at close range, not just in photos. Art3d is the other quality standard for bathroom floors. Both use vinyl construction that is fully waterproof and humidity-resistant. Surface prep is the step that determines success: the floor must be spotlessly clean and completely dry, with no wax residue or grit. Smooth surfaces bond best; lightly textured surfaces can work with careful edge attention.
For small apartment bathrooms, light colors do the most work — white, cream, or light grey expands the floor visually and reflects light upward. Diagonal installation of square tiles adds geometry and makes the floor feel wider than a straight grid. Before deciding on a pattern, have a look at various bathroom floor tile ideas to compare how different scales and patterns read at floor level.
At move-out, a hairdryer on medium heat directed at each tile for 20 to 30 seconds softens the adhesive. Peel at a 45-degree angle from one corner, slow and steady. Any residue responds to a paint-safe adhesive remover. The floor underneath should come out unscathed.
4. Apartment Bathroom Lighting Ideas for Low-Ceiling Spaces
Single overhead fixtures are the design equivalent of a single phone speaker — they technically produce the thing you need, but the result is flat, directionless, and fatiguing over time. In a bathroom, a single overhead light casts downward shadows across the face from the worst possible angle.
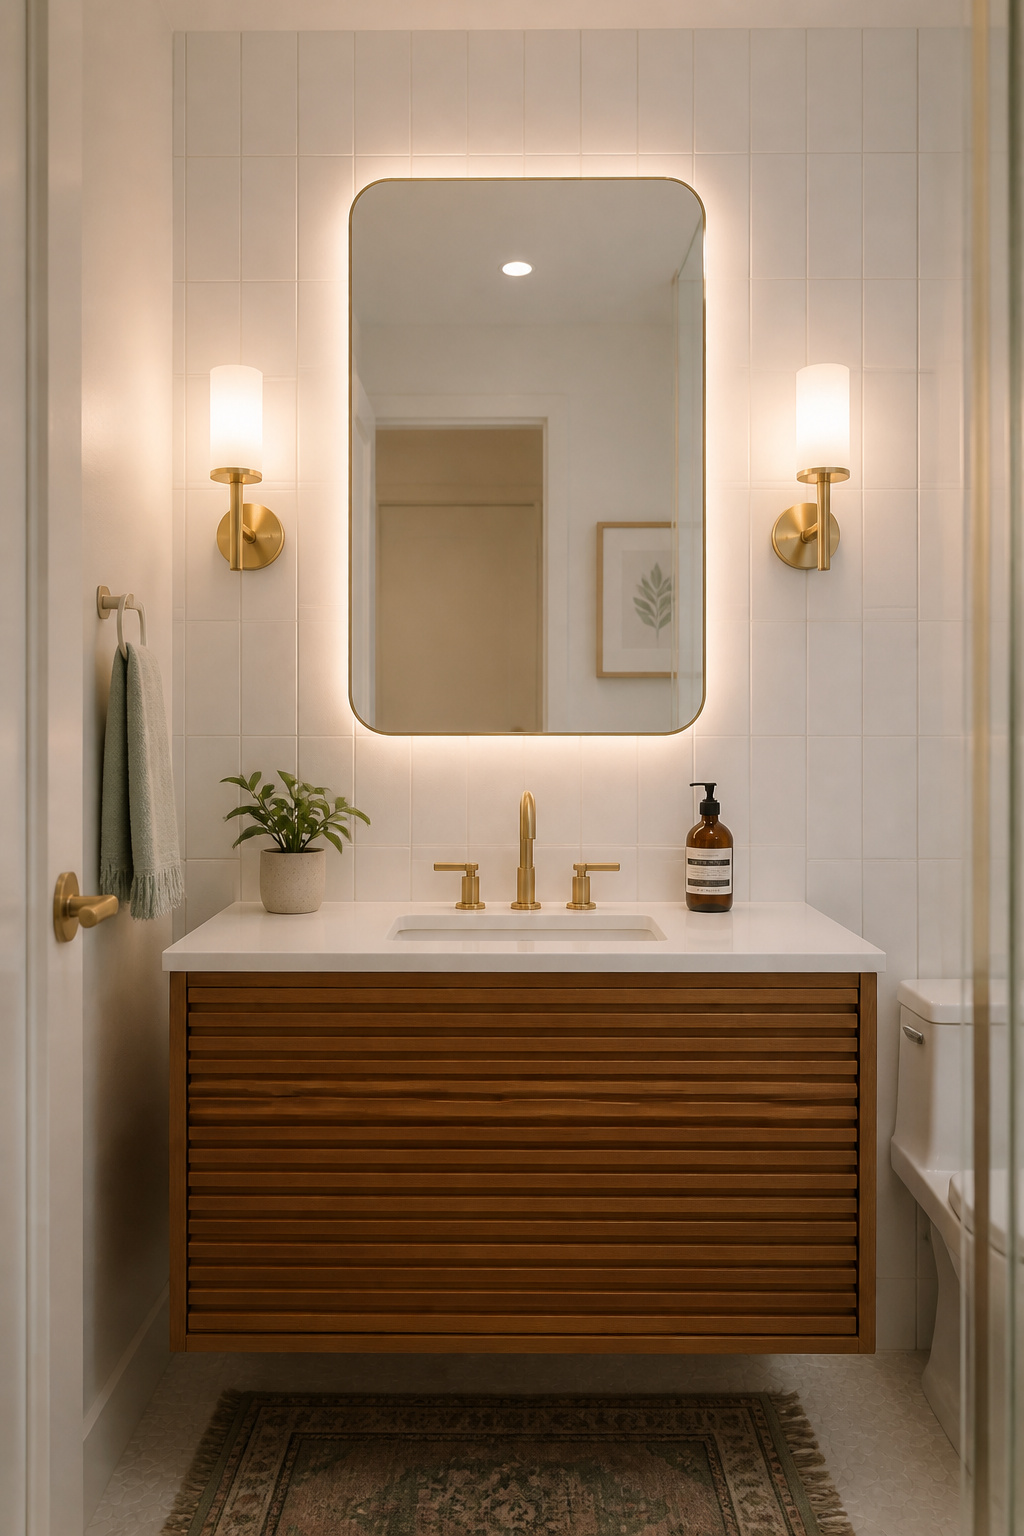
The fix is layering: a source from above for general illumination plus a source at face level for even, shadow-free light. Color temperature matters more than most people realize — target 3000K to 3500K. Warm enough to be flattering, cool enough to trust what you’re seeing. Anything above 4000K reads as clinical.
For vanity-level light, battery-powered or plug-in adhesive sconces are the rental-safe option. Mount them flanking the mirror at 60 to 65 inches from the floor — that height centers light at face level and avoids the forehead shadow you get from any above-mirror placement. A plug-in backlit mirror is the cleanest single-upgrade: it combines mirror and light source in one purchase, hung and plugged in, no wiring. There is a full range of options in this guide to stylish vanity lighting fixtures if you want to compare before committing.
For low ceilings, flush-mount or semi-flush globe-style fixtures are the right overhead choice. Frosted glass shades diffuse light more evenly than bare bulbs, and a $30 frosted globe set is often the quickest win in the whole bathroom.
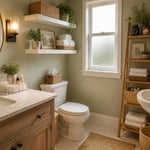
5. Over-Toilet Shelving That Uses Vertical Space You’re Ignoring
There are usually 30 to 40 inches of usable vertical space above a toilet tank that has never held anything in its life. A freestanding over-toilet storage unit colonizes that space without touching the wall — the unit straddles the toilet tank on legs resting on the floor on either side.
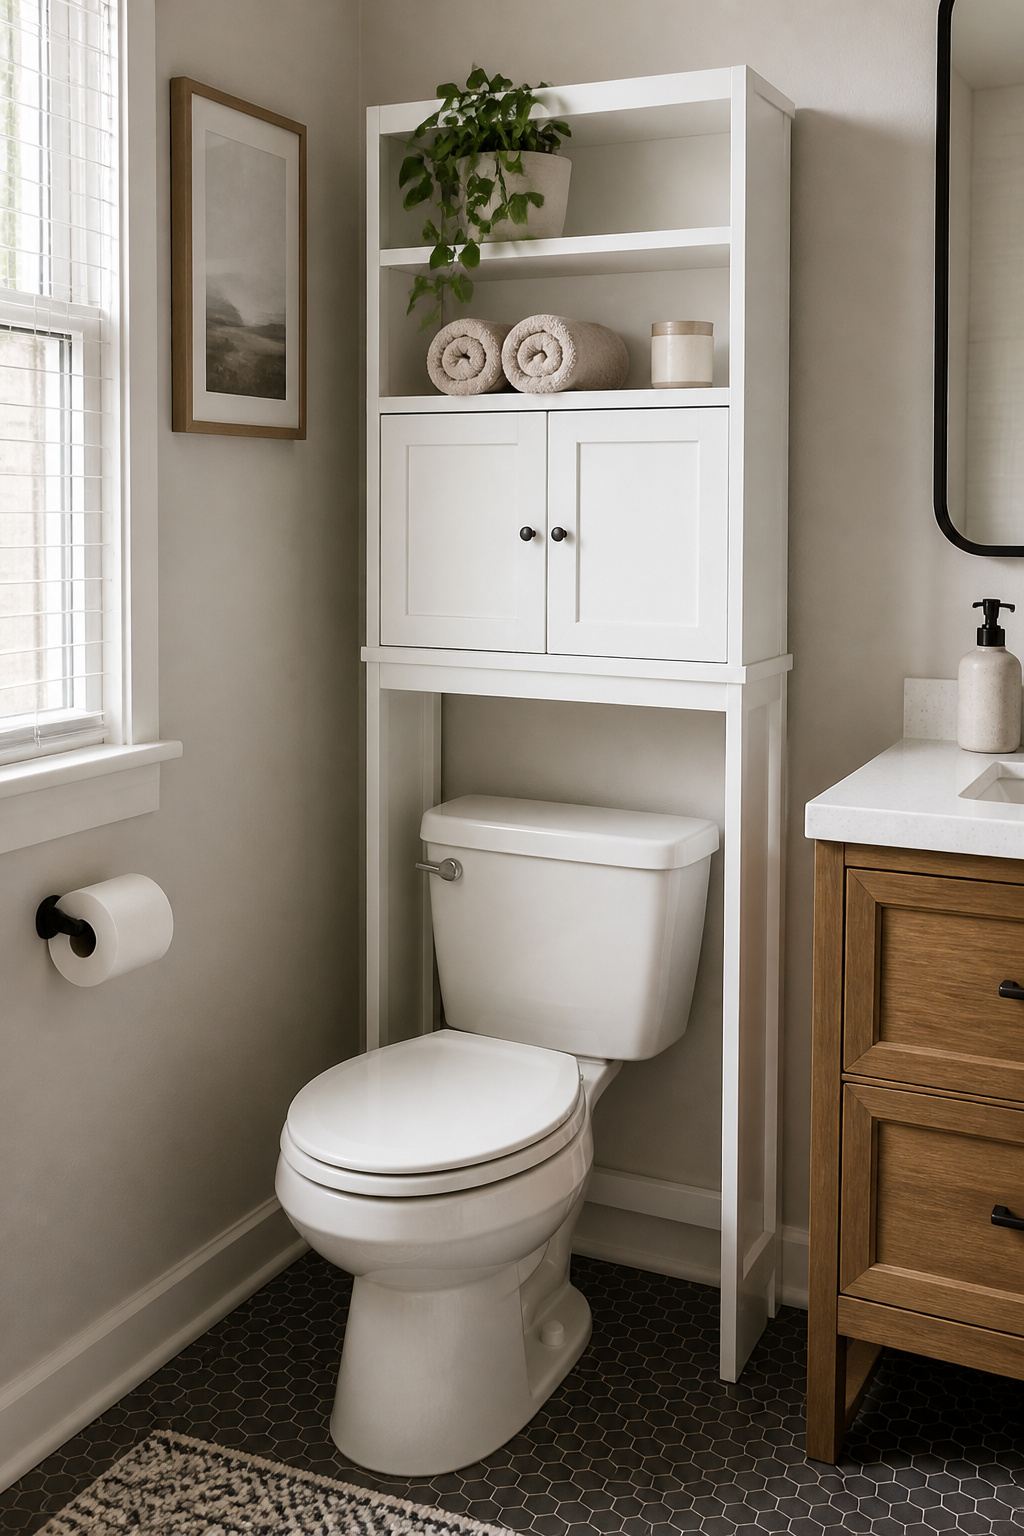
Before ordering, take two measurements: distance from floor to top of your toilet tank (you need at least 32 inches of clearance for the unit to straddle without touching — older models sometimes run taller), and the width of the tank. Most units are designed for 31 to 33 inches. Common dimensions for quality over-toilet towers: 31 to 33 inches wide, 14 to 15 inches deep, 66 to 72 inches tall. P2-grade MDF with melamine surface handles bathroom humidity reliably.
Also check for the genius storage hacks for small bathrooms guide if you want more vertical storage ideas beyond a single unit. Upper open shelves work best with intentional, attractive items: rolled towels in one color, a small plant, a candle in a simple vessel. Lower closed cabinets hide the functional reality — toilet paper, cleaning supplies, spare toiletries. Leave some open shelf space empty. A curated half-populated shelf reads completely differently from one that has been filled to capacity.
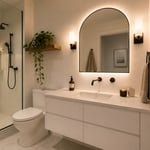
6. Statement Mirror to Double the Visual Depth of Small Bathrooms
A statement mirror is the single upgrade that delivers more visual return per dollar than anything else in a small bathroom. It doesn’t just reflect — it multiplies. The reflective surface bounces both natural and artificial light back through the room and creates perceived depth: the eye reads the mirror plane as the beginning of additional space beyond the wall. In a bathroom without a window, this effect is particularly pronounced.
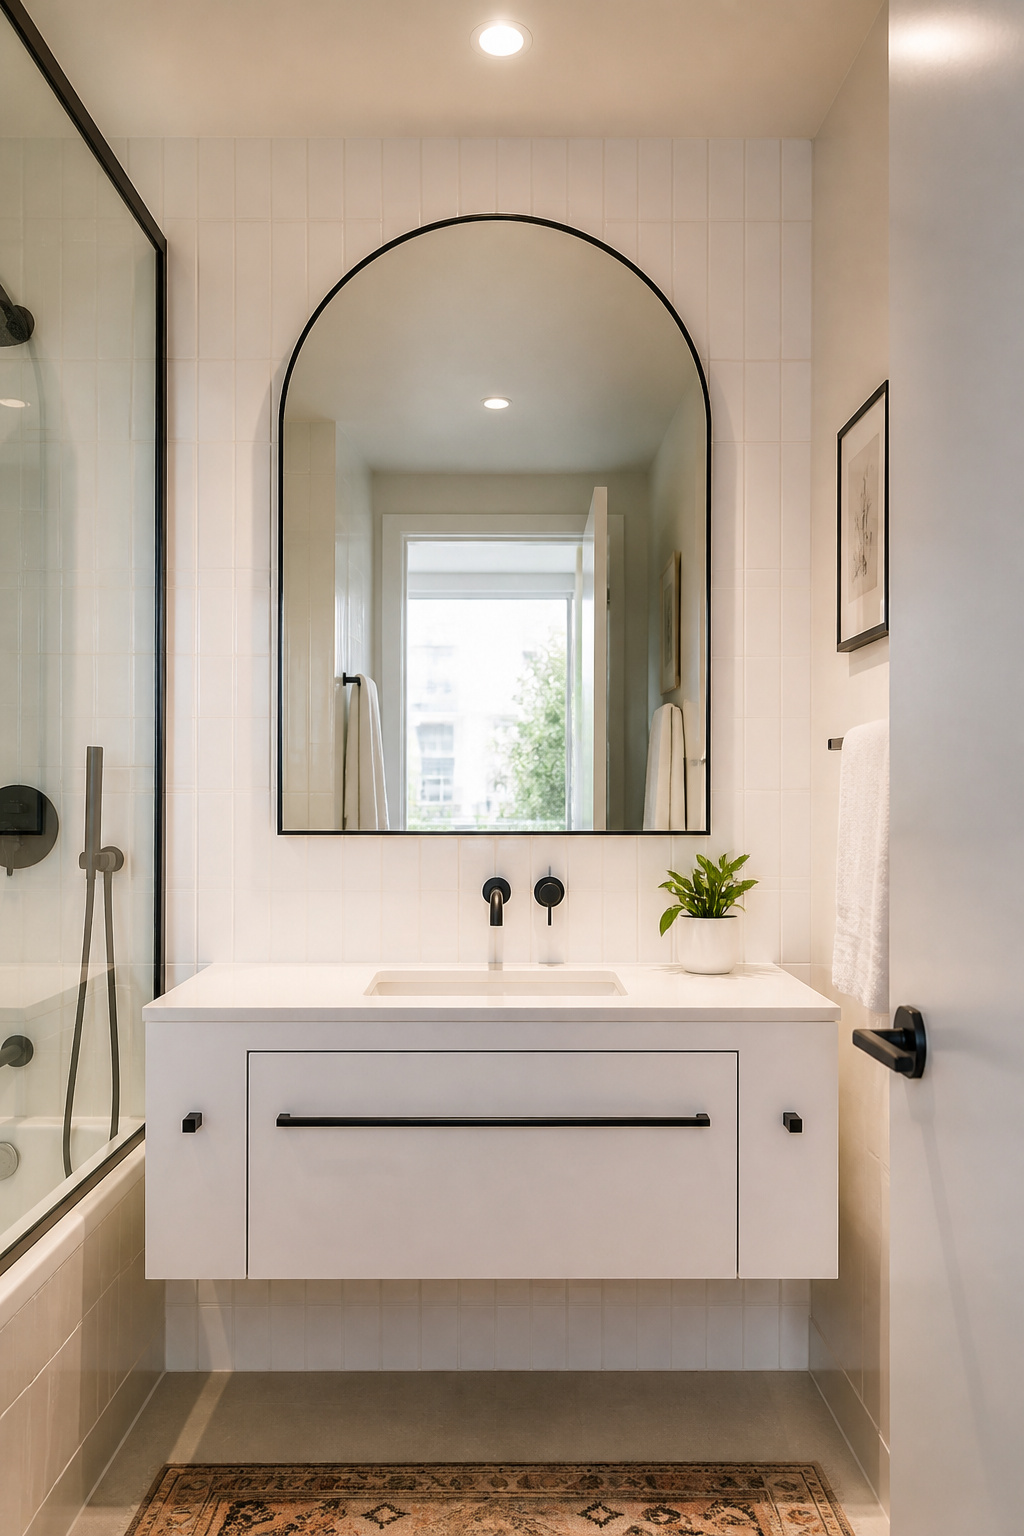
Sizing is where most people undershoot. Mirror width should be 70 to 80 percent of the vanity width, or 2 to 4 inches narrower than the vanity cabinet on each side. A frameless mirror can push slightly larger because the glass surface visually recedes into the wall rather than adding a decorative border. For height: a taller mirror draws the eye upward and makes the ceiling feel higher than it is.
Frame Styles: What Each One Communicates
Frameless stays clean and modern, maximizes the reflective area, and works in nearly any aesthetic — the safest default for a rental bathroom. Black metal frames are sharp and contemporary but add visual weight, so size down slightly from the maximum. Arched frames are genuinely having a moment in apartment interiors and for good reason: the curve softens the hard geometry of a tiled rectangular space. Wood frames bring warmth and texture, working especially well against cold tile in bathrooms styled toward boho, rustic, or Japandi sensibilities.
For renters, heavy-duty adhesive strips handle mirrors up to a specific weight — always check the mirror’s listed weight against the strip’s rating. A leaner mirror propped against the vanity backsplash skips the mounting question entirely. There is a full breakdown of sizing and frame options in this guide to best mirrors for small bathroom illusions if you want to compare styles side by side.
7. Rainfall Showerhead That Feels Luxurious Without Plumbing Work
Most fixtures in a rental bathroom — the vanity, the toilet, the tile — are permanent, structural, and beyond reach. The showerhead is different. It screws onto a standard threaded pipe, and swapping it for a rainfall head is a 20-minute project that requires an adjustable wrench and plumber’s tape. No plumber, no permit, no landlord negotiation.
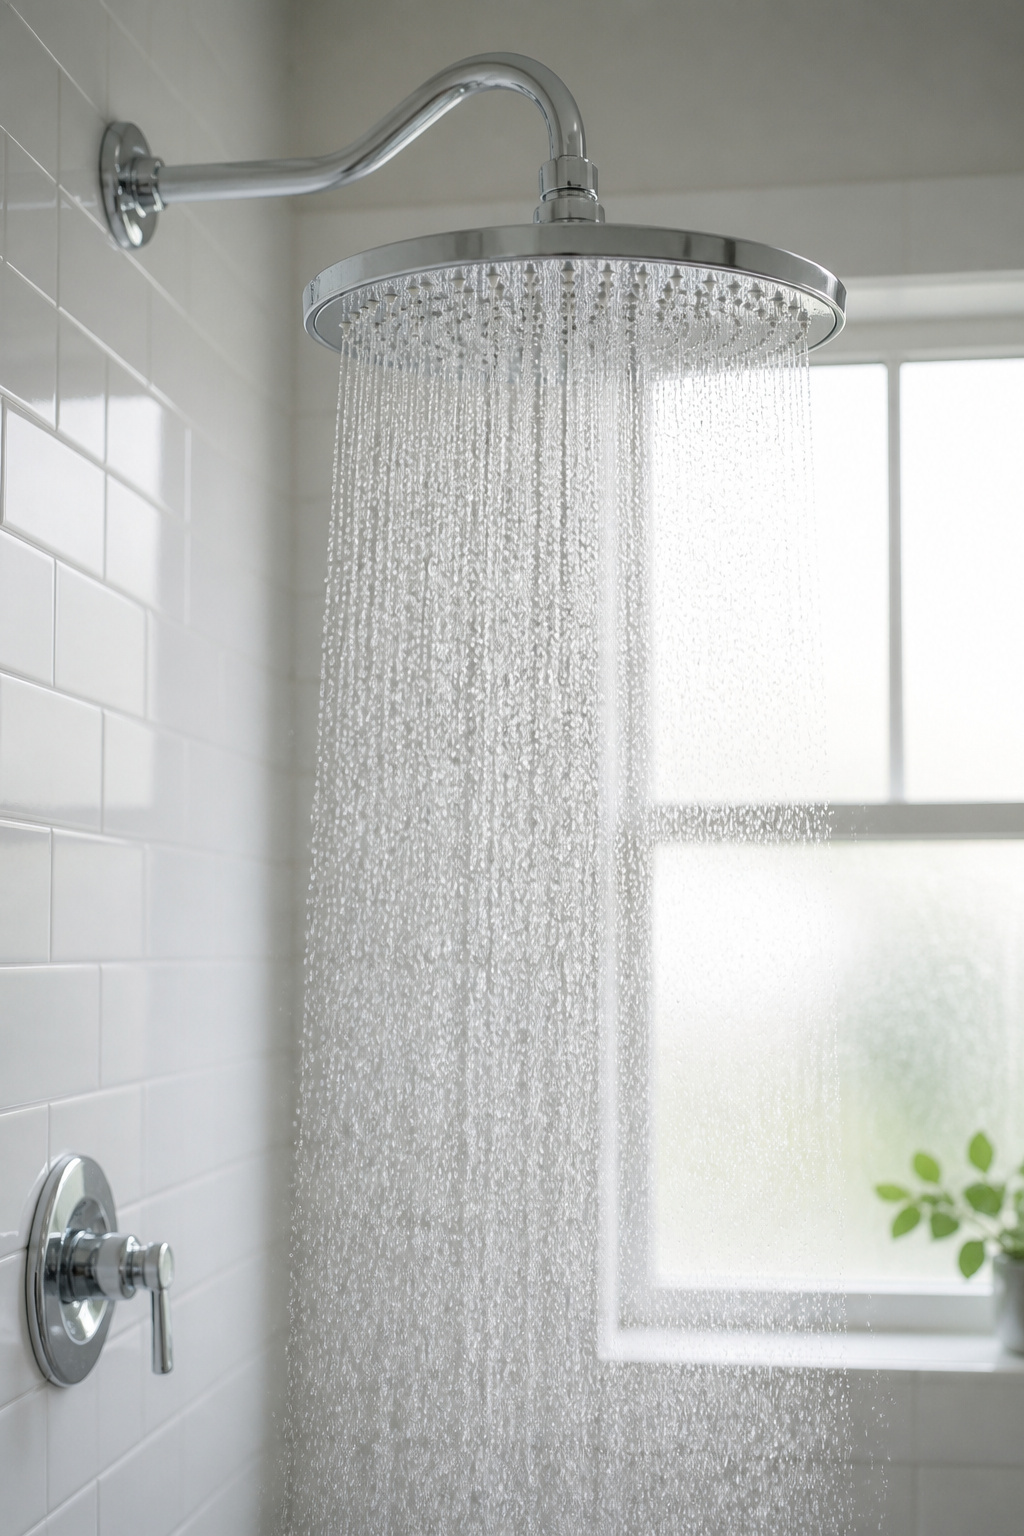
Ceiling-mount rainfall heads require capping the existing wall pipe and running a new line through the ceiling — a real plumbing project most renters can’t pursue. Wall arm extensions are the answer: they thread onto the existing shower arm, extend overhead by 6 to 18 inches, and position the rainfall head directly above rather than at an angle. An adjustable arm lets you dial in both height and reach.
Before ordering, check your building’s water pressure. Rainfall heads work best above 40 PSI. In older buildings with known low pressure, look for a high-pressure rated head or pair a standard head with a pressure-boosting arm — low pressure through a wide rainfall head produces something closer to a light mist than a proper shower. The federal maximum is 2.5 GPM; California’s is 1.8 GPM. Quality heads in the 1.75 to 2.5 GPM range are easy to find.
For the installation: wrap the arm threads with 2 to 3 layers of Teflon tape, hand-tighten first, then snug with the wrench. Choose stainless steel or solid brass arm construction — chrome-plated plastic corrodes at the joints within a year in a humid shower. Read through more ideas in this bathroom shower ideas guide if you’re thinking about the shower as a whole.
8. Walk-In Shower Conversion for Studio and One-Bedroom Layouts
A tub-to-shower conversion is the most significant upgrade in this guide — and the most selective one. It makes obvious sense for a single adult or couple in a studio or one-bedroom apartment who uses the tub for storage more than bathing. It makes much less sense if the apartment has only one bathroom and a future occupant might need a tub.
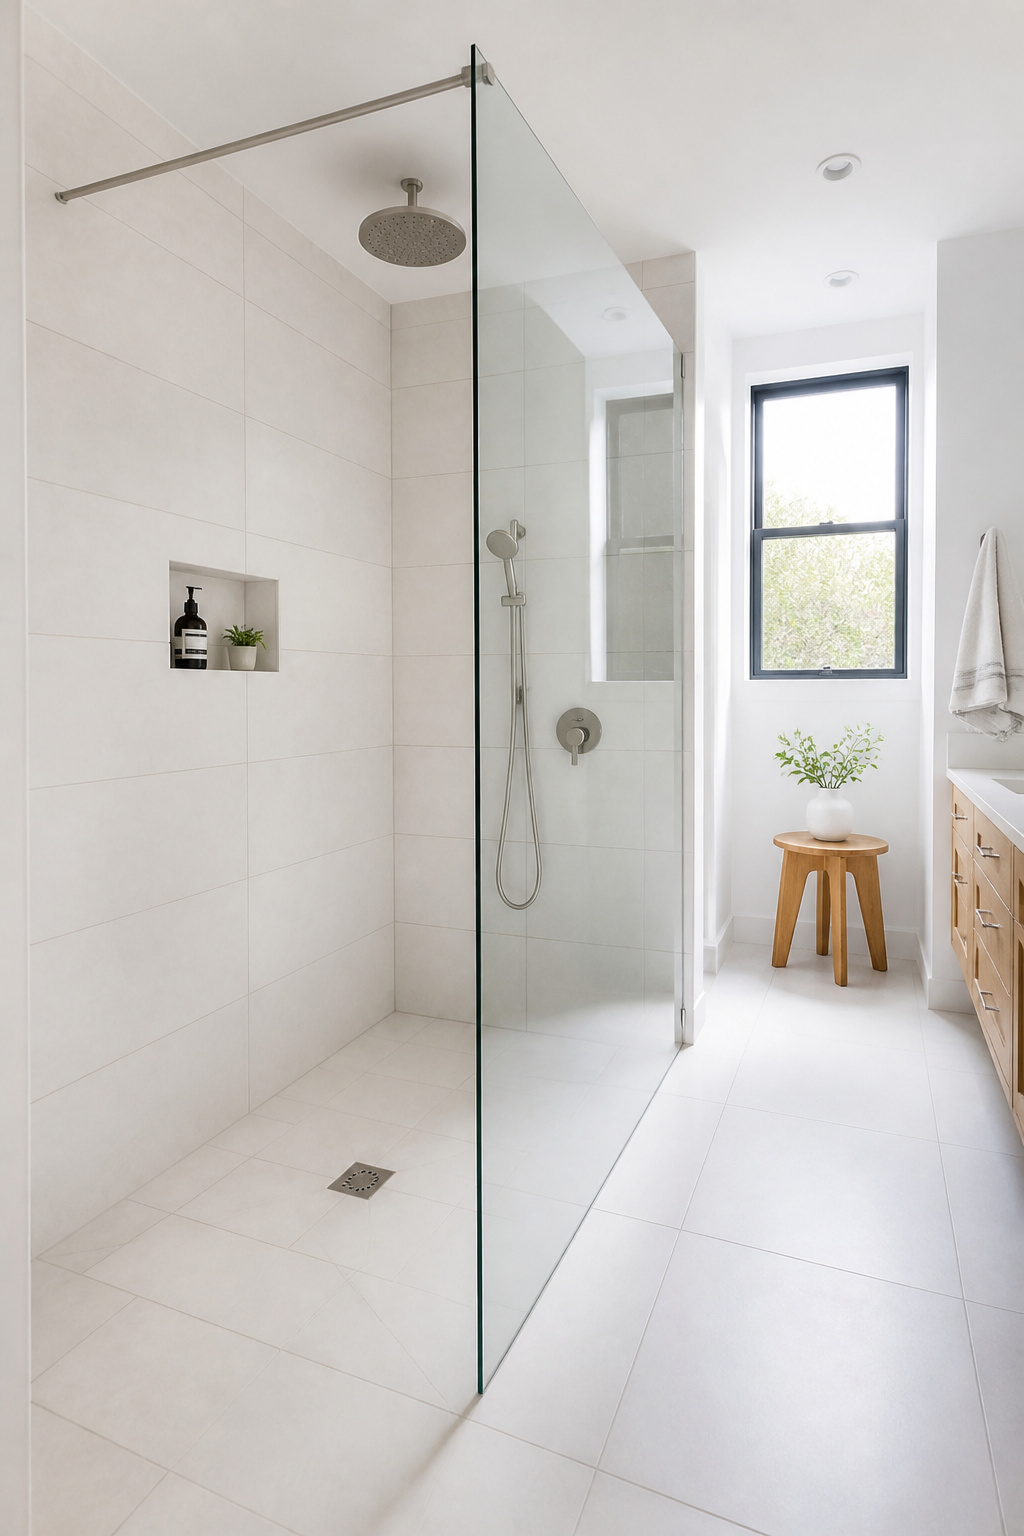
Assuming the circumstances align, the space gain is real. A standard 5-foot tub occupies roughly 25 square feet including surround clearance. A compact walk-in shower can occupy as little as 16 to 18 square feet — recovering 7 or more square feet that a small apartment bathroom feels acutely.
The cost range is wide: a basic conversion with prefabricated surround runs $1,200 to $3,000 with a contractor. Custom tile and curbless entry push toward $8,000 to $12,000. The curbless design is worth the additional subfloor cost if the budget allows. Removing the step-over curb eliminates one of the most common causes of bathroom falls — a genuine accessibility benefit, not just an aesthetic choice. What requires a contractor: anything involving moving the drain, repositioning valves, or modifying the subfloor. Don’t skip the waterproofing membrane — it’s the step that determines whether water stays inside the shower or eventually destroys the subfloor.
9. Subway Tile Ideas to Brighten Any Apartment Bathroom
Subway tile has stayed relevant across more than a century of interior design because it solves problems at reasonable cost — it’s bright, versatile, and reads as finished. What’s changed is the scale options available, and a deeper understanding of how much grout color determines the overall effect.
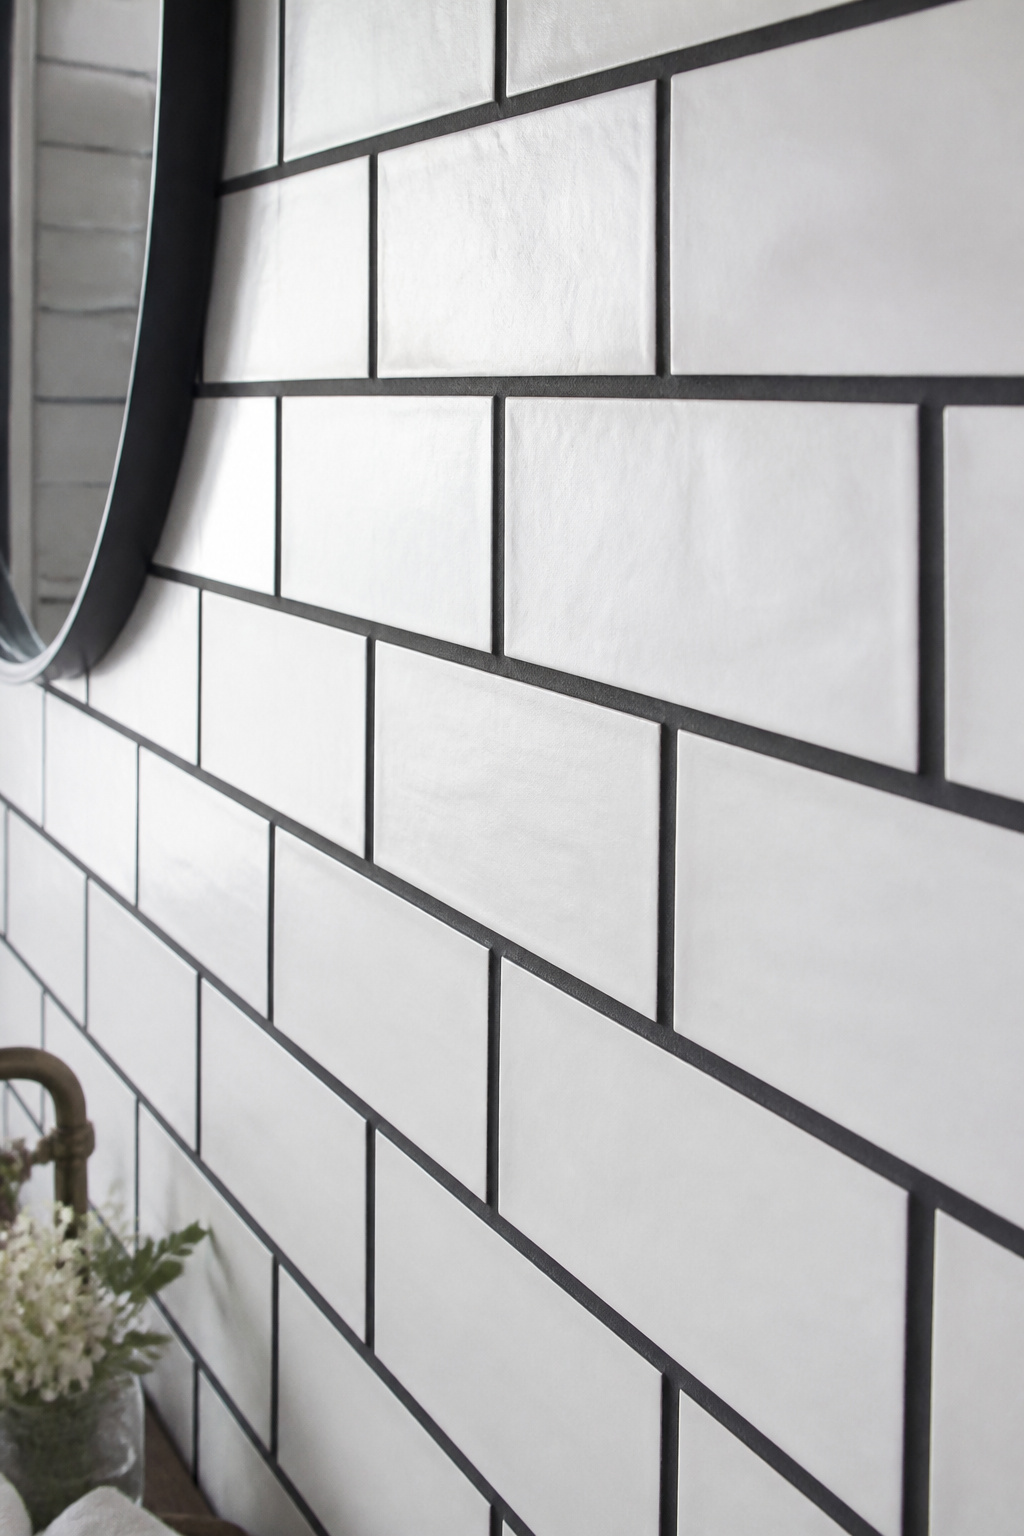
The classic 3×6 format still works, especially in bathrooms under 40 square feet where its proportions match the room’s scale. Going larger — a 4×12 or 4×16 format — reduces grout lines by 40 to 60 percent, creating a sleeker surface that reads as more expensive and more spacious. In bathrooms above 40 square feet, the larger format is worth the slightly higher material cost.
Grout color is the design decision that changes the tile’s entire character. White or light grey grout blends tiles into a clean, traditional surface. Dark grout — charcoal or graphite — outlines each tile as a deliberate graphic element and is substantially easier to keep clean. Matching grout to tile color minimizes the grid pattern almost completely, making the wall read as a nearly seamless surface — the most space-expanding approach of the three.
For renters, Smart Tiles peel-and-stick subway tiles are the current quality standard. The Gel-O surface creates realistic depth, passes visual inspection at close range, and is waterproof. Use them on the wall behind the vanity or as a shower surround accent.
10. Frameless Glass Shower Door for an Open, Airy Feel
A shower curtain cuts a small apartment bathroom roughly in half. The eye stops at the curtain plane and the room feels divided — the shower becomes a separate enclosure rather than part of the bathroom. A frameless glass door removes that visual wall entirely. The shower reads as continuous with the rest of the room, sightlines carry across the full depth, and the space feels larger without a single square inch having been added.
Frameless glass must carry its own structural load without a perimeter frame, which sets the minimum thickness at 3/8 inch (10mm) tempered glass. Upgrading to 1/2 inch (12mm) gives a noticeably more solid feel when operating the door — the difference between glass that feels adequate and glass that feels like a design choice. Installed cost runs $1,000 to $3,500 nationally, with labor at $300 to $800.
Whatever hardware finish you choose — matte black, brushed nickel, brushed brass — extend it consistently to the towel hooks and other hardware in the room. Three different metals in a small apartment bathroom reads as assembled rather than designed. Maintenance is simpler than it sounds, especially with a hydrophobic coating on the glass. In hard-water areas, this coating is not optional — without it, mineral deposits build faster than you can wipe them away. With it, a 30-second squeegee after each shower handles most of the maintenance.
11. Humidity-Tolerant Plants for Small Apartment Bathroom Walls
Plants in a bathroom are one of those ideas that seem purely decorative but land as something more substantial. In an enclosed space used for a daily routine, the presence of living material changes the quality of the room in a way that accessories don’t replicate. Studies consistently connect indoor plant presence to reduced stress markers and better mood — particularly relevant in a small space you visit every morning before your day starts.
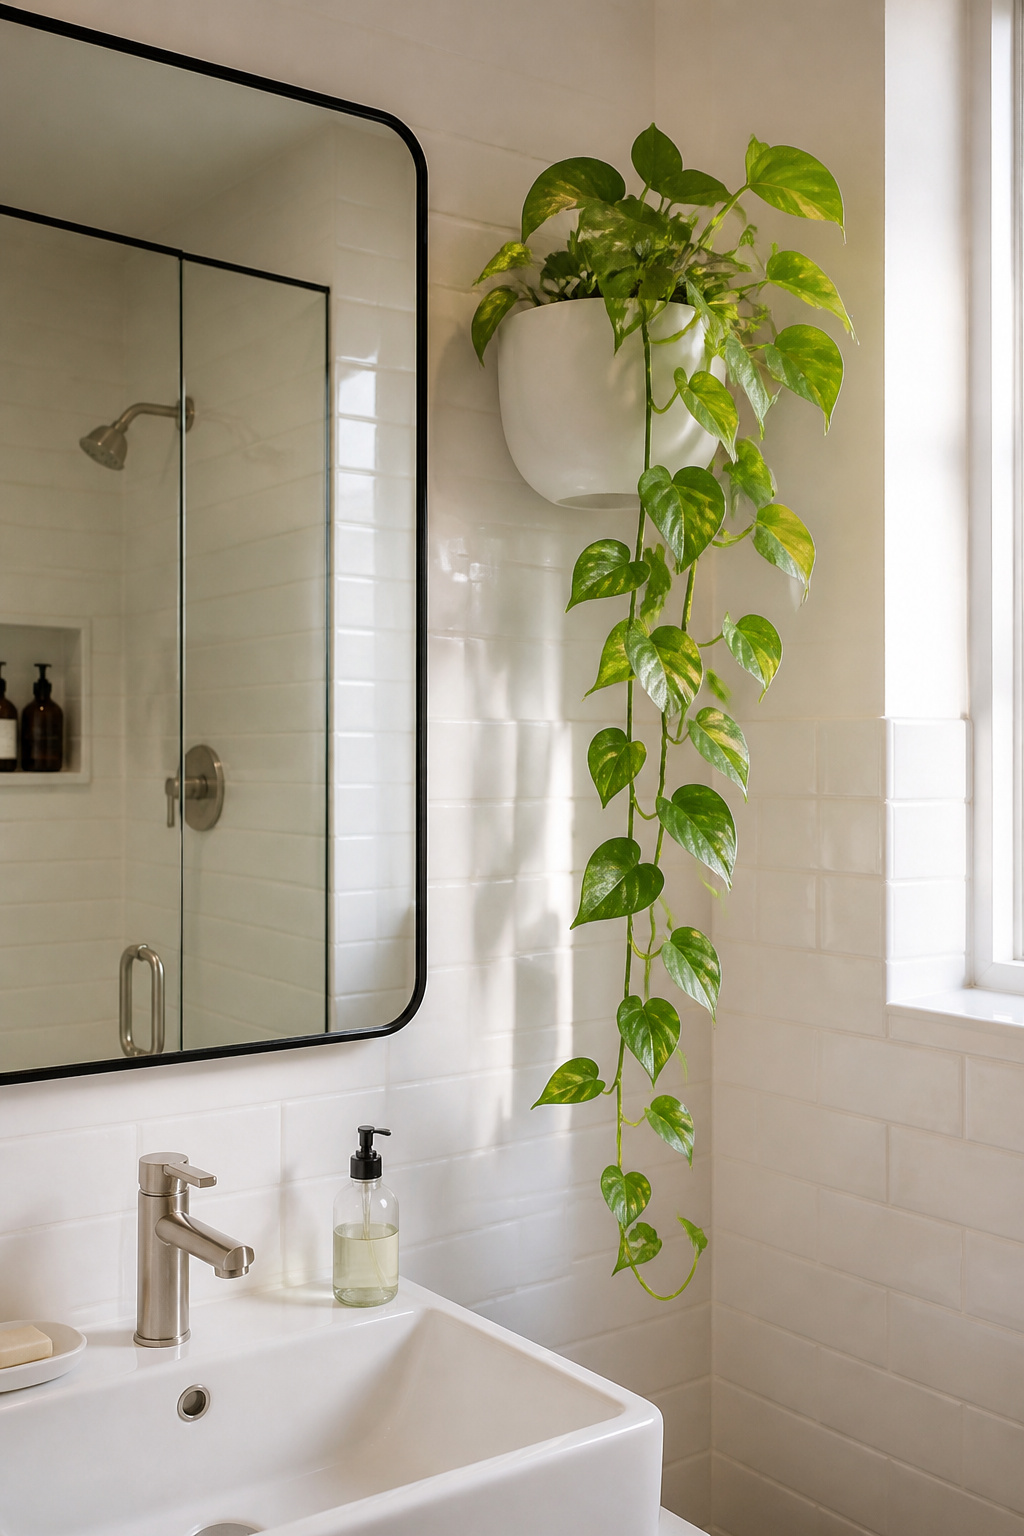
Several plant species actively thrive in bathroom conditions rather than merely tolerating them. Pothos is the most forgiving — it handles low light, adapts to irregular watering, and trails well from a wall-mounted planter. Snake plants tolerate near-windowless conditions, have an upright form that works in tight spaces, and require water only every 2 to 3 weeks. Peace lilies prefer indirect light and benefit from the humid air counting toward their watering needs. ZZ plants store water in their rhizomes and need attention only every 2 to 4 weeks — nearly impossible to kill.
One thing to avoid: placing a cactus or succulent in the bathroom because it seems appropriate next to the towels. They need direct bright light and low humidity. A bathroom is the opposite of their ideal environment and they decline slowly and unpleasantly in it.
Suction cup hooks on smooth tile hold lightweight pots (under 1 lb including soil and pot — check the weight rating). Tension poles similar to corner shower caddies, extended floor-to-ceiling, can hold multiple plants without wall contact. Command picture strips rated for 3 to 5 lbs work on painted drywall for small pots. Apply to a clean, dry surface; press firmly for 30 seconds; wait one hour before loading.
12. Tension-Rod Organizers for the Dead Space Under the Sink
The under-sink cabinet is almost always the worst-organized space in an apartment bathroom. The P-trap occupies the center with a curved pipe that blocks full-width bins, cleaning products stack unstably, and finding anything at the back requires removing everything at the front. The fix costs about $10 and takes five minutes.
Two tension rods at different heights inside the cabinet — one in the back slightly higher than the one in front — create a hanging tier for spray bottles. Hang the bottles from their trigger handles on the rods, elevated off the cabinet floor. This opens a full lower tier of storage that previously didn’t exist, for a $10 investment with near-immediate results.
Pull-out drawers designed for under-sink use (IKEA’s VARIERA bin is the standard option) slide fully out to reveal their contents rather than requiring you to reach blindly to the back. A lazy susan turntable works well for skincare and cleaning products — one rotation brings everything into reach. Use plastic containers near the P-trap, not woven or fabric organizers. If the trap ever leaks, plastic survives; everything else absorbs standing water and creates a separate problem. Leave the P-trap itself accessible — don’t block it with a bin that requires a full cabinet empty-out if the drain needs service.
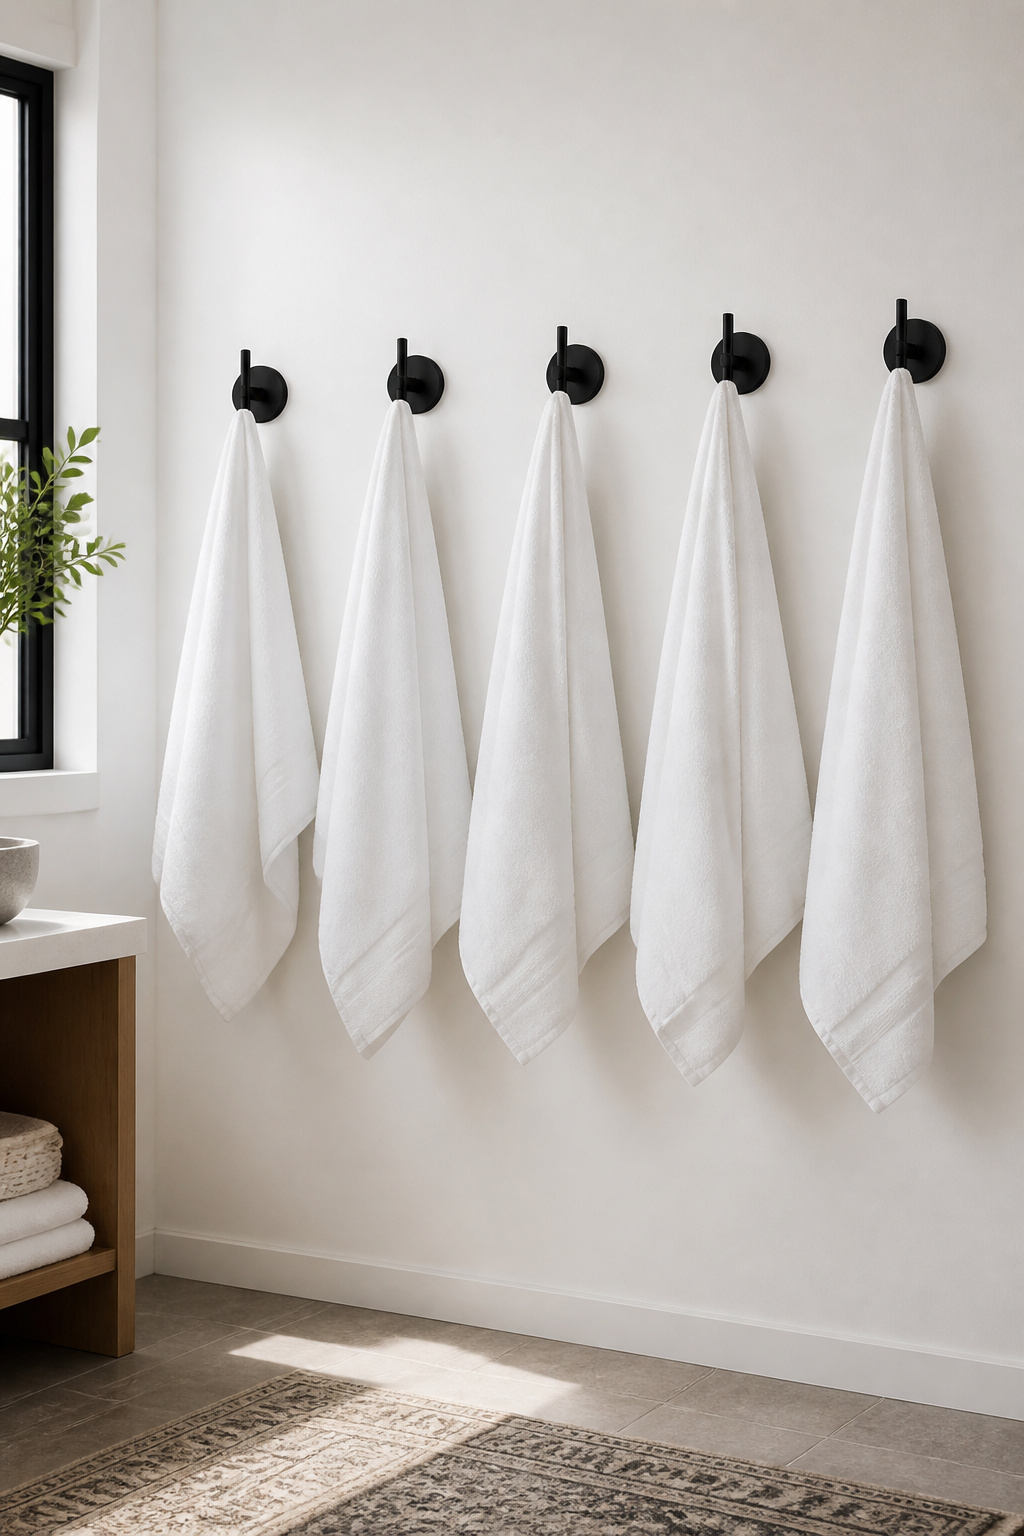
13. Towel Hooks Placed Strategically Instead of Space-Hungry Bars
A 24-inch towel bar holds one fully spread towel. The same 24 inches of wall space holds three to four hooks, each carrying a towel, a robe, or a bag. The capacity math alone makes the case — and the practical argument is even stronger. Hooks are grab-and-go; a bar requires re-folding and careful re-hanging if you want it to look right, which most people skip under morning time pressure.
The trade-off: towels on hooks fold slightly and dry marginally slower than towels spread on a bar. In a small apartment bathroom where the bar would go in an awkward location anyway, this is rarely a deciding factor.
For renters, Command Towel Hooks — specifically the towel hook SKU rated for wet conditions — are the standard solution. The Large Utility Hook handles 5 lbs, which comfortably covers a wet bath towel. Application matters: surface must be clean and completely dry before installing; press firmly for 30 seconds; wait one hour before loading. On painted drywall and smooth tile, both surfaces hold reliably to the full rated capacity.
A horizontal gallery row of four to six hooks at consistent 6- to 8-inch spacing, at 66 to 70 inches from the floor, looks designed rather than improvised. If mixing hardware finishes, keep it to two metals maximum — matte black hooks with a brushed brass towel ring works; three or four different metals in a small bathroom does not.
14. Minimalist Accessories for a Countertop That Stays Serene
Bathroom countertops don’t accumulate clutter — they attract it. The flattest available horizontal surface in the room becomes, over time, a landing zone for everything that hasn’t found a permanent home: the extra soap bar, the skincare product used once a week, the perfume that looks good but belongs in a drawer, the makeup from the morning rush.
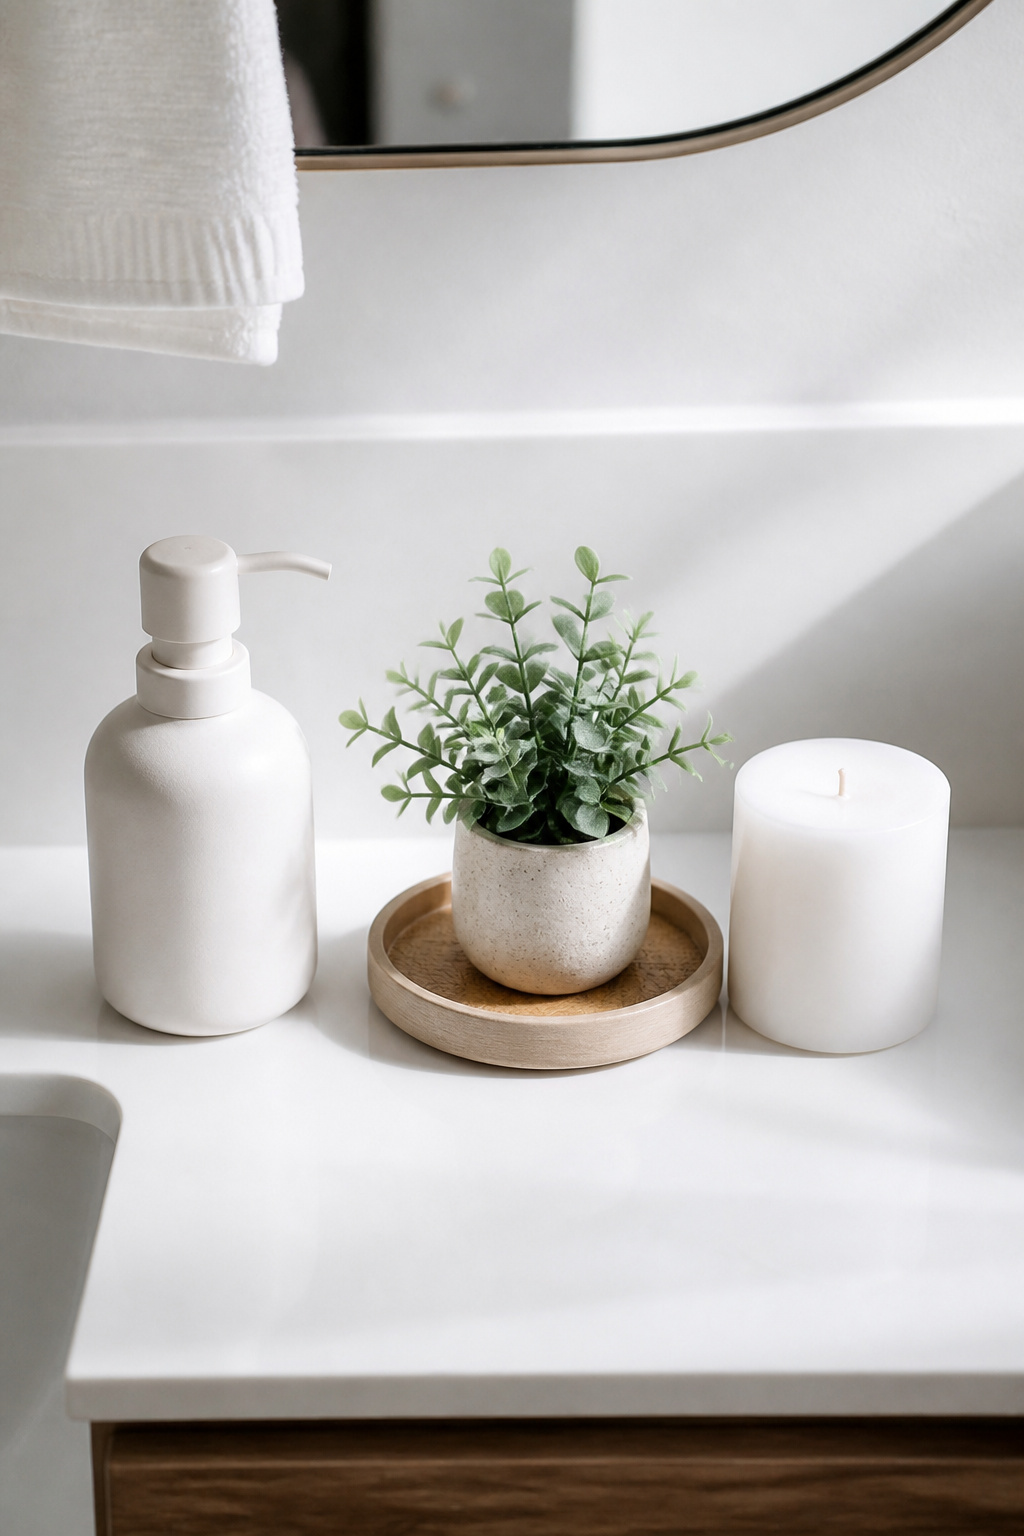
The rule that works: a maximum of three items on the counter at any time. One functional, one decorative, one optional containing element. A soap dispenser earns its position — you use it multiple times a day. A small tray or flat dish anchors the other items visually, giving the grouping a defined home. One decorative element — a small plant, a candle, a simple vessel — completes it. Everything else goes in a drawer.
The test for any current countertop item: would you reach for it if you were staying somewhere unfamiliar? Daily-use items pass. Weekly items generally don’t. Hair tools (dryers, straighteners) create the most chaos; a drawer organizer with a built-in heat-resistant mat gives them a home without taking up counter space. Material coordination across the three items makes the arrangement look intentional — choose a single finish (matte ceramic, brushed brass, natural stone, matte black) and apply it consistently across all three pieces. For a broader application of the same approach, these minimalistic bathroom design ideas translate the principle across the whole room.
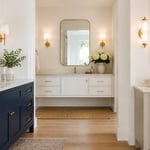
15. Color Palette Ideas for Apartment Bathrooms That Feel Larger
The “light colors only” rule for small apartment bathrooms is widely taught and mostly correct — but it contains an important exception that interior designers use regularly. Understanding when the rule applies and when to break it deliberately gives you more options than the standard advice suggests.
Light Reflectance Value (LRV) is the measurement behind the rule: colors with an LRV above 60 — whites, creams, light greiges, pale sage greens — maximize light bounce in small bathrooms with limited natural light. This is the right default for most apartment bathrooms, and it’s reliable.
When to Break the Light-Colors Rule
The exception is the full-commitment dark palette. Painting every surface — walls, ceiling, trim, door — the same deep color creates what designers call the infinity effect: without visible corners and edges, the room’s boundaries disappear and the space feels expansive rather than contained. This only works with total commitment. A dark wall with a white ceiling reintroduces the corner lines and the box shape. If you’re going dark, go fully dark, and use a single color throughout.
A more accessible middle path is the monochromatic approach: a light tint on the ceiling and upper walls, the base tone at mid-wall, a darker shade for trim or lower accents. The eye reads this as depth and sophistication rather than a single flat wash of color. Warm greige, sage green, and warm white all work well as base colors in apartment bathrooms with limited natural light — LRVs in the 55 to 75 range where they reflect enough light while still reading as a color choice.
For renters who want color without painting at all, peel-and-stick wallpaper has reached a quality level where a single accent wall behind the toilet or vanity reads as a genuine design decision rather than a rental workaround. Apply a pattern on that wall, keep the remaining surfaces neutral, and the bathroom has a design identity that cost $40 and two hours to achieve.
How to Start Transforming Your Apartment Bathroom Today
The most common mistake in bathroom redesign isn’t choosing the wrong tile or the wrong fixture — it’s getting stuck in the planning phase and never improving anything. The apartment bathroom you’re using now is the result of decisions someone else made. The bathroom you want requires a series of decisions you make intentionally, and those don’t have to happen all at once.
If you’re renting with a limited budget, start where visual impact is highest per dollar: a statement mirror, adhesive towel hooks in a gallery row, and a reorganized under-sink cabinet change how the room looks and functions within a single afternoon for under $150 combined. That momentum matters more than a comprehensive plan.
For renters with more to invest: a rainfall showerhead swap, a vertical storage tower, and a few bathroom plants add up to a meaningful transformation in a single weekend. None require contractor involvement, permission, or permanence.
For owner-occupiers with renovation appetite, the frameless shower door and floating vanity deliver the highest long-term return from this list. A tub-to-shower conversion — particularly a curbless one — delivers daily usability improvements and genuinely future-proofs the space against life changes that none of us can fully predict ahead of time. Good design anticipates those changes. That’s the principle that connects accessible design to apartment bathroom ideas in the first place: the bathroom that works well for the most people tends to be the bathroom that works best for everyone.