As a designer who specializes in creating productive and comfortable workspaces, I’ve seen firsthand how the shift to remote work has radically changed our relationship with our homes. The kitchen, once just a place for meals, is now the company breakroom, the after-school homework station, and often the background for our video calls. Its design has a direct impact on our daily productivity and well-being.
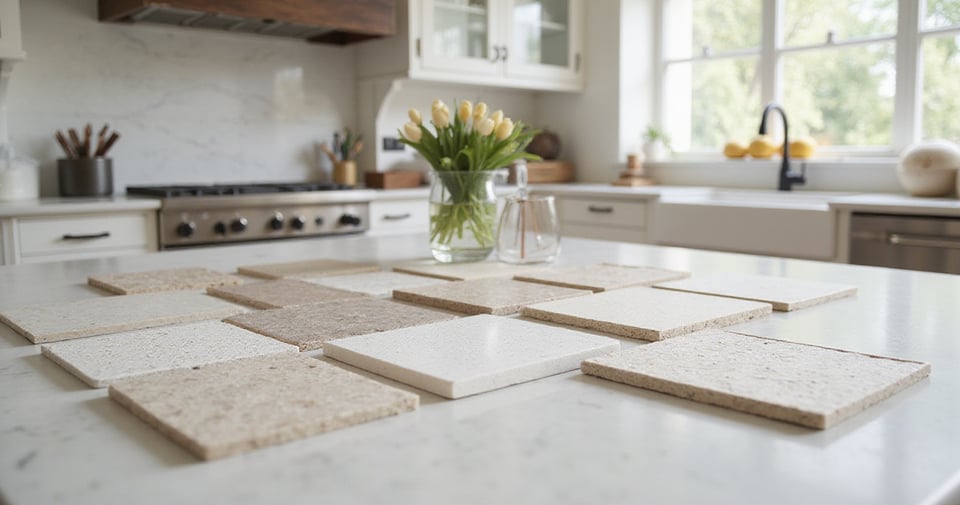
Your kitchen tile isn’t just a surface; it’s a foundational element that affects the room’s light, its ease of use, and even your mood as you grab that third coffee of the day. The problem isn’t a lack of beautiful options—it’s the sheer volume of them. Stepping into a tile store can feel overwhelming. What really matters? And how do you choose something that not only looks great today but also supports your busy life for years to come?
I’m here to cut through the noise. With my background in ergonomics and interior design, I connect every choice back to a practical benefit. These 21 tips are the same systematic approach I use with my clients, designed to help you build a stunning kitchen that works as hard as you do.
1. Set Your Budget Before You Even Think About Shopping
This is the least glamorous part of any design project, but honestly, it’s the most critical. Nailing down a realistic budget is your single best defense against the project creep and financial stress that can sour a renovation. It’s so easy to fall for a tile that’s just a few dollars more per square foot, but that small difference can explode your total cost.
Your budget isn’t just the price of the tile itself. You need to account for the thin-set, the grout, any special trim pieces, and—this is the big one—labor. Professional installation can easily cost as much as the materials, and intricate patterns like herringbone can bump labor costs by 20-40%. I always tell my clients to add a 15-20% contingency fund on top of that. You never know when you’ll uncover a subfloor issue or simply need an extra box of tile for tricky cuts.
Key Budget Considerations:
- Material costs (don’t forget grout and adhesives)
- Labor rates in your area (get a few quotes!)
- Tools and supplies if you’re attempting a DIY
- A 15-20% contingency for the unexpected
Planning this upfront isn’t restrictive; it’s liberating. It narrows your choices and lets you focus on the best options within your reach, preventing heartbreak down the road.
Now that we have the money talk out of the way, let’s talk logistics. The order you do things in matters. A lot.
2. The Golden Rule of Installation: Floor First, Always
In design, sequence is everything. Getting it wrong can cost you dearly in both time and money. When it comes to tile, the rule is simple: install the floor tiles before the backsplash. Always. There’s no debate here.
Floor installation is messy work. It involves hauling heavy boxes, wet saws slinging water and dust, and a ton of foot traffic. All of that is a direct threat to a freshly installed, delicate backsplash. I once had a client who insisted on doing the backsplash first because it was “more exciting.” Sure enough, a dropped trowel led to a cracked glass tile, and the whole mood of the project soured. Installing the floor first also lets your cabinets sit perfectly on the finished surface, which makes getting the countertop height just right a whole lot easier.
Why Floors First is Non-Negotiable:
- It protects your beautiful backsplash from getting wrecked.
- It ensures your cabinets are at the correct, final height.
- It creates a clean, defined space for your backsplash installation later on.
This simple rule reduces rework, protects your investment, and keeps the project moving smoothly. A core principle for a productive space is minimizing friction—and that starts with the build itself.
Speaking of a solid foundation, let’s talk about the workhorse material for your kitchen floor.
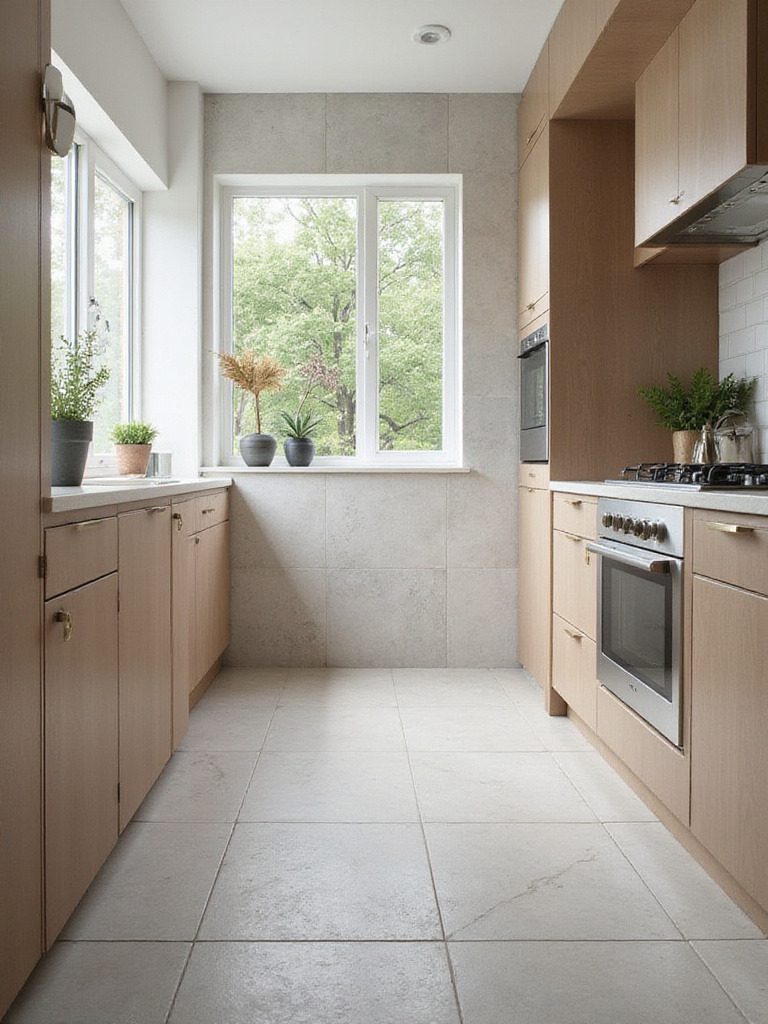
3. For High-Traffic Floors, Porcelain Is Your Best Bet
When it comes to durability in a high-spill, high-traffic environment like a kitchen, porcelain tile is the undisputed champion. It’s a denser, less porous material than standard ceramic, with a water absorption rate of less than 0.5%. What does that mean for you? It means that spilled red wine or splattered olive oil won’t sink in and become a permanent stain.
For kitchen floors, you absolutely must check the PEI rating (Porcelain Enamel Institute). Think of it as a durability score. You need a tile with a PEI rating of at least Class IV, or preferably Class V. This ensures it can handle dropped pans, dragged chairs, and the constant foot traffic of a busy home. Unlike natural stone, porcelain doesn’t need to be sealed, making it a low-maintenance choice that supports a busy, productive life—not add to its chore list.
Porcelain’s Winning Features:
- Nearly waterproof, so it resists staining.
- A Class IV-V PEI rating means it’s tough enough for any kitchen.
- Requires zero sealing or special upkeep.
- Looks great for decades.
It’s a “set it and forget it” solution that provides an incredible return on investment through its longevity and ease of care. A smart, practical foundation for any kitchen.
But what if your heart is set on something a little more organic?
4. Considering Natural Stone? Know What You’re Signing Up For
There is no denying the appeal of natural stone. Materials like marble, travertine, or slate bring a unique, earthy beauty into your home that simply can’t be replicated by a machine. Each tile is a one-of-a-kind piece of art, with veining and imperfections that add incredible depth and character.
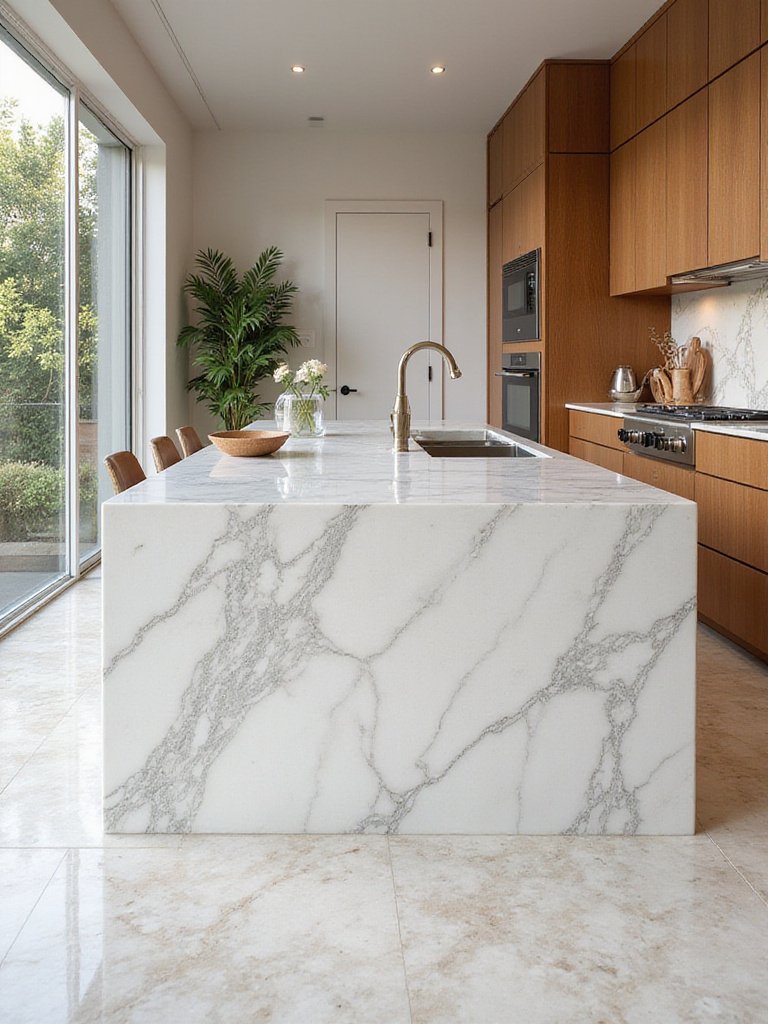
However—and this is a big “however”—let’s be honest about the commitment. Natural stone is porous. It will stain if you don’t seal it regularly. We’re talking at least once a year in a kitchen environment. Are you prepared to add that to your home maintenance checklist? It’s also heavier and often more fragile, meaning professional installation is almost always the right call. The payoff can be huge in terms of aesthetic beauty and home value, but you have to go in with your eyes wide open.
Natural Stone: The Trade-Offs
- Pro: Absolutely unique, one-of-a-kind beauty.
- Con: Requires regular sealing to prevent stains from coffee, wine, or oil.
- Pro: Can significantly boost resale value.
- Con: Higher upfront cost and generally requires a professional installer.
If you love the ritual of caring for your home and see beauty in the way stone patinas over time, it could be perfect. If not, it could become a source of stress.
Now, whether you go with porcelain or stone, there’s one technical spec you cannot ignore for floors.
5. Check the Slip-Resistance Rating. It’s Non-Negotiable.
From an ergonomic and safety perspective, this might be the most important tip in this entire guide. Kitchens are wet, greasy, and prone to spills. Choosing a floor tile without adequate grip is an accident waiting to happen. A slip and fall doesn’t just mean injury; for a professional working from home, it means lost productivity, disruption, and stress.
The key spec to look for is the DCOF (Dynamic Coefficient of Friction) rating. For any area that might get wet, you need a DCOF of 0.42 or higher. That’s the industry standard for safety. Polished, glossy finishes might look sleek, but they become dangerously slippery when wet. Instead, opt for matte, honed, or lightly textured finishes. The trick is to find a surface with enough grip for safety that’s still smooth enough to clean easily.
Safety First:
- Look for a DCOF rating of 0.42+. No exceptions.
- Favor matte or textured finishes over polished ones for floors.
- Test a sample. Splash a little water on it. Does it feel secure underfoot?
This isn’t about aesthetics; it’s about creating a safe and functional environment that supports your well-being.
Once your floor is sorted, the backsplash offers a fantastic opportunity to inject some personality. Let’s start with a classic.
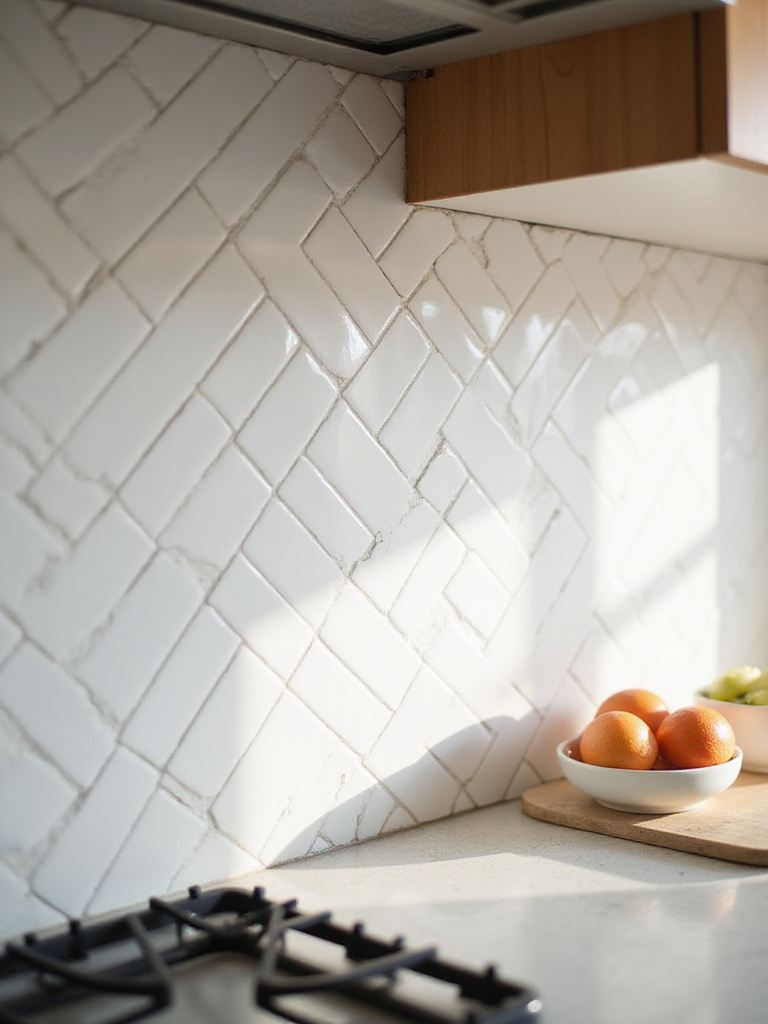
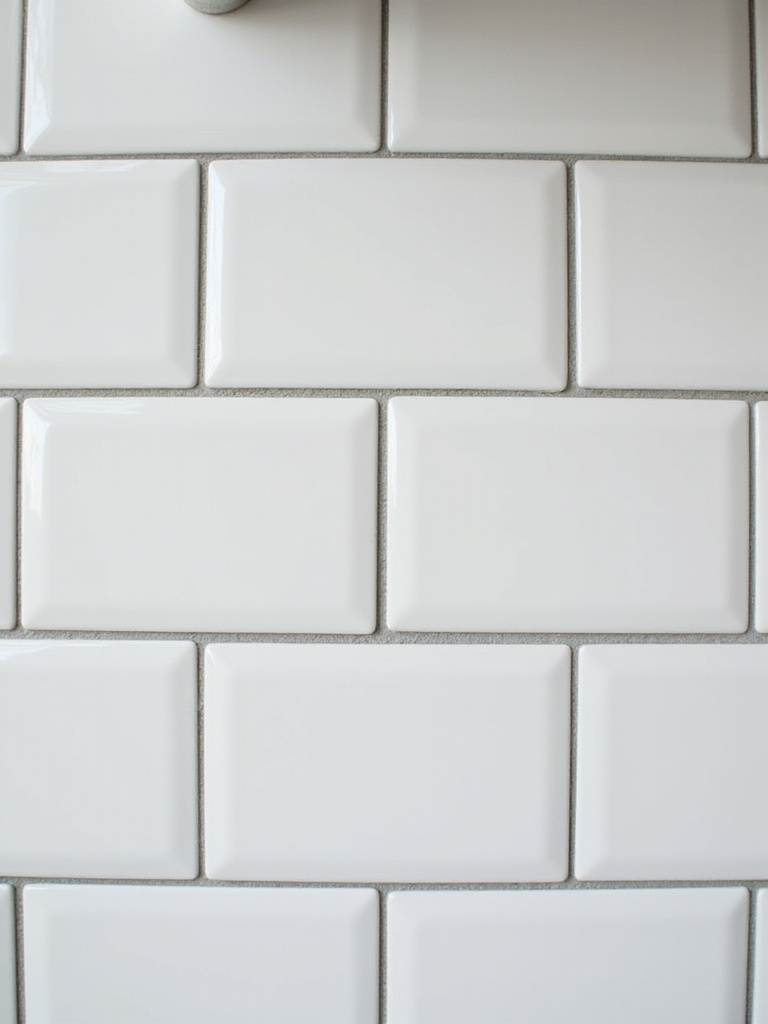
6. Get Creative with Subway Tile Layouts
The humble subway tile is a design chameleon. It’s affordable, widely available, and can look classic or modern depending entirely on how you lay it. The standard horizontal brick-lay is timeless, but don’t stop there.
Changing the pattern is one of the easiest ways to get a custom look on a budget. Stacking the tiles vertically draws the eye upward, making ceilings feel higher—a great trick for smaller kitchens. A herringbone pattern adds a sense of luxury and dynamic movement. Or, a simple horizontal stack (where the grout lines all line up) creates a clean, grid-like look that feels very contemporary. Think of the tile as your building block and the pattern as your unique design signature.
Subway Layout Ideas:
- Vertical Stack: Emphasizes height, feels modern.
- Herringbone: Adds sophisticated energy and movement.
- Horizontal Stack: Clean, graphic, and orderly.
- Classic Brick-Lay: Timeless and versatile.
Just know that more complex patterns require more cuts and more time, so your labor costs will be higher. But for the visual payoff? It’s often worth it.
If you love the idea of dynamic movement, let’s go a step further.
7. Make a Statement with a Herringbone Pattern
The herringbone pattern takes simple rectangular tiles and arranges them into a “V” shape that feels instantly upscale and energetic. It’s a fantastic way to create a focal point behind your range or to give an entire floor a sense of movement, which can make a small kitchen feel wider.
Here’s the deal, though: herringbone is not a beginner-friendly DIY. It demands meticulous planning to get the center lines right and precise cutting to keep the 45-degree angles perfect. You should also plan on ordering about 15-20% extra tile to account for all the angled cuts. For most people, this is a pattern where hiring a professional installer is a wise investment to ensure the final result is stunning, not skewed.
Keys to a Great Herringbone:
- Start with a perfectly plotted centerline.
- Maintain a consistent angle—no exceptions.
- Buy at least 15% extra material for waste from cuts.
- Seriously consider a pro for this one.
When done right, it adds a layer of architectural detail that elevates the entire room.
If herringbone feels a little too traditional for you, let’s talk about making an even bigger splash.
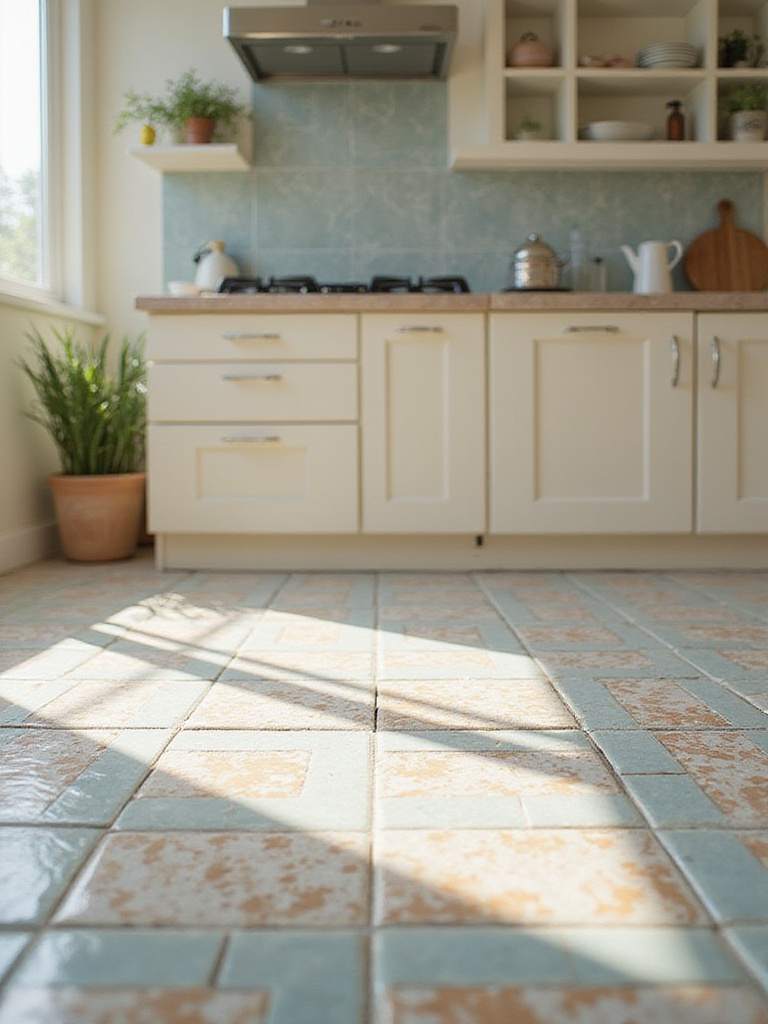
8. Go Bold with Patterned Cement Tiles
Want to turn your floor or backsplash into a work of art? Look no further than patterned cement tiles. These handcrafted tiles bring vibrant, graphic designs and rich colors into your kitchen, instantly infusing it with personality. I think of them like an incredible rug that you never have to worry about tripping over. They can ground a space, add a touch of bohemian flair, or provide the perfect “wow” moment in an otherwise minimalist kitchen.
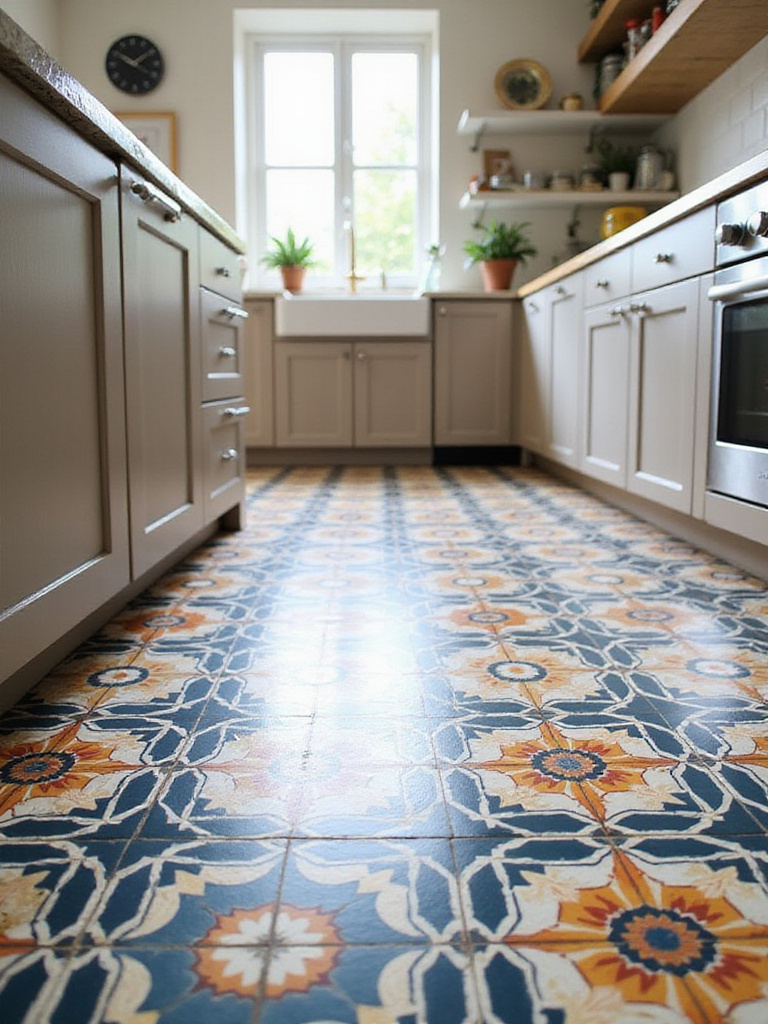
Like natural stone, these beauties come with a care manual. They are porous and absolutely must be sealed before and after grouting to protect their beautiful patterns from stains. I also recommend having them installed by a professional who has experience with cement tile, as they require a different touch than standard porcelain. The upkeep is real, but the result is a truly unique, show-stopping kitchen.
Cement Tile Cheat Sheet:
- Seal before grouting. Seal after grouting. Reseal annually.
- Hire an installer who knows how to work with them.
- Embrace their handcrafted nature; no two tiles are identical.
- Use them to create an unforgettable focal point.
If maintenance isn’t your thing, but you still want some wow-factor, there’s another great option.
9. Maximize Light with a Glass Tile Backsplash
In my corporate design work, maximizing natural light is a top priority for creating positive and productive environments. The same rule applies to your home office—and your kitchen. If your space is small or lacks big windows, glass tiles are your secret weapon. They can reflect up to 80% of the light that hits them, making the entire kitchen feel brighter, bigger, and more open.
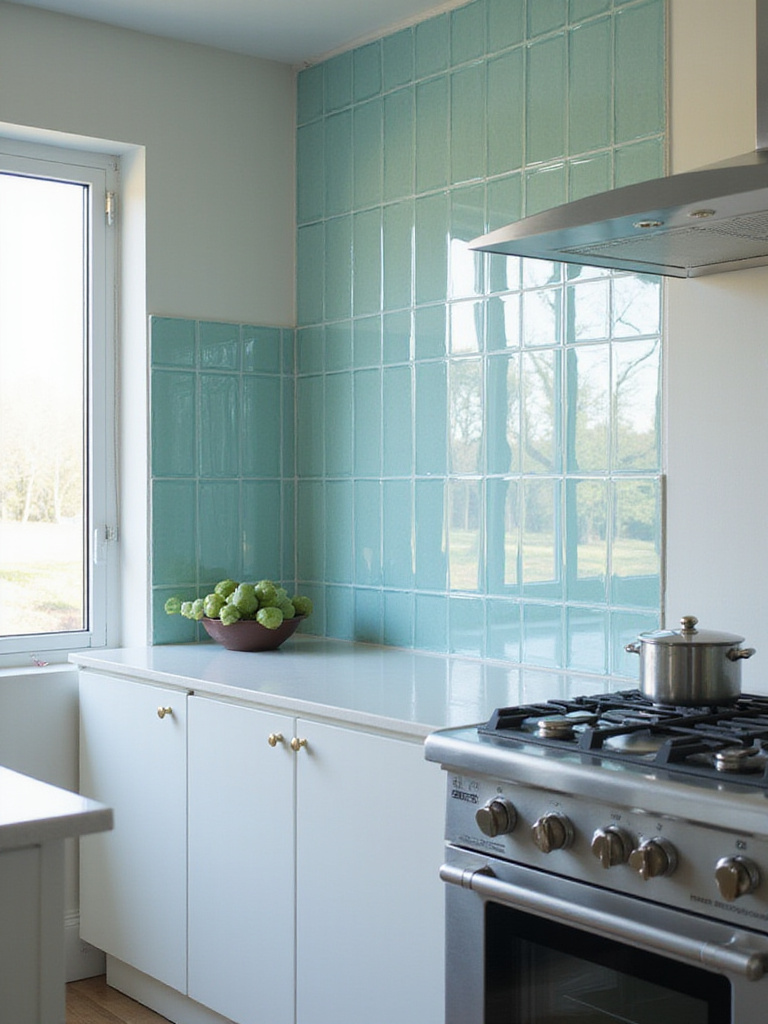
Beyond bouncing light around, glass offers a sleek, modern look and is completely non-porous. Splatters and spills wipe right off, making it incredibly easy to clean. My advice? Choose clear, back-painted, or lightly frosted glass for maximum brightness, and pair it with a grout color that blends in. Using a dark, contrasting grout can create a busy grid effect that defeats the purpose of creating a seamless, light-enhancing surface.
The Power of Glass:
- Reflects light, making the space feel bigger and brighter.
- Non-porous surface means it’s stain-proof and easy to clean.
- Creates a sleek, contemporary feel.
- Pairs well with under-cabinet lighting for extra sparkle.
Think of it as a design tool to amplify the light you already have, lifting the whole mood of the room.
If sleek and modern isn’t your vibe, let’s look at the complete opposite.
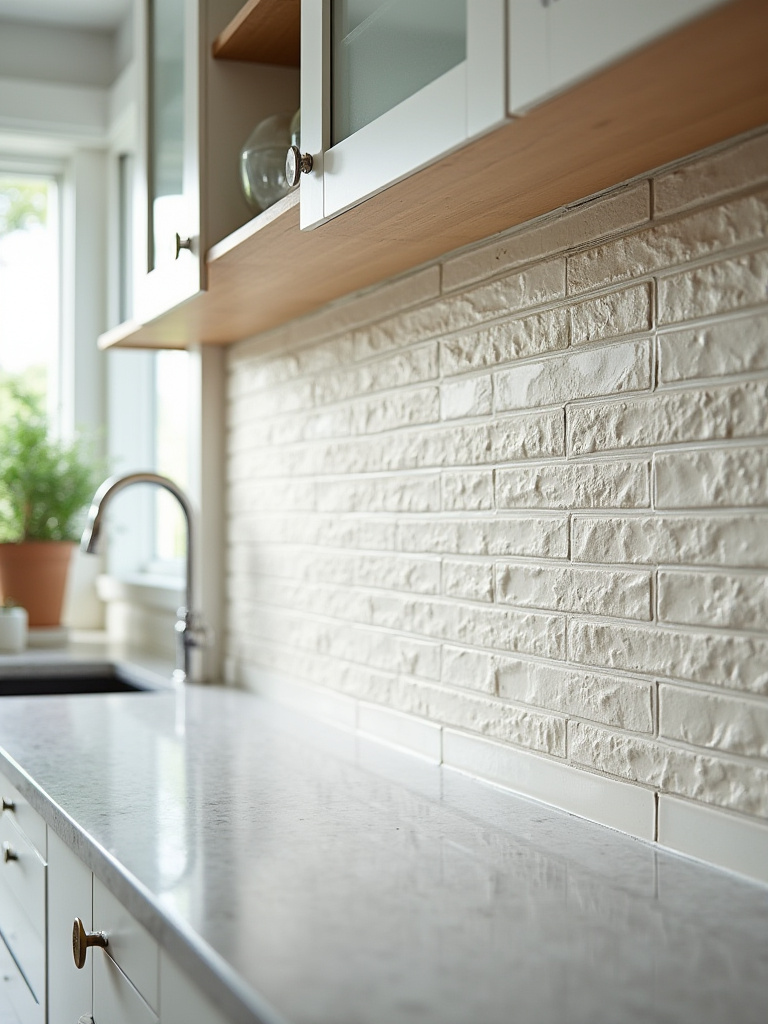
10. Add Soulful Character with Handmade Zellige Tiles
There’s a growing movement away from machine-made perfection and toward things with soul and story. Enter Zellige: traditional, handmade clay tiles from Morocco. They are beloved for their imperfections—the subtle variations in color, the slight irregularities in shape, the undulating surface that catches the light in the most beautiful way.
Installing Zellige is an exercise in embracing wabi-sabi. If you need perfectly straight lines and uniform color, these tiles will drive you crazy. But if you want a wall that feels alive, with texture and shimmering depth, there is nothing else like it. You’ll need to order 15-20% extra to allow for culling and sorting, and it’s essential to hire an installer who understands how to work with their unique character, typically setting them very close together with minimal grout lines.
Embracing Handmade Tile:
- The variations in color and texture are the main attraction.
- The irregular edges create an organic, soulful look.
- Requires an installer experienced with handmade tile.
- The end result is a one-of-a-kind surface full of character.
It creates a kitchen that feels collected and authentic, not just constructed.
What if you just want a little bit of that special texture, without committing to a whole wall?
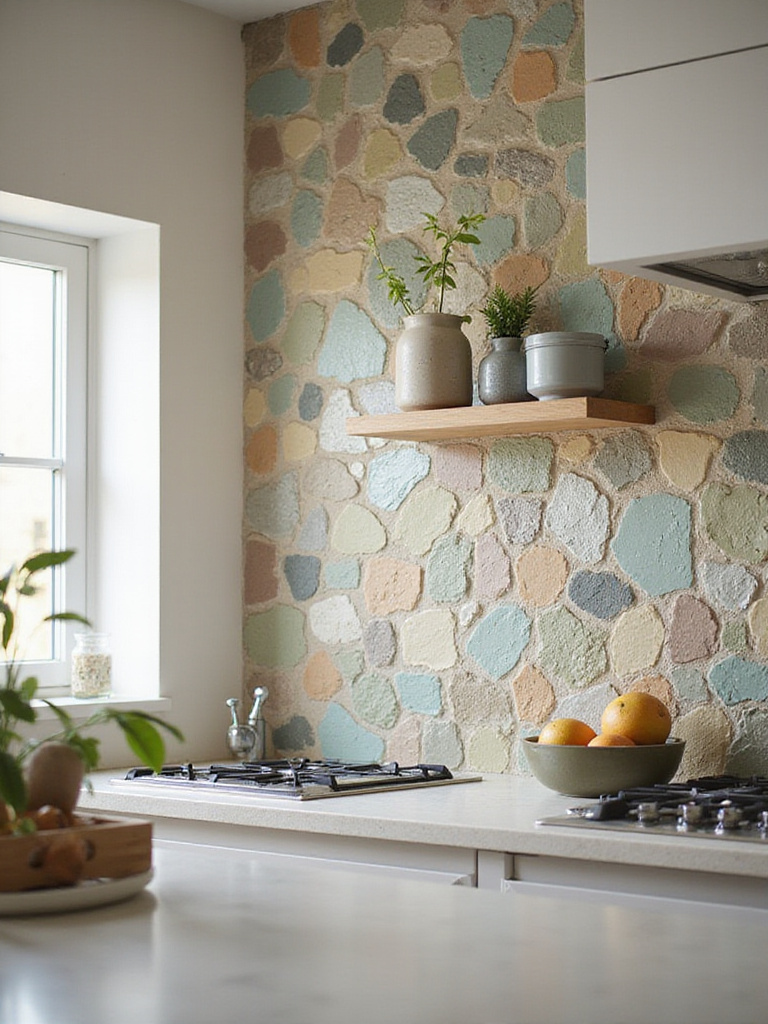
11. Use Mosaic Details for Intricate Accents
Mosaic tiles are like the jewelry of the kitchen. Because of their tiny size, they’re perfect for adding intricate detail, texture, or a pop of color in strategic doses. Using them for an entire wall can sometimes feel visually busy and dated, but as an accent? They’re brilliant.
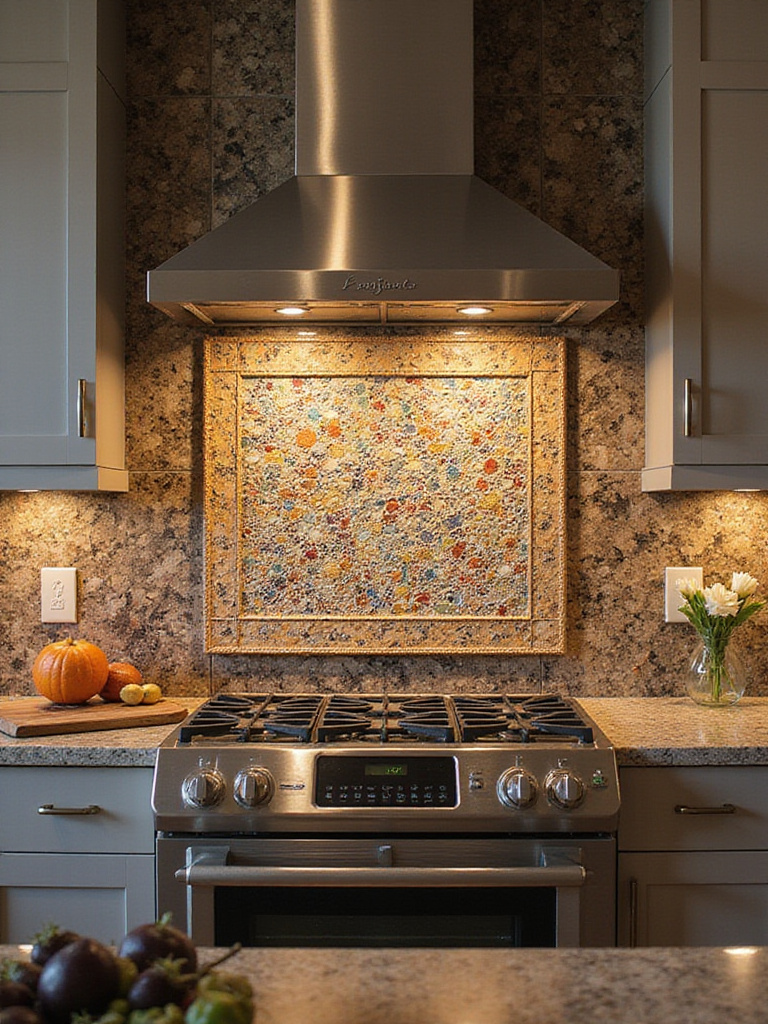
Think about a decorative strip running through a field of simpler subway tile, or a beautiful focal point in a niche behind your range. Many mosaics come on mesh-backed sheets, which makes installation much more manageable. Just be mindful of your grout choice. Contrasting grout will make every tiny tile pop, creating a complex pattern. A matching grout color will unify the surface, emphasizing the overall texture rather than the individual pieces.
Smart Mosaic Applications:
- As an accent strip within a field of larger tile.
- As a framed “tile rug” behind the cooktop.
- To line a recessed shelf or niche.
- As a border for a tile floor.
A little bit of mosaic can go a long way in adding a custom, high-end feel.
Just like with mosaic, a little bit of bold color can have a huge impact.
12. Create a Powerful Focal Point with Bold Color
A blast of bold color can completely transform the energy of your kitchen. But that doesn’t mean you need to tile the whole room in canary yellow. The most effective way to use a strong color is to concentrate it in one area to create a powerful focal point. A vibrant backsplash, a colorful island front, or even a bold floor can anchor the entire room’s design.
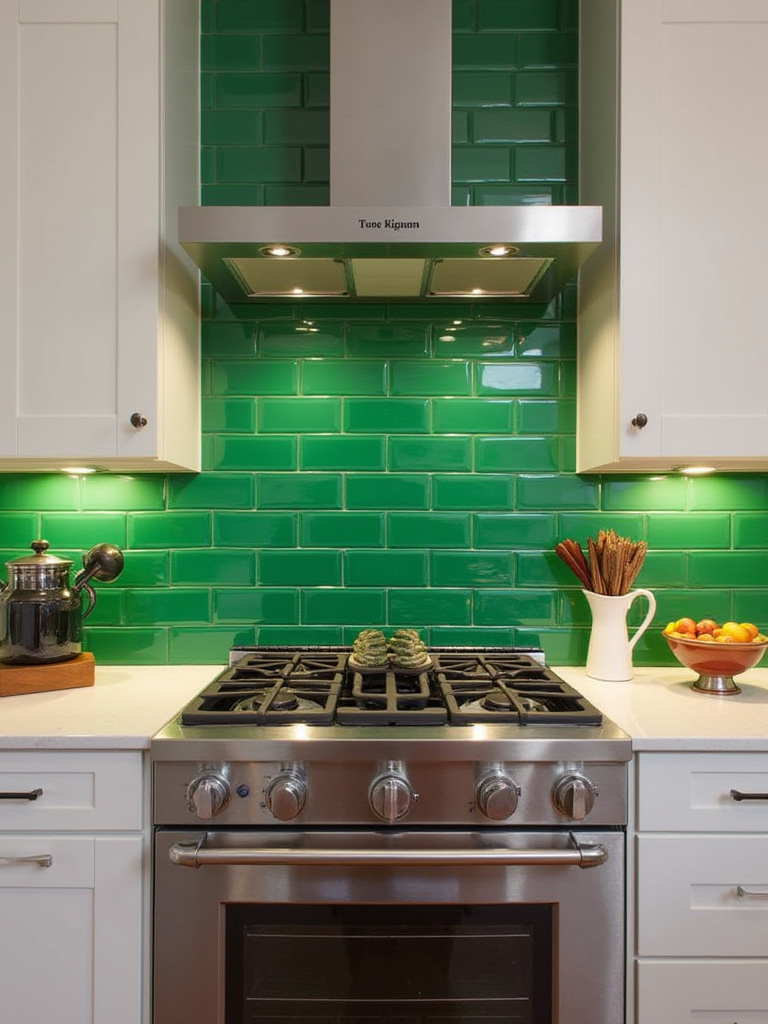
The key is balance. If you go for a bold tile, keep other major elements like countertops and cabinetry relatively neutral. And please, please test samples in your kitchen first. That brilliant blue you loved in the showroom might look totally different under the warm-toned LED lights in your actual kitchen. Observe the samples in the morning, afternoon, and evening to ensure you love the color in all conditions.
Strategic Use of Color:
- Focus on one key area, like the backsplash or island.
- Test color samples in your kitchen’s unique lighting.
- Let the bold tile be the star and keep other elements simpler.
- This is a great way to inject your personality into the space.
It’s your kitchen’s equivalent of a power tie—it adds confidence and personality.
But maybe bold isn’t your style. That’s perfectly fine—in fact, there’s a lot of wisdom in playing the long game.
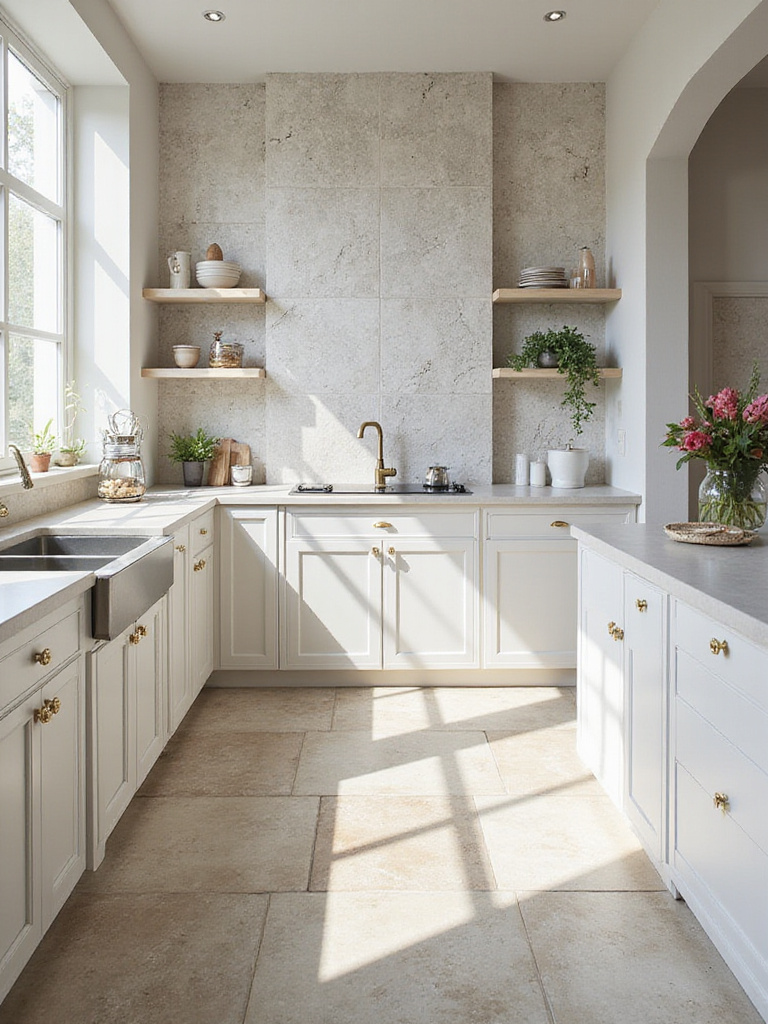
13. Build a Timeless Foundation with Neutral Tiles
Choosing a neutral tile—a soft white, a warm gray, a creamy beige—is one of the smartest, most strategic decisions you can make. It creates a timeless foundation that will adapt with you as your tastes change over the years. You can repaint your walls, change your hardware, and update your accessories a dozen times, and your neutral tile will still look fantastic.
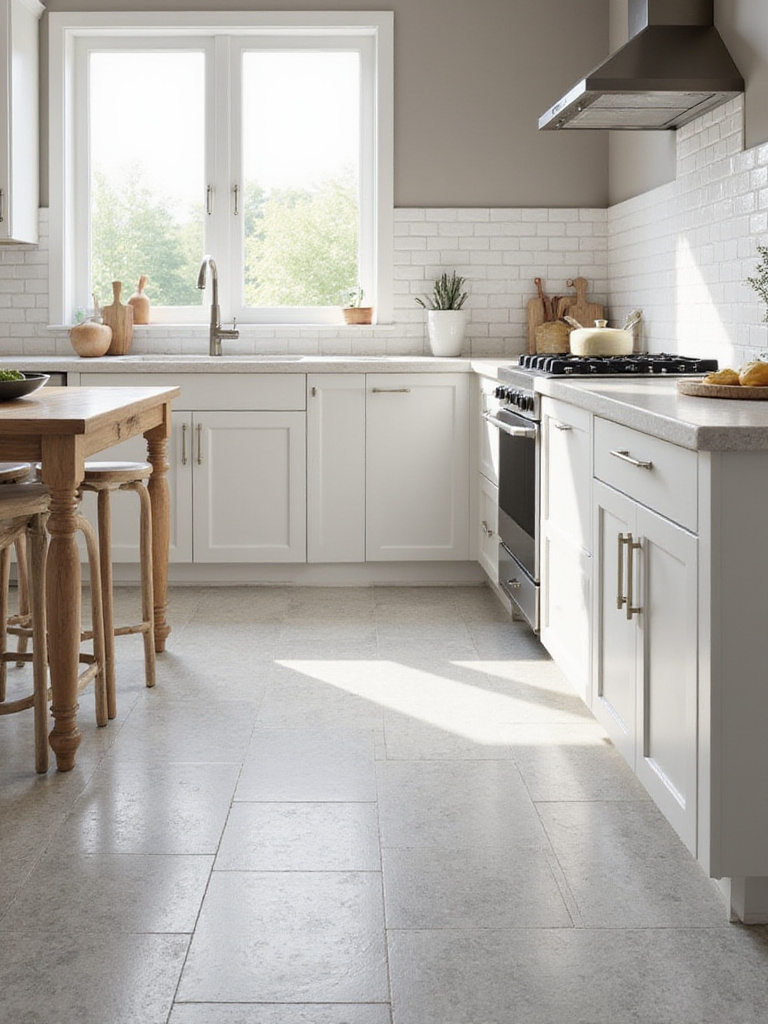
“Neutral” doesn’t have to mean “boring.” You can create tremendous interest within a neutral palette by playing with texture, size, and pattern. Imagine a warm white Zellige tile with its shimmery, uneven surface, or a simple gray subway tile laid in a sophisticated herringbone pattern. The secret is to pay close attention to undertones. Make sure the undertone of your neutral tile (Is it warm/yellow, or cool/blue?) plays nicely with your cabinet and countertop colors.
The Benefits of a Neutral Base:
- Incredible versatility for future decor changes.
- Broad appeal for home resale value.
- Allows you to introduce color through less permanent things like paint and accessories.
- Creates a calm, serene atmosphere—a welcome feeling in a busy home hub.
It’s the ultimate future-proof choice for a major home investment.
And you can make that neutral palette even more interesting by playing with scale.
14. Add Sophistication by Mixing Tile Sizes
Layering different tile sizes and shapes is a designer trick for creating a space that feels custom and thoughtfully composed. Combining large-format floor tiles with a smaller, more textured backsplash, for instance, creates a clear visual hierarchy and breaks up what could otherwise be a monotonous sea of the same material.
The key to making this work is to maintain a sense of harmony. A good rule of thumb is to stick to two, or at most three, different tile shapes or sizes to avoid visual chaos. Often, the easiest way to ensure they look good together is to choose different tiles from the same collection. This way, you know the colors and finishes are designed to coordinate, and you’re just playing with the scale for visual interest.
Guidelines for Mixing Sizes:
- Stick to just two or three different tile sizes/shapes.
- Use tiles from the same manufacturer’s collection for easy color matching.
- Plan your transitions. For example, a larger tile on the floor and a smaller tile on the walls.
- Use a different shape/size to define a specific area, like a mosaic behind the stove.
This layering technique adds depth and sophistication without having to resort to bold colors or patterns.
Now for the detail that can make or break any tile job…
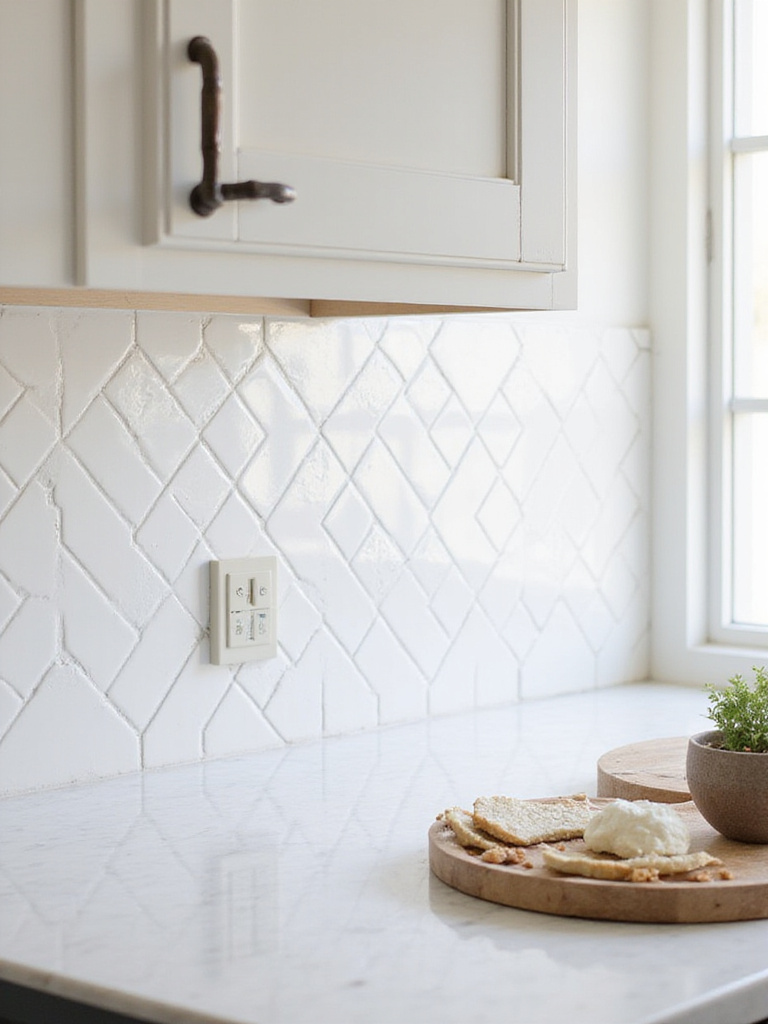
15. Grout Color Isn’t an Afterthought—It’s a Design Choice
I’m telling you, grout color is the most powerful and most underestimated design tool in any tiling project. It completely controls the final look of your wall or floor. Do you want your tile pattern to be the star, or do you want the tiles to blend into a seamless, textured surface? Your grout color makes that decision.
- Contrasting grout (e.g., dark gray grout with white subway tile) emphasizes the shape of each tile and the pattern you’ve chosen. It creates a bold, graphic look.
- Matching grout (e.g., white grout with white tile) makes the grout lines disappear, unifying the surface. This highlights the tile’s texture and finish rather than its geometry.
The biggest mistake I see people make is choosing a grout color from a tiny plastic stick in a brightly lit store. You must get a sample of the actual grout powder, mix a tiny bit with water, and test it next to your actual tile in your kitchen’s light. It’s the only way to know what you’re really getting.
It’s the difference between your tile whispering and shouting.
But the choice of grout isn’t just about color.
16. Choose the Right Type of Grout for Kitchen Durability
This might feel a little technical, but staying with me here is crucial for the long-term success of your kitchen. In a nutshell, there are three main types of grout, and choosing the right one for the job prevents headaches later.
- Unsanded Grout: For tiny grout lines (1/8″ or less). It’s a smooth paste used for delicate tiles like polished marble or glass that could be scratched by sand.
- Sanded Grout: The standard for most installations, used for grout lines wider than 1/8″. The sand adds strength and prevents the grout from shrinking and cracking in a wider joint.
- Epoxy Grout: This is the high-performance option. It’s not cement-based; it’s a resin that is virtually stain-proof and waterproof once cured. It costs more and is trickier to install, but for a backsplash behind a busy stove or a countertop, it is worth every penny.
My advice? For the high-spill zone behind your range, spend the extra money on epoxy grout. You will thank me two years from now when that splashed spaghetti sauce or grease wipes away without a trace.
With our materials selected, let’s talk about another high-impact strategy.
17. Use an Accent Wall to Define Kitchen Zones
In so many modern homes, the kitchen bleeds into the dining room which flows into the living area. For those of us working from home, this can create a feeling of never really leaving the “office.” Using tile to create an accent wall is a powerful way to visually define different zones without putting up physical walls.
Think about tiling the entire wall behind your range, from countertop to ceiling. This clearly delineates the “cooking zone.” Or perhaps you have a small breakfast nook or coffee bar area—tiling that wall in a different pattern or color sets it apart as a distinct “break zone.” This kind of visual zoning helps your brain transition between tasks and moods, a core concept in productive workspace design. It subtly tells you, “This is the space for cooking,” and “This is the space for relaxing.”
Ideas for Zone Definition:
- A floor-to-ceiling tile treatment behind the stove.
- A uniquely tiled wall in a breakfast nook.
- A different tile to create a “wet bar” or coffee station area.
- It helps guide the eye and establishes order in an open floor plan.
This is how you use design to add function beyond just the surface level.
And speaking of function…
18. Prioritize Surfaces That Are Easy to Clean
A core principle of good design is that it should reduce friction in your life, not create more of it. Your kitchen is a workspace. It needs to be functional. And nothing is less functional than a surface that’s a nightmare to clean. It adds another task to your already full plate and becomes a source of low-grade, constant stress.
So, prioritize cleanability. This means choosing tiles with low porosity, like porcelain, which won’t absorb stains. It means favoring surfaces that are smooth or only lightly textured, as heavy textures can trap grease and grime. And it means thinking about the grout. As we discussed, even the most stain-resistant tile can look dingy if it’s surrounded by stained, discolored grout. An easy-to-clean kitchen gives you back time and mental energy—two of the most valuable resources for any busy professional.
The Cleanability Checklist:
- Is the tile porous? (If so, are you committed to sealing it?)
- Is the surface smooth enough to wipe down easily?
- Have you chosen a high-performance grout (like epoxy) for high-spill zones?
Give yourself the gift of an easy-to-maintain space. You deserve it.
This next tip is one I repeat like a mantra to all my clients.
19. You MUST Test Tile Samples in Your Actual Kitchen Light
I cannot stress this enough: Tile colors can look dramatically different in your home than they do under the harsh fluorescent lights of a showroom. Your kitchen has its own unique lighting ecosystem—a mix of natural light from windows, overhead ambient light, and focused task lighting under the cabinets. Each one can change the way a tile’s color and finish appear.
Bring home at least three to four sample tiles of your top choices. Don’t just lay them on the counter. Prop them up vertically where your backsplash will go. Look at them in the morning with the natural sunlight streaming in. Look at them in the afternoon. Then, turn on all your artificial lights in the evening and see how they change. That “perfect” warm gray in the store might suddenly look muddy or even greenish under your warm LED bulbs. This five-minute test can save you from a five-thousand-dollar mistake.
The Proper Testing Protocol:
- Bring actual tile samples (not just photos) into your space.
- View them in the exact spot they’ll be installed.
- Observe them at different times of day—morning, noon, and night.
- Turn on all your kitchen lights to see how they look.
There’s no substitute for seeing it in place.
While you’re testing, it’s a good idea to have an eye on what’s current.
20. Know the Trends, But Don’t Be a Slave to Them
It’s smart to be aware of current kitchen design trends to ensure your renovation feels fresh and modern. Right now, large-format tiles (like 24×48 inches) are popular for creating a clean, nearly seamless look with minimal grout lines. We’re also seeing a lot of texture—those handmade Zellige tiles, fluted tiles, and other tactile surfaces are huge. And vertical stacking of subway tiles continues to be a go-to for a contemporary twist.
My advice is to balance trend-forward choices with timeless design. Maybe use that super-trendy tile in a smaller, more contained area like the backsplash, while keeping your more expensive and permanent floor tile classic and neutral. This way, your kitchen won’t feel dated in five years. You get the fresh, modern feel without locking yourself into a look that has a short shelf life.
Current Trends to Watch:
- Large Format Tiles: For a clean, expansive look.
- Texture & Handmade Finishes: For organic, authentic character.
- Vertical Layouts: A modern take on classic shapes.
- Earthy, Nature-Inspired Colors: Think muted greens, warm terracottas, and deep blues.
Now for the final, crucial decision.
21. Know When to Hire a Professional Installer
With all the DIY content out there, it can be tempting to tackle a tile installation yourself to save money. And for a simple project, like a small, straight-set backsplash with ceramic tile, a skilled DIYer can get great results. But it’s critical to be honest about your skill level and the complexity of the job.
When does it pay to hire a pro?
- When you’re using expensive materials (like natural stone or handmade Zellige), where a mistake would be costly.
- When you’ve chosen a complex pattern like herringbone that requires precision.
- When you’re using large-format tiles, which are heavy and require a perfectly flat substrate.
- Frankly, when you value your time and sanity. A botched job can cost more to fix than hiring a pro from the get-go.
Think of it as an investment in the final outcome. Professional installers have the right tools, the experience to handle unexpected issues, and the skill to deliver a flawless finish that will make your entire kitchen look more valuable and polished.
Your Kitchen Is More Than Just a Room
Your journey to a new kitchen is about much more than picking out pretty tiles. It’s about making a series of smart, intentional choices that result in a space that supports your life. It’s about balancing your aesthetic vision with the practical realities of your budget, your timeline, and your tolerance for maintenance.
By thinking systematically—from budget and layout to materials and installation—you move from being overwhelmed to being empowered. Remember to connect every choice back to how you live. Will this surface reduce your daily stress or add to it? Will this design energize you in the morning or feel chaotic?
Take your time. Test your samples. And don’t be afraid to invest in professional help where it counts. You are making a significant investment not just in your home’s value, but in the quality of your daily life. The result will be a kitchen that you don’t just love to look at, but that truly works for you and your family for years to come.