There’s a specific kind of defeat that comes from staring at a bathroom that hasn’t changed since the previous owners — the brass fixtures, the pink tile, the builder’s mirror bolted crookedly to a hollow-core door — and then Googling “bathroom renovation cost” and closing the tab immediately. The numbers look brutal. But a full gut renovation is only one way to transform a bathroom, and it’s rarely the right one for most households. A thoughtful budget bathroom remodel, done in stages with a clear sense of which changes deliver the most impact, can turn a dated space into one that functions better, feels genuinely refreshed, and holds up for years. After more than a decade working with homeowners on inclusive, long-term design — spaces that need to work well for a wide range of ages, abilities, and daily routines — I’ve found the same fifteen changes coming up again and again as the ones that actually move the needle.
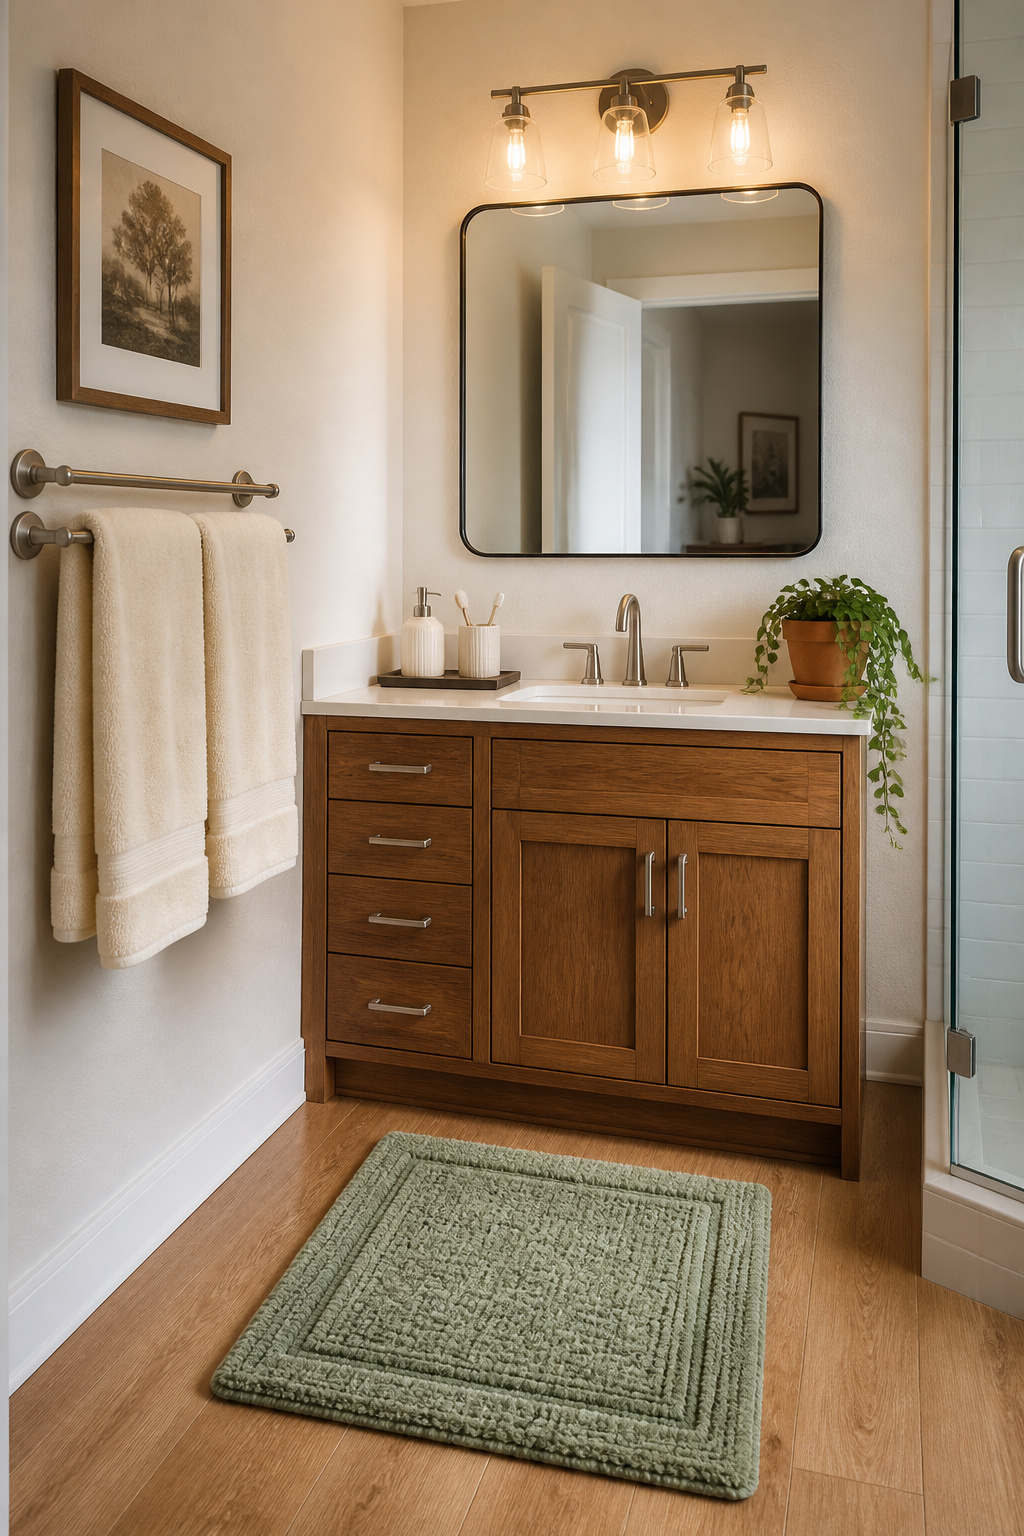
1. Swap the Vanity: A Budget Bathroom Remodel Starting Point
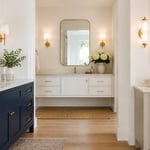
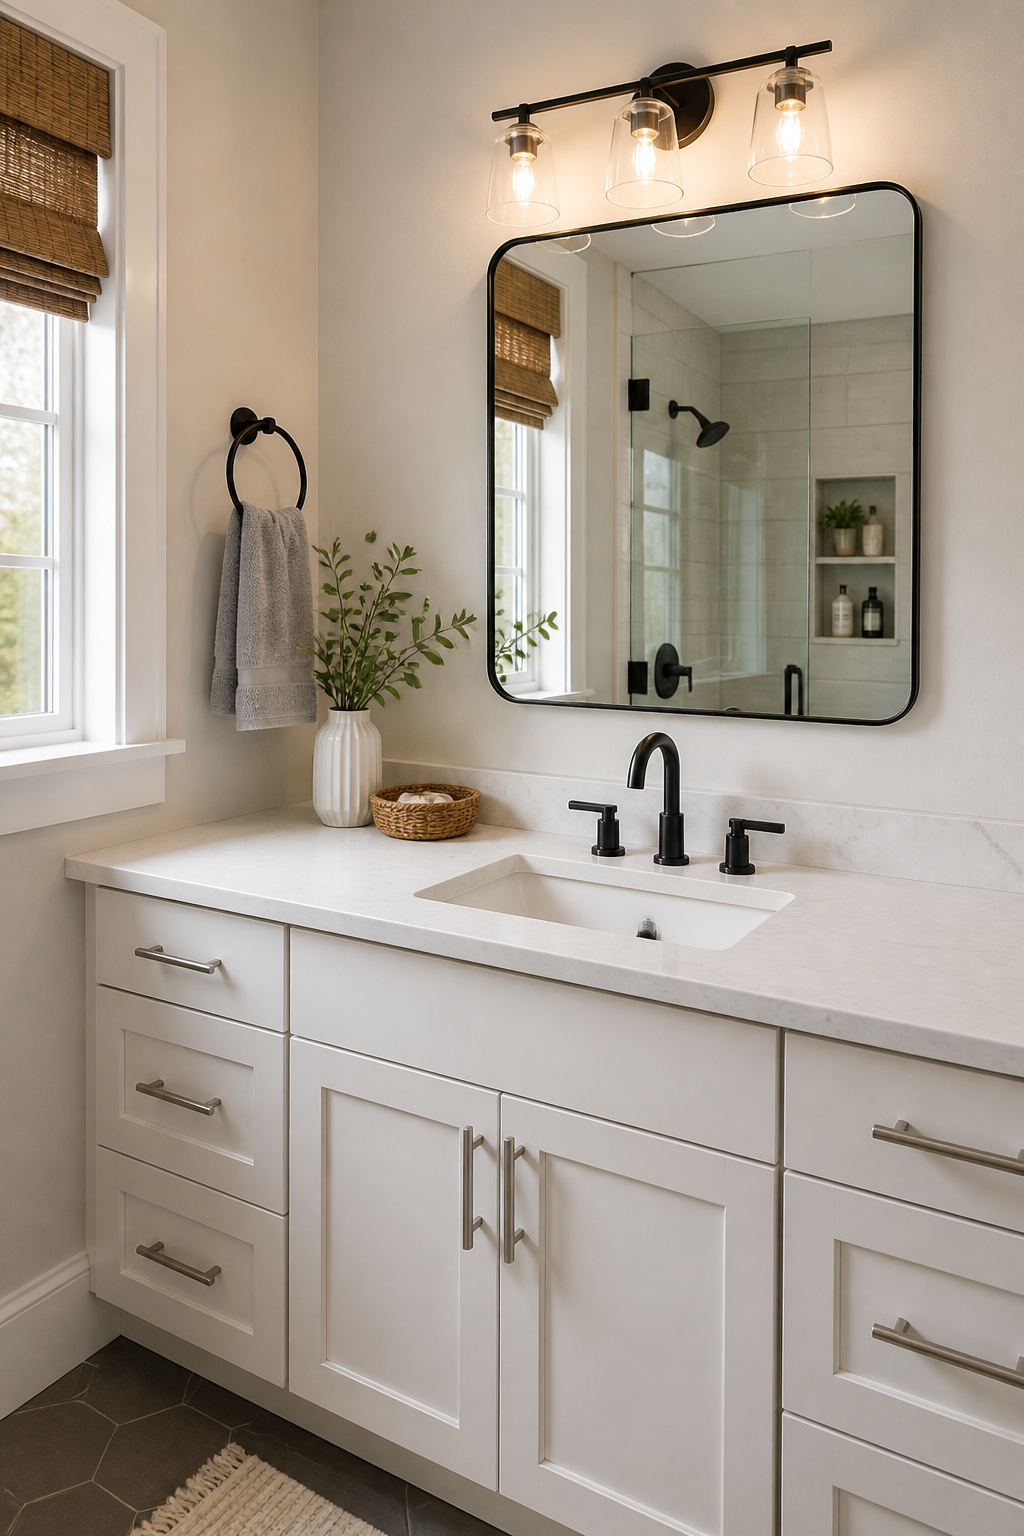
The vanity is the room’s anchor. Cabinet doors, countertop, sink, and faucet all land in the same visual zone — and when that zone is dated, every other improvement feels like rearranging furniture in a room that needs repainting. Replacing a worn or builder-grade vanity is the single highest-visual-impact swap in a budget bathroom remodel, and it costs less than most people assume.

Where to find quality vanities under $400 — stock, flatpack, and secondhand
IKEA’s GODMORGON line starts around $299 for the cabinet alone — pair it with an ODENSVIK or BRÅVIKEN sink and you’re under $450 for a complete unit that looks well-designed and lasts. Home Depot and Wayfair stock pre-assembled 24-inch vanities starting at $150–$250 in clearance sections worth checking regularly. And Habitat for Humanity ReStores — the retail arm of the charity — regularly stock salvaged vanities in excellent condition for $30–$120. Before buying secondhand, check the base carefully for water damage and look at the drawer slides; cosmetic wear is fine, structural damage is not.
Installation basics and what to leave to a plumber
For the installation itself, a like-for-like swap (same footprint, same plumbing location) is genuinely DIY-feasible. Mounting the cabinet, connecting supply lines, and fitting the P-trap are within reach for most handy homeowners with basic plumbing confidence. Moving supply lines or changing the drain rough-in is a different matter — that’s where a plumber’s couple of hours saves an expensive mistake. One measurement to check before you buy: the rough-in plumbing location. A vanity whose cabinet doesn’t align with the existing supply lines will require a plumber visit that erases every dollar saved on the unit itself.
A note on height: the standard builder vanity sits at 32 inches, a relic of older construction norms. If you’re replacing anyway, choose a 34–36-inch comfort-height vanity. Easier to use for adults of all heights, far more accessible for anyone with back or knee issues, and simply a better specification for a space designed to last decades.
2. Fresh Paint — The Lowest-Cost Bathroom Transformation There Is
A gallon of good bathroom paint costs $35–$55. The ceiling, walls, and door can be done in a weekend. Nothing else in this list delivers that ratio of cost to transformation — which is why paint should usually be the first step in a budget bathroom remodel — not the last.
Moisture-resistant and mould-resistant paint: what to actually buy
Bathroom paint is not the same as regular interior paint, and this is where most people go wrong. Zinsser Perma-White Mold & Mildew-Proof is formulated with mildewcide built into the paint during manufacturing — not added as a store tint — which means it’s significantly stronger than a standard latex interior paint with a mould-resistant additive. It requires two coats for full protection, and a semi-gloss or satin finish that resists humidity better than flat. Benjamin Moore Aura Bath & Spa is the alternative for anyone who wants colour options in a matte finish without the chalkiness of flat paint in a wet room.
Prep work that makes paint last in a humid room
The prep work matters more than the paint itself. Clean all surfaces with TSP substitute or sugar soap before you open a tin — soap scum, body oils, and any existing mould need to go first, or they’ll bleed through and compromise the new coat. Apply a moisture-resistant primer, especially over glossy existing paint or any new drywall patching. Caulk all joints before you paint: where the wall meets the tub, where tile meets painted drywall, any gaps at the base of the vanity. Those gaps let moisture behind the surface, and moisture behind the surface is where paint failure begins.
As for colour: light neutrals (warm white, soft greige, pale sage) bounce whatever natural light exists around a space that often has limited windows — a practical choice as much as an aesthetic one. Deep colours work in larger bathrooms balanced with reflective fixtures. Satin finish is the sweet spot: washable, not institutional.
3. Upgrade Faucets and Fixtures Without Touching the Plumbing
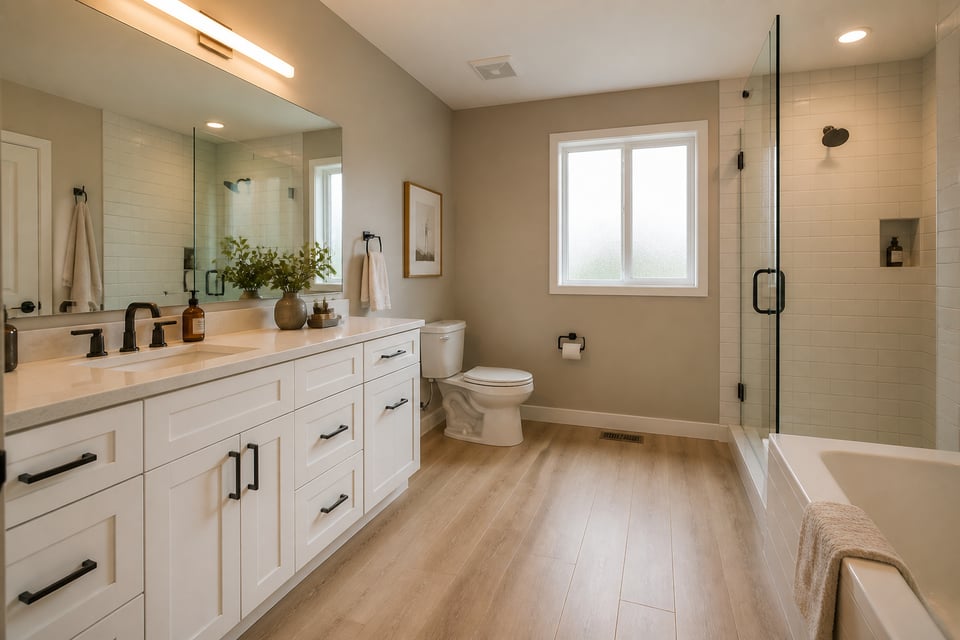
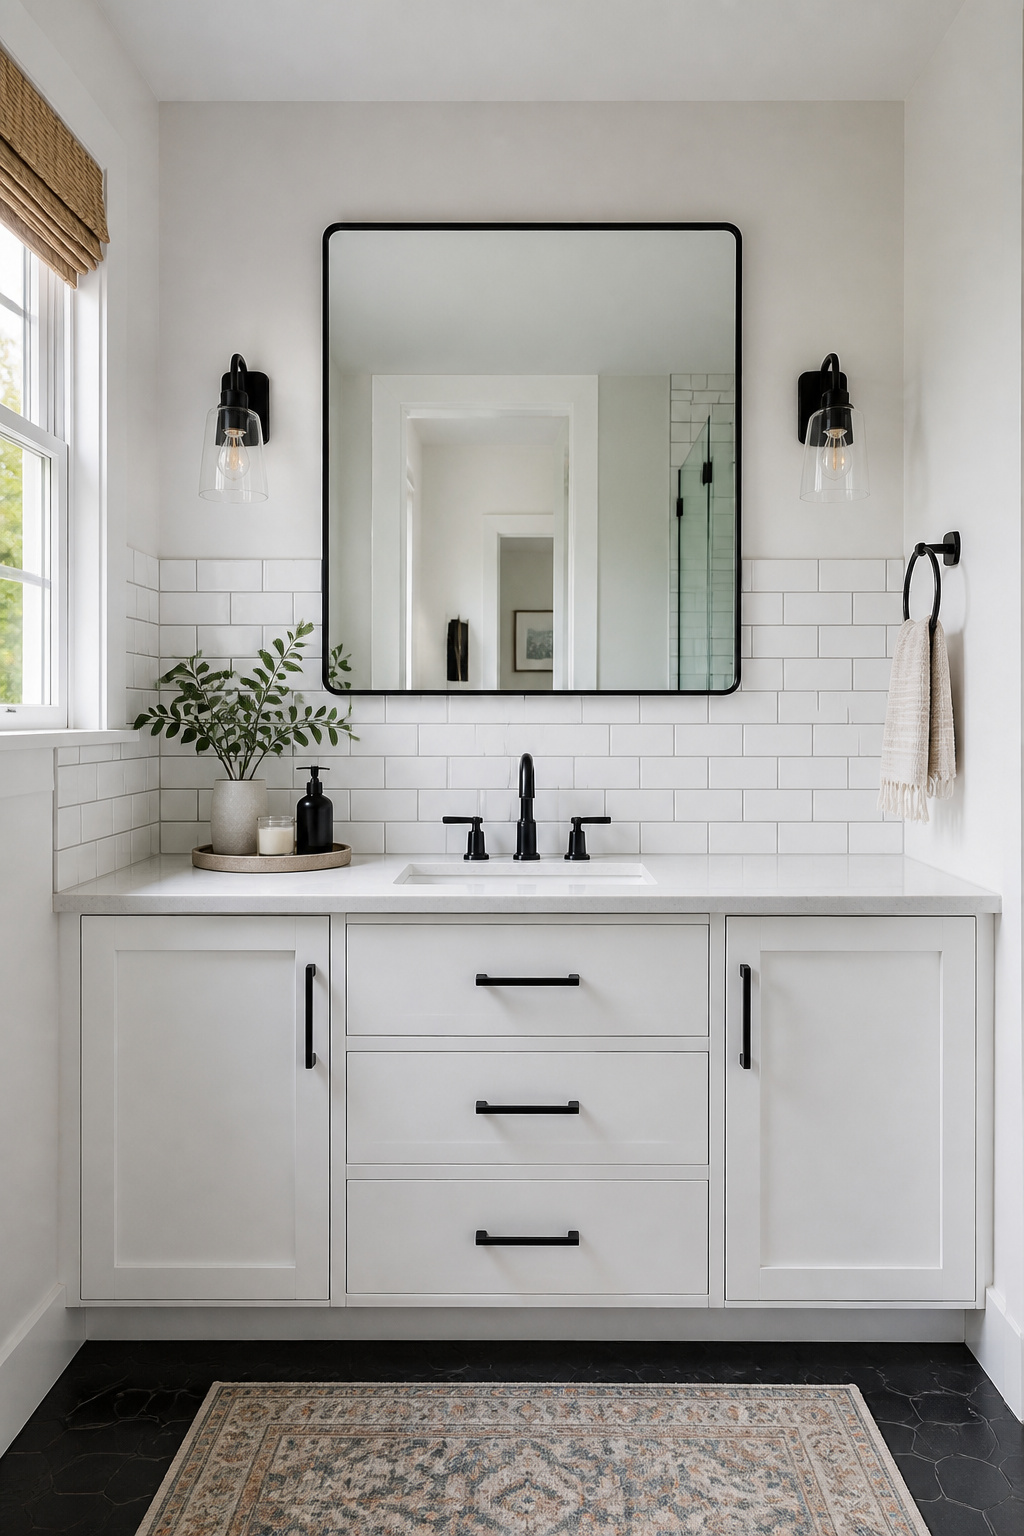
A new faucet in a contemporary finish does something disproportionate to its cost: it makes everything around it look intentional. The same vanity that looked dated with brushed gold hardware and a chrome faucet reads as a considered design choice when the faucet is matte black and the hardware matches. Budget: $60–$180 for a good mid-range faucet (Moen Adler, Delta Trinsic, Kohler Artifacts entry-level) — and the only tools needed are an adjustable wrench and a pair of channel-lock pliers.
The single biggest mistake in faucet replacement is ordering without measuring the existing hole configuration. There are four standard setups: single-hole (one lever, one hole), centerset (three holes at 4-inch spread, two handles on a shared baseplate), widespread (three separate pieces spread 8–16 inches apart), and wall-mount. To measure yours: with a three-hole sink, measure center-to-center from the far-left hole to the far-right hole in millimetres, not inches. Under roughly 120mm is a centerset; 150mm or more is a widespread. They are not interchangeable, and a faucet for the wrong configuration simply won’t work. A single-hole faucet with a wide baseplate can cover four-inch centerset holes if you’re upgrading from three holes to one — a useful path if you want to simplify the look.
For finish coordination: the era of matching everything exactly has passed. Anchoring one finish as dominant (brushed nickel for the faucet and drain) and using a contrasting accent (matte black for cabinet hardware and towel rings) looks designed rather than kit-bought. As of 2026, matte black and brushed brass have the strongest longevity among finish choices — chrome is safe and timeless but reads as standard. One rule: don’t use three different metals in a single small bathroom. It looks undecided rather than eclectic.
4. Peel-and-Stick Backsplash Tile for an Affordable Bathroom Renovation
Let’s be clear about what peel-and-stick tile is and isn’t: it’s a legitimate backsplash solution that looks hand-laid when done correctly, lasts 5–10 years with proper prep, and costs a fraction of real tile installation. It is not a shower surround solution — water standing against adhesive-backed tile eventually wins. Understand those limits, and it becomes one of the more useful tools in an affordable bathroom renovation.
Smart Tiles is the benchmark brand: heat and humidity resistant, not recommended for direct shower or tub use, but well-suited to the backsplash wall behind a vanity or as an accent wall in a dry zone. The installation is entirely DIY and takes a few hours. What separates a good result from a peeling disaster is surface preparation. The wall must be bone dry — not just visually dry but genuinely moisture-free. Let the bathroom air out for 24 hours after any cleaning before installing. Acclimate the tiles in the bathroom for 24 hours before applying so they reach room temperature. Clean the wall with isopropyl alcohol, not a damp cloth, to remove soap film and oils that will undermine adhesion. After installation, run a bead of clear latex sealant along all edges and seams to seal against moisture infiltration.
Pattern choice matters more than most people realise. Subway-format tiles in a classic brick offset avoid the ‘obviously fake’ look of oversized mosaic sheets. Moroccan and geometric patterns photograph well and create a focal point that reads as deliberate design. If you want to see more permanent options, bathroom tile ideas that hold up long-term covers a range of real tile approaches for comparison. For a budget bathroom remodel, though, the economics of peel-and-stick are hard to argue with — a full backsplash wall for under $80, done on a Saturday morning.
5. Replace the Mirror to Shift the Whole Room’s Proportions
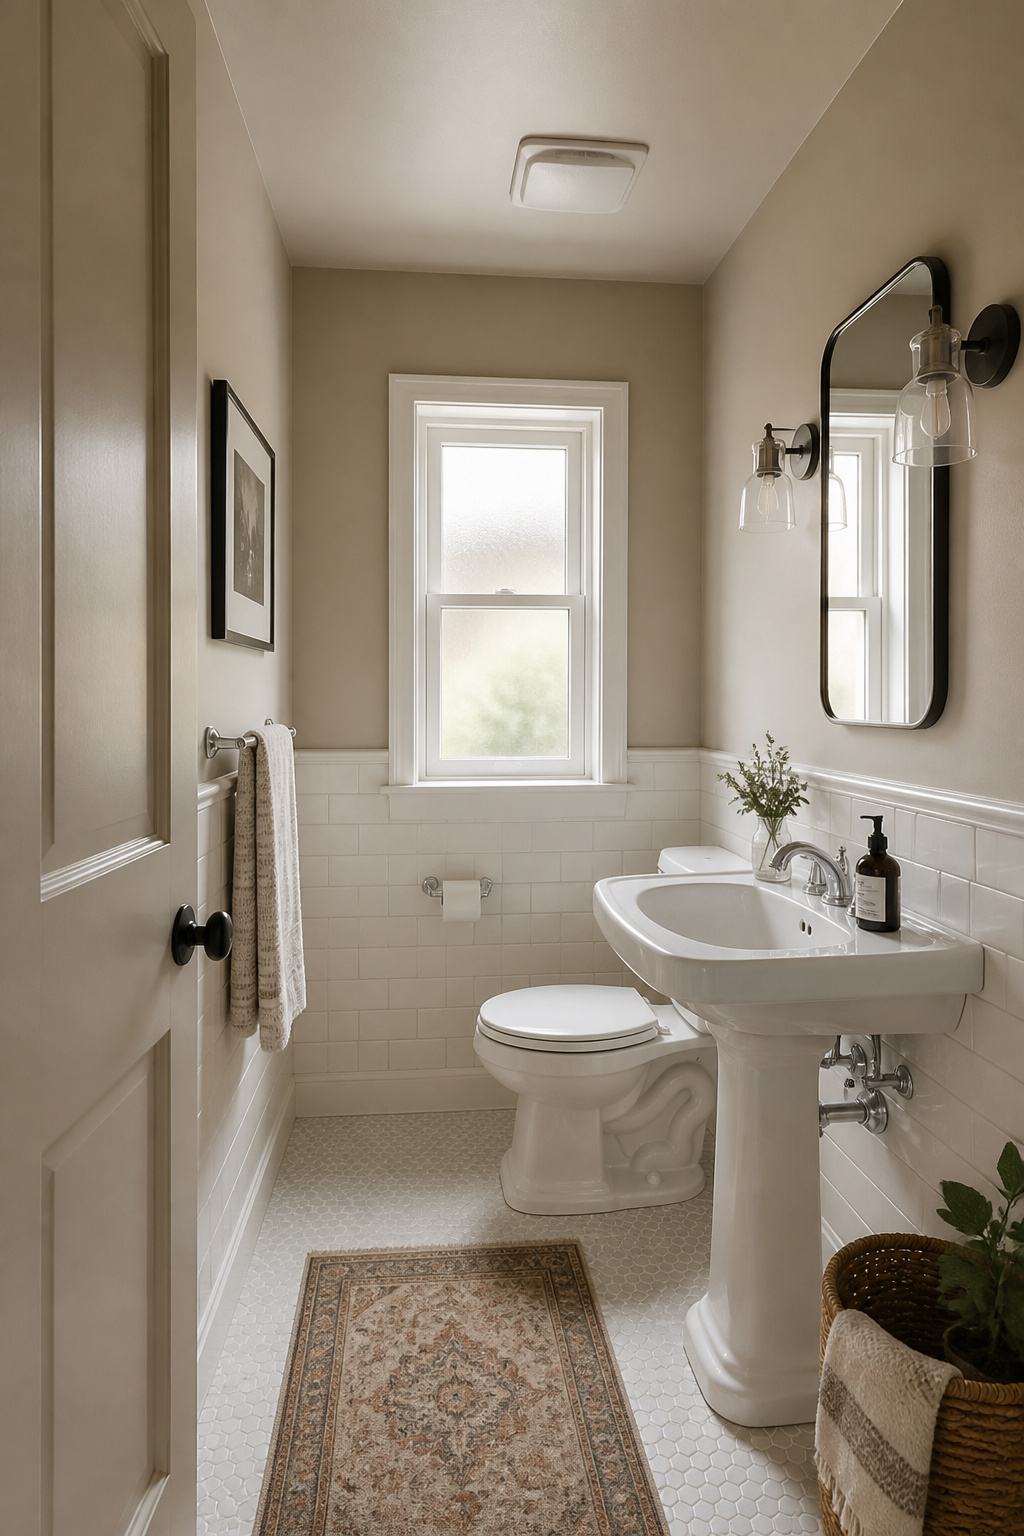
The builder’s mirror — a horizontal slab bolted to the wall with metal clips — is in more bathrooms than it deserves to be. It’s not ugly, exactly, but it’s indistinct, and replacing it with an oversized, framed, or vertically oriented mirror is one of the fastest ways to shift a bathroom’s proportions. Mirrors reflect light and double perceived depth. In a small bathroom, that’s not a decorating trick — it’s practical physics.
The sizing rule is simple: mirror width equal to vanity width minus 2–4 inches (or slightly wider for a dramatic statement). Mirror centre at 60 inches from the floor covers most adult heights. Vertical mirrors elongate low-ceilinged spaces; wide horizontals make narrow rooms feel broader. If you’re designing with accessibility in mind, extending the bottom of the mirror lower — to 40 inches from the floor — serves seated users and children equally without compromising the look.
Pre-framed mirrors run $80–$350 depending on size and finish. The smarter move in a budget bathroom remodel is to DIY-frame a plain builder’s mirror. Buy 2.5-inch MDF trim from any home centre, cut 45-degree mitre joints at the corners, and attach the frame directly to the mirror face with mirror-safe construction adhesive (look for variants labelled non-acid-based) and a few finish nails driven into the wall behind. Total cost: $20–$50. The result reads as a custom framed mirror because it effectively is one.
Mounting on tile requires a diamond-tipped drill bit, slow speed, and masonry wall anchors rated for the mirror’s weight — confirm no plumbing runs behind the drill path first. On drywall, always stud-mount or use heavy-duty toggle bolts (50–75 lbs each in half-inch drywall) for anything over 20 lbs. Standard drywall anchors alone are not reliable for mirrors.
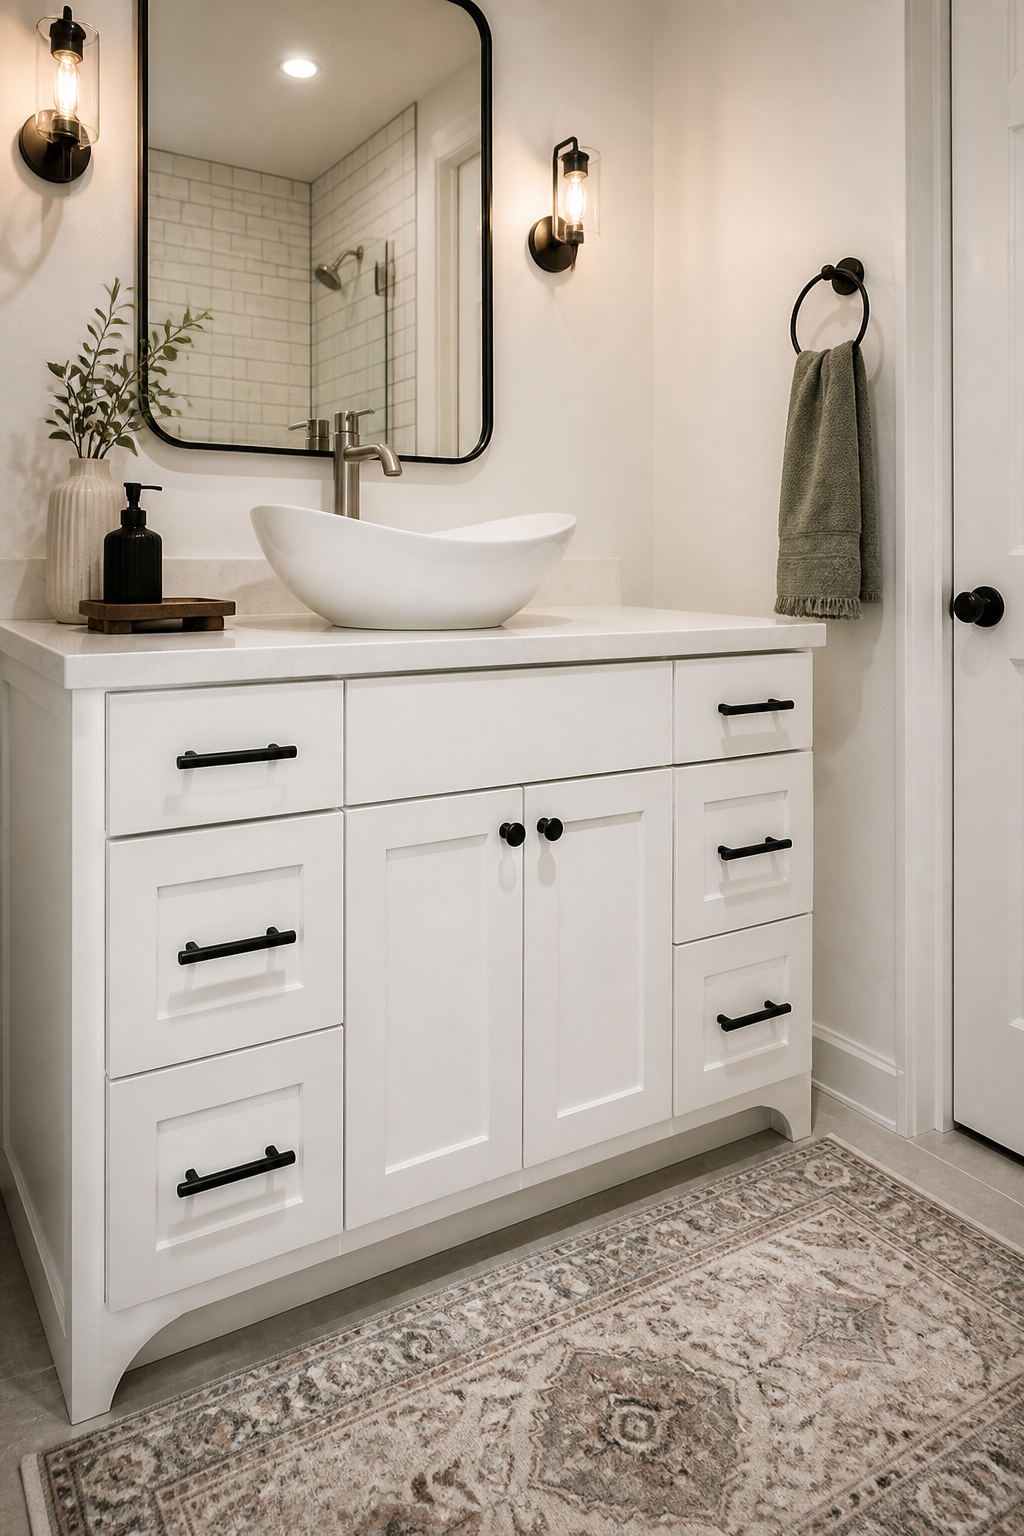
6. New Cabinet Hardware: A Budget Bathroom Remodel Under $50
Hardware is the jewellery of a vanity. It’s the first thing hands touch and the detail eyes notice at close range, and a tired knob on a freshly painted cabinet announces an incomplete renovation more loudly than anything else. Replacing it requires no tools beyond a screwdriver, costs $20–$60 for a full vanity set, and is fully reversible. It is the lowest-barrier, highest-return task on this list.
The critical step is measuring before ordering — specifically, measuring center-to-center (CTC) in millimetres, not inches. The most common bathroom vanity pull spacing is 96mm (roughly 3-3/4 inches), followed by 128mm (5 inches) and 160mm (6.25 inches). Use a metal ruler and measure between the centres of the two screw holes precisely. If the new hardware matches that CTC, the existing holes work. If not, you’ll fill and repaint the old holes before drilling new ones — add an extra hour and a tube of wood filler to your plan.
For shape and size: 1–1.25-inch round knobs on doors and 3–4-inch bar pulls on drawers is the most readable pairing for a bathroom vanity, and bar pulls have an accessibility advantage — easier to grip than round knobs for anyone with limited hand dexterity. Matte black is the finish with the strongest longevity signal right now and looks updated even on older cabinet boxes. Budget sources include Amazon hardware sets ($15–$25 for 10-packs in consistent finishes), IKEA’s BILLSBRO stainless bar pulls, and RenovationAngel for secondhand premium hardware at steep discounts. One thing to avoid: ordered pulls should have visible grip length on each side of the CTC — a 3-inch pull on a 3-inch CTC leaves essentially no handle.
7. Beadboard or Shiplap Wainscoting for an Affordable Bathroom Update
Wainscoting does two things simultaneously: it adds architectural character that a flat painted wall simply cannot achieve, and it provides a physical moisture buffer for the lower wall zone where splashing is highest. As affordable bathroom updates go, it’s one of the few that genuinely reads as structural rather than cosmetic.
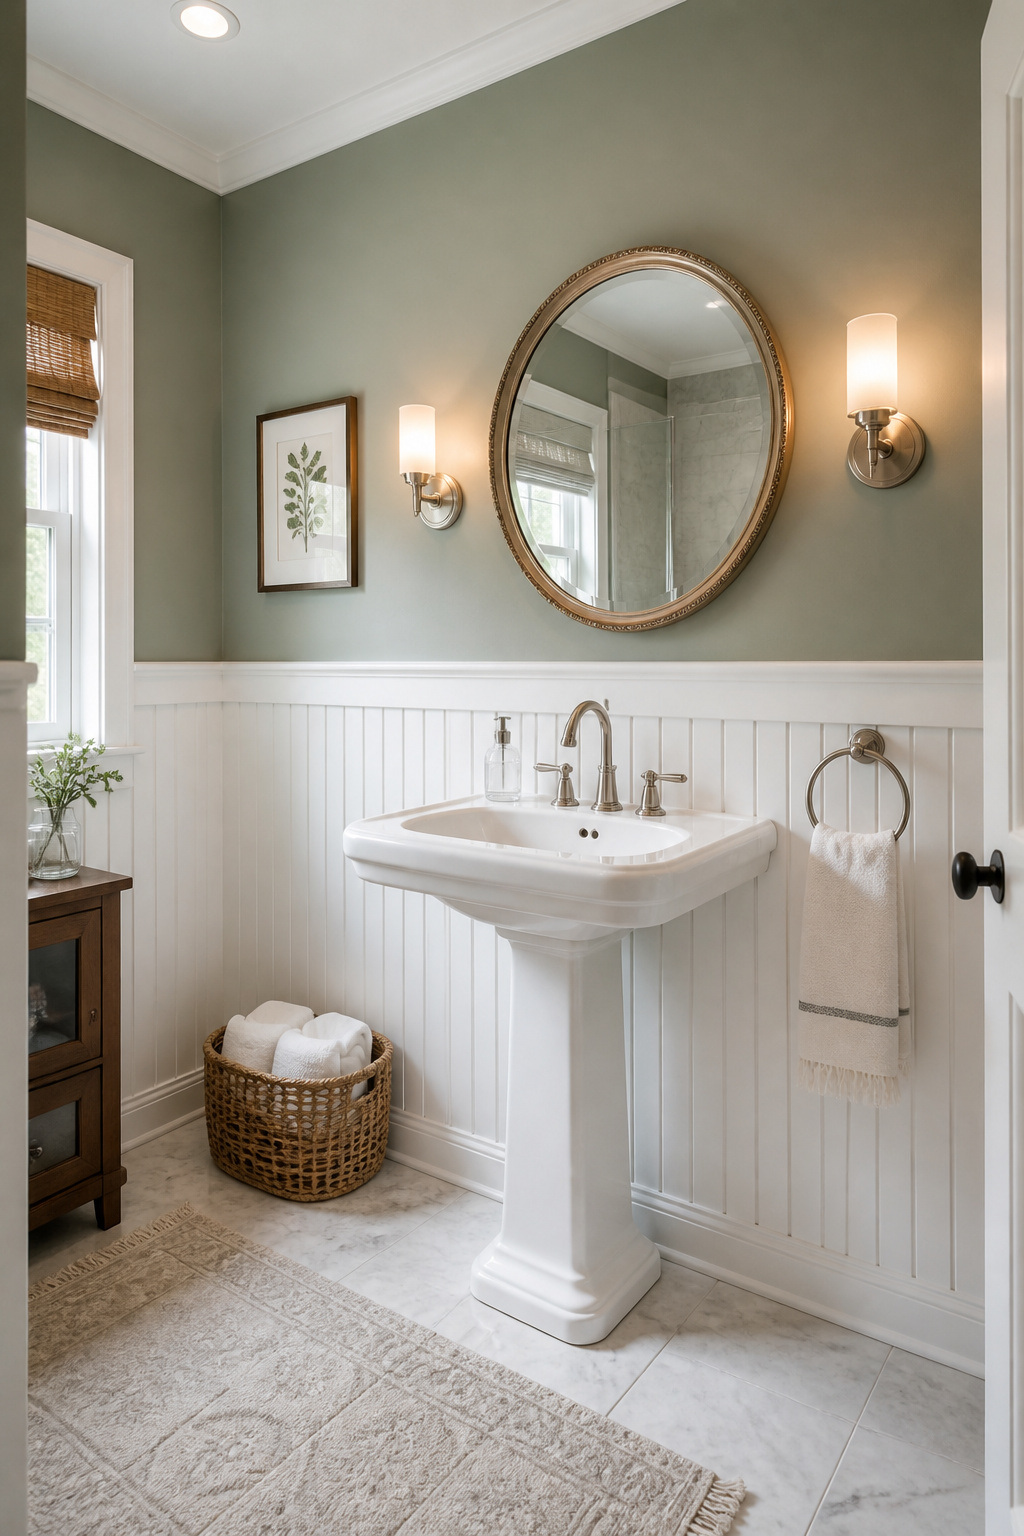
What wainscoting does to a bathroom’s proportions and perceived height
The standard wainscoting proportion — one-third of wall height, roughly 32–36 inches in a room with 8-foot ceilings — creates a balanced look in most bathrooms. Raising it to 48–54 inches in a smaller bathroom draws the eye up and adds apparent height, which is often worth the extra materials. The horizontal top cap rail serves as both a visual anchoring line and a practical ledge for small accessories. It also creates a clear line where the moisture-resistant lower zone ends and the standard upper wall begins.
MDF beadboard panels versus PVC — cost and moisture considerations
Material selection is where most budget bathroom wainscoting goes wrong. Standard MDF swells with humidity within one to two years and is the wrong choice for this application — full stop. Use moisture-resistant MDF (American Beadboard and similar speciality brands manufacture it specifically for bathrooms and basements) or PVC boards (Versatex, AZEK) which are completely impervious to moisture and hold paint beautifully. PVC costs slightly more but never warps. For farmhouse bathroom ideas with character and texture, beadboard specifically adds the vertical-groove detailing that defines that aesthetic, while shiplap lends a cleaner horizontal line.
Paint-grade finishing and the right primer for a lasting result
Prime all cut edges with oil-based primer before installing — MDF edges are porous and will wick moisture in at any unsealed cut. Use paintable caulk at all panel joints and where the wainscoting meets the floor. Finish with two coats of Zinsser Perma-White or a quality bathroom satin paint. A complete 36-inch kit for one bathroom runs around $223 in materials; installation is a one-day DIY project with basic carpentry tools.
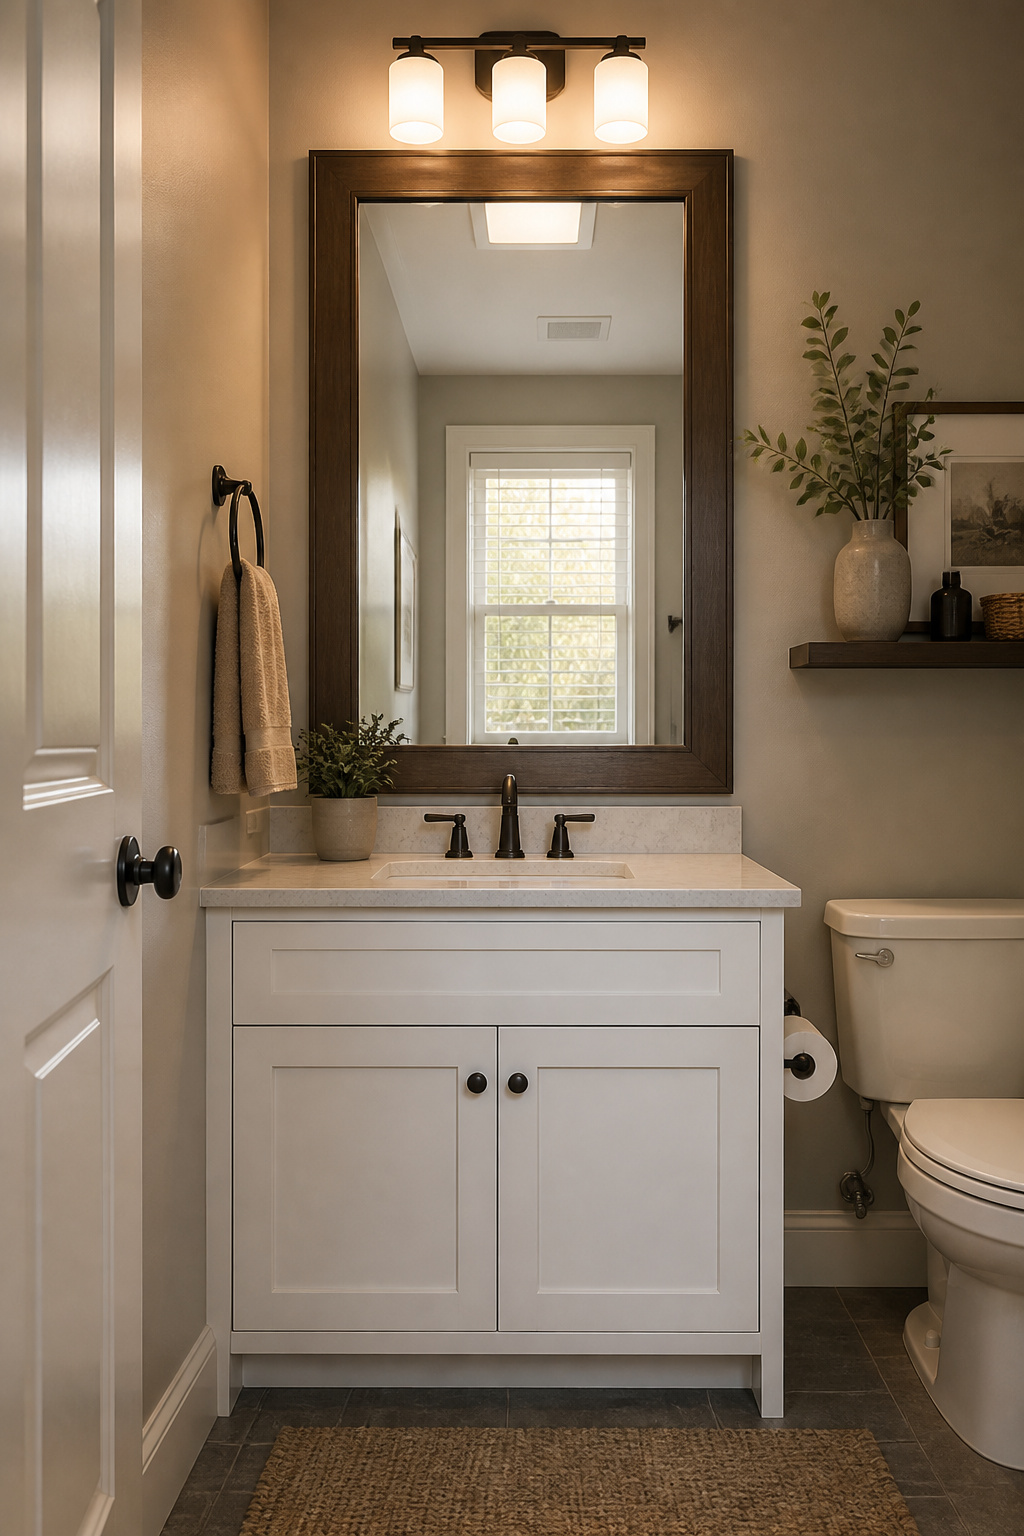
8. Better Vanity Lighting Without Hiring an Electrician
Poor bathroom lighting undermines every other improvement in the room. Good tile looks flat. A carefully painted wall looks washed out. Skin tones look sallow or green under a fixture with a CRI below 80. And yet lighting is the most commonly skipped upgrade in a budget bathroom remodel, usually because homeowners assume it requires an electrician. A like-for-like fixture swap — same mounting bracket, same J-box, no new wiring — is within most people’s DIY capability and typically takes 45 minutes.
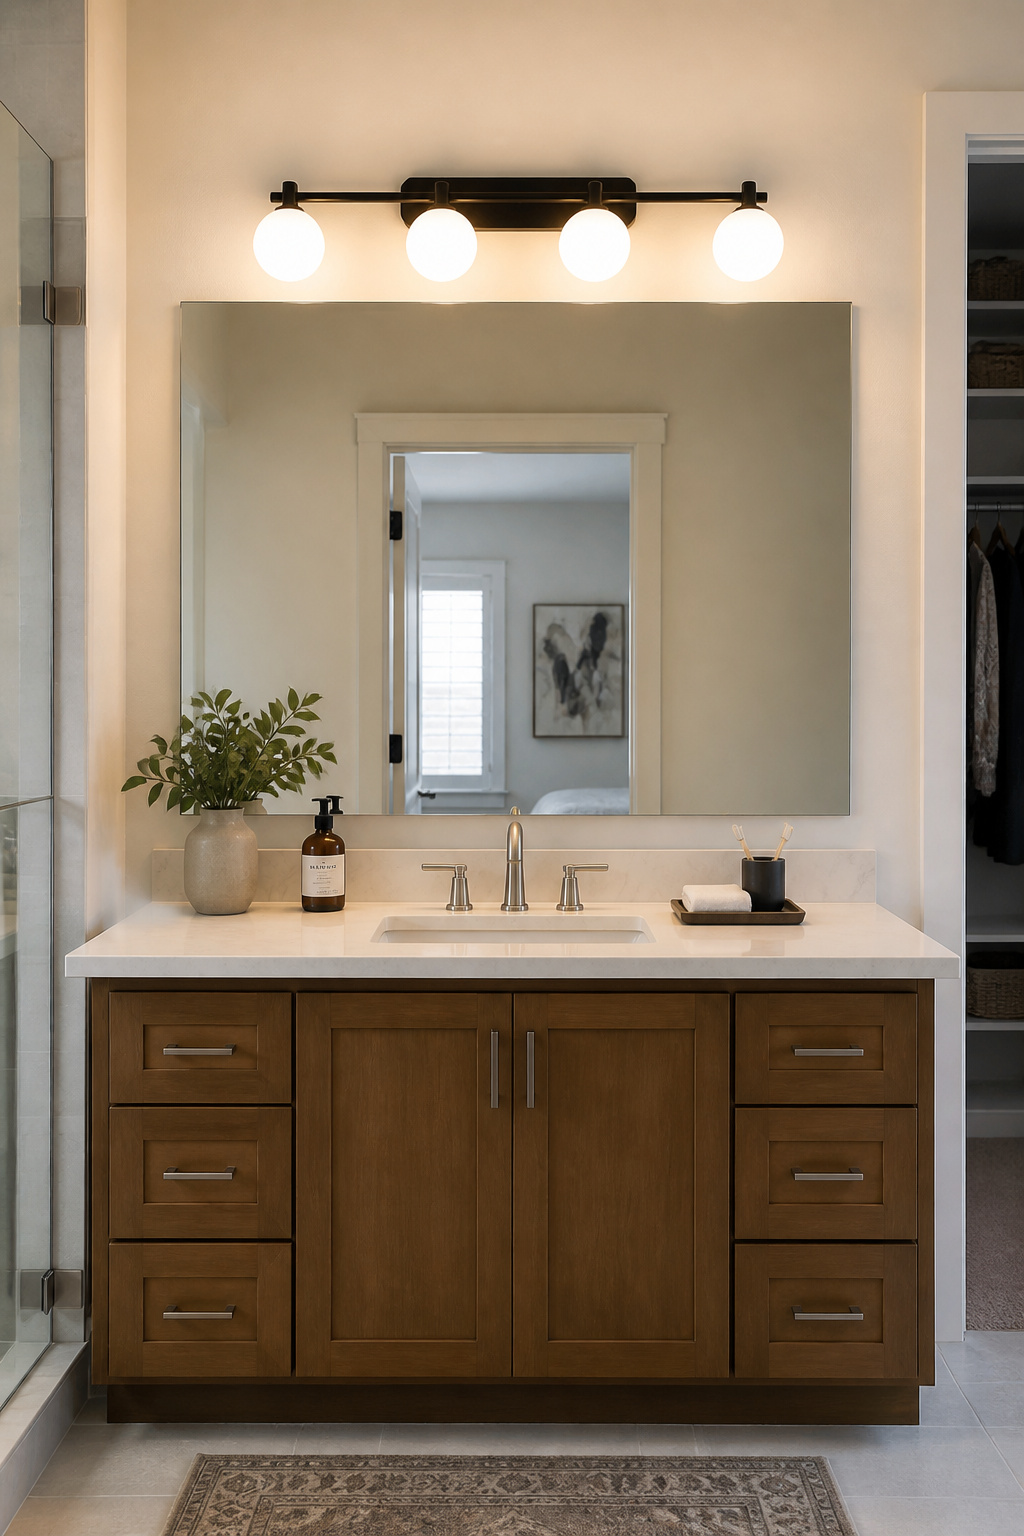
The numbers that actually matter are colour temperature and CRI. For bathrooms: 2700K–3000K for a warm, spa-like atmosphere; 3000K–3500K for a brighter, more task-focused space (better for makeup application). CRI 90 or above is the minimum for accurate colour rendering; CRI 95+ is worth seeking for any household where makeup, shaving accuracy, or colour-matching matters. Most builder fixtures use 80 CRI at best — the difference between 80 and 90 CRI is visible without direct comparison once you see it. For dedicated guidance on getting light placement right, small bathroom lighting secrets that make a real difference covers fixture position, mirror lighting, and layering approaches in depth.
On vanity light sizing: the fixture should be 75–80% of the mirror’s width. A 48-inch mirror pairs with a 36–40-inch fixture. If replacing the fixture isn’t in budget, replacing the existing bulbs with 2700K CRI 90+ LEDs of the correct base type (E26 or GU10 — check before buying) costs $15–$30 and delivers most of the benefit. Important safety note: any bathroom fixture must be rated for damp or wet locations depending on proximity to water — check the label before purchasing and before installing.
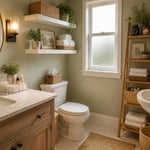
9. Open Shelving to Add Storage and Visual Breathing Room
Closed wall cabinets in a small bathroom terminate sightlines and make the room feel boxier than it is. Floating shelves accomplish the opposite: they add storage without adding visual weight, preserve the sense of depth, and can be installed on a Saturday morning with a stud finder and a drill. The space above the toilet — typically 12–16 inches above the tank — is often entirely wasted and transforms with a single well-mounted shelf.
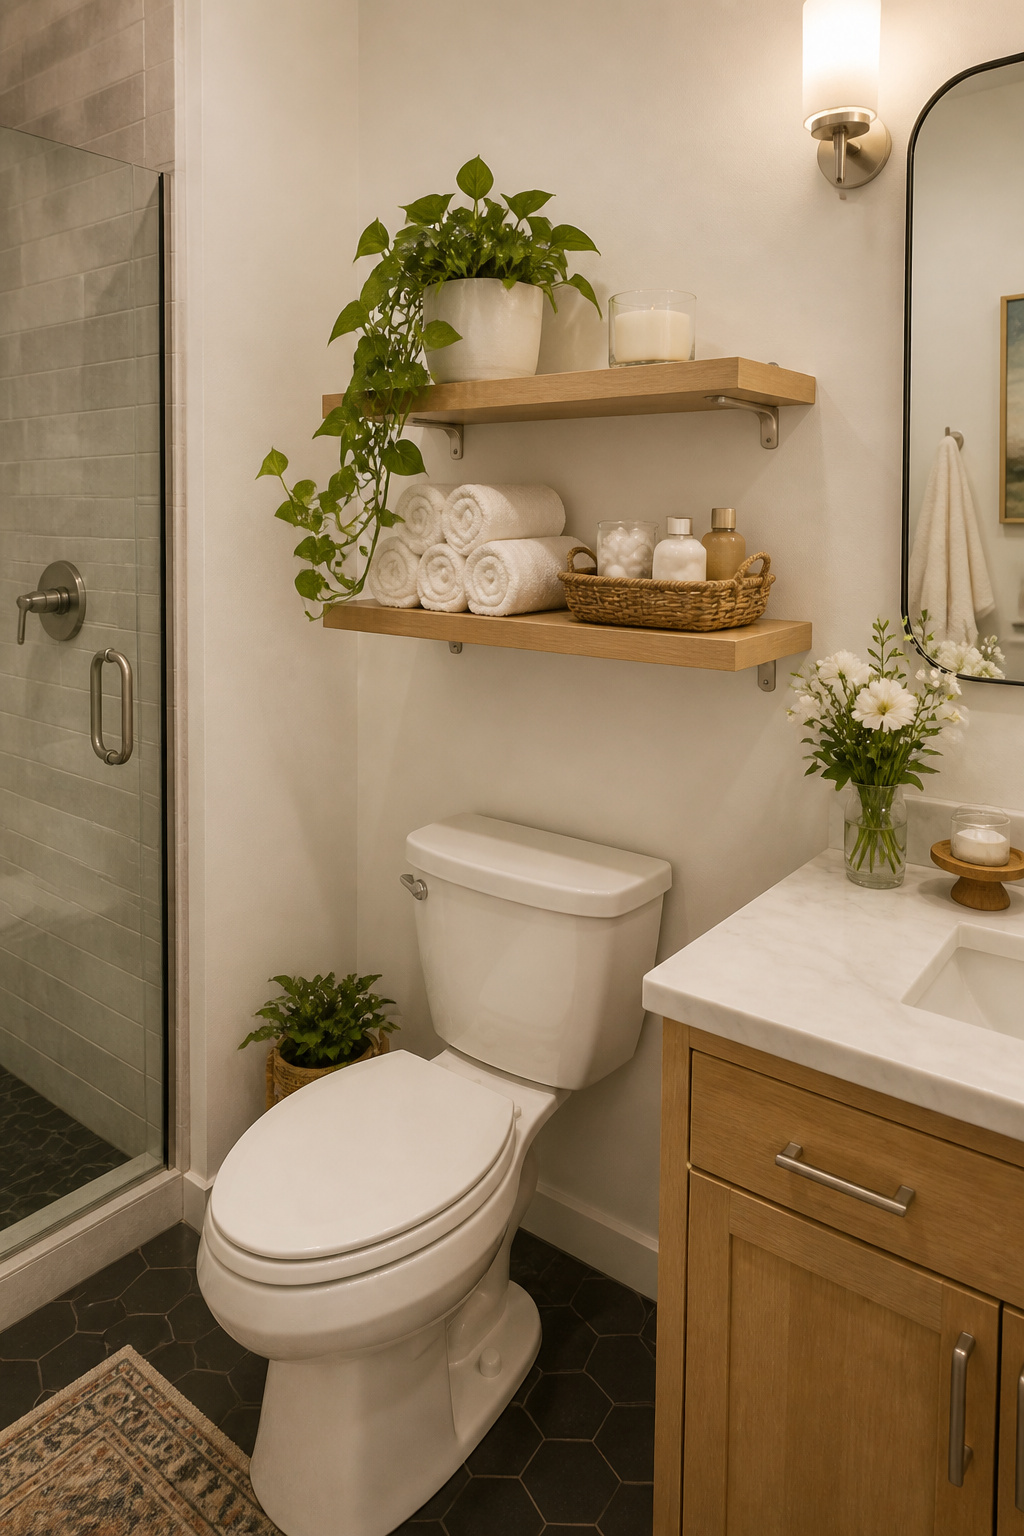
For small bathroom storage solutions worth trying, the mounting method matters as much as the shelf itself. Always try to hit a wall stud first — 3-inch screws into a solid stud hold 50 lbs per stud, meaning a two-stud bracket mount handles 100 lbs with confidence. When studs don’t align with your planned position, heavy-duty toggle bolts hold 50–75 lbs each in half-inch drywall — adequate for towels, baskets, and bathroom supplies, but not for heavy stone shelves loaded with filled glass jars. Check your bracket’s stated weight rating and add a 10-lb safety margin above the intended load.
Material choice is essential in a humid environment. Sealed solid wood (teak, acacia), marine-grade plywood with a polyurethane finish, powder-coated steel, and glass with metal brackets all perform reliably. Avoid particleboard and unsealed MDF — both swell in bathroom humidity within a season. If you prefer natural wood, finish it with water-resistant polyurethane or marine varnish; tung oil looks beautiful but needs reapplication every few months in a wet room.
Two to three shelves is the right number in a small bathroom. More creates storage but also creates visual noise. Style them with varied heights — tall candle, mid-height rolled towel stack, small plant low — using matching containers for anything small enough to look cluttered in the open.
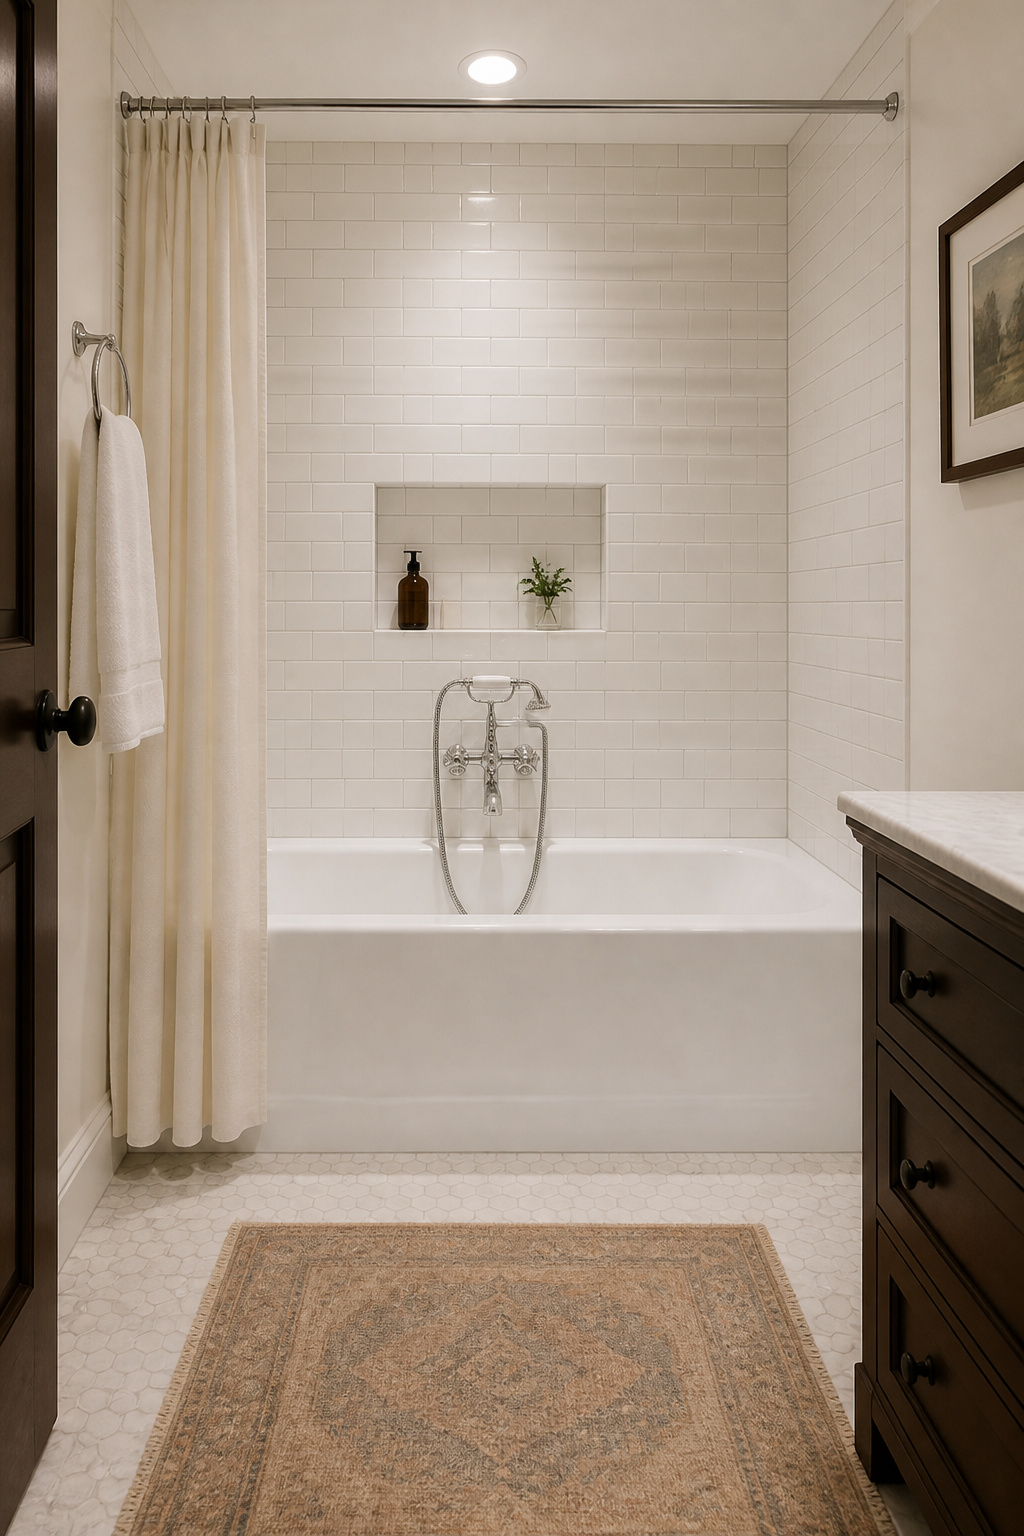
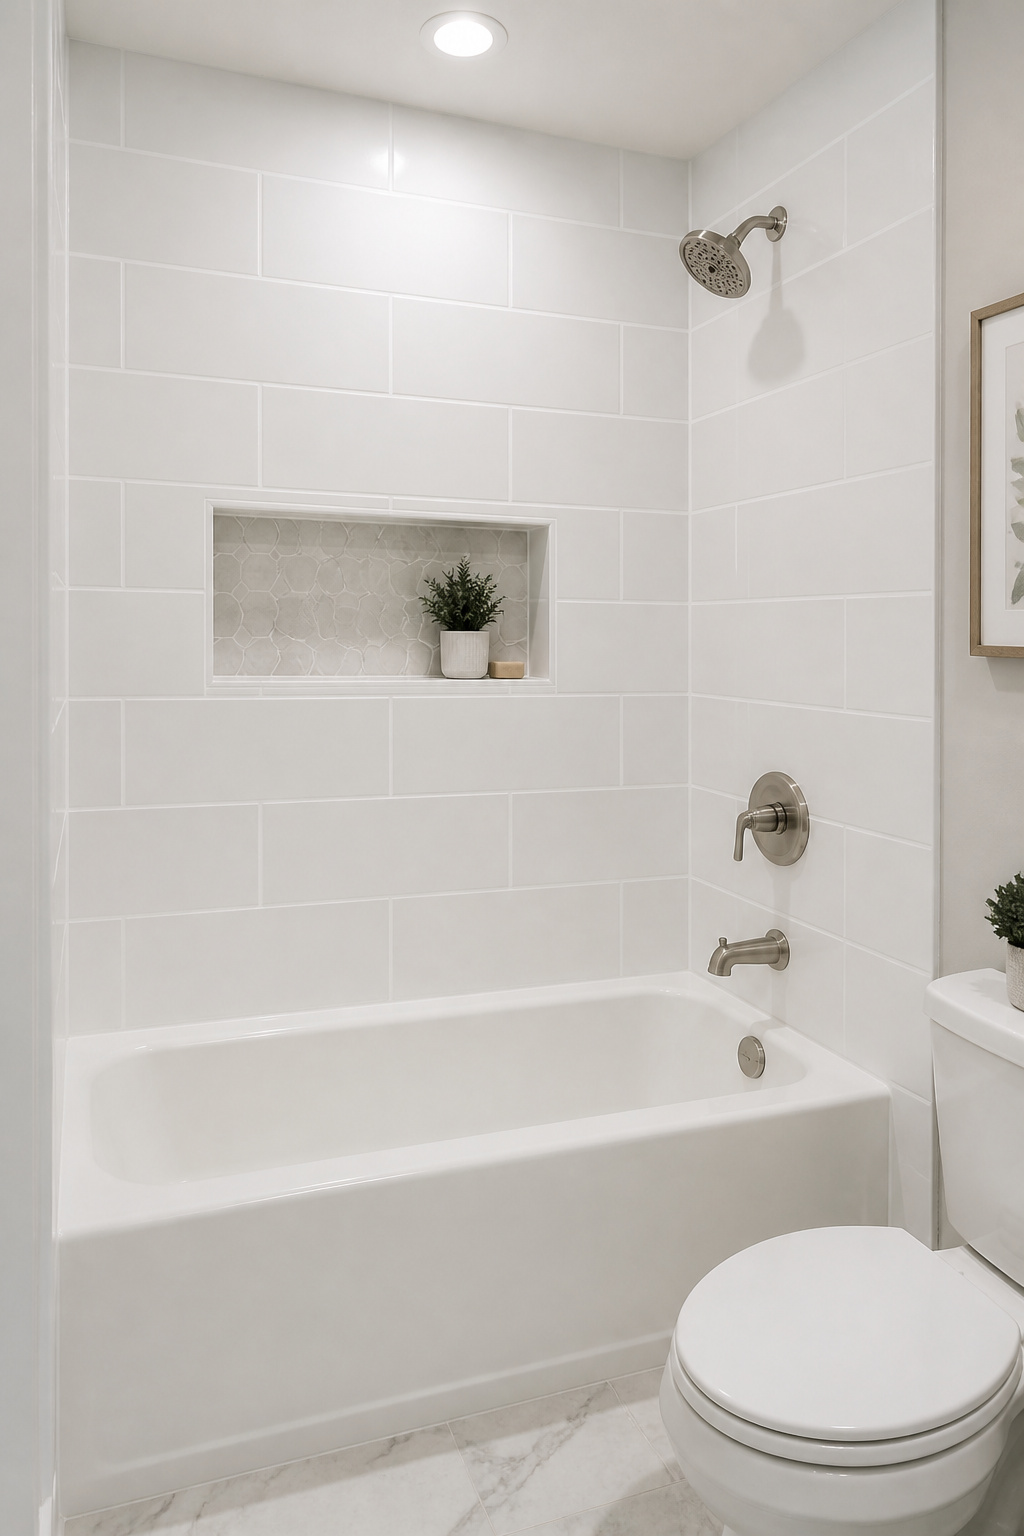
10. Reglaze the Tub or Tile Instead of a Full Replacement
A stained, faded, or off-white tub is one of the most demoralising things in an otherwise improved bathroom. It looks dirty even clean. And the reflex response — tear it out and replace it — is also the most expensive one, at $1,500–$5,000+ once demolition, new fixtures, tile work, and plumbing reconnection are factored in. For any budget bathroom remodel where the tub is stained or yellowed, professional bathtub reglazing delivers a result that looks genuinely renewed for $350–$600 and lasts 10–15 years with proper maintenance. The math is not close.
The process works by acid-etching the existing surface to create mechanical adhesion, applying a bonding primer, and spraying multiple coats of two-part polyurethane or acrylic coating. Done by a qualified professional, the cured finish is visually and functionally comparable to original enamel — not a painted-on coating that peels at the edges. The caveat is ventilation: fumes during curing are significant, and the bathroom needs to be off-limits for 24–48 hours after professional application. Plan for this when scheduling.
DIY reglazing kits (Rust-Oleum Tub & Tile, Homax) cost $30–$100 and deliver a 2–5-year result even with perfect preparation — the chemistry simply differs from professional spray finishes. DIY makes sense for a rental bathroom or a tub you plan to replace in a few years. For a primary bathroom tub you’ll use daily, the professional option at $480 average — roughly $40 per year over its lifespan — is clearly the right call. One firm rule: never apply a new coating over an existing DIY kit coating. Old coatings must be fully stripped first, or adhesion fails immediately.
11. Vinyl Plank Flooring: A Budget-Friendly Bathroom Remodel Floor Fix
Bathroom flooring is the update most homeowners put off because they assume it means tile removal, subfloor work, and a week of inconvenience. Luxury vinyl plank changes that calculation. 100% waterproof LVP floats over most existing floors — tile, vinyl sheet, even some hardwood — without adhesive, without demolition, and can typically be installed in a bathroom in a single day.
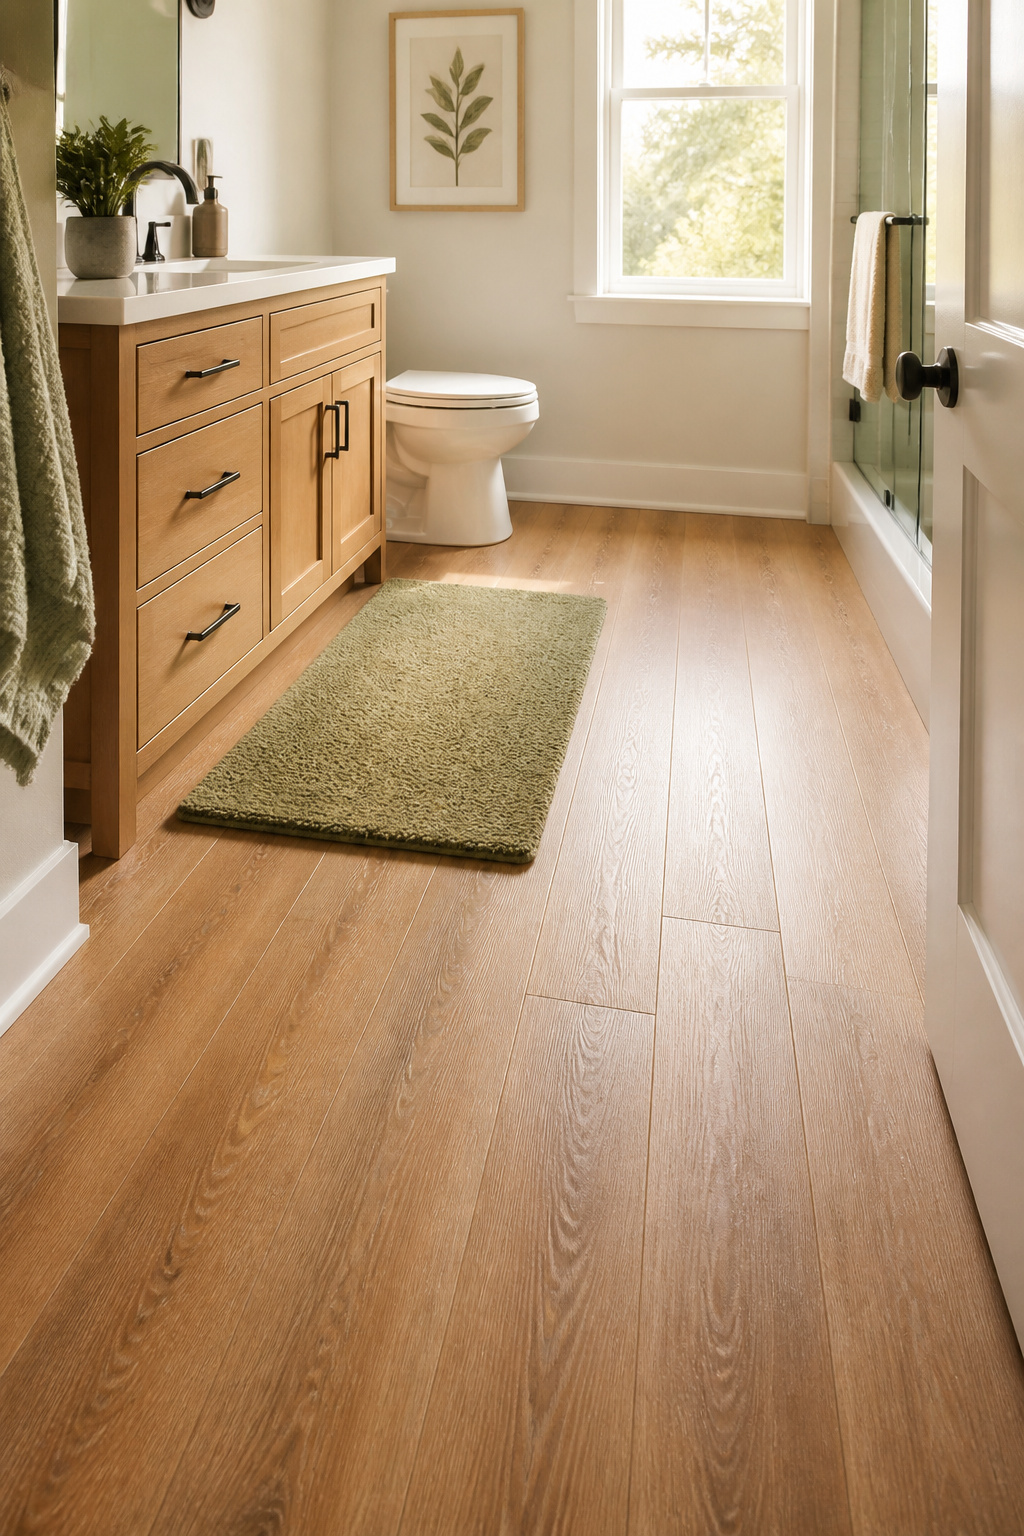
The critical phrase is “100% waterproof core,” not “water-resistant surface.” Laminate flooring, even variants marketed for kitchens, has a wood-fibre core that swells and delaminates when water gets beneath a plank — and in a bathroom, water gets beneath planks regularly. Brands like LifeProof (Home Depot’s exclusive), COREtec, and Shaw Floorté engineer their cores from limestone composite or rigid PVC, meaning water under a plank simply doesn’t damage the floor. For bathroom flooring ideas beyond basic tile, LVP is consistently the recommendation for anyone who wants low-maintenance waterproofing without the expense and permanence of stone or ceramic.
Wear layer is the other number to check: 12-mil minimum for a bathroom floor, 20-mil for households with children or heavy daily use, and 30-mil (COREtec Advanced+) for maximum longevity. Leave a quarter-inch expansion gap at all walls — this gap gets covered by base moulding or quarter-round. For the cleanest result around a toilet, disconnect and remove it, install full planks across the entire floor, then reinstall. Cutting around an in-place toilet leaves a visible seam at the base that looks unfinished. The toilet removal adds about an hour to the job and is within most people’s DIY capability.
12. Regrout and Recaulk for a Bathroom That Looks Professionally Restored
Grout is invisible when it’s clean and white. When it’s dark grey, cracked, and mouldy, it’s the first thing everyone sees. Regrouting is one of the more labour-intensive tasks on this list — more than a few hours of careful grinding and cleaning — but the result reads as a professional restoration that makes a 20-year-old tile installation look freshly laid. Before committing to full removal, try a grout colour pen (Rust-Oleum Grout Pen, Polyblend Grout Renew) on a small test section. Mild discolouration often responds well. For bathroom tile ideas for lasting renovation results, the maintenance approach matters as much as the initial installation.
Grout removal tools and technique — oscillating tool versus manual grout saw
Full regrout requires removing old grout to a depth of at least 1/8 inch. An oscillating multi-tool with a grout removal blade (Fein, DeWalt) is the fastest method and manageable for most DIYers if kept at a careful pace — the risk is scratching tile edges, so go slowly near finished surfaces. A manual grout saw is slower but more controlled for small areas or delicate tiles. Vacuum all dust out thoroughly before applying new grout, or contamination will cause adhesion failure.
Choosing the right caulk for wet zones, movement joints, and tub surrounds
On grout type: cement grout (sanded for joints over 1/8 inch, unsanded for smaller joints) is the standard choice and requires a penetrating sealer within 72 hours of full cure. Epoxy grout is harder to apply and more expensive but requires no sealer and is stain-resistant — worth considering for floor grout joints that take heavy wear. The rule for caulk is clear and important. Grout belongs between tiles on a single plane. Caulk belongs wherever planes change — at corners, where tile meets tub, where tile meets floor. These joints flex with temperature and movement, and grout in a movement joint cracks immediately. Use 100% silicone caulk (GE Advanced Silicone, Gorilla 100% Silicone) at all wet zone changes. Latex caulk for dry areas and painted surfaces only.
13. Curated Towels, Rugs, and Accessories for a Spa-Like Finish
The moment a bathroom renovation feels “finished” is often the moment new towels go on the rail. Soft goods are the final layer that unifies updates made in stages, and they’re the element most likely to be underspent in a budget bathroom remodel. A 600-GSM cotton bath towel is not an indulgence — it’s a daily object that should feel genuinely good every time it’s used.
GSM (grams per square metre) is the number that actually tells you what a towel will feel like. Below 400 GSM: thin, quick-drying, lacks body. 400–500 GSM: everyday quality, the majority of supermarket towels. 500–600 GSM: solid everyday-to-spa range, where most households find their balance between absorbency and drying time. 600–900 GSM: true spa weight — dense, plush, holds significant moisture. Turkish cotton at 500–600 GSM dries faster and softens progressively with washing. Egyptian cotton at 600–800 GSM has longer staple fibres, higher initial absorbency, and grows softer and more resilient over time rather than pilling. Either is a meaningful upgrade from a 400-GSM retail set.
For bath rugs: tufted cotton (cotton chenille) and machine-washable Turkish cotton are the practical choices — both can be laundered weekly without deteriorating. A non-slip latex backing is a safety essential, not an optional feature, particularly in households with older adults or young children. Position the mat where feet land when exiting the shower or tub, not beside it. Microfibre bath mats dry faster but tend to skid without backing and pill within a year of regular washing. The Company Store’s Turkish Cotton Bath Mat and similar products sit in the $35–$55 range and represent well-rated mid-range performance.
Keep the palette to two or three colours: a neutral base and one accent. This is where a budget bathroom remodel starts looking intentional rather than assembled.
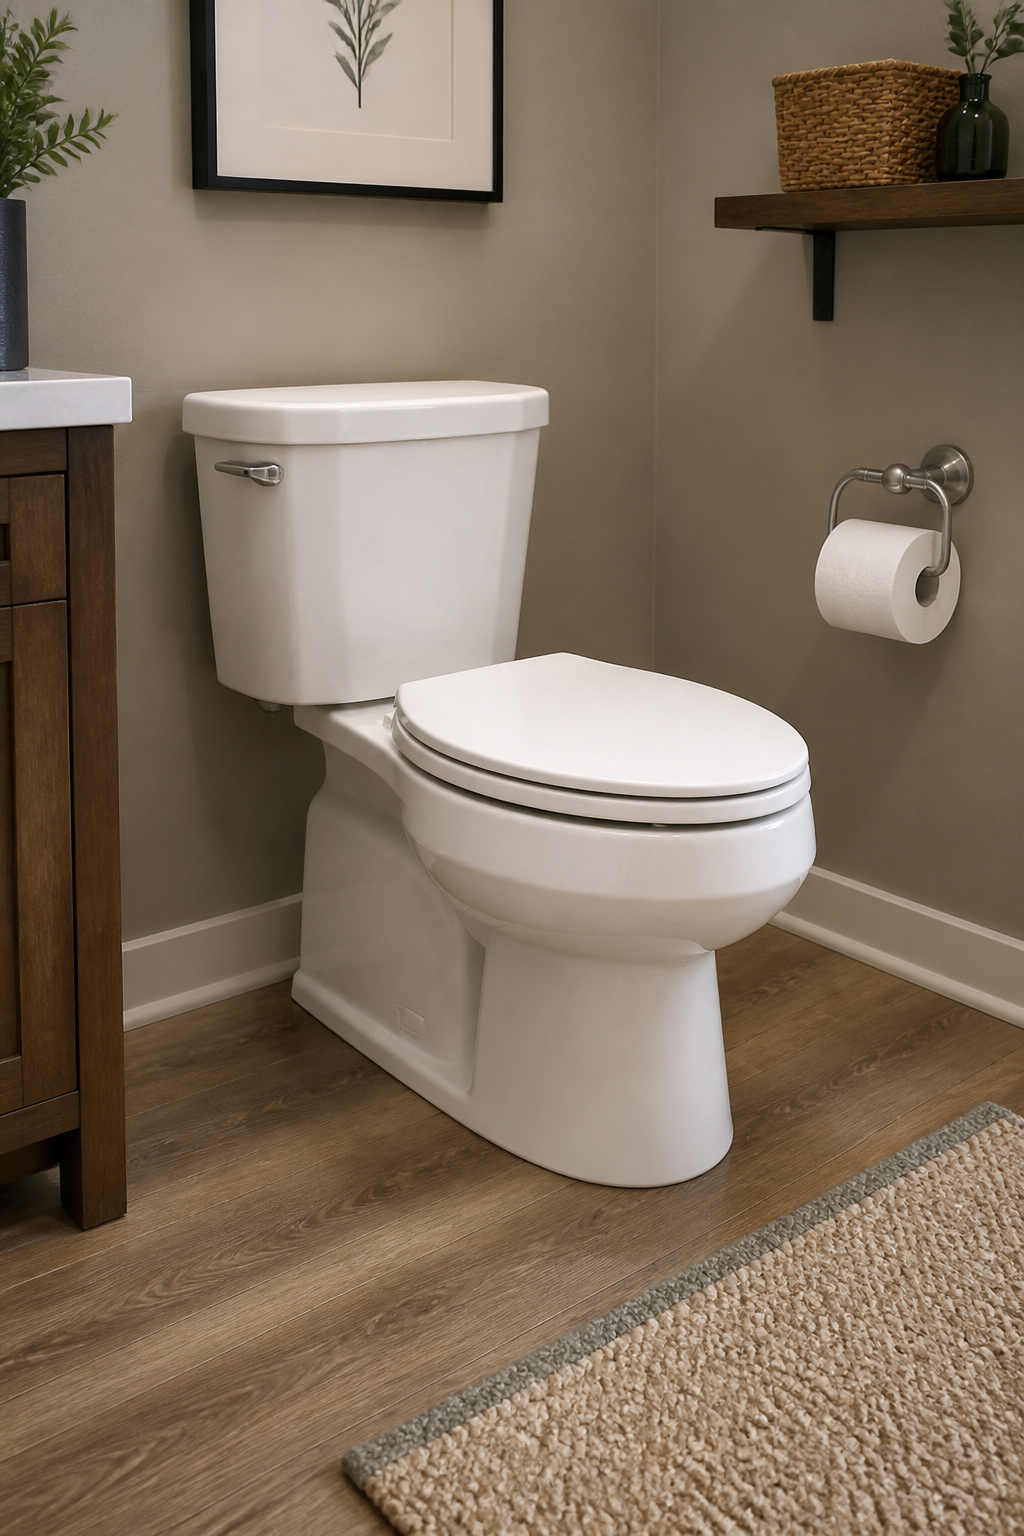
14. A New Toilet Seat — or a New Toilet — for Under $200 Impact
The toilet is the most-used fixture in a bathroom and the one most often overlooked in renovation planning. A soft-close elongated seat costs $40–$80 and eliminates the slamming sound permanently — a hinge mechanism that gently lowers the lid rather than dropping it. That’s a noticeable, daily-use improvement for the price of dinner out.
When a seat swap is enough and when the toilet itself should go
Whether to replace the seat or the entire toilet comes down to a few checks. If the toilet flushes at 3.5 GPF (pre-1994 model), the case for replacement is economic — WaterSense-certified toilets at 1.28 GPF pay back their cost in water savings within a few years in most households. If the porcelain is stained through the glaze (not surface staining, but colour change in the ceramic itself), replacement is the only real fix. If the toilet wobbles at the base, the flange is likely damaged — address the flange at the same time as any replacement, or the wobble returns.
Elongated vs. round, comfort height, and universal design
For bowl shape: elongated projects 28–31 inches from the wall and is more comfortable for most adults; it’s also the standard bowl shape for ADA accessibility compliance, making it the default specification for any bathroom designed to be usable across ages and abilities. Round projects 25–28 inches — right for a very small bathroom where every inch counts. Comfort height (seat surface at 17–19 inches from the floor, compared to standard 15 inches) is easier to sit down to and rise from, and is worth the small premium in most households.
Rough-in measurement and why it matters before ordering a new toilet
Before ordering a replacement toilet, measure the rough-in: the distance from the finished wall to the centre of the floor flange. The 12-inch rough-in is standard in most homes. Some older construction uses 10-inch, and a 12-inch toilet in a 10-inch rough-in space leaves a visible gap behind the tank. Measure it. Modern efficient toilets in the $150–$300 range (KOHLER Highline, American Standard Champion, TOTO entry-level) are WaterSense certified and include soft-close seats.
15. Shower Curtain, Rod, and Rings as an Instant Focal Point
A shower curtain is the largest single piece of fabric in a bathroom, which means it has more proportional influence than most people realise. Hang a standard 72-inch curtain at standard height and the bathroom looks exactly as expected. Hang a 96-inch curtain from a rod positioned near the ceiling and the eye follows a vertical line straight to the top of the room — the most reliable trick for making a bathroom feel taller without touching a single wall.
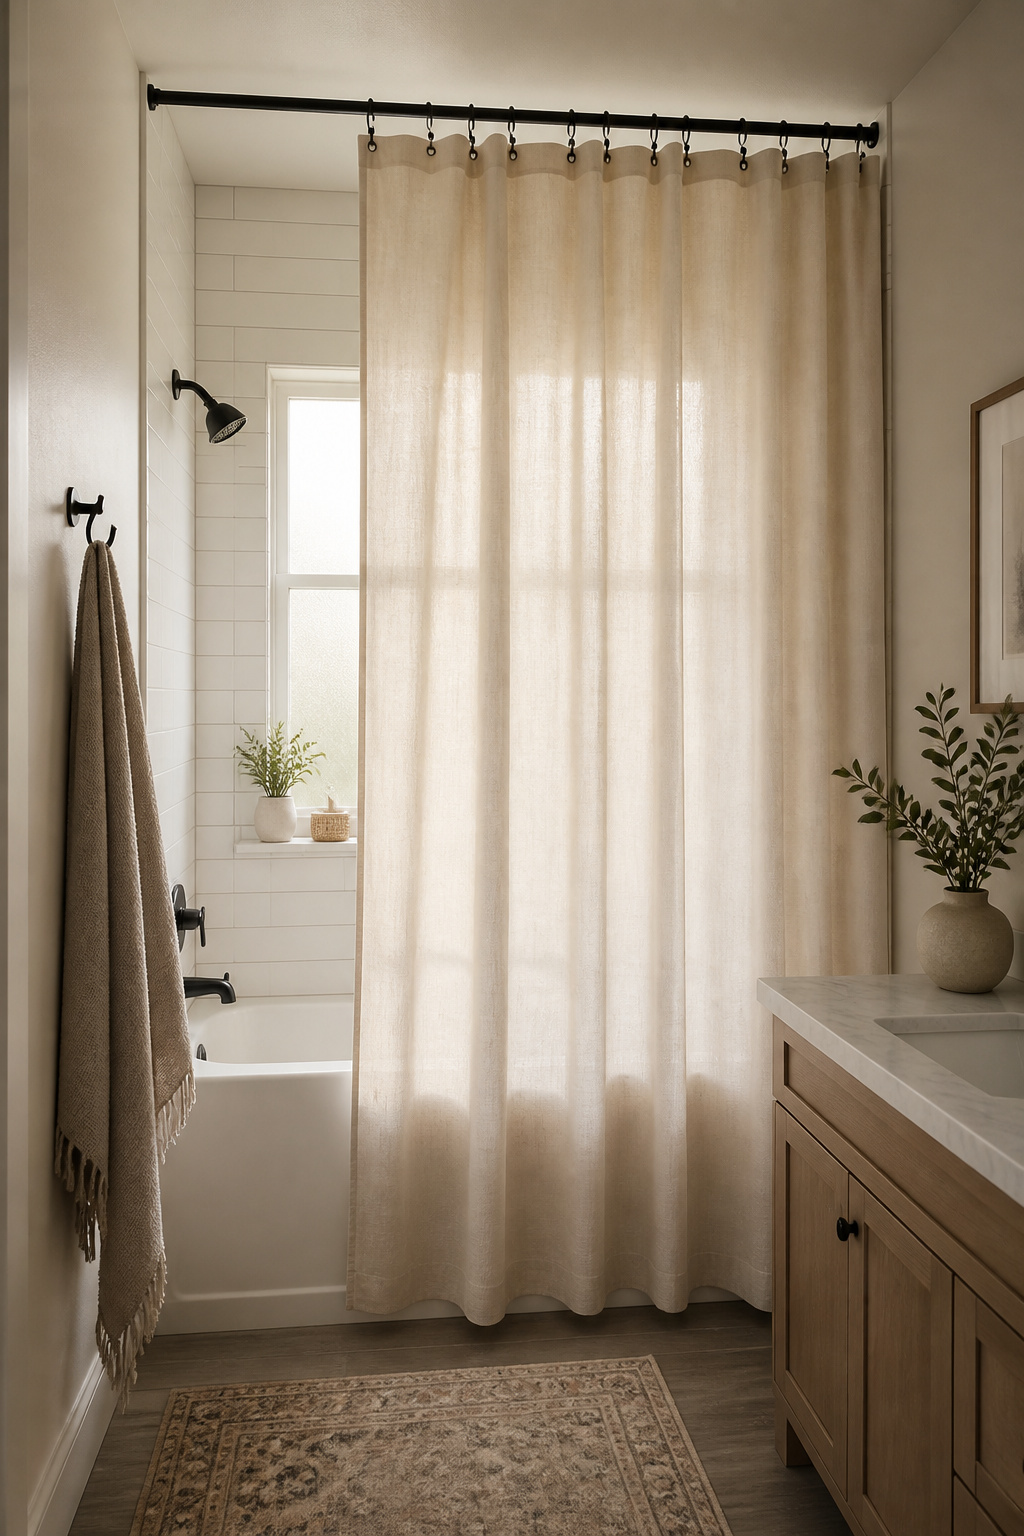
The rod choice matters more than the curtain in most bathrooms. Tension rods require no drilling — they press between walls using spring force — and are the sensible choice for tiled showers where drilling into tile is undesirable. Their weakness is holding weight over time: temperature and humidity fluctuations loosen the spring, and curtains over 2–3 lbs eventually pull them down. Wall-mounted rods use drilled-in flanges and hold 20–45+ lbs reliably — the right choice for heavy linen, velvet, or a double-curtain setup, and for any drywall-walled bathroom where drilling into a stud is feasible. For bathroom ideas for small spaces that feel bigger, a curved tension rod is worth specific mention: it bows outward 3–6 inches, adding meaningful elbow room in a shower without any permanent installation.
On liners: PEVA (polyethylene vinyl acetate) is the responsible default — chlorine-free, lighter than PVC, and widely available for $10–$20. A heavyweight woven fabric curtain with a tight weave can function as its own liner in a shower-over-tub setup without a separate layer. Machine-wash liners monthly on a cold, gentle cycle; dry thoroughly before rehanging. Magnetic weighted bottoms — a small detail on better-quality curtains and liners — keep the bottom flush against the tub and prevent the billowing that pushes curtains into the shower. For a budget bathroom remodel that needs one more finishing touch, the shower curtain is the one that costs the least and changes the most.
Planning Your Budget Bathroom Remodel: Where to Start First
The sequence matters as much as the list. Begin with any structural or wet work: tub reglazing, toilet replacement, and LVP flooring all affect the surfaces immediately around them and should be completed before cosmetic layers go in. Reglaze the tub before you paint; install the floor before you set the vanity. The second phase covers the changes that affect all four walls — paint, wainscoting, vanity swap. These need to happen before accessories and soft goods go in, or you’ll be moving things out of the way repeatedly.
How to sequence these projects so each one builds on the last
The finishing layer comes last: hardware, lighting, mirror, curtain, towels, and rugs. These are the details that unify the room and can be swapped incrementally over time as budget allows. Starting with them, as many people do, means the room looks polished for a week and then stalls when it’s time for the harder work.
Setting a realistic total budget and where to splurge versus save
A realistic budget for all fifteen ideas, with careful sourcing, ranges from $800 to $2,500 depending on how much is DIY versus contracted out, your material quality choices, and local labour rates. The principle for allocating that budget: put roughly half toward the highest visual-impact items — vanity, flooring, reglazing if needed. A third toward improvements with daily functional consequences — lighting, toilet, paint. And a fifth toward soft goods and accessories, where coordinated choices go further than expensive ones. The bathroom that functions well for everyone who uses it, every day, for the next fifteen years — that’s what a thoughtful budget bathroom remodel actually delivers.