I’ll be honest: I stood in my bathroom last Tuesday and just stared. I had cleaned it the weekend before — scrubbed the tile, bleached the grout, wiped every surface. It was spotless. And it still looked tired. Not dirty. Just… defeated. That flat, beige, fluorescent-lit box had all the warmth of a hospital waiting room, and no amount of cleaning was going to fix that.
Here’s what I’ve learned from years studying colour psychology and how space affects mood: a bathroom that looks dated isn’t a cleanliness problem. It’s a design problem. And the best budget bathroom makeovers tackle it with colour, light, and materials — not contractors and loan applications. The fifteen ideas below cost anywhere from nothing to about $150 at the upper end, and each one is backed by how colour, light, and material actually interact with human perception. Start with your room’s biggest weakness. The difference will be immediate.
1. A Fresh Coat of Paint: Start Your Budget Bathroom Makeover Here
Paint is the highest-return investment in this room. For $50-$80 in materials, you change the emotional register of a bathroom entirely — and the science backs this up. Light colours in the blue-grey-sage range slow the perceived heart rate and create the spa-like calm most of us are actually after when we renovate a bathroom. Warm creams and off-whites feel energising and expansive. What matters is choosing deliberately, not defaulting to whatever was already there.
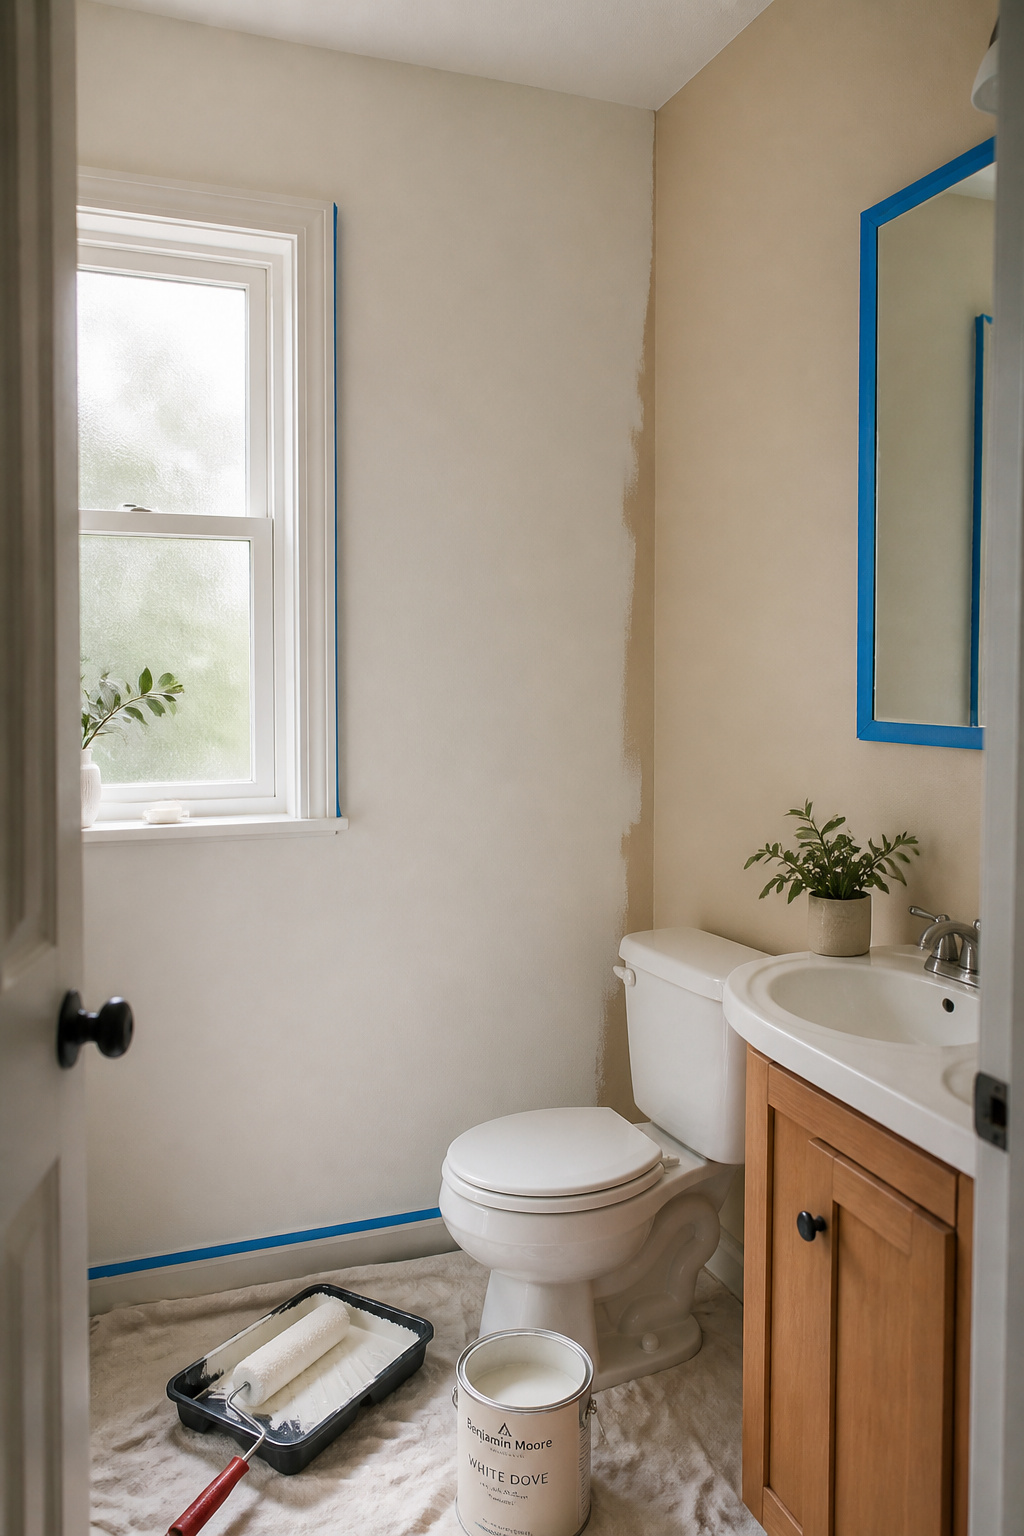
Bathroom paint is not the same as wall paint, and this distinction is where most DIY budget bathroom makeovers fail. You need a formula with mildewcide additives and a semi-gloss or satin finish — eggshell absorbs moisture and will peel within a year. Zinsser Perma-White ($45/gallon) comes with a five-year mold-proof guarantee and is self-priming. Benjamin Moore Aura Bath & Spa ($75/gallon) is the professional choice — a rare matte finish that resists humidity beautifully. Sherwin-Williams Emerald adds antimicrobial agents and cures to a surface that wipes clean easily.
If the bathroom is small, consider colour drenching: paint walls, ceiling, and trim the same shade. Eliminating the visual break between surfaces removes awareness of edges, and the room stops reading as a box. A glossy finish adds the equivalent of tiny mirrors to every wall surface, bouncing light into corners natural light never reaches. The combined effect can make a 45-square-foot bathroom feel 25% larger without touching a single fixture.
2. Swap Out Lighting Fixtures for an Instant Mood Shift
Most bathroom lighting is doing two things wrong simultaneously: wrong colour temperature and wrong direction. The small bathroom lighting secrets that professional designers use start here — with kelvin numbers, not wattage.
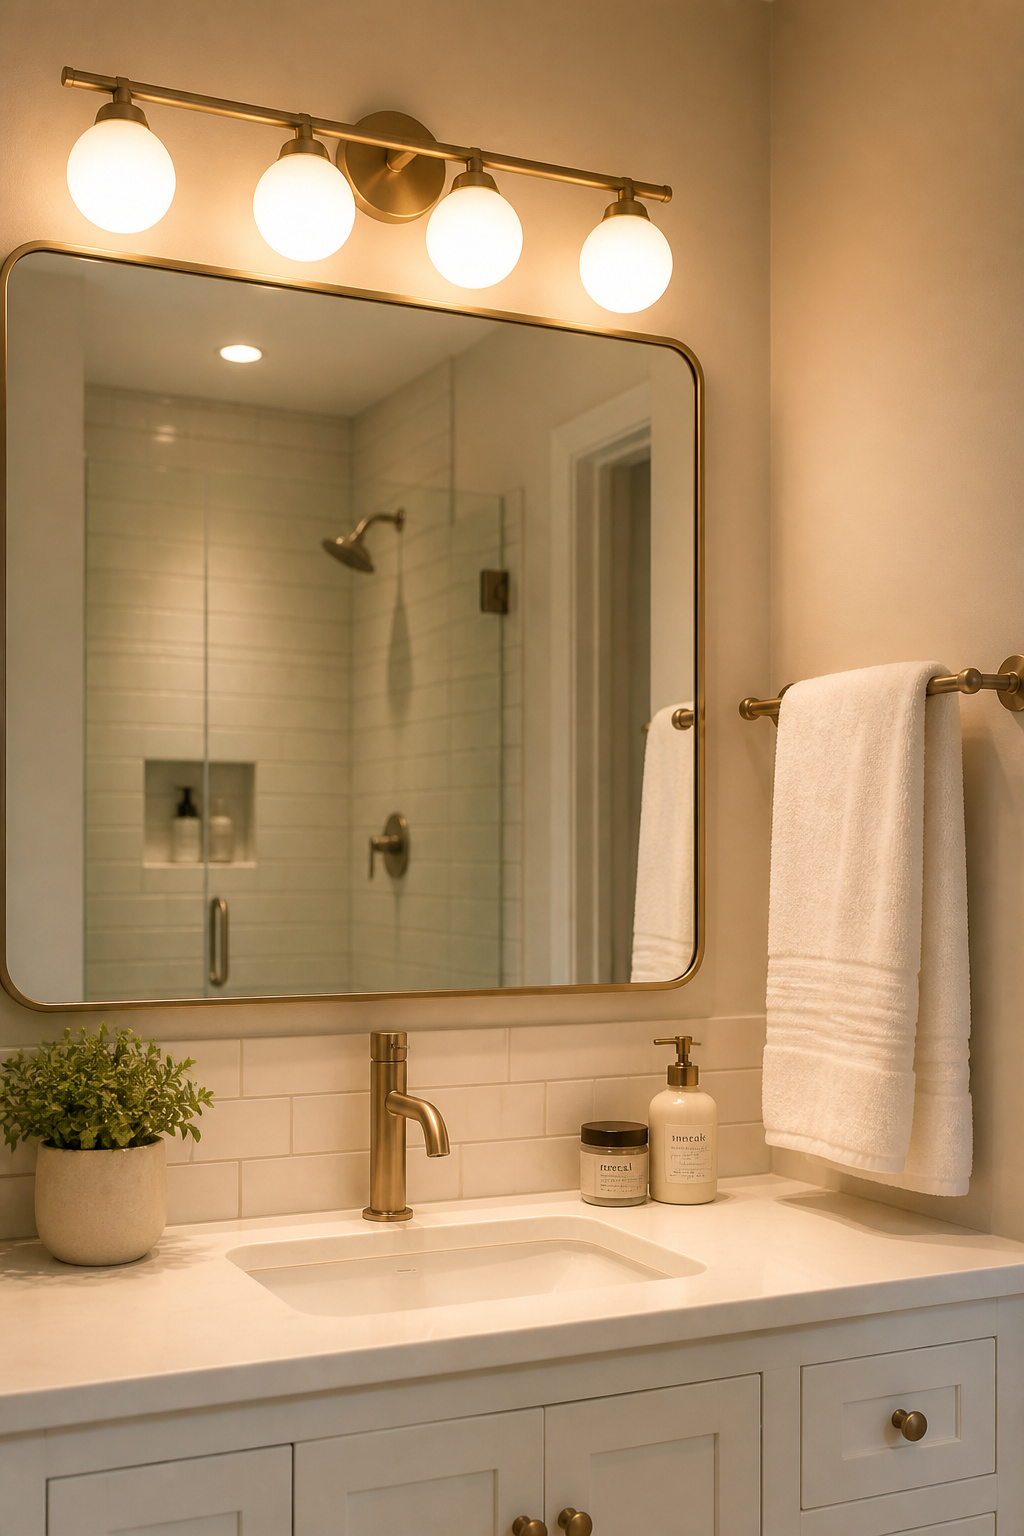
Older incandescent bulbs run around 2400K as they age, casting yellow across everything — your skin, your towels, your tile. Swapping to 3000K LEDs (warm white, colour-accurate) instantly makes the room look cleaner before you’ve changed anything else. Side-mounted sconces at face height, roughly 60 to 65 inches from the floor, eliminate the harsh under-eye shadows overhead fixtures create. That’s why every flattering bathroom you’ve photographed in a hotel uses them.
Replacing a vanity light bar is straightforward when the wiring is already in place: turn off the breaker, disconnect the old fixture, match black-to-black and white-to-white on the new one, mount it. The whole thing takes under an hour. Look for fixtures rated ‘damp’ or ‘wet’ by UL — ‘dry’ rated fixtures are a safety violation in bathrooms. Globe-bulb bars with clear Edison-style LED bulbs run $45-$75 and look considerably more expensive. If the wiring intimidates you, conversion kits like EzLightWraps slide over your existing bar with a two-screw installation — no electrician, $30-$50, transformative result. As affordable bathroom upgrades go, lighting pays back more per dollar than almost anything else in this list.
3. Replace Cabinet Hardware and Faucets Without Touching the Plumbing
Hardware is the jewellery of a bathroom vanity — small, noticed, and changing it changes everything. Six cabinet handles going from brushed nickel to matte black takes twenty minutes with a standard screwdriver and costs $25-$50 total. The bathroom’s perceived decade shifts by at least one.
Matte black is the durability winner in humid environments: it resists water spots and fingerprints better than polished chrome or shiny gold. Brushed brass — warm gold satin, not the bright 1980s version — is the finish with real staying power right now, pairing well with white, navy, and sage vanities. Whatever you choose, match it across every metal element in the room: faucet, towel bar, toilet paper holder, and light fixture. Mismatched metals read as ‘unfinished’ even in otherwise beautiful bathrooms.
A faucet replacement is also genuinely within afternoon-DIY territory. The tools needed: an adjustable wrench, a basin wrench for the tight under-sink space, plumber’s tape, and silicone caulk — total under $40 if buying fresh. The process: shut off supply valves, disconnect supply lines, unscrew the mounting nut, lift out the old faucet, feed the new one through the deck holes, hand-tighten, reconnect. Moen includes all mounting hardware and the clearest installation instructions in the industry. Budget $50-$300 for the fixture versus $150-$400 to hire a plumber. That math holds in almost every budget bathroom scenario.
4. Peel-and-Stick Tiles for a Budget-Friendly Bathroom Refresh
These get a bad reputation because most people skip the one step that determines success: surface preparation. The tiles themselves are fine — it’s the floor beneath them that fails.
Peel-and-stick tiles work reliably in powder rooms and half-baths, and work in full bathrooms if you do two things: choose tiles at least 2mm thick, and seal every seam with clear silicone caulk after installation. The tile surface is waterproof. The seams are not. That distinction matters enormously in wet bathroom environments. Art3d tiles at 2mm with a textured, slip-resistant surface run $1.50-$2.50 per square foot. LaCarte Premium at 2.5mm with industrial-grade adhesive performs best in wetter conditions at $2-$3 per square foot.
Before any tile touches the floor: fill low spots with self-leveling compound, clean with isopropyl alcohol (not just water — invisible grease kills adhesion), and let everything dry completely. The tiles need 48 hours before getting wet, and a full week to fully bond. For pattern selection, geometric designs hide seams better than large-format stone or wood mimics — the pattern draws the eye away from joints that would otherwise be obvious.
5. Add Floating Shelves to Open Up Storage and Visual Space
A floating shelf does two jobs in a bathroom: it creates storage that gets toiletries off the counter, and it draws the eye upward along the wall, making the room read as taller. Both are meaningful in a small space. As small bathroom storage ideas that actually work go, vertical wall real estate above eye level is the most underused resource in most bathrooms.
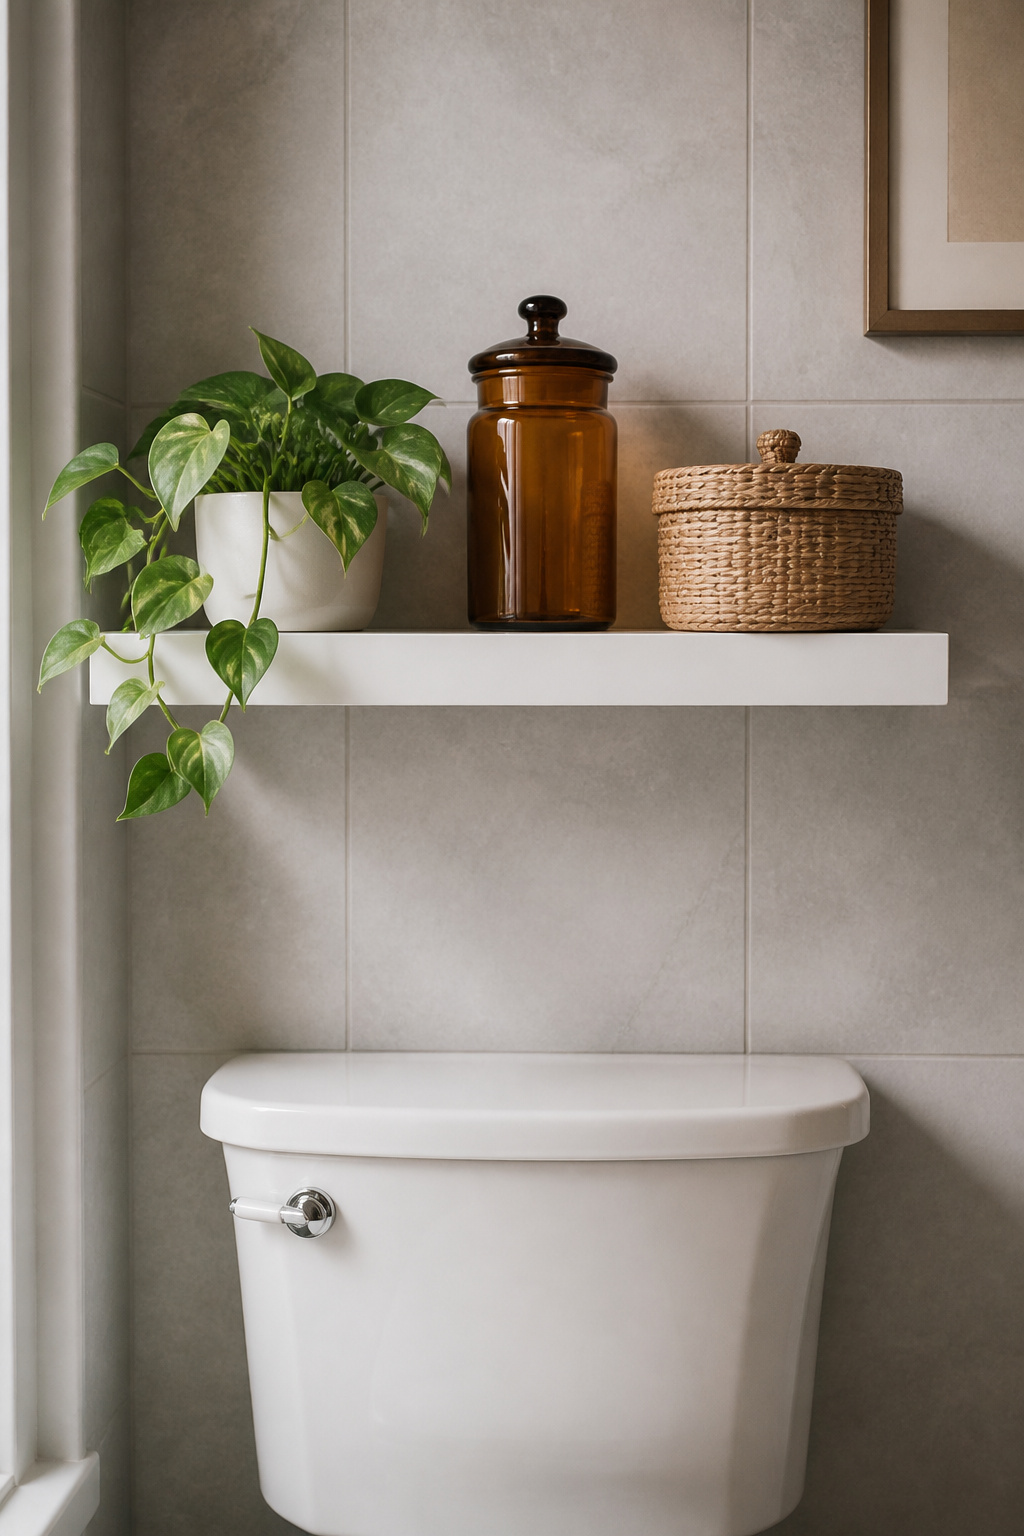
For tile walls, you need a carbide-tipped masonry bit (3/16 inch) and sleeve anchors — standard plastic ribbed drywall anchors spin uselessly in tile and never grip. Hitting a stud behind the tile is ideal; stud-mounted brackets handle 100-200 pounds. For hollow drywall behind tile, Toggler SnapToggle bolts are rated at 80-100 pounds in half-inch drywall. Shelf depth of 8-10 inches accommodates most toiletry bottles without protruding awkwardly. Above the toilet — 10-12 inches above the tank — is the most efficient use of dead wall space in any bathroom.
Styling is the part most people underestimate. The rule: odd numbers, varying height, strict quantity limit. A tall bottle, a medium jar, a small trailing plant. That’s a styled shelf. Eight different-sized things in a row is a medicine cabinet without a door. Use matching containers — same basket brand, same glass jar style — to unify varied products visually. IKEA Lack shelves ($15-$30) or a pine board cut from a lumber yard with Home Depot brackets ($20-$35 total) are the affordable paths here.
6. Frame or Replace Your Bathroom Mirror on a Small Budget
The bathroom mirror is the largest single decorative element in most bathrooms, and the builder-grade frameless rectangle glued to the wall is universally the weakest point in the design. Framing it or replacing it transforms the entire vanity wall for less than a set of cabinet hardware. Few budget bathroom makeover moves are as high-impact per dollar spent.
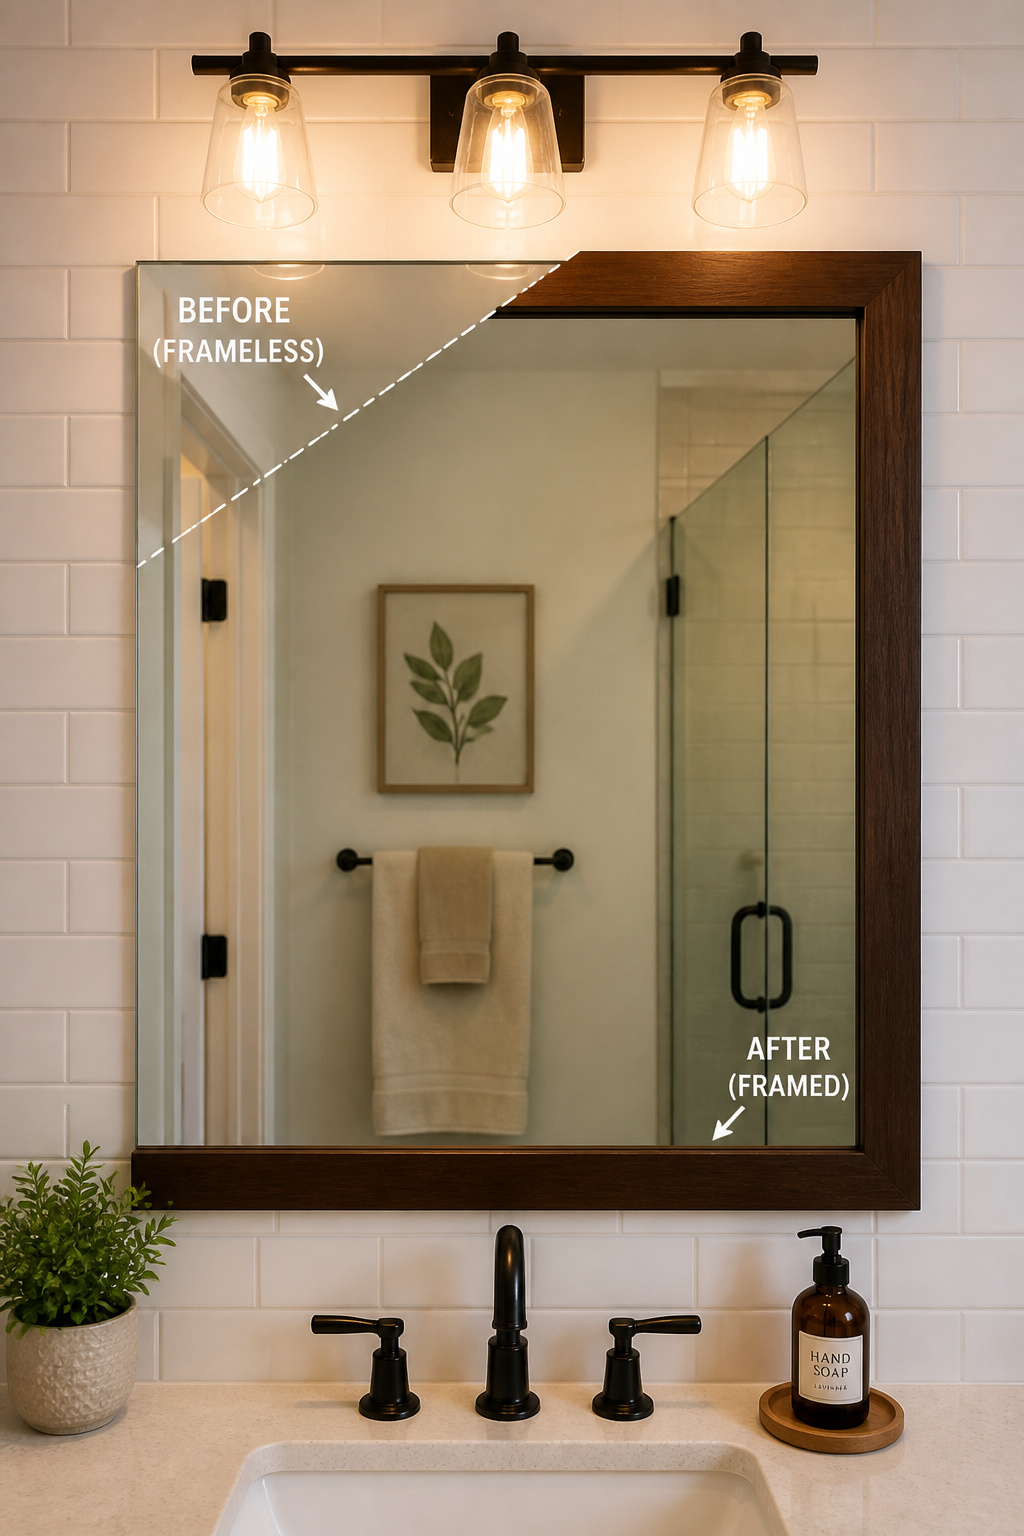
MirrorMate’s kits attach directly to existing glass with 3M professional double-sided tape and take under 30 minutes — no mirror removal, no wall damage, no tools. They offer 65+ frame styles cut to your exact dimensions; pricing runs $80-$180 depending on size and style. This is the safest approach when the original mirror is glued to the wall, since removal often takes chunks of drywall with it. For replacement: IKEA NISSEDAL ($30-$80) and Target’s arch mirror collection ($60-$150) are the current value leaders.
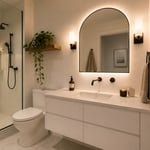
Arch-top mirrors are worth the slight premium. Their curved upper edge softens a bathroom full of hard angles — tile grout lines, cabinet frames, square fixtures — and are the defining shape of 2025-2026 bathroom design. Two smaller mirrors over a double-sink vanity, rather than one large shared mirror, gives the space a modern hotel quality that feels intentional. For a full gallery of what different shapes can do, bathroom mirror ideas for any style covers the range comprehensively.
7. Regrout Your Tile for a Budget Bathroom Makeover That Looks New
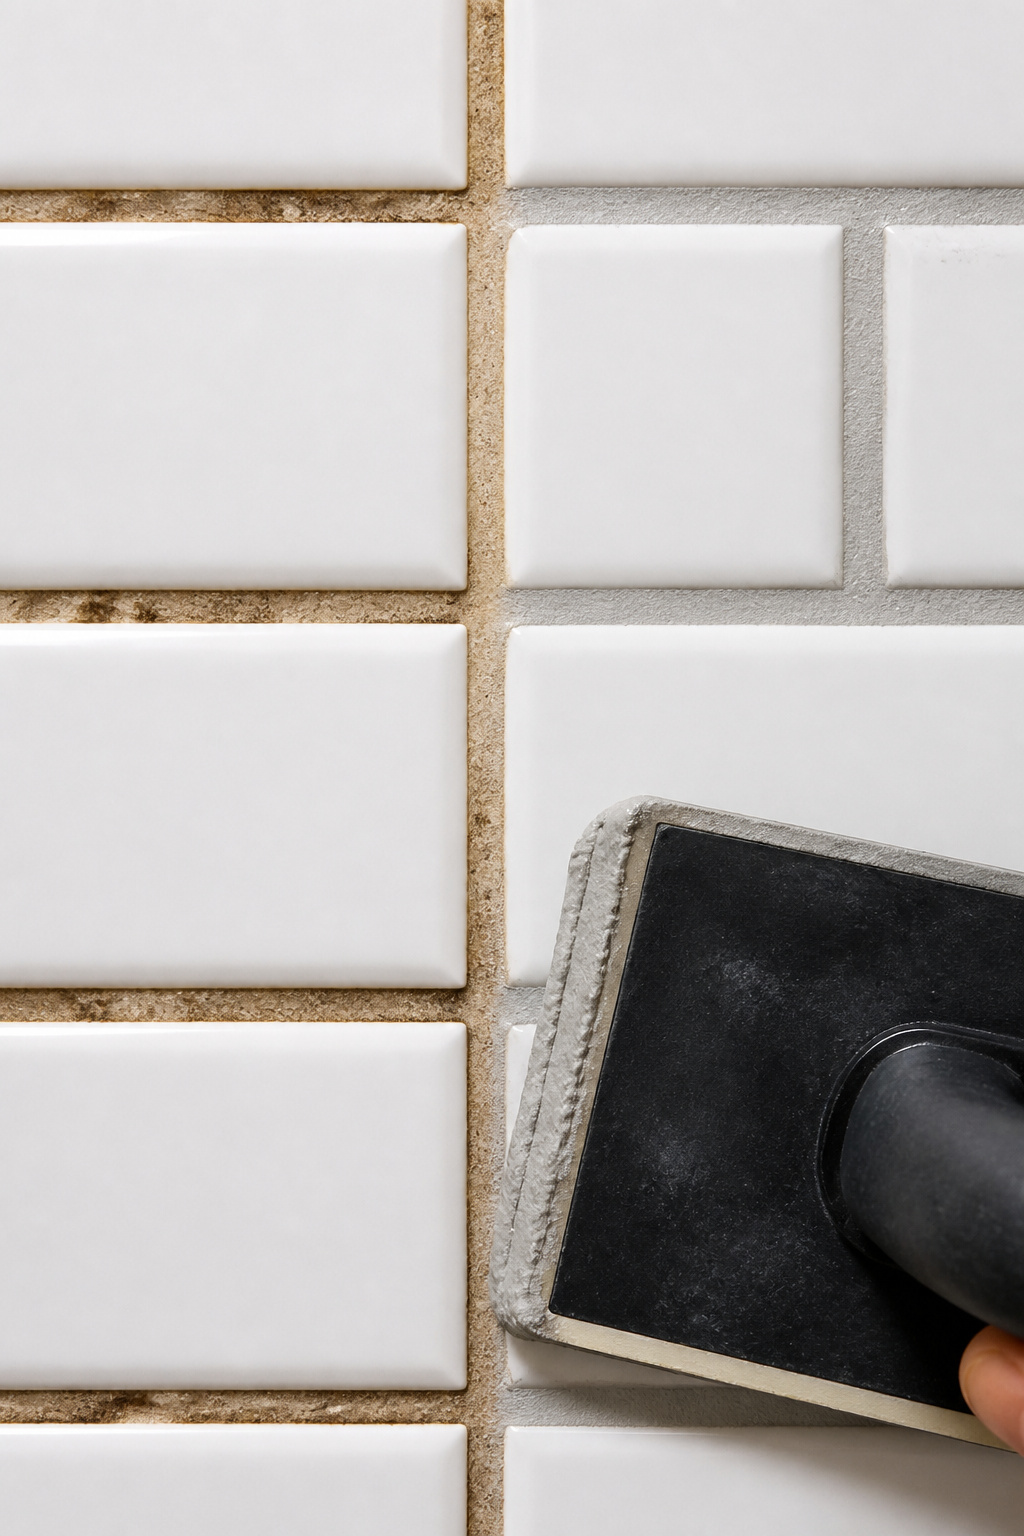
Old grout is the invisible culprit behind bathrooms that feel perpetually dirty despite regular cleaning. The issue isn’t cleanliness — discoloured, grey-stained, or pinkish grout creates a psychological read of ‘neglected’ that no amount of bleaching fully corrects. For lightly stained grout, Polyblend Grout Renew ($12 a tube, covers 50 sq ft) restores colour without full removal and is worth trying first. For grout that’s crumbling, gapping, or discoloured through-and-through, a full regrout is the honest fix — and one of the most underrated budget bathroom makeover steps available.
The Process and Tools
An oscillating multitool with a grout blade removes old grout in a fraction of the time of a manual saw — rental from Home Depot runs $40-$60 per day. After removal: vacuum thoroughly, wipe tiles, mix grout to manufacturer specs, apply at 45 degrees with a float, sponge off excess in two passes, buff the haze with a dry cloth after 30 minutes. Allow 72 hours to cure before sealing. That sealing step is non-negotiable — penetrating grout sealer ($15-$25) is what keeps the new grout looking new for five to ten years.
The Right Grout Colour Changes Everything
Light grey hides dirt better than white while keeping the room bright — the professional choice for white subway tile. Matching grout to tile colour (grey grout on grey tile) creates a seamless, stone-like surface that visually enlarges a small bathroom by eliminating the grid. Contrasting dark grout on white tile is deliberately graphic and works beautifully in a design-forward bathroom.
8. Install a New Showerhead for a Spa Feel at Hardware Store Prices
The showerhead is the one element in this room you interact with physically every single day. Its performance shapes the morning routine more directly than any mirror or shelf ever will — which makes it one of the strangest candidates for a budget bathroom conversation. And yet: a quality showerhead runs $30-$120 and takes ten minutes to install.

The Waterpik PowerPulse is the value leader at $50-$75: 1.8 GPM flow rate, seven spray modes, and a PowerPulse massage setting that generates twice the force of standard massage showerheads while remaining water-efficient. The Moen Magnetix Attract ($60-$90) earns its place for the magnetic dock — the handheld clicks back into position automatically, which sounds trivial until you’ve spent three years wrestling it onto a slippery chrome bracket every morning. For pure budget: the Delta 75152 ($25-$40) uses H2Okinetic technology that creates larger water droplets retaining heat longer — the shower feels warmer than the actual temperature reading.
Installation: unscrew the old head, clean the arm threads, wrap 2-3 rounds of plumber’s tape clockwise, hand-thread the new head, tighten a quarter turn past hand-tight. The tape creates the seal, not torque. Over-tightening is the most common mistake and the most common cause of cracked plastic fittings. Total time: ten minutes. Total cost for the tape: $3.
9. Use Removable Wallpaper for a Renter-Friendly Bathroom Statement
Removable wallpaper is one of the most versatile budget bathroom makeover tools available to renters — fully reversible, no permanent changes, and costing $1-$3 per square foot. A full accent wall in a 5×8 bathroom might be 40 square feet; at $2 per square foot, that’s an $80 transformation that comes off cleanly when you move.
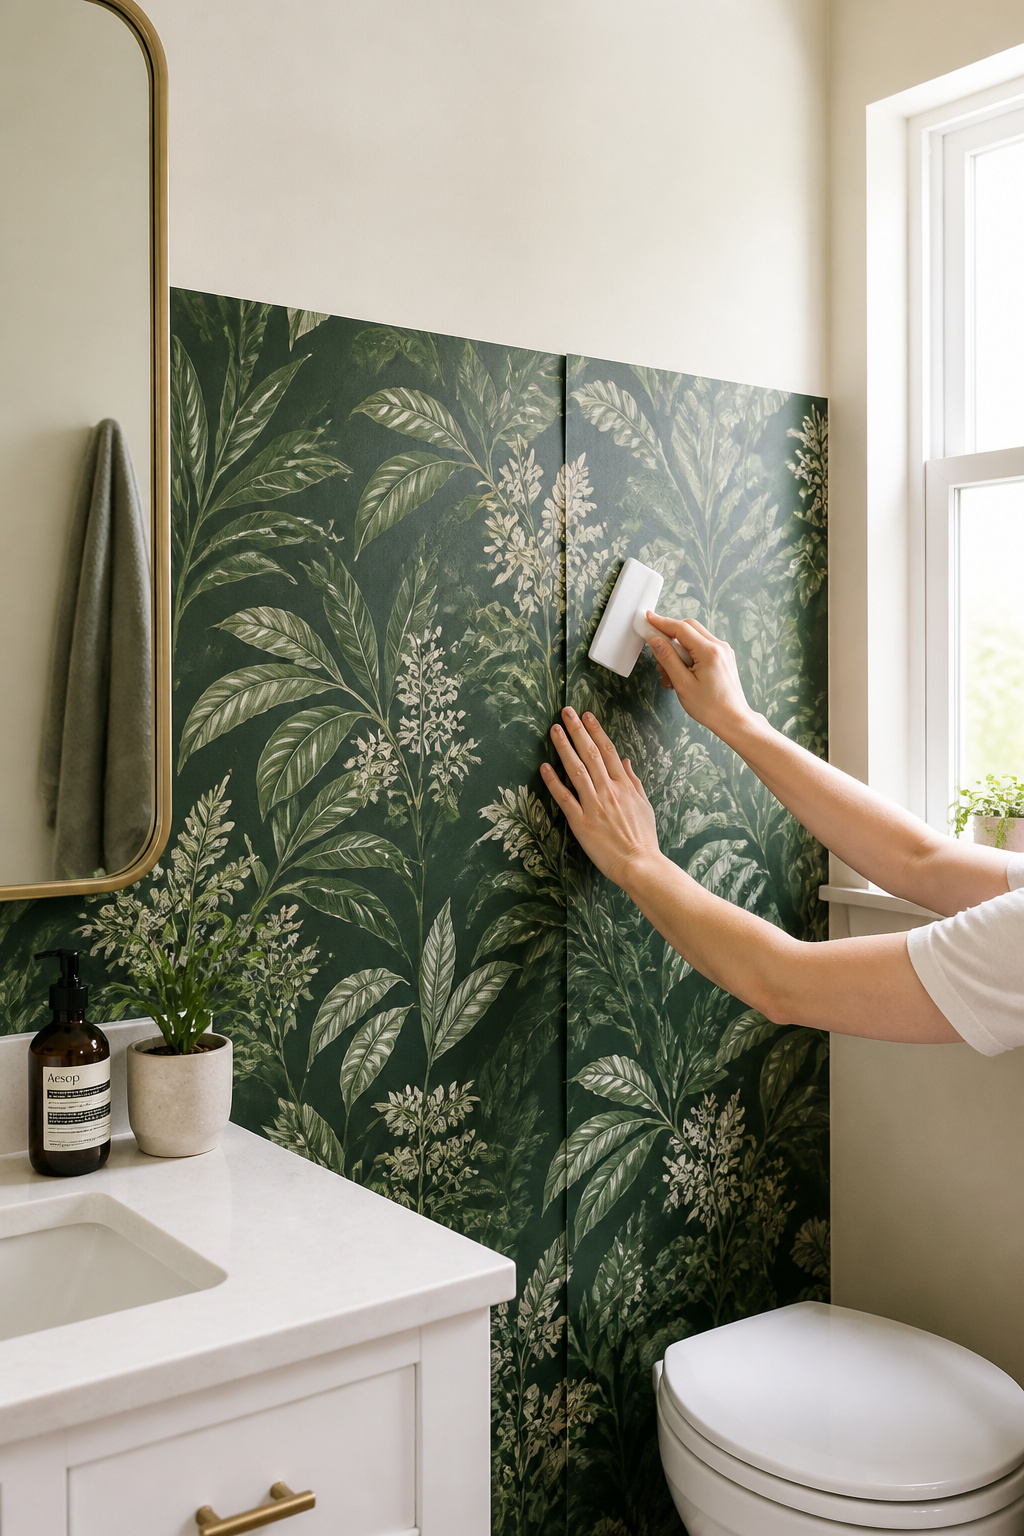
Not all removable wallpaper performs equally in humid spaces. Chasing Paper is the most reliably bathroom-safe option based on independent testing — GreenGuard certified, VOC-free, with a matte finish that resists fading. Tempaper has a stronger design library but has reported adhesive issues in high-humidity environments over time. Fancy Walls uses PVC-free polyester textile that reduces bubbling because the material itself has flex. Whatever brand: walls must be smooth, painted with cured latex at least 30 days old, and wiped down with a 1:1 isopropyl alcohol/water solution first. Fresh paint off-gasses in a way that prevents adhesion regardless of brand.
For small bathrooms, choose patterns with a repeat under 6 inches — large florals and overscaled geometrics get cut off awkwardly in narrow rooms. Vertical stripes draw the eye upward and are among the most effective small-bathroom pattern strategies. Apply panels by peeling only 12-18 inches of backing at a time, smoothing with a squeegee from centre outward. For bold bathroom wallpaper ideas that show what’s possible in real bathrooms, the range of what works is wider than most people expect.
10. Go Bold: Affordable Bathroom Makeover With Pattern and Colour
Here’s the permission slip most people need: the bathroom is the safest room in the house for bold colour decisions. It’s small, enclosed, and you exit it after ten minutes — unlike a living room colour choice you live inside for hours every day.
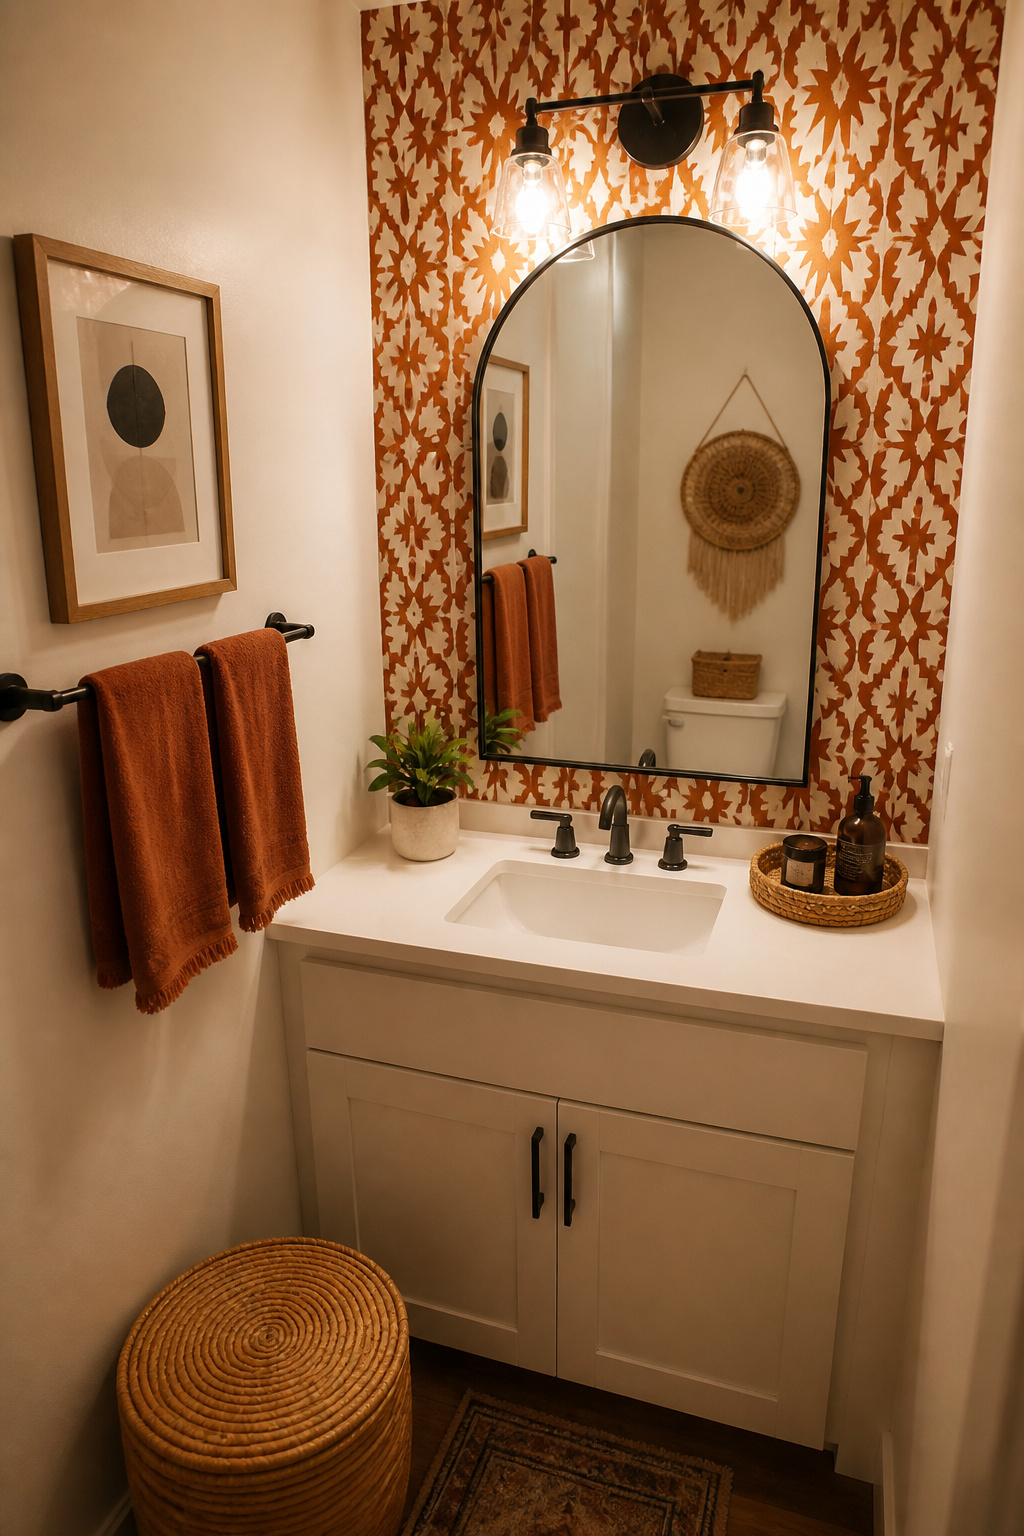
Environmental psychology research shows that high-contrast or pattern-rich small spaces are perceived as ‘interesting’ rather than ‘small’. The visual complexity shifts attention away from square footage entirely. This is why boutique hotels put their boldest wallpaper in the smallest bathrooms — the room stops reading as compact and starts reading as deliberate. For an affordable bathroom makeover on a limited budget, bold pattern on one wall costs less than replacing a single fixture.
The mirror wall is the most powerful choice for an accent treatment because whatever you put on it is reflected and doubles its visual presence. Bold wallpaper behind a large mirror effectively wraps the room for the cost of half the room. Keep the remaining three walls in the most receding colour from the wallpaper’s palette — typically the background tone, not the dominant motif. Extend the theme upward: painting the ceiling in the wallpaper’s accent colour costs a quart of paint ($10-$15) and creates a wraparound effect at minimal cost. Ground bold pattern with natural materials — a rattan basket, a wood shelf, a stone soap dish. These provide visual rest in the same way neutral furniture grounds a colourful living room.
11. Replace the Toilet Seat for an Effortless Modernization
A discoloured, plastic-creaky, or loose toilet seat registers as ‘worn-out bathroom’ on a nearly subconscious level — it’s often the first thing a guest’s eye settles on, even when the rest of the room is well-maintained. Replacing it is a 15-minute project that costs $25-$120. As budget bathroom upgrades go, the cost-to-perception ratio here is genuinely hard to beat.
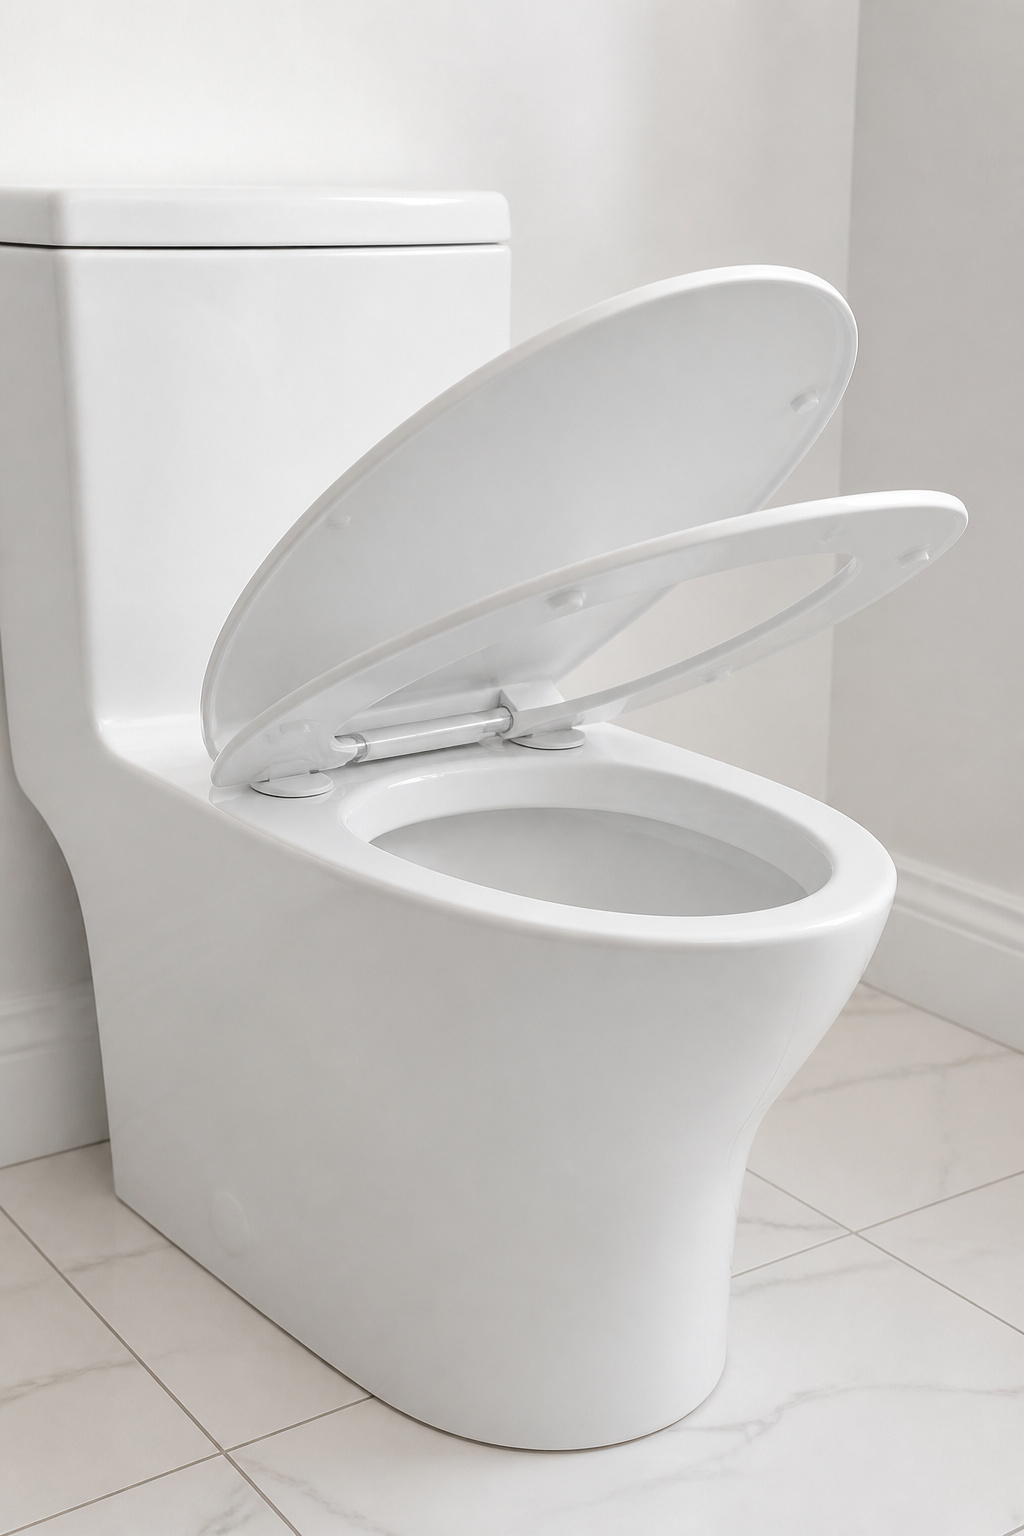
Before shopping, measure from the hinge bolt holes to the front of the toilet bowl. Sixteen and three-quarter inches or less is a round bowl; 18.625 inches or more is elongated. Getting this wrong is the most common purchasing mistake, and the return is awkward. Soft-close hinges — an internal resistance mechanism lowers the seat gently rather than slamming — are now standard at every price point and should be considered the minimum.
At $25: a basic soft-close polypropylene seat is a significant upgrade over a builder-grade slam version. At $60: the Kohler Cachet ReadyLatch uses Duroplast — more durable and hygienic than standard polypropylene — with quiet-close hinges and a quick-release mechanism that lifts the whole seat off for cleaning access. That cleaning feature alone is worth the $35 premium. At $120: the Toto SoftClose uses superior hinge engineering and contoured seating for a noticeably different quality feel. Installation: unscrew old bolts from inside the bowl, lift off, position new seat, hand-tighten bolts — no tools needed in most cases.
12. Bring In Plants and Natural Elements for Texture and Life
Biophilic design — the deliberate inclusion of natural elements in interior spaces — reduces perceived stress and increases wellbeing in measurable ways. In a bathroom, the humidity that makes the space challenging for paint and adhesive is exactly what many plants thrive on. It’s one of the more satisfying ironies of budget-friendly bathroom design.
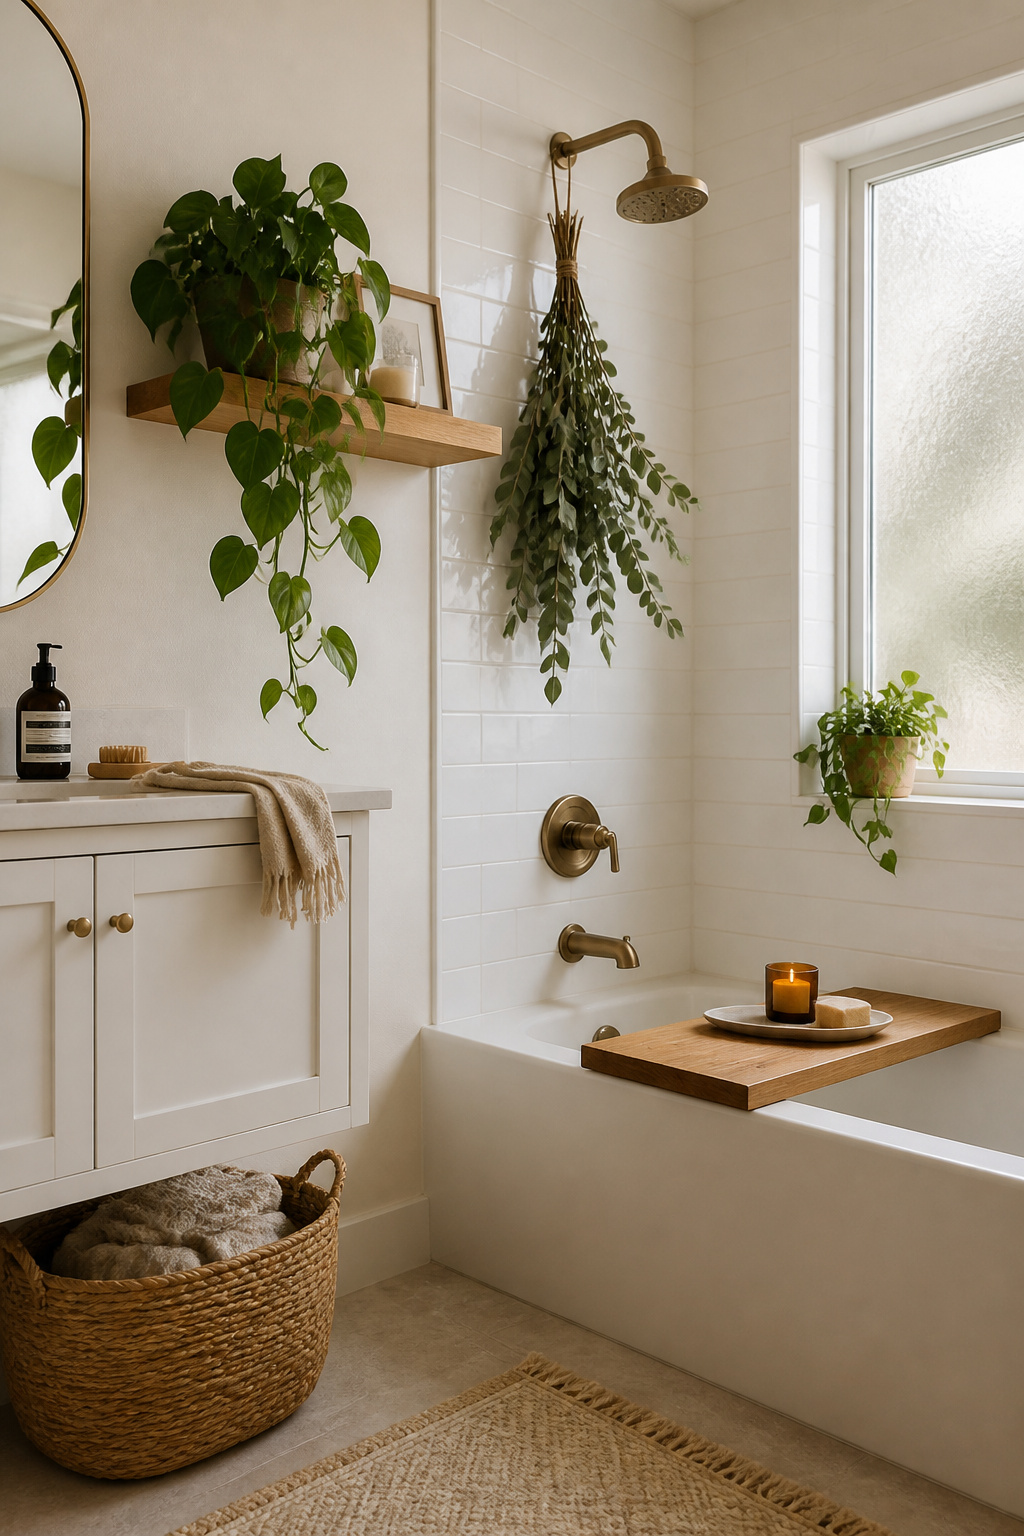
Pothos is the most forgiving option: low to medium indirect light, loves humidity, needs watering only when the top inch of soil dries out — which in a steamy bathroom can be once every two weeks. Peace lilies tolerate near-zero natural light and produce white flowers; NASA identified them as top performers for removing formaldehyde and benzene from indoor air. Spider plants produce trailing ‘spiderettes’ that add movement to a shelf and absorb excess moisture from the air. One note: succulents and cacti need dry air. They rot in bathroom humidity — a very common, very avoidable mistake.
Beyond plants: a seagrass basket under the vanity ($8-$20 at TJ Maxx) hides cleaning supplies while adding warmth. A teak bath tray across the tub ($20-$45) shifts the bathroom from functional to spa-like in a single object. Dried eucalyptus bundles hung from the showerhead release scent with steam and look deliberately styled — $10-$15 for a bundle lasting two to four weeks. The goal is restraint: one large statement plant, two or three natural material accessories, unified pot finishes. Ten mismatched small plants in a row reads as a collection, not a decision.
13. Refinish the Vanity: The Budget Bathroom Upgrade That Fools Everyone
Painting a bathroom vanity is the most dramatic transformation available at a budget price point. A $200-$300 paint job turns a dated oak vanity into a piece that looks custom-made — the kind of cabinet that costs $1,500 in a showroom. And consistently, it’s the budget bathroom makeover idea that surprises people most when they see what it does to a room.
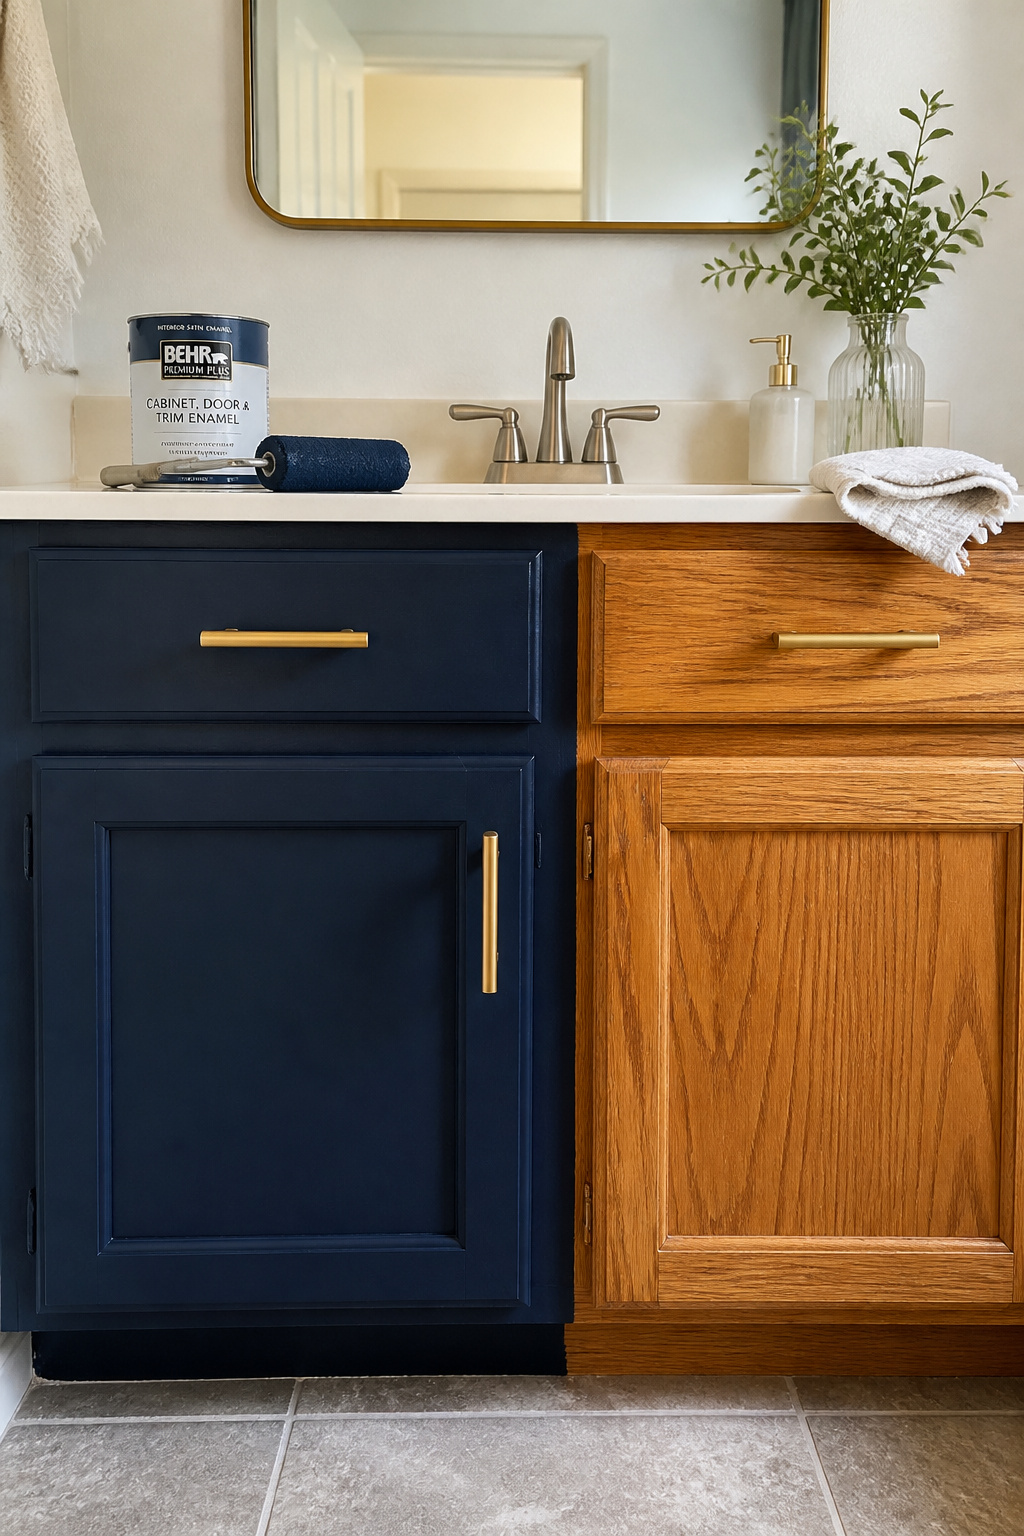
The prep work is what separates a five-year paint job from one that peels in six months. Solid wood and MDF accept paint readily with proper sanding and oil-based primer. Laminate requires a bonding primer — Zinsser BIN shellac-based primer ($30/qt) is the industry standard, because laminate is specifically engineered to repel adhesion. Skip it and the paint sheets off in large sections within months regardless of paint quality. Thermofoil (vinyl-wrapped) is the most difficult and often not worth painting; if yours is thermofoil and peeling at the edges, replace the doors rather than paint them.
Prep, Paint, and Colour
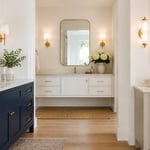
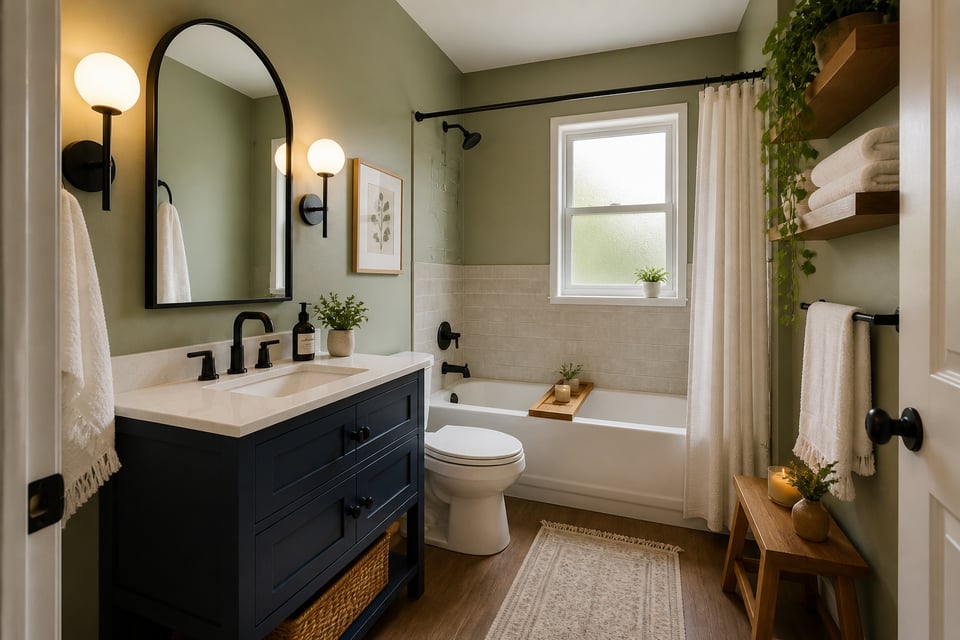
The process: remove all doors and hardware, degrease every surface with TSP substitute (factory finishes have invisible silicone release agents that cause adhesion failure), scuff-sand with 220-grit, apply bonding primer, apply 2-3 thin coats of cabinet paint with a foam roller, sand lightly between coats with 320-grit. Navy blue (Benjamin Moore Hale Navy, Sherwin-Williams Naval) transforms an oak vanity completely — pairs with brushed brass hardware and reads luxury. Sage green (SW Privilege Green) is the dominant 2025-2026 bathroom vanity trend. Of all the changes you will make in a budget bathroom makeover, vanity colour delivers the most dramatic transformation relative to its cost.
14. Address the Floor: Budget Bathroom Makeover With Peel-and-Stick Vinyl
The floor sets the room’s base colour temperature and visual grammar. An outdated vinyl pattern from the early 1990s — pink marble, floral, anything with a dated finish — colours the entire room negatively regardless of what else has been updated. Replacing it with peel-and-stick vinyl plank is a budget bathroom makeover move that costs $0.75-$2.50 per square foot and requires no adhesive, no special tools, and no professional.
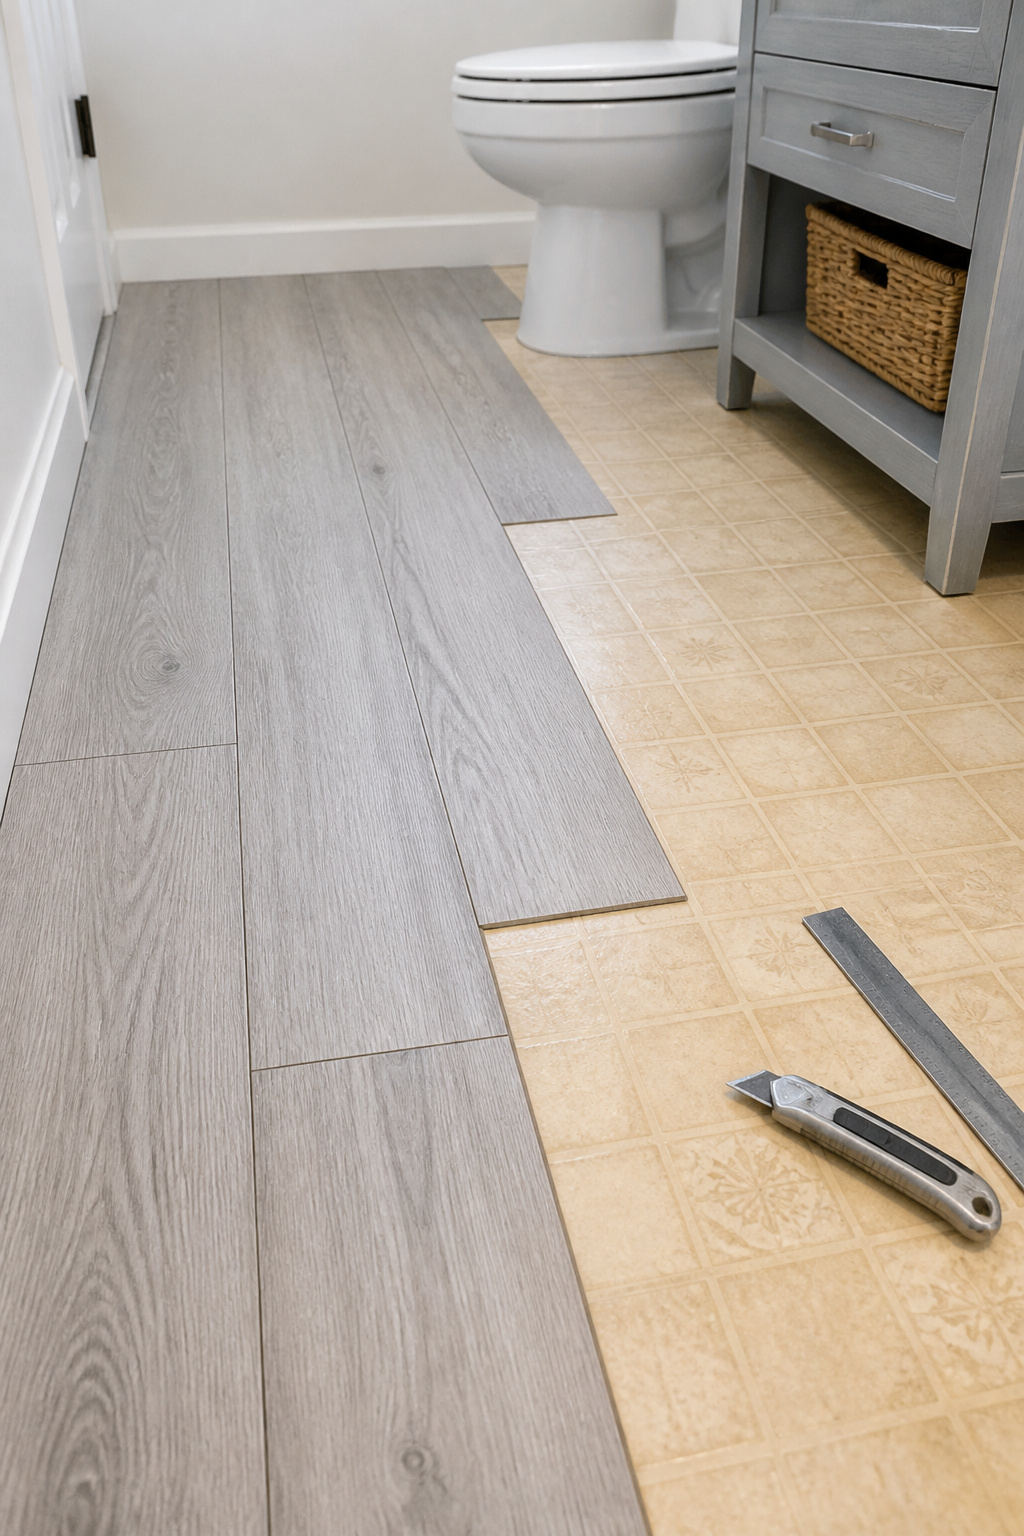
Vinyl plank (wood-look format in 36×6 inch strips) installs faster than tile squares and is more forgiving of minor subfloor imperfections. For floors with existing ceramic tile, vinyl tile squares (12×12 or 18×18) follow room edges more cleanly and are easier to cut around the toilet base. For any peel-and-stick vinyl in a bathroom: 100% waterproof designation (not merely water-resistant), minimum 2mm thickness, textured surface for slip resistance. Style Selections at Lowe’s runs $1-$1.50 per square foot; TrafficMaster at Home Depot runs $1-$2; Achim Tivoli II is the Amazon value option at $0.75-$1.
Cutting is almost entirely score-and-snap with a straight edge and utility knife. For the toilet base, trace a paper template of the base footprint, transfer to the vinyl, and cut. Leave an 1/8-inch expansion gap at all walls, covered by baseboard or quarter-round trim. Before installing, check that the bathroom door clears the new floor height — adding 2-3mm can cause doors to drag. For more ideas on bathroom flooring ideas for a complete room transformation, the options at budget price points have expanded considerably in recent years.
15. Accessorize With Intention: Towels, Rugs, and Soap Dispensers
Accessories are the finishing layer that either pulls everything together or makes the room read as a series of unrelated purchases. The approach that works is restraint plus consistency — two coordinating textile colours, one metal finish, one dominant material for accessories.
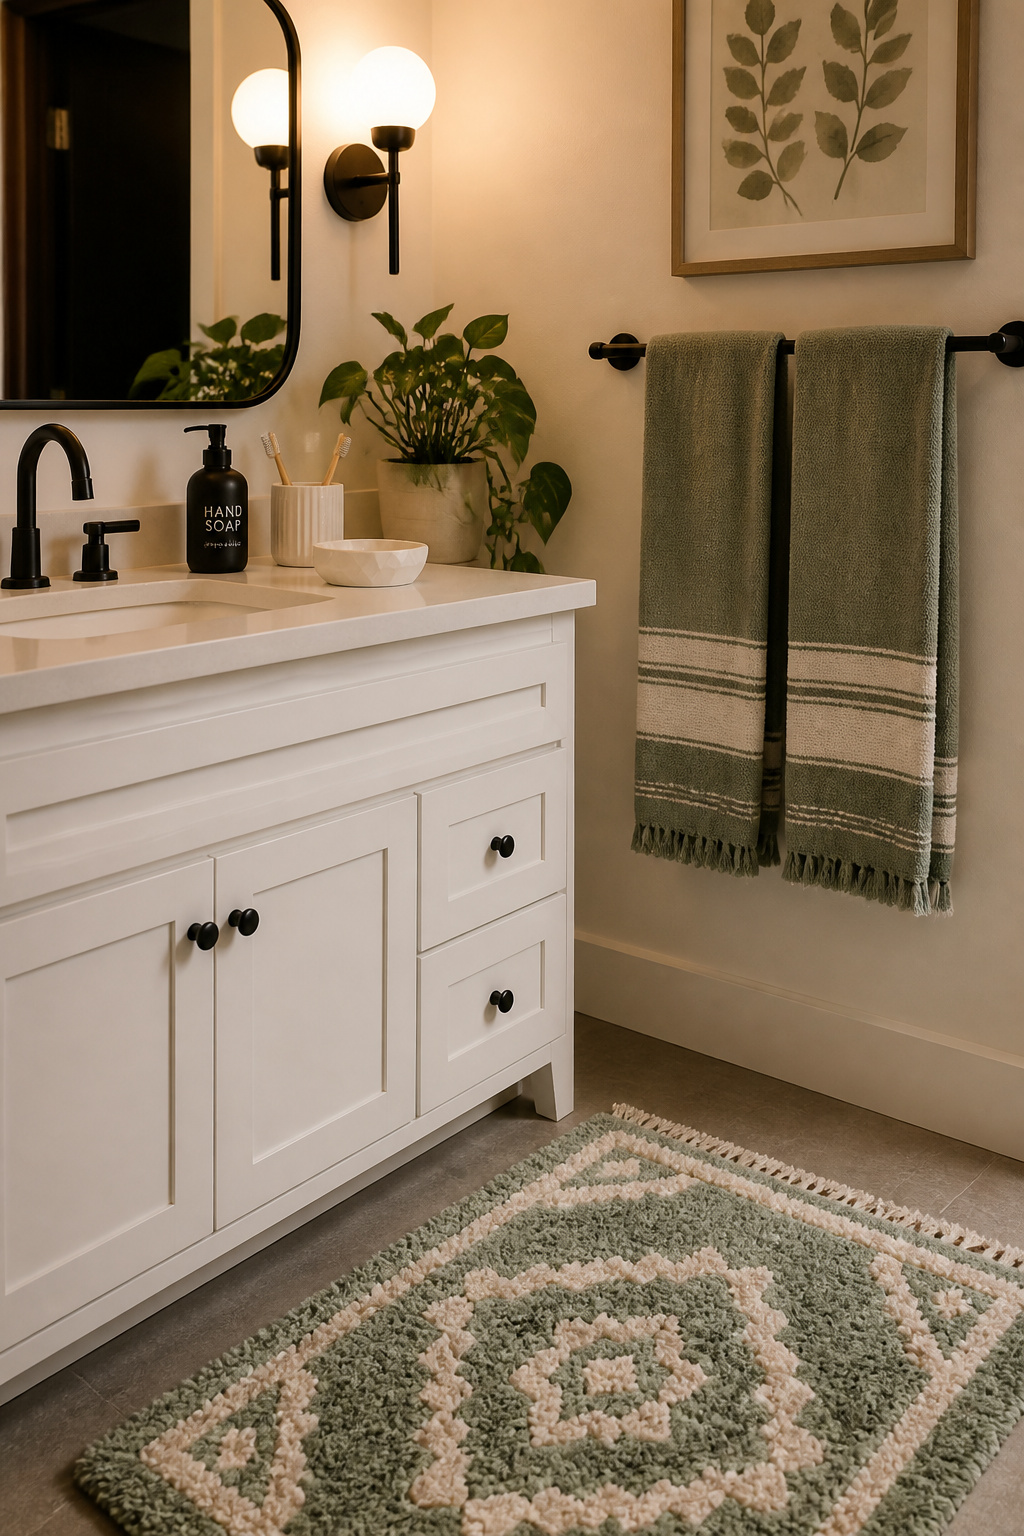
White towels are the professional default. They signal cleanliness without competing with any palette and photograph well at year five as they do at purchase. That said, colour towels efficiently introduce warmth or character — cool tones like sage, dusty blue, or soft teal reinforce calm in a cool-palette bathroom; terracotta and rust energise the morning and pair naturally with warm vanity tones. The key is matching the towel’s colour temperature to the room’s, rather than just picking a colour you like in isolation. For small bathroom decor ideas to maximize style, textiles are the fastest-changing and most easily reversible design element in the room.
Where to Spend and Where to Save
Spend on towels — Turkish cotton at 600+ GSM ($15-$25 per towel from Costco, Amazon, or Target’s Threshold line) feels noticeably better and photographs well for years. Save on soap dispensers and toothbrush holders — $8-$15 ceramic sets at TJ Maxx are visually identical to $40 designer versions in a bathroom context.
The accessory-set trap: buying a matching 8-piece bathroom set makes a bathroom look like a hotel catalogue display, not a home. Instead: choose one consistent metal finish (all matte black, all brushed brass) and one dominant material (all ceramic, or all glass-plus-wood), then let individual pieces vary in exact form. A terracotta ceramic soap dish with a glass toothbrush holder and a rattan waste bin, all on white-painted surfaces, reads as curated and layered. Six matching beige plastic pieces reads as default.
Bringing Your Budget Bathroom Makeover Together
The fifteen budget bathroom makeover ideas above don’t all need to happen at once. In fact, doing them in the right sequence extracts more value from each one.
Start with grout restoration and a toilet seat replacement — these address the ‘feels perpetually dirty’ problem that no surface update can solve. A bathroom that reads as clean is the foundation everything else builds on. Paint next: it’s the backdrop against which every subsequent decision is evaluated, and choosing paint colour before buying accessories avoids the expensive cycle of returns. Hardware and lighting come third — they define the metal and temperature language of the room and should be established before you commit to accent colours.
The vanity, mirror, and floor are the largest commitments in this budget bathroom makeover plan and land hardest when the rest of the room is already aligned around a colour direction. Budget triage: regrout ($100-$150 in materials), paint ($60-$80), lighting upgrade to 3000K LEDs and a new fixture ($40-$75), toilet seat ($60), showerhead ($30-$80). That’s $290-$445 to address the five highest-impact changes in a typical bathroom — and it’s a complete transformation, not a partial one. Start with your bathroom’s biggest weakness. The room will tell you what it needs if you’re willing to look at it honestly.